How to Get Microsoft 365 Exchange Mailbox Reports Using PowerShell

Windows PowerShell scripting helps Microsoft 365 administrators manage Exchange Online in a granular manner. This is something that Microsoft 365 admin center does not do.
For example, PowerShell scripting can generate reports on the following:
- Mailboxes available in your Microsoft tenant, user mailboxes, and specific mailboxes
- Inactive mailboxes
- Mailboxes that exceed storage limits
- Archive mailboxes available in your tenant
- Mailboxes that forward email
These handy reports help you manage Microsoft 365 mailboxes efficiently. In this article, let’s understand how you can pull out useful information (like the reports mentioned above) from your Microsoft 365 Exchange Online tenant by using PowerShell.
For those who like to watch and learn, check out the 3-minute video at the end of this article, which is a shortened version of this content.
Prerequisite
You must install the ExchangeOnlineManagement PowerShell module in your PowerShell console. For more information, read my earlier blog post: How to Connect to Microsoft 365 Exchange Online with PowerShell.
Note: You can get all the commands available within the ExchangeOnlineMangement PowerShell module by running the Get-Command -Module ExchangeOnlineManagement command. This article only serves as a quick-start guide for Get-family cmdlets of the ExchangeOnlineManagement PowerShell module that help you retrieve crucial Microsoft 365 mailbox information. For details about the commands that are listed, see this ExchangePowerShell documentation from Microsoft. Or search for Microsoft’s online help right from the PowerShell console by running the Help <command name> command.
Get-Mailbox Report
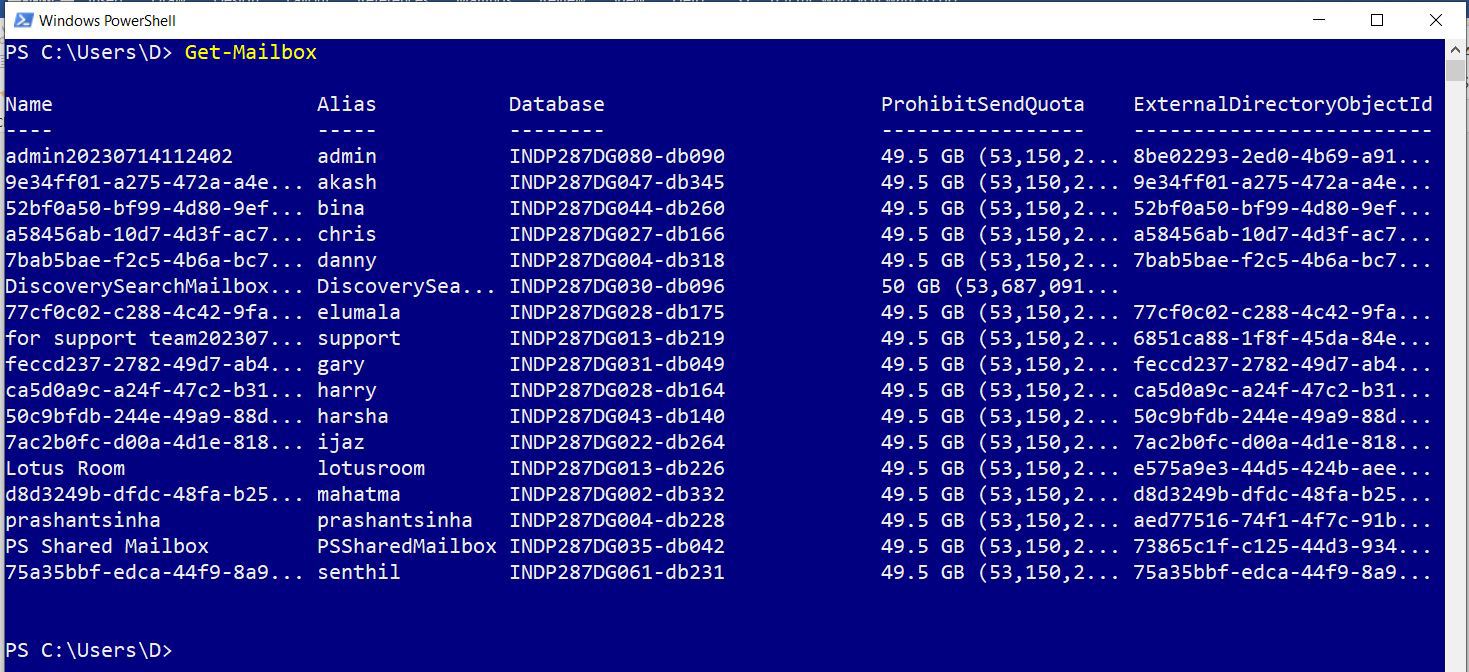
Let’s begin with the simplest of all commands: Get-Mailbox. This helps you view all the mailboxes available in your Microsoft 365 tenant, as shown in Figure 1.
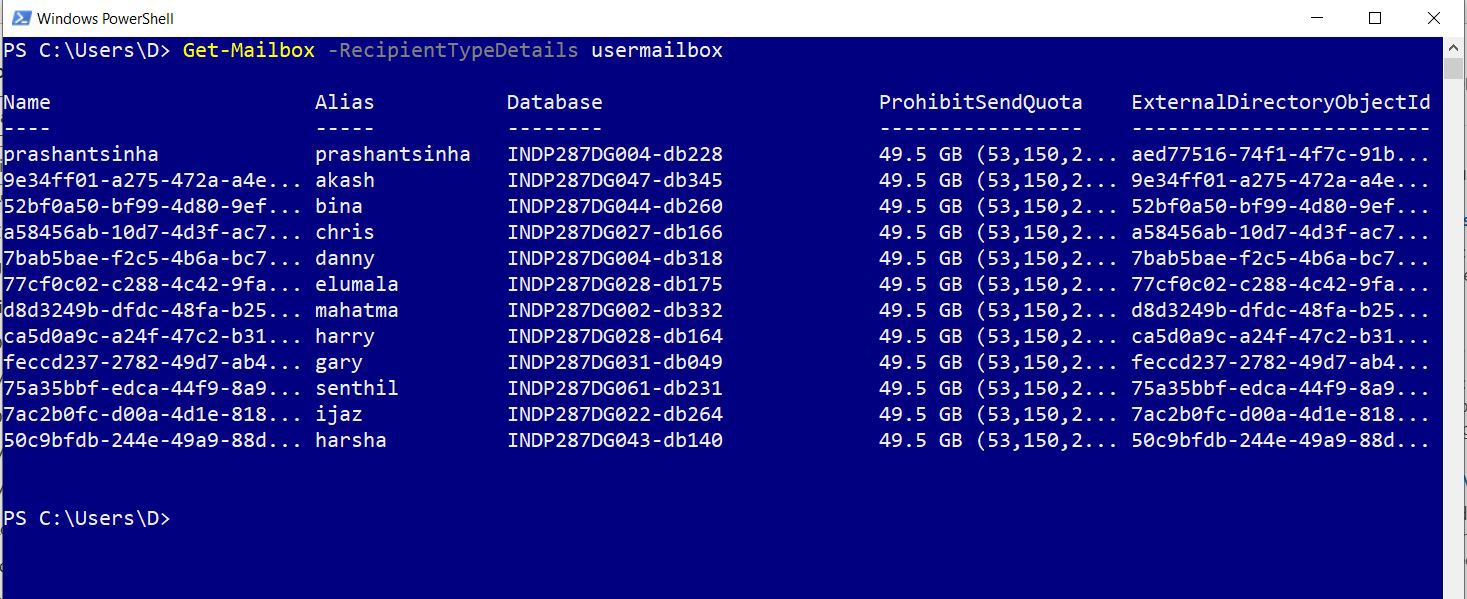
If you want to view only your user mailboxes, pass usermailbox as the value to the parameter -RecipientTypeDetails and run Get-Mailbox -RecipientTypeDetails usermailbox command, as shown in Figure 2. For more information, read How to Create Common Types of Microsoft 365 Mailboxes Using PowerShell.

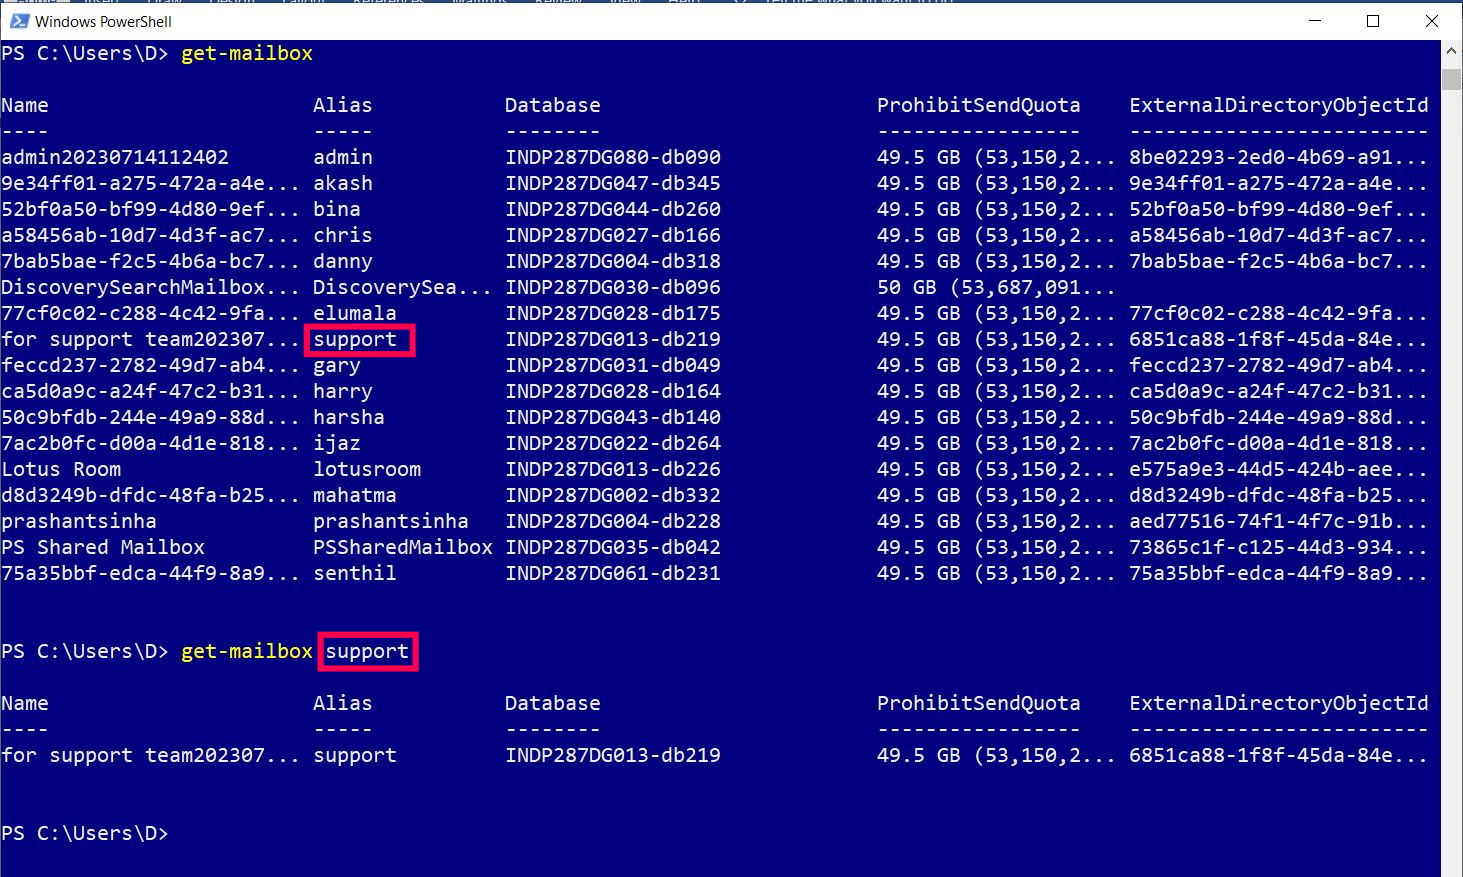
You can also fetch the details of individual mailboxes by specifying the mailbox alias, such as get-mailbox support as shown in Figure 3.

Note: The support mailbox is a shared mailbox, which support executives commonly share. It’s not possible to sign in to a shared mailbox with a username and password, as is the case with user mailboxes. Instead, it is a mailbox shared among a group of users with a common purpose. For more info, read How to Create a Microsoft 365 Shared Mailbox.
Inactive Mailboxes Report
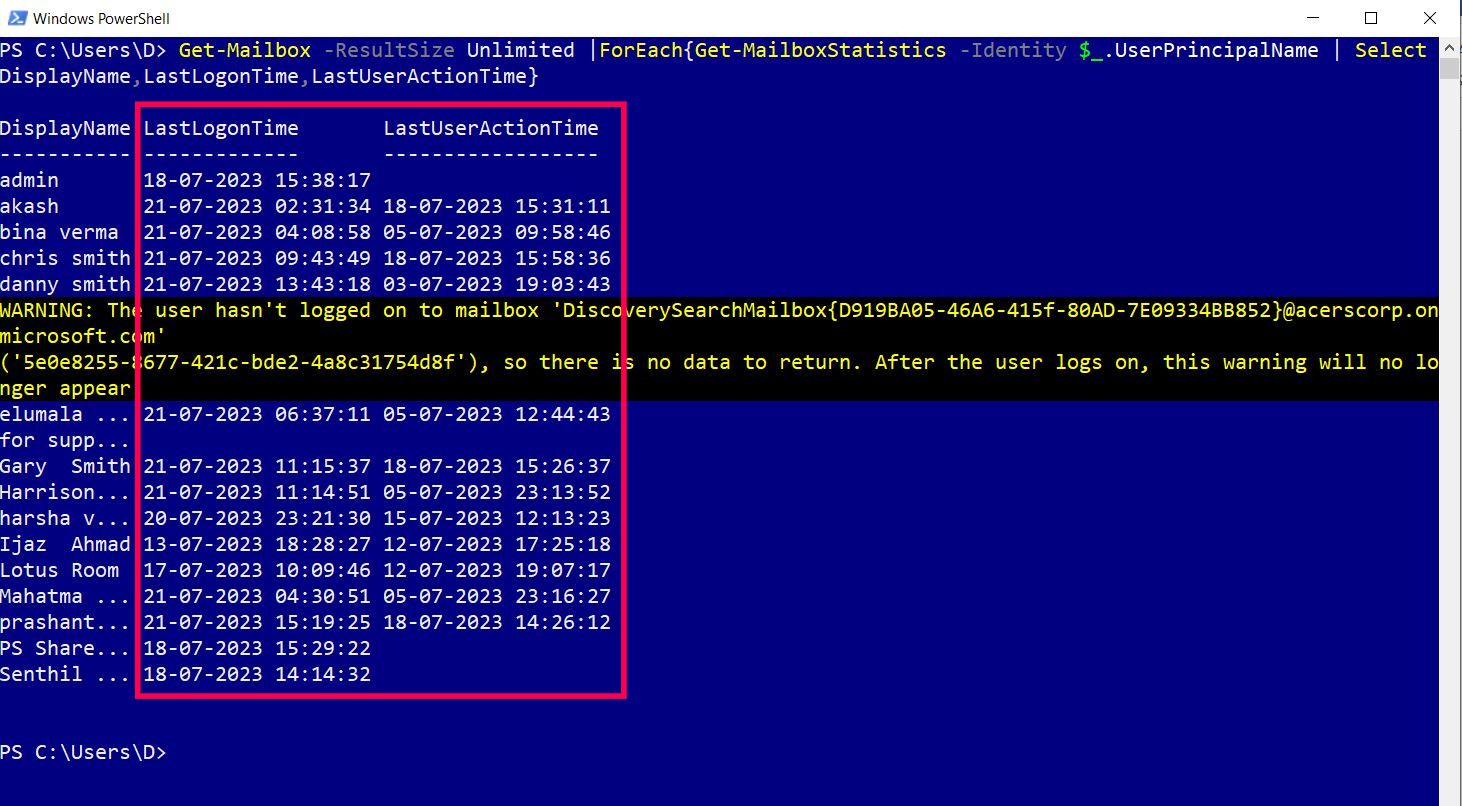
Run Get-Mailbox -ResultSize Unlimited |ForEach{Get-MailboxStatistics -Identity $_.UserPrincipalName | Select DisplayName,LastLogonTime,LastUserActionTime} command. By doing so, you can identify inactive mailboxes based on the last logon time and the last mailbox activity time, as shown in Figure 4. Based on this information, you can take appropriate action.

How Does the Script Work?
Let’s break down the script:
- To get information about all your Microsoft 365 mailboxes, use the Get-Mailbox -ResultSize Unlimited command.
- Run a foreach loop over the fetched mailboxes. Pull out the individual mailbox statistics by using the Get-MailboxStatistics cmdlet and $_.UserPrincipalName from each of them and passing this to the -Identity parameter to fetch the individual mailbox statistics.
- Display only the DisplayName, LastLogonTime, and LastUserActionTime properties of the fetched mailboxes.
Mailbox Storage Report
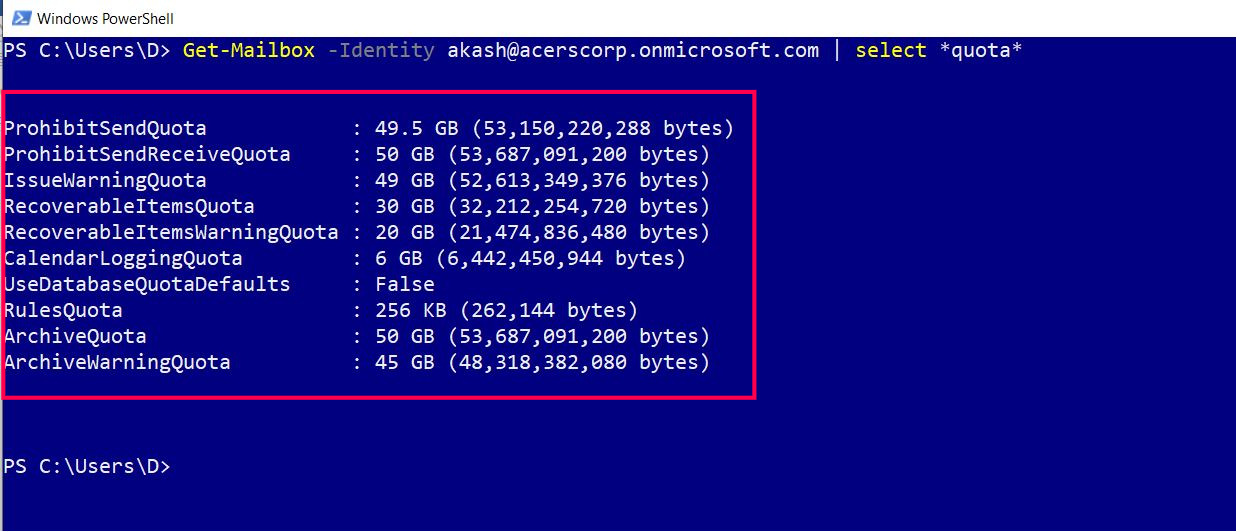
When a Microsoft 365 mailbox exceeds its storage limit or reaches its quota, actions like sending and receiving emails get restricted. To avoid this and to ensure timely additional space is allotted, run the following command:
Get-Mailbox -Identity <user@domain.com> | select *quota*
This generates storage reports about individual Microsoft 365 mailboxes (and identifies mailboxes that are running out of storage space), as shown in Figure 5.

Archive Mailbox Reports
Archive mailboxes are additional mailboxes assigned to Microsoft 365 users who need more mailbox space. With PowerShell scripting, you can generate an archive mailbox report of all the archive mailboxes available in your Microsoft 365 tenant. Run the Get-Mailbox -ResultSize Unlimited -Archive command, as shown in Figure 6.
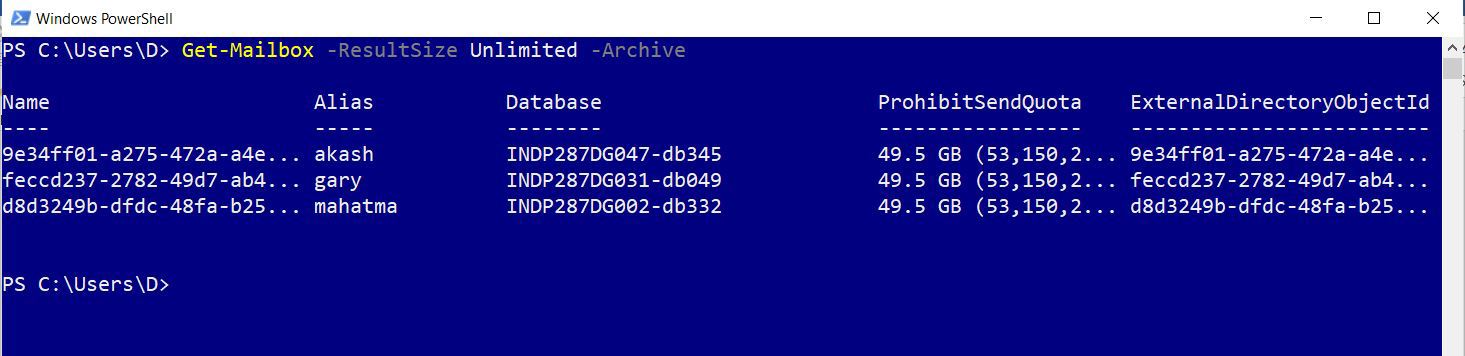
Mail Forwarding–Enabled Mailbox Reports
Mail forwarding enables administrators and users to forward mail from one mailbox to another automatically. With PowerShell scripting, you can fetch all the mailboxes that are enabled to forward mail. Run the following command:
Get-mailbox -ResultSize Unlimited| where {$_.ForwardingAddress -ne $Null} | select DisplayName,ForwardingAddress
You should get a response similar to Figure 7.

How Does the Script Work?
- To get information about all your Microsoft 365 mailboxes, use the Get-Mailbox -ResultSize Unlimited command.
- Query for only those Microsoft 365 user accounts that have the FowardingAddress property configured for them.
- Display the DisplayName and the ForwardingAddress properties from the fetched results.
Possible Errors You Might Face
Here are some errors you might face and ways to rectify them:
- Typos in your PowerShell script: You might have typos even while copying/pasting scripts. Save your scripts in separate .ps1 files, and then run them. This not only saves time but also prevents your script from running into unnecessary errors.
- Providing incorrect login credentials: Ensure that you get your credentials right to prevent yourself from running into this embarrassing error.
Conclusion
Now you know how to retrieve useful information from Microsoft 365 Exchange Online and how to generate reports to help you make the right decisions.
In the next article, I’ll explain:
- What shared mailboxes are.
- How you can create them (using Microsoft 365 admin center and PowerShell).
- How to assign users with the shared mailbox permissions (again, using Microsoft 365 admin center and PowerShell).
For Those Who Like to Watch and Learn
The following video is a shortened (3-minute) version of this article. It shows you how to retrieve useful information about Microsoft 365 mailboxes by using the Get-Mailbox PowerShell cmdlet.

Thilak Kumar Singh
Thilak Kumar Singh is a trainer who believes in teaching about IT in the simplest possible way with more emphasis on visual mode of learning. He firmly believes in democratizing IT knowledge, especially of Microsoft solutions, in which he specializes as a trainer and consultant.
He observes that in this era dominated by cloud computing and collaboration, where IT has reached users unimaginable hitherto, IT knowledge must not be an obscure science, but rather be available to anyone who wishes to engage with IT.