How to Create a Microsoft 365 Shared Mailbox

A Microsoft 365 shared mailbox is a mailbox shared among a group of users from the same department—like admin, support, or legal—that helps users send emails to and receive emails from outsiders. Unlike the Microsoft 365 user mailbox, a shared mailbox doesn't require a username and password to sign in, and administrators grant access on a user permission basis.
This article shows you how to create a Microsoft 365 mailbox via the following methods:
- Using the Microsoft 365 admin center
- Using the Microsoft 365 Exchange admin center (EAC)
- Using Windows PowerShell
Note: Only Microsoft 365 Global or Exchange administrators have permission to create shared mailboxes.
For those who like to watch and learn, check out the 5-minute video at the end of this article, which is a shortened version of this content.
Using the Microsoft 365 Admin Center
To create a shared mailbox from the Microsoft 365 admin center:
Sign in to your Microsoft 365 tenant using your credentials. From the left pane, select the Admin icon, as shown in Figure 1. Doing so opens up the Microsoft 365 admin center.
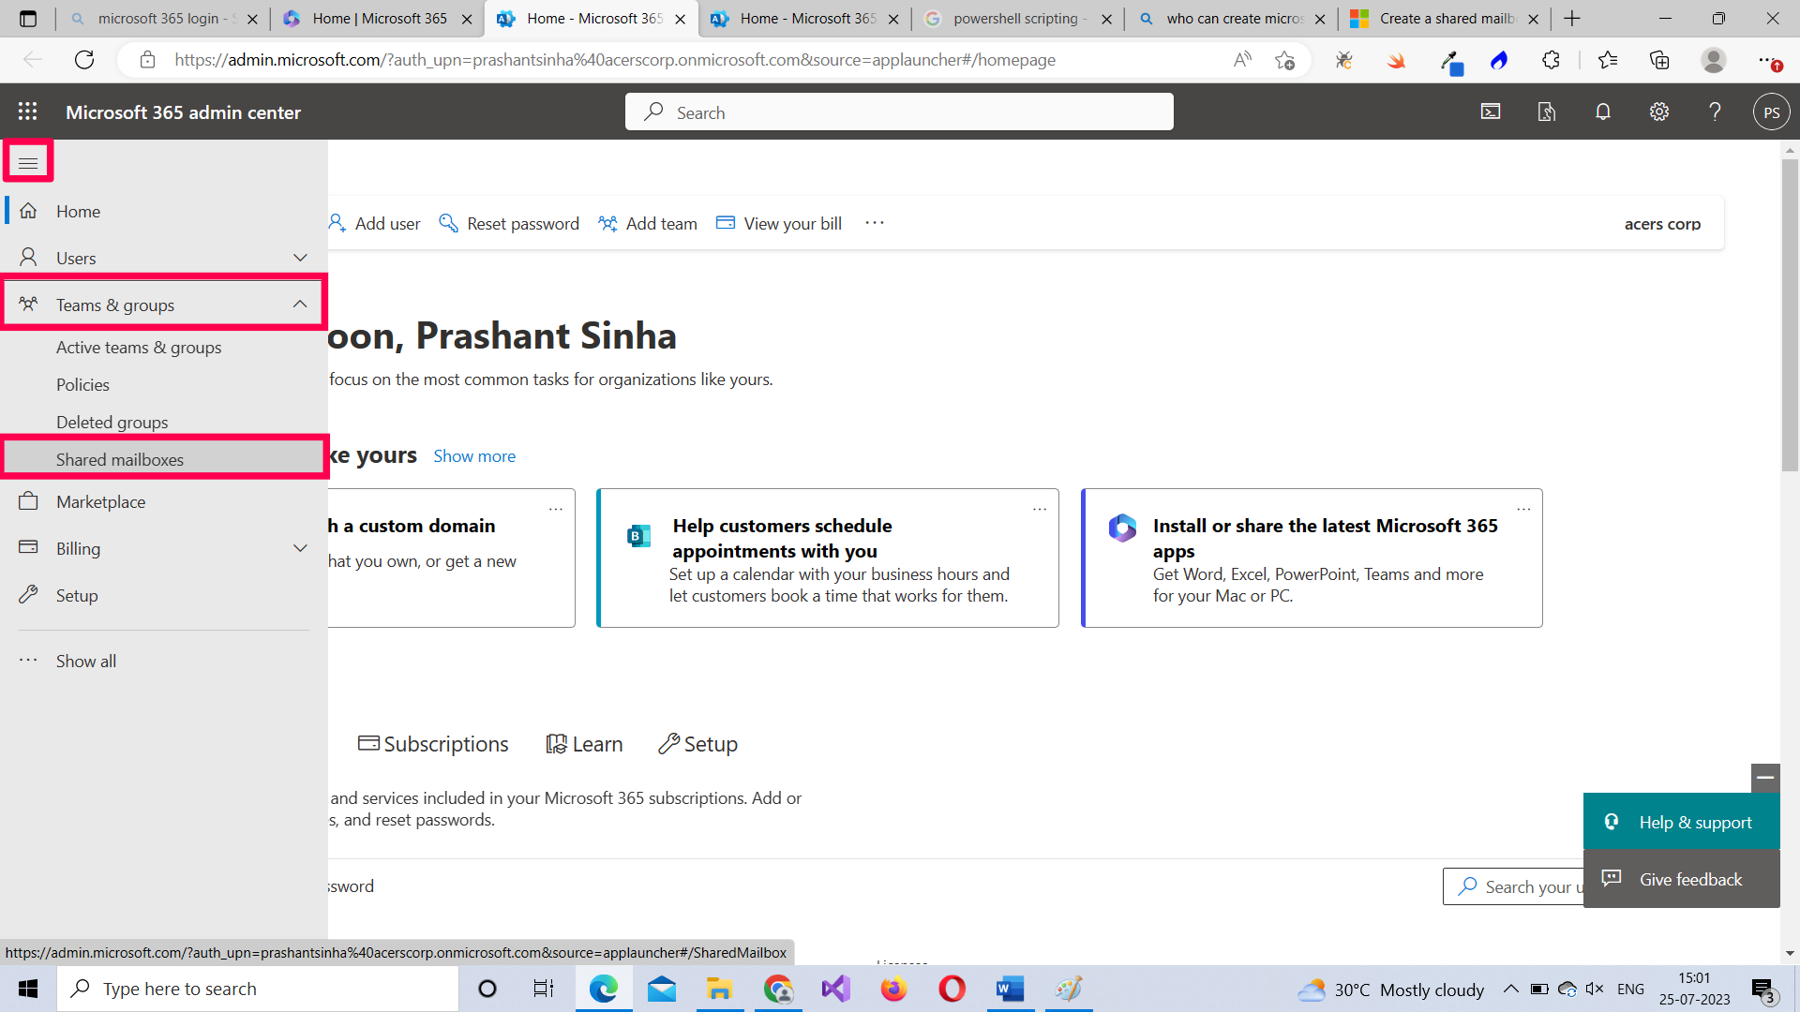
From the menu, select the Teams & groups > Shared mailboxes option, as shown in Figure 2.
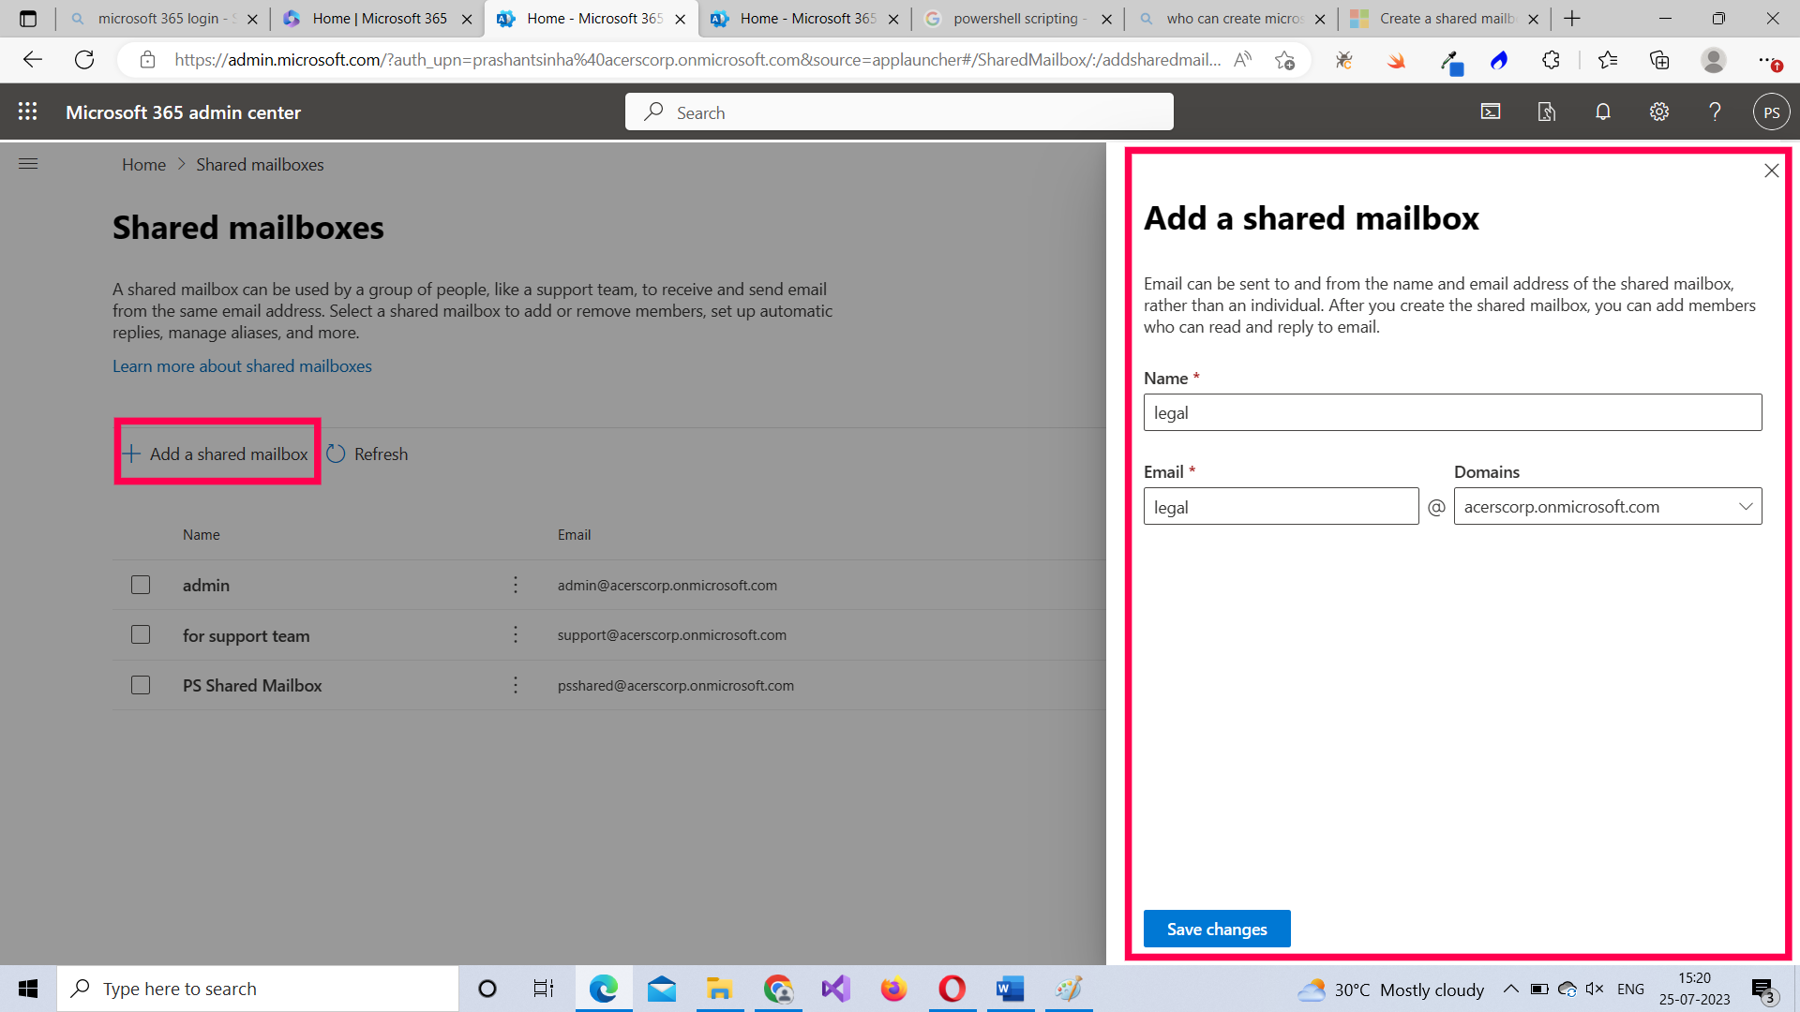
From the Shared mailboxes page, select Add a shared mailbox. This opens the Add a shared mailbox pane to your right, as shown in Figure 3. Provide a name and email address for the shared mailbox, and then select Save Changes.
The Your shared mailbox was created success message gets displayed, as shown in Figure 4.
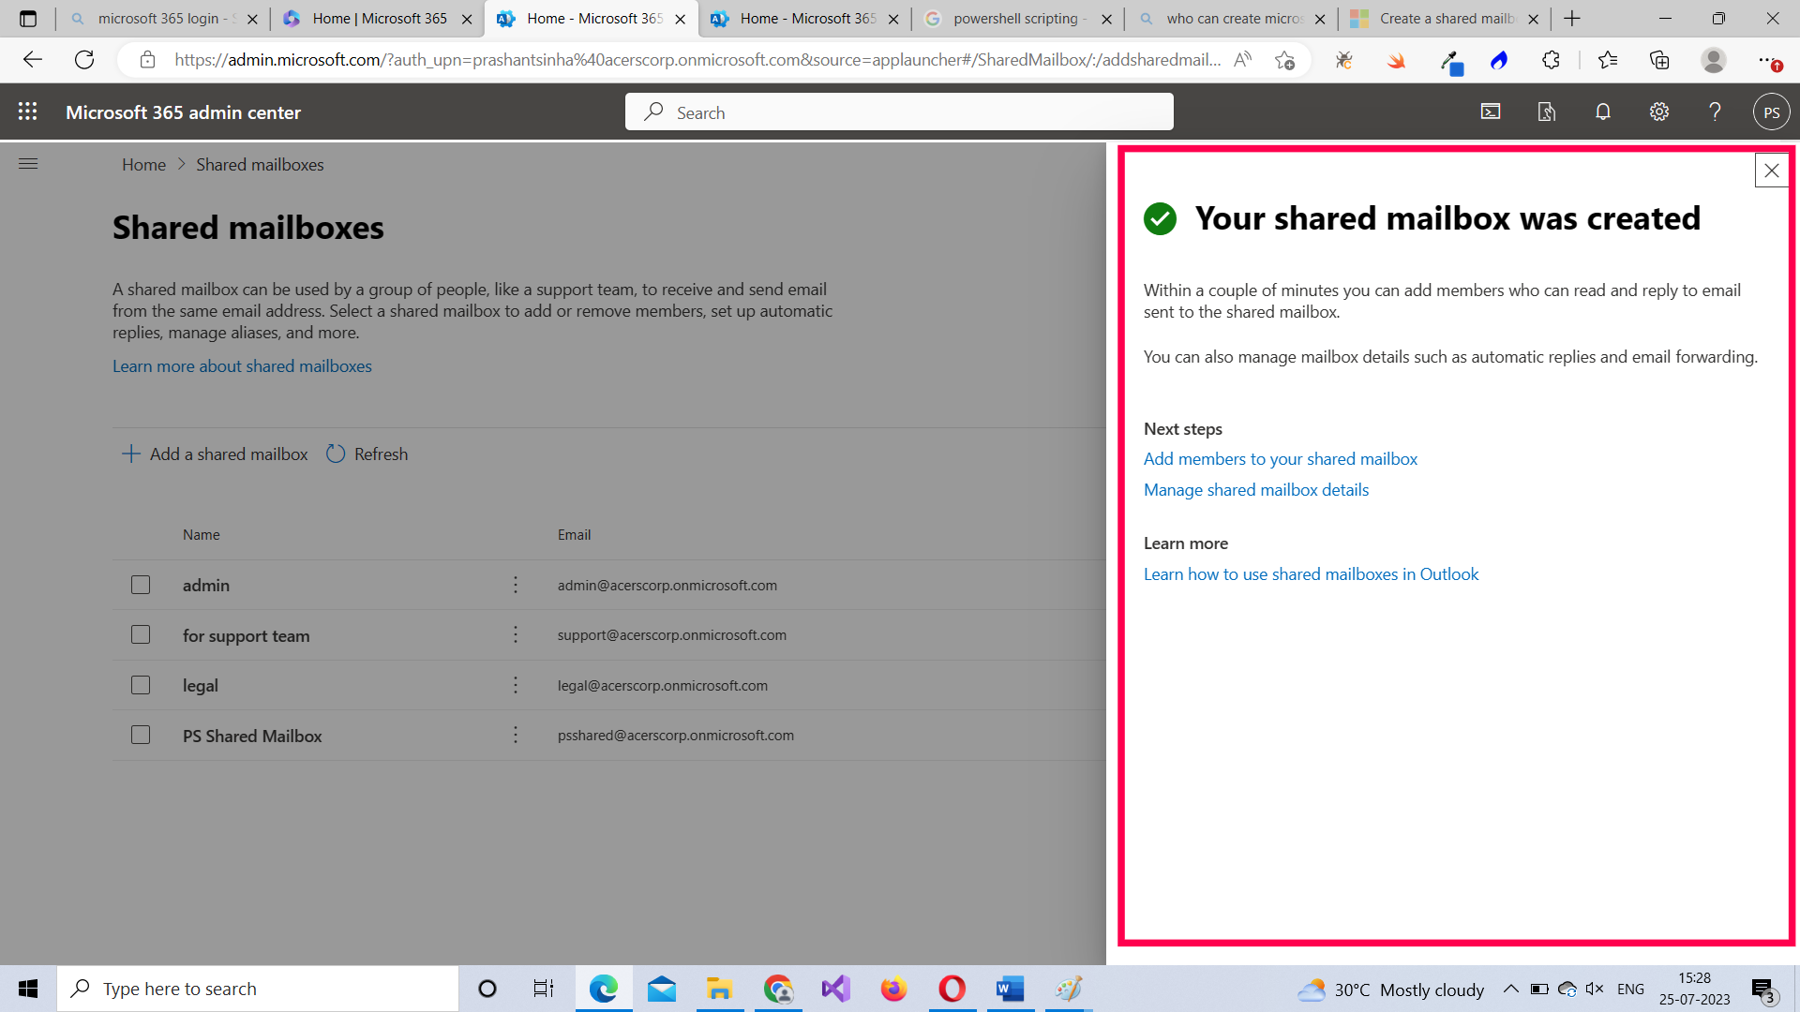
Note: You can start adding members to your newly created shared mailbox by selecting the Add members to your shared mailbox link just below the success message.
Using the Microsoft 365 Exchange Admin Center (EAC)
The EAC is the best place to manage all your Microsoft 365 mailbox–related activities.
To create a shared mailbox from the EAC:
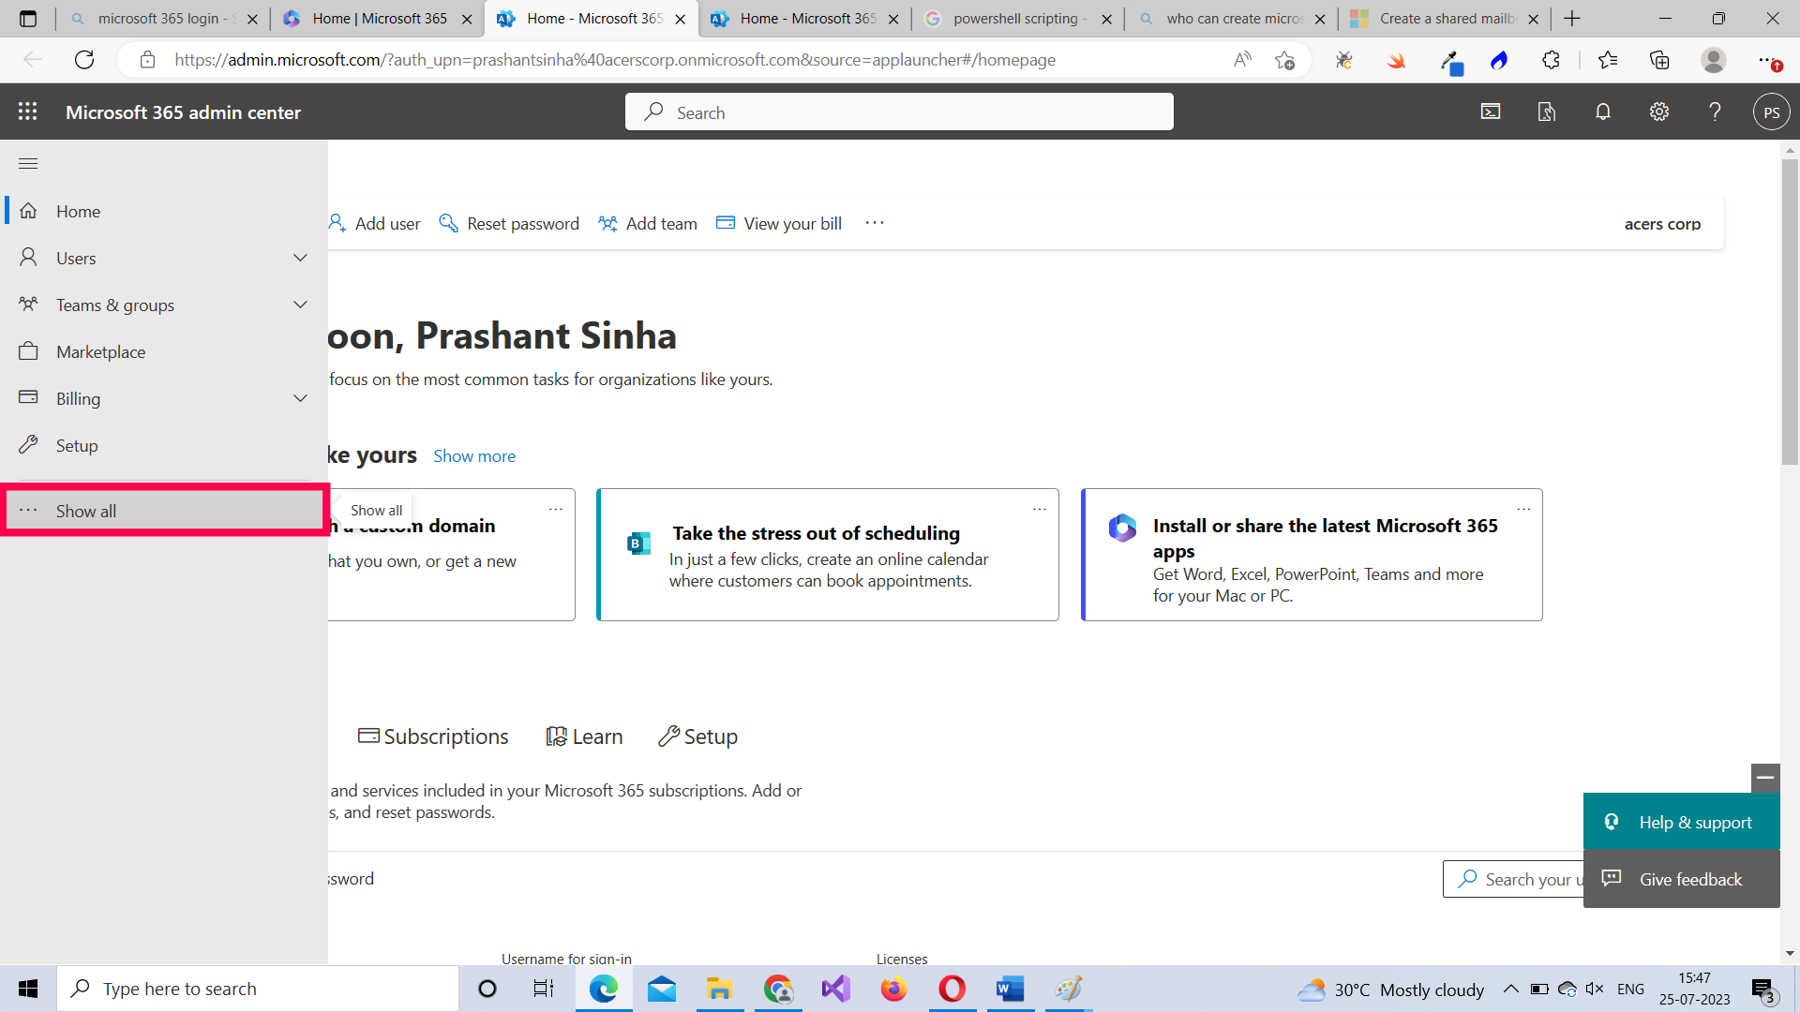
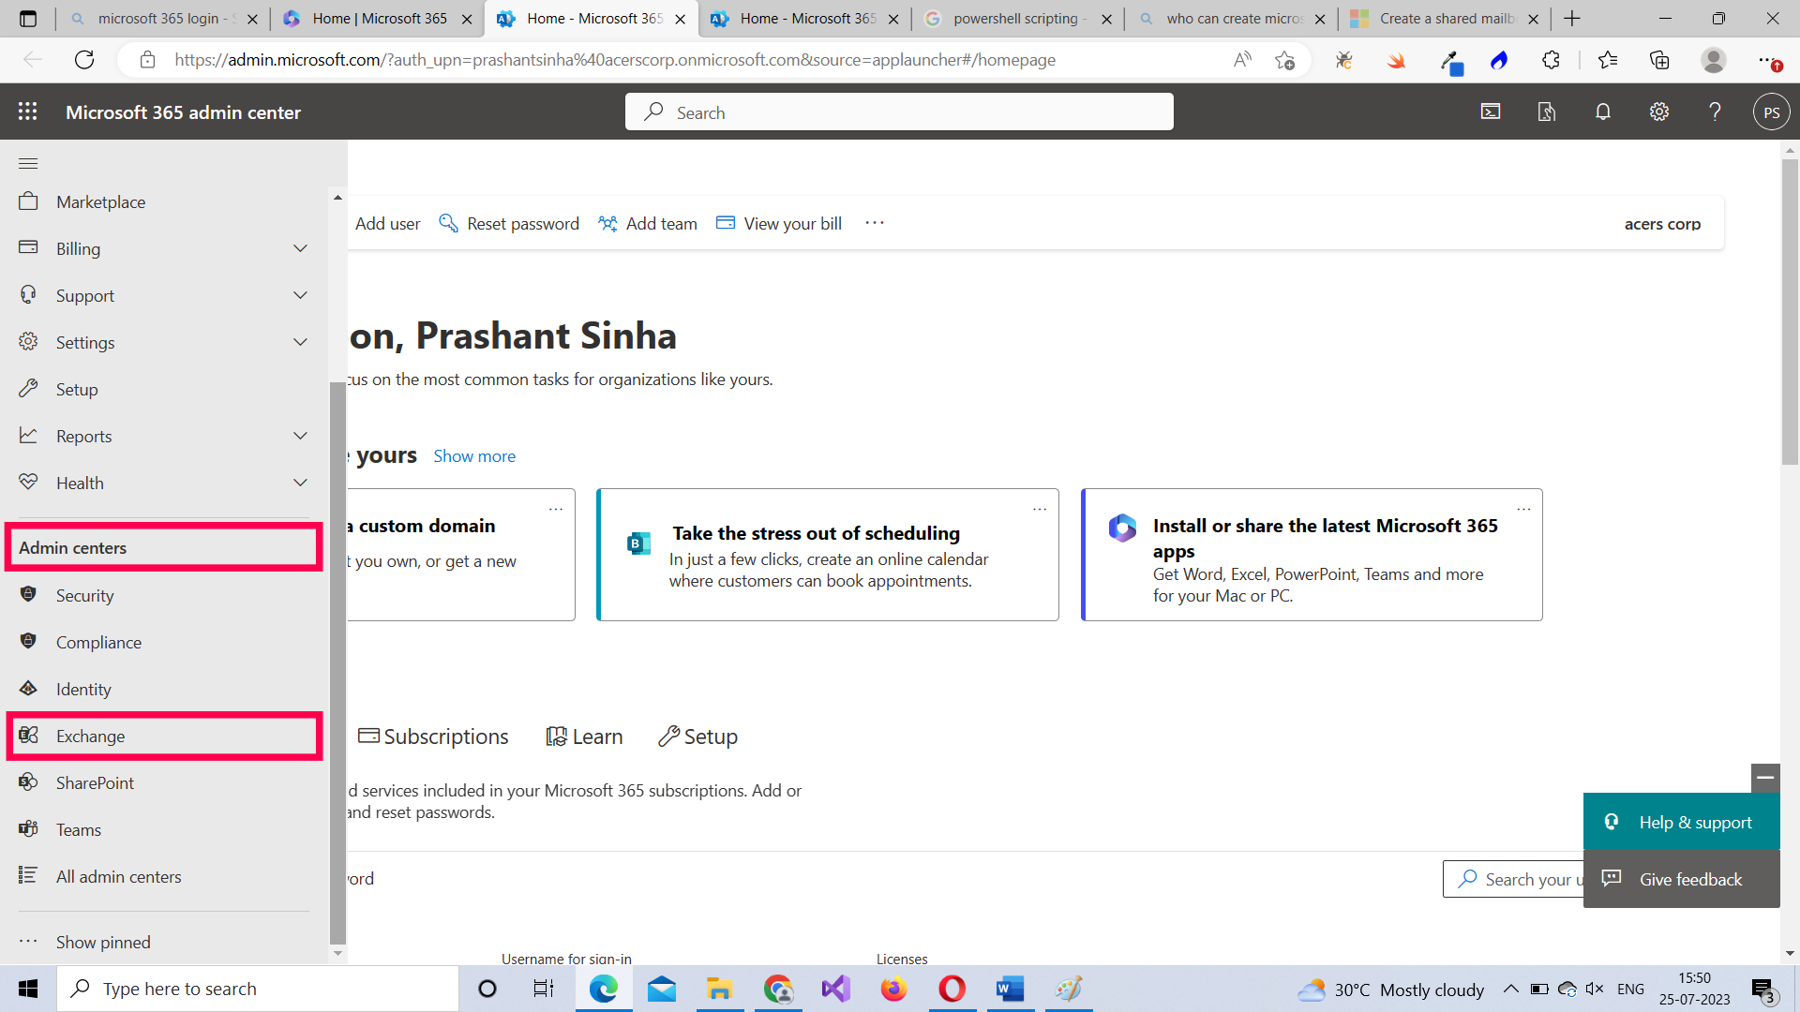
From the Microsoft 365 admin center, select Show all, as shown in Figure 5.
From Admin centers, select Exchange, as shown in Figure 6.
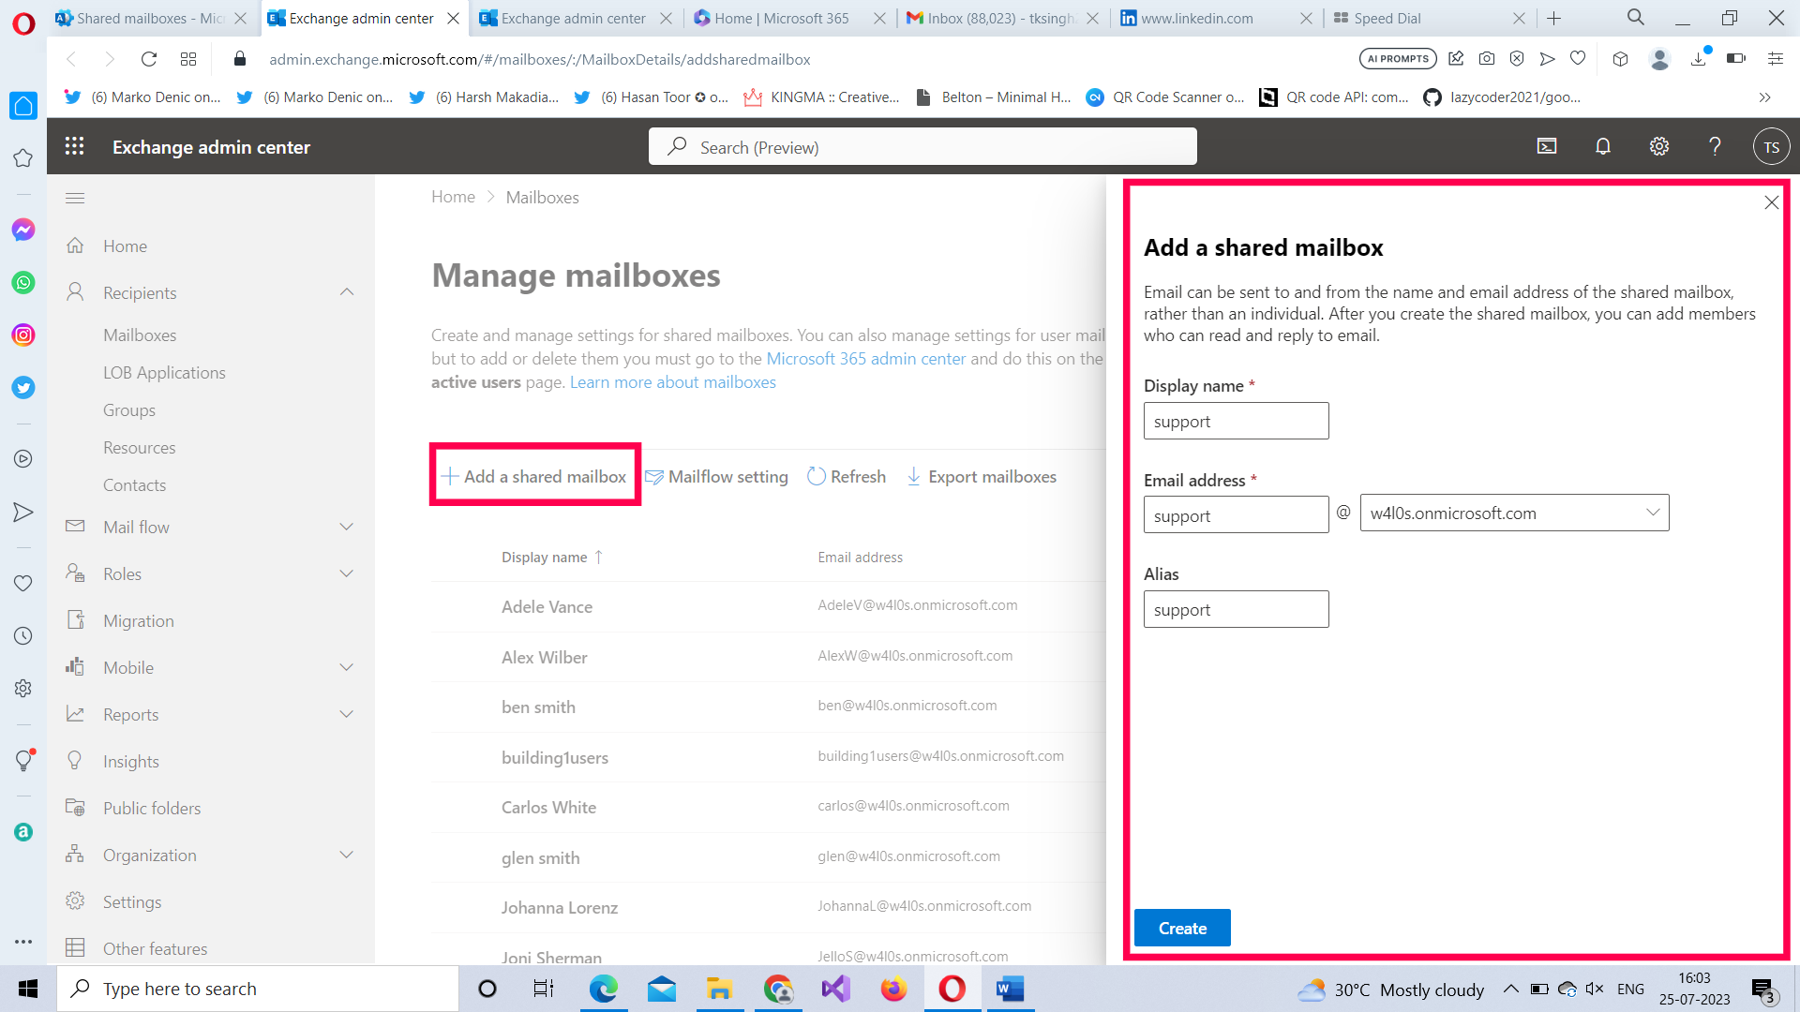
From the Manage mailboxes page, select Add a shared mailbox. This opens the Add a shared mailbox pane to your right, as shown in Figure 7. Provide a Display Name, Email address, and alias for the shared mailbox, and then select Create.
The Shared mailbox created successfully message gets displayed, as shown in Figure 8.

Note: You can start adding members to your newly created shared mailbox by selecting the Add users to this mailbox link below the success message.
Using PowerShell
To create a Microsoft 365 shared mailbox using PowerShell:
Connect to your Microsoft 365 tenant by running the Connect-ExchangeOnline command and providing your sign-in credentials.
Note: For more information, read How to Connect to Microsoft 365 Exchange Online With PowerShell.
Run the following command, as shown in Figure 9:
New-Mailbox -Shared -Name "Marketing Department" -DisplayName "Marketing" -Alias marketing
Doing so creates a shared mailbox with Name set as Marketing Department, Display Name set as Marketing and Alias set as marketing.

How Does This Script Work?
Let’s break down the script:
- Use the New-Mailbox cmdlet. Pass in the -Shared parameter to indicate the mailbox is going to be a shared mailbox.
- Pass in the -Name, -DisplayName, and -Alias parameter values as "Marketing Department", "Marketing", and marketing respectively.
Possible Errors You Might Face
Here are some possible errors you might face and ways to rectify them:
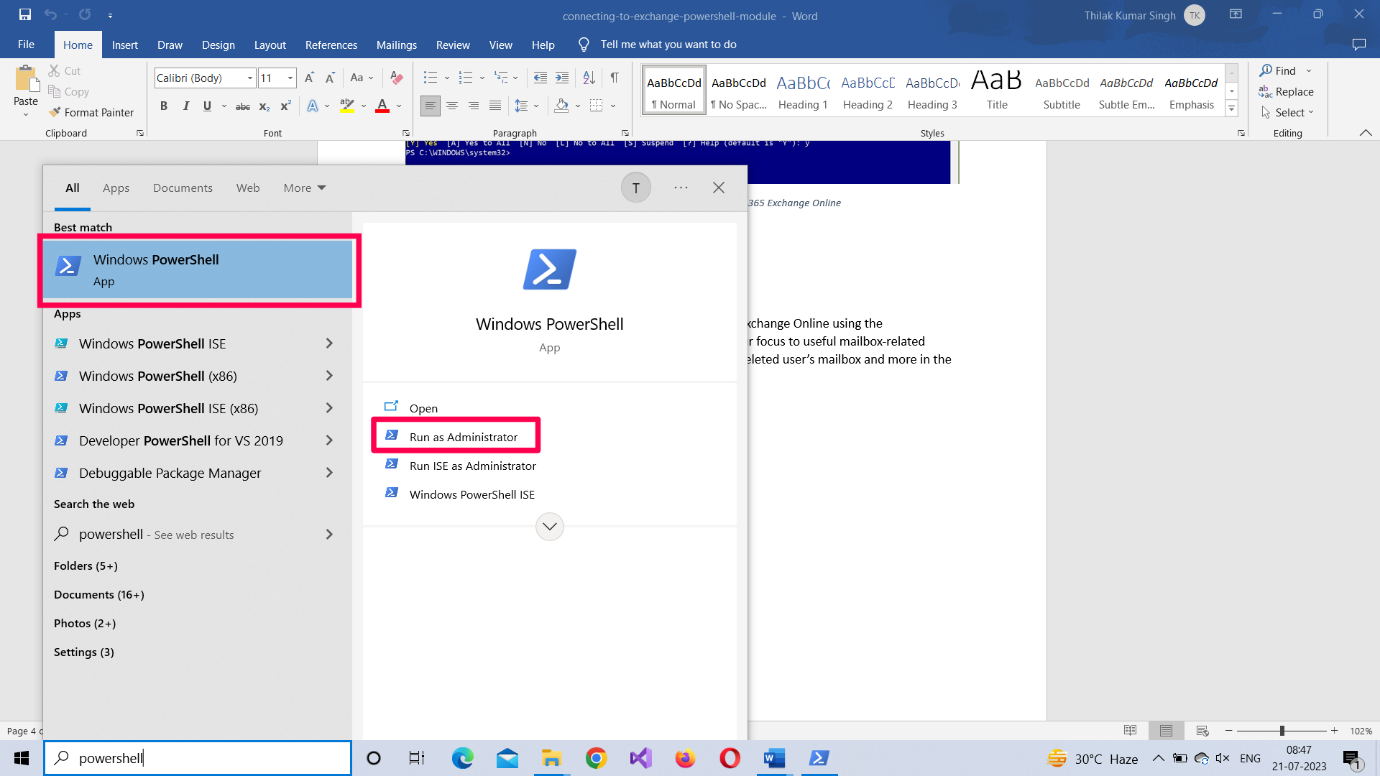
- Not running your shell as Administrator: Select the PowerShell program from the Windows start menu, and then choose Run as Administrator, as shown in Figure 10.
- Execution Policy set to restricted mode: Execution policy setting determines the script execution rights for the current user. If you are signing in for the first time, chances are this is set to restricted mode. Ensure that the execution policy is set to RemoteSigned (which allows you to run your scripts). The command for doing so is Set-ExecutionPolicy RemoteSigned
Note: You can run the Get-ExecutionPolicy command to check your current script execution rights.
- Typos in your PowerShell script: You can run into typos even while copying and pasting scripts. Therefore, it's best to save your scripts in separate .ps1 files and run them. This not only saves time but also prevents your script from running into unnecessary errors.
Sending Mail to the Shared Mailbox and Testing Whether It Works
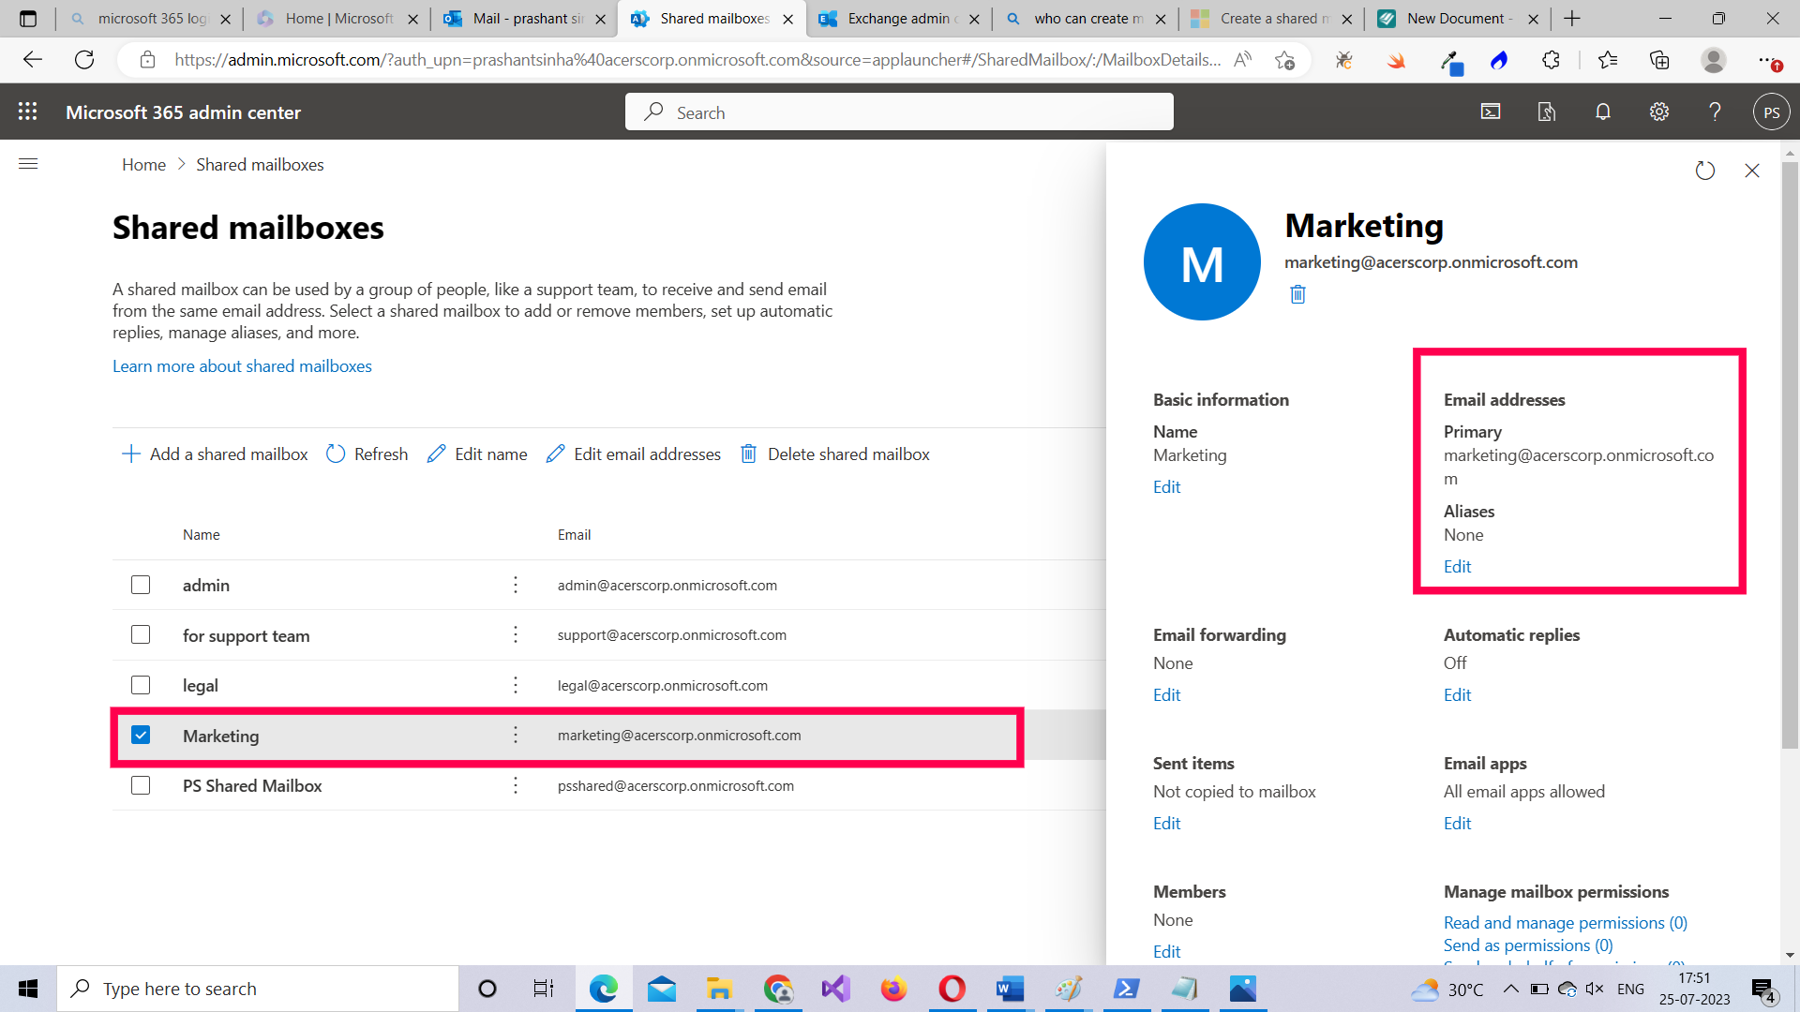
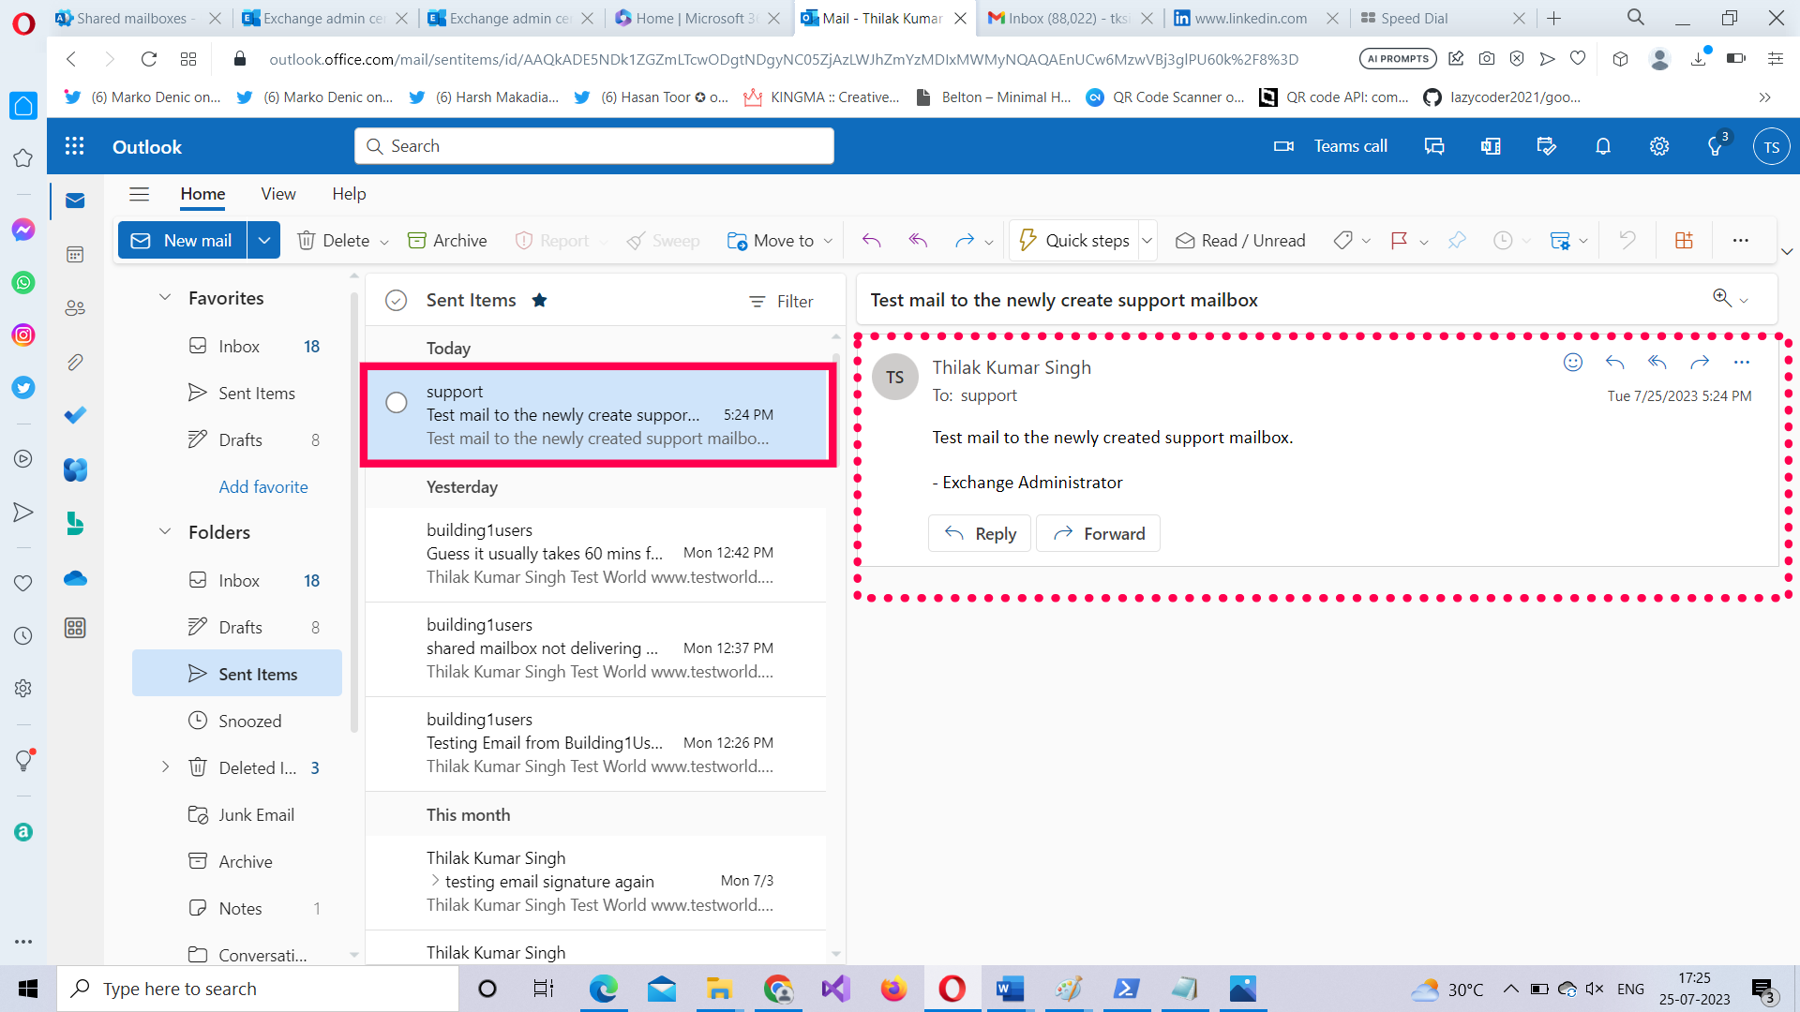
You can test whether the shared mailbox you set up is running by sending mail to its e-mail address from your inbox. You can always get the e-mail address of the shared mailboxes by selecting them, as shown in Figure 11.
If the email gets delivered successfully as shown in Figure 12, then this means you have successfully set up the Microsoft 365 shared mailbox.
Conclusion
Now that you know how to create a Microsoft 365 shared mailbox, in the next article I will show how you can add members to it and manage their permissions using the following:
- The Microsoft 365 admin center
- The Microsoft 365 Exchange admin center
- PowerShell
For Those Who Like to Watch and Learn
The following video is a shortened (5-minute) version of this article. It shows you how to create Microsoft 365 shared mailboxes using the Microsoft 365 admin center, the Exchange admin center, and PowerShell.

Thilak Kumar Singh
Thilak Kumar Singh is a trainer who believes in teaching about IT in the simplest possible way with more emphasis on visual mode of learning. He firmly believes in democratizing IT knowledge, especially of Microsoft solutions, in which he specializes as a trainer and consultant.
He observes that in this era dominated by cloud computing and collaboration, where IT has reached users unimaginable hitherto, IT knowledge must not be an obscure science, but rather be available to anyone who wishes to engage with IT.