How to Bulk Delete Microsoft 365 Users

Bulk deletion is like an emergency button you never turn on, except of course in the case of emergencies (or an exceptional situation). But since it’s been raining layoffs in the corporate world, it’s worth learning how to delete Microsoft 365 users in bulk. In this article, I’ll discuss the two ways that you can bulk delete users:
- Using the Microsoft 365 admin center
- Using Windows PowerShell
Note: When it comes to handling hundreds of user accounts, PowerShell scripting proves more beneficial because you can delete hundreds of Microsoft 365 user accounts in seconds.
For those who like to watch and learn, check out the 3-minute video at the end of this article, which is a shortened version of this content.
Bulk Deleting Using the Microsoft 365 Admin Center
To bulk delete your Microsoft 365 users, sign in to your Microsoft 365 tenant. Go to the Active users page by clicking the Admin icon, selecting Users, and then selecting Active users, as shown in the following video demo.
Video 1: Accessing the Active users page. | Demo: Thilak Kumar Singh.
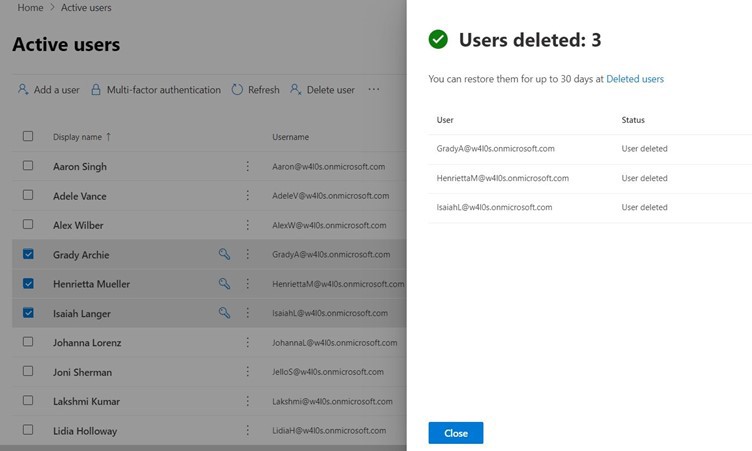
Select the users you want to delete by enabling the appropriate user checkboxes. At the top of the Active users list, click Delete user, as shown in the following video demo. The Delete users pane pops up to your right and shows the number of users you selected. It also displays a warning that you can only restore deleted users for 30 days, after which they are deleted permanently. (You can double-check the user list that you selected for deletion by clicking the info icon.)
Video 2: Selecting users for bulk deletion. | Demo: Thilak Kumar Singh.
The selected users are deleted successfully, and a confirmation message appears, as shown in Figure 1.
Note: The licenses of deleted users are available for assignment immediately.
Restoring Deleted Users
You have just 30 days to restore any accidental deletions. After this, your deleted user accounts are gone forever. To restore a deleted user, do the following:
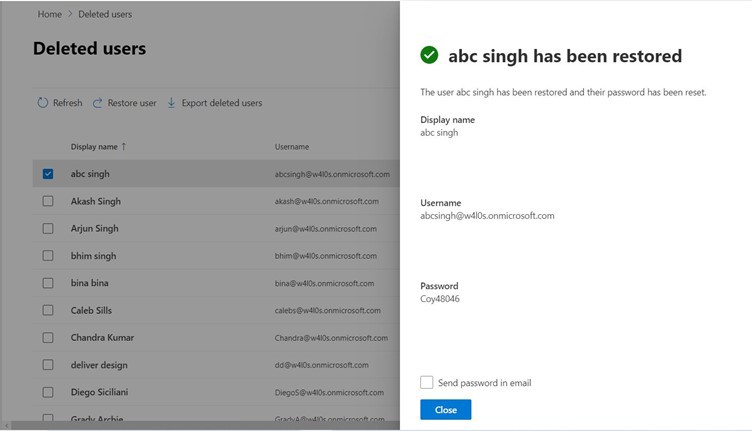
Under Users in the left pane, go to the Deleted users page, and then select the user to be restored. At the top of the Deleted users list, click Restore user. This opens the Restore user pane to your right, as shown in the video demo.
Video 3: Restoring a deleted user. | Demo: Thilak Kumar Singh.
Set the password for the user being restored. You can auto-generate the password or set it manually. The password can be mailed to the user too, if required. Click Restore. The deleted user is restored successfully, and a confirmation message appears, as shown in Figure 2.
Bulk Deleting Using Windows PowerShell
When you need to delete many user accounts, it’s best to use PowerShell. This is because you can delete hundreds of Microsoft 365 user accounts in seconds. There are two PowerShell modules that help you bulk delete users:
- Bulk deleting using MsolService
- Bulk deleting using AzureAD
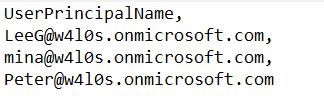
Whatever module you use, the first step is to import the users being deleted from your CSV file. Ensure that you properly configure your CSV file, as shown in Figure 3.
| Demo: Thilak Kumar Singh. View Full Size
Importing Users from the CSV File
Run the following command to import the users to be deleted and store this in the $deleteUsers PowerShell variable (for ease of use), as shown in the following video demo.
Import-Csv <location to the file>/<filename>.csv
Video 4: Import users from a CSV file. | Demo: Thilak Kumar Singh.
Bulk Deleting Using MsolService
To delete the users, run the following command:
ForEach($user in $deleteUsers){Remove-MsolUser -UserPrincipalname $user.UserPrincipalName}
Because of the sensitive nature of the operation involved, you’ll be prompted to confirm the deletion four to five times. The following video demo shows the Remove-MsolUser cmdlet in operation.
Video 5: Bulk deleting users with MsolService. | Demo: Thilak Kumar Singh.
Here’s a brief explanation of how the preceding script works:
- PowerShell ForEach loop is used to loop through the users in the $deleteUsers collection.
- $user represents every user in the $deleteUsers collection.
- The Remove-MsolUser cmdlet is run for every user in the $deleteUsers collection.
- UserPrincipalName of every user ($user.UserPrincipalName) is passed to the
-UserPrincipalName parameter.
Note: You can get rid of the annoying deletion confirmation prompt from showing up by passing the -Force parameter to the Remove-MsolUser cmdlet.
Bulk Deleting Using AzureAD
To delete the users, run the following command:
ForEach($user in $deleteUsers){Remove-AzureADUser -ObjectId $user.UserPrincipalName}
The following video demo shows the Remove-AzureADUser cmdlet in operation.
Video 6: Bulk deleting users with AzureAD. | Demo: Thilak Kumar Singh.
Here’s a brief explanation of how the preceding script works:
- PowerShell ForEach loop is used to loop through the users in the $deleteUsers collection.
- $user represents every user in the $deleteUsers collection.
- The Remove-AzureADUser cmdlet is run for every user in the $deleteUsers collection.
- UserPrincipalName of every user ($user.UserPrincipalName) is passed to the
-ObjectId parameter.
Deleting Users Permanently
What if you want to remove your deleted users from the recycle bin? Run the following command:
forEach($user in $deleteUsers){Remove-MsolUser -UserPrincipalName $user.UserPrincipalName -RemoveFromRecycleBin}
Just remember that if you remove your users from the recycle bin, you cannot restore them after that.
Possible Errors You Might Face
Here are examples of errors you might come across:
- Using -RemoveFromRecycleBin on users yet to be deleted: The -RemoveFromRecycleBin parameter of MsolService is reserved for users available in the deleted users list in your admin center. If you accidentally pass this parameter while trying to bulk delete users, your script throws an error for obvious reasons.
- Getting your CSV headers wrong: Always have pre-defined CSV templates ready for bulk actions like creating, updating, or deleting users. This ensures you get your CSV headers right and prevents your script from running into unnecessary errors.
Conclusion
PowerShell is the preferred option for bulk deleting users because you can delete hundreds of Microsoft 365 user accounts within seconds. This task takes a lot of time if you use the Microsoft 365 admin center. So having a dedicated PowerShell script for bulk deleting your users — and a pre-defined CSV template containing the right headers — can prove hugely beneficial.
For Those Who Like to Watch and Learn
The following video is a 3-minute visual version of this article. It explains two ways that you can assign licenses to a single user or to multiple users:
- Bulk delete using the Microsoft 365 admin center
- Bulk delete using PowerShell

Thilak Kumar Singh
Thilak Kumar Singh is a trainer who believes in teaching about IT in the simplest possible way with more emphasis on visual mode of learning. He firmly believes in democratizing IT knowledge, especially of Microsoft solutions, in which he specializes as a trainer and consultant.
He observes that in this era dominated by cloud computing and collaboration, where IT has reached users unimaginable hitherto, IT knowledge must not be an obscure science, but rather be available to anyone who wishes to engage with IT.