Using DISM /Get-Packages for Windows Image Inspection

Maintaining a Microsoft Windows image requires tools to check and inspect existing images. Ditto for building new ones and customizing or maintaining existing images. For all these purposes (and at least several other management tasks, including driver access, image repair and cleanup, language packs, and more), the Deployment Image Servicing and Management (DISM) command line tool is just what's needed.
As Windows images get installed and then updated over time, the Windows Component Store—the central repository where the packages that make up Windows and its runtime environment reside—gains (and sometimes loses) entries. In fact, a key aspect involved in Windows image upkeep and maintenance comes from understanding the component store’s contents and composition. Properly formatted and analyzed, the DISM /Get-Packages command offers useful, informative insight into the Windows images that it targets.
Check Out Another DISM Article
This article is kind of a continuation of another one of my TekkiGurus articles from April 25, 2023: Important Windows Image Cleanup Maneuvers. In my current article, I rely on descriptions of certain other DISM commands from the April article, especially those related to /cleanup-image. To wit:
- /AnalyzeComponentStore: Tells DISM to inspect and report on the contents of the component store, with an emphasis on its size and composition, plus enumeration of any reclaimable packages it may find therein. (A reclaimable package is one that’s superseded or obsolete, so it may be safely purged from the store.)
- /StartComponentCleanup: Tells DISM /cleanup-image it may undertake the process of cleaning up (removing) any reclaimable packages that it is allowed to handle.
- /ResetBase: Tells DISM /cleanup-image to use the remaining packages after cleanup as the base for all future changes and updates. No currently installed package may subsequently be removed from the image, even if it becomes superseded or obsolete. This features heavily in one of the later sections of this current article.
Here, you’ll learn—and see—much of what DISM /Get-Packages can do overall and how it works. The April article emphasized how to use DISM to clean up the component store, often by 1 GB or more.
Furthermore, the DISM command can target either a running Windows image (through the /Online parameter) or an offline Windows image (through various image targeting sub-commands). As I’ve learned through hard-won experience, targeting offline images (Windows image files not actually running) can be tricky. But these often provide the focus for deployment and staging of updates inside enterprises and other large organizations. For syntax details, consult the Microsoft Learning DISM Reference. (I’ve also found asking Copilot for detailed examples to be helpful.) When in doubt, experiment to find out what works. As it happens, the /Get-Packages option for DISM makes an ideal learning platform because it only reports on (and cannot alter) Windows images. Fool around to your heart’s content with /Get-Packages, and you will learn what you need to know before you start changing the images that you manage.
Note: The DISM command works in both Windows PowerShell and the Command Prompt inside Windows Terminal. I will show examples based on PowerShell because it is the default shell within Windows Terminal. To learn more about working with and customizing Windows Terminal, I recommend my series of articles on that topic for TekkiGurus.
Capturing /Get-Packages Output
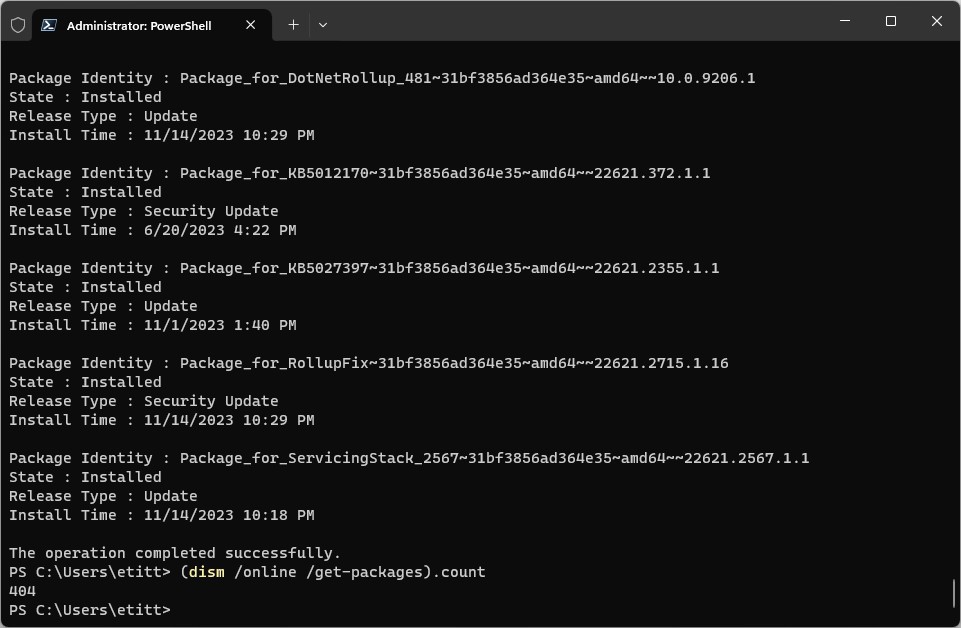
The complete syntax for using /Get-Packages with DISM involves a bit of formatting sleight of hand. If you simply enter dism /get-packages at the prompt, its output is long and difficult to read. On my test PC, as shown in Figure 1, it lists 404 packages, of which you can see only five at the end of that listing. It’s much more productive to capture the output from this command using a redirect (“>”) at the command line to write it to a text file. Then you can examine it at your leisure (and use it to compare against other such files also).
Fortunately, it’s quite easy to redirect output from DISM /Get-Packages into a file. There are two basic formats from which you can choose: a list or a table. Unsurprisingly, these work with the following command-line additions: /format:list specifies the former, while /format:table specifies the latter. This command redirects the output from DISM /Get-Packages in table format to a file named gp<date>.txt where date takes a yymmdd format:
DISM /online /get-packages /format:table > gp231127.txt
By default, that file appears at the root of my signed-in user account (C:/Users/Ed in this case). Figure 2 shows what the opening section of that file looks like in my favorite text editor: Notepad++.
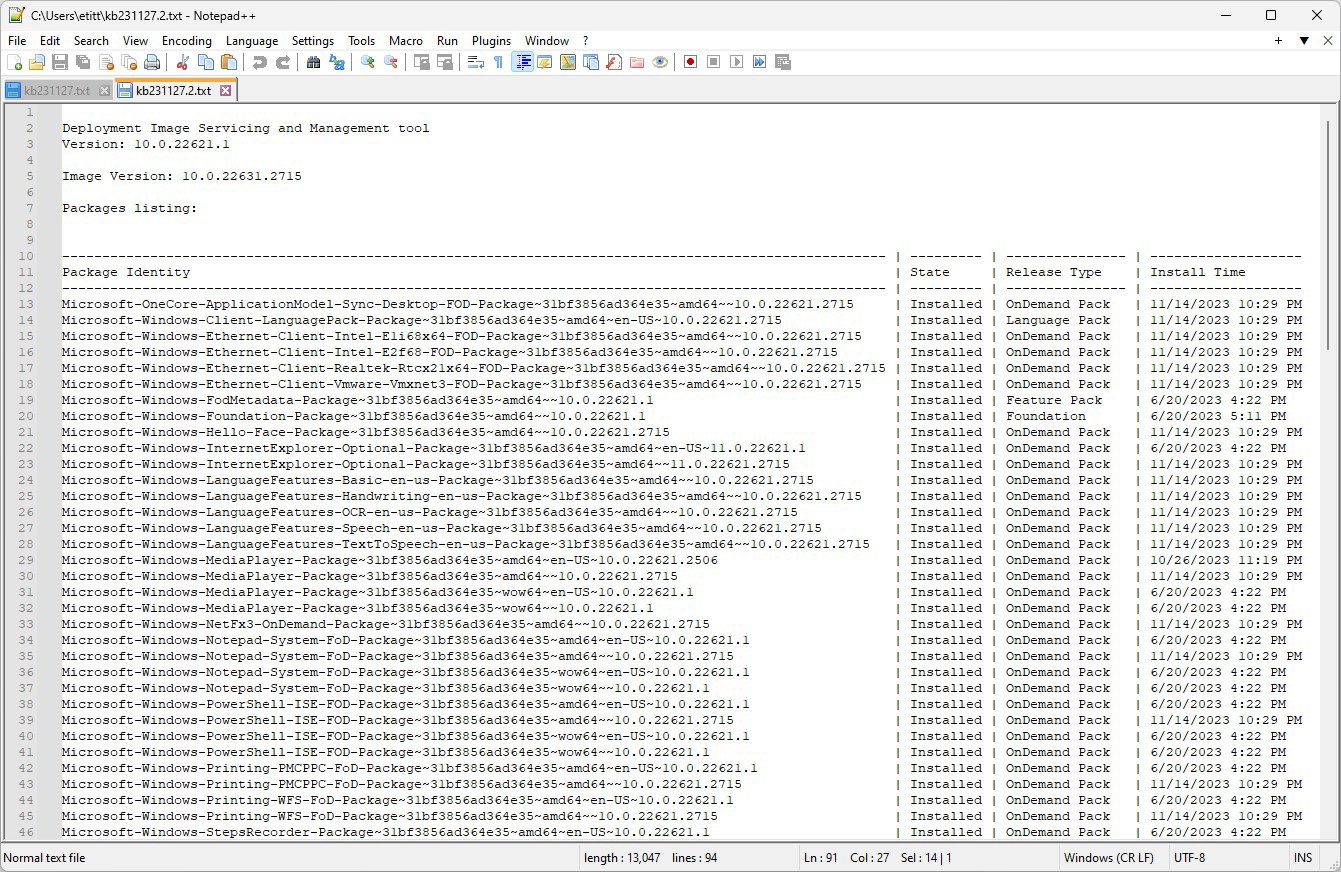
The values of the “State” field (Column 2 in Figure 2) are of particular interest. According to the docs, this field can take one of seven possible values (of which I’ve seen mostly the asterisked items):
- DismStateNotPresent (0): The package or feature is not present in the image.
- DismStateUninstallPending (1): The package or feature is staged for uninstall on the next boot.
- DismStateStaged (2): The package or feature is staged for installation on the next boot.
- DismStateRemoved (3): The package or feature has been removed from the image.
- DismStateInstalled (4)*: The package or feature is installed in the image. This appears as “Installed” in the Get-Packages output.
- DismStateInstallPending (5): The package or feature is pending installation on the next boot.
- DismStateSuperseded (6)*: The package or feature has been superseded by a newer version. This appears as “Superseded: in the Get-Packages output.
- DismStatePartiallyInstalled (7): The package or feature is partially installed in the image.
In the context of these many possible states, it’s important to understand that /Get-Packages works well with offline .cab (cabinet) and .msu (Microsoft Update) files, and also with WIM, ESD, and VHDX image files. But if you want to use DISM /Get-Packages with offline image files, you must first mount some offline image using the DISM /Mount-image command. This takes the form:
DISM /Mount-image /imagefile:<path> {/Index:<Index-value>|/Name:
<Img-name>} /MountDir:<targetdir> [/readonly] [/optimize]}
Please understand that {} (curly braces) enclose alternate elements when separated by | (vertical bar) characters, and [] (square brackets) enclose optional items. Elements must be entered in their order of appearance as well. Thus, the preceding syntax indicates that you can specify an image by name or by index. Bold text items are mandatory; others are optional. Here’s more information about associated values, enclosed in angle brackets (<>) in the preceding syntax example:
- <path>: The path specification for the location of the image or VHDX file to be mounted. Here, I’ll use an ISO mounted as a virtual drive P: to provide the path to install.wim – namely P:\Sources\install.wim.
- <Index-value>: The index for the specific image (usually a Windows version) within a WIM, ESD, VHDX, or other image file. You can use the /Get-WimInfo element with DISM to list image information for a specific image file. In this case, the index for Windows 11 Pro is 6.
- <Img-name>: The name for the specific image (also a Windows version) within a WIM, ESD, VHDX, or other image file. The /Get-WimInfo element lists index, name, description, and size (this corresponds to the value for the Name field). In this case, it’s “Windows 11 Pro.”
- <targetdir>: Mount-image must point to a mount directory at least one level below the directory root and must be created before being referenced in this command. In this example, I created a folder named dismt (short for “DISM mount point”) on the M: drive, which makes it M:\dismt.
The /readonly value means the mounted image cannot be changed. For our purposes (inspecting packages) that’s perfectly OK. (I recommend using it unless you plan to update the image later on; this bypasses potential permissions issues, too.) The /optimize value means the initial mount gets sped up because the entire image structure is not populated in advance. (The first time you access a folder inside the mounted image, it will take extra time as the image structure does get completely populated when that happens.) I don’t use this because /Get-Packages will read the whole image structure anyway.
For my mounted ISO on drive P:, the actual image mount syntax was (broken across two lines for readability):
DISM /mount-image /imagefile:P:\sources\install.wim /Index:6
/MountDir:M:\dismt /readonly
If you work on an online image, you will typically see only two states in /Get-Packages: “Installed” (as in currently installed and in use) or “Superseded” (as in present in the component store, but no longer in use). In the use cases I discuss next, you can also see “Uninstall Pending,” “Staged,” and “Install Pending.” It is something of a special case, as I explain in that section: it’s got updates pending, and it’s been subject to /ResetBase at some prior time.
Use Cases for /Get-Packages
In most cases, dism /cleanup-image /analyzecomponentstore can reliably report whether that store contains reclaimable packages. Even so, following up with /startcomponentcleanup may still save space in the component store even when nothing reclaimable is found. Thus, for example, I observed the following values in a recent sequence of analyze-clean-analyze on a Windows 11 test PC. (Before means “prior to cleanup” and after means “following cleanup.”)
| Item | Value Before | Value After | Delta | |||
| Reported size of WinSxS | 7.70 GB | 7.25 GB | 0.45 GB | |||
| Actual size of WinSxS | 7.67 GB | 7.33 GB | 0.34 GB | |||
| Shared with Windows | 6.65 GB | 6.65 GB | 0 GB | |||
| Backups and disabled features | 1.02 GB | 0.56 GB | 0.48 GB | |||
| Cache and temporary data | 0 GB | 0 GB | 0 GB | |||
| Net overall space recovered | 0.48 GB |
In general, though, dism /Get-Packages will tell you by inspection that clean-up may be warranted because it shows one or more (usually several) packages with “Superseded” status. Indeed, there’s a many-to-one ratio of reclaimable packages as reported in /analyzecomponentstore output to superseded packages as reported in /Get-Packages output (ditto for the excellent GitHub project Driver Store Explorer also known as RAPR.exe).
Use Case 1: Observing Post-Update Behavior and /ResetBase After-Effects
The best use case for /Get-Packages is to observe how the reported contents of WinSxS (the location of Windows Component Store files) change after Windows Update provides updates before and after the first post-update reboot. In the pre-reboot /Get-Packages output, here are the State values found, and their associated counts:
- Staged: 63
- Uninstall Pending: 56
- Install Pending: 112
- Installed: 24
- Superseded: 57
After the reboot, during which “Installing updates” status appeared onscreen before and after the actual shutdown and restart, those counts are dramatically different:
- Staged: 63
- Uninstall Pending: 0
- Install Pending: 0
- Installed: 80
- Superseded: 57
Then, after running dism /cleanup-image /startcomponentcleanup (/AnalyzeComponentStore reports a whopping and unusual 13 reclaimable packages), those counts became:
- Staged: 63
- Uninstall Pending: 0
- Install Pending: 0
- Installed: 79
- Superseded: 1
In every case where there’s a Staged item in the file, it bears a version number of 10.0.22621.1 with an accompanying item numbered 10.0.22621.2776. (According to an online search, confirmed by update history on the PC itself, this represents Cumulative Update KB5032292 released on 11/28/2023.) Thus, the update reflects accommodation for today’s Cumulative Update as I write this article. It also shows what happens to the component store as pending items (both install and uninstall) get handled.
What makes this PC unusual and noteworthy is that the staged items remain unaltered. Even more so, it’s the 13 reclaimable packages reported vis-à-vis items with “Superseded” state in the /Get-Packages information just analyzed. This leads me to a remarkable conclusion: it is NEVER a good idea to include the /ResetBase option with /StartComponentCleanup on an image used for deployment. This literally freezes extraneous items in the component store that become an unnecessary part of the image forever afterward. My recommendation: It's better to clean install and rebuild an image from scratch than to use the /ResetBase option. It simply carries too much baggage. At some point, this test PC had 63 packages that are now stuck in “Staged” status, even though newer versions for all of them are present and show “Installed” status. Not good in general, but terrible for deployment!
Sidebar: Access to Get-Packages Output files
Anyone who wants to inspect or interact with the various output files for all three use cases can use this OneDrive link to access them: https://1drv.ms/f/s!Aua6_mGppTa7n7o808BBdymiXZkVnA?e=i7NF6l.
Note: The files are read-only, but you can change their attributes once you’ve copied them to your PC by taking ownership and changing permissions. Here are those filenames and their descriptions:
- Gp231128(c1step1): First phase of Case 1 as described earlier
- Gp231128(c1step2): Second phase of Case 1 as described earlier
- Gp231128(c1step3): Third and final phase of Case 1 as described earlier
- Gp231128.2 (pv11).txt: Plain-vanilla Windows 11 output from a Build 22621 PC (production release) as described in Case 2 next
- Gp231205(pv10).txt: Plain-vanilla Windows 10 output from a Build 19045 PC (production release) as also described in Case 2 next
Use Case 2: Plain-Vanilla Images (Windows 11 and Windows 10)
Few images are less controversial than those simply stood up from Microsoft ISO downloads and then routinely updated as per normal Windows Update cycles thereafter. Inspection of /Get-Packages output from test machines following this “normal” regimen show the following:
- On Windows 11, /Get-Packages output routinely includes only items (71 of them) in the “Installed” state: nothing else. As updates come and go, routine reclaimable package cleanups keep this data completely clean and pristine.
- On a Windows 10 test VM installed from a July 2022 UUPDump.net image, I see 51 Installed items, 17 Superseded items, and nothing else. A quick /StartComponentCleanup later, and it’s down to 51 Installed items, 0 Superseded ones. Nothing odd to see here!
These are the kinds of images that you should be deploying. As Guy Fieri often says on Triple D: “All thrilla, no filla”—that is, only useful packages and no extra Superseded (or other) items.
Using /Get-Packages Output Wisely and Well
Simply by inspecting the /Get-Packages output that I’ve shown you how to generate and save to a text file, you can tell a LOT about the Windows images under your purview and control. My advice is to get them clean, clean, clean prior to deployment. Ideally, they will only contain as many “Installed” items as their users need to get their jobs done, and nothing more. It’s especially important to remove all “Superseded” items. And if you see anything with other State values in a deployment image, that means it’s time to troubleshoot and do what you can to get them out of the component store.
In closing, this adventure has also shown me that while /ResetBase, when used with /StartComponentCleanup, may produce a more compact Windows image, it’s not a good fit for deployment images. Because it freezes the set of existing Windows packages at the time the command is run (and provides no mechanism to remove them afterward), it’s simply locking in many items (63, in the Use Case 1 example) for eternal propagation. I repeat: It’s better to rebuild an image from scratch, starting with a clean install, and then adding in apps, settings, preferences, policies, and more, than it is to use /ResetBase. Don’t do it! Keep your image—and the resulting DISM /Get-Packages output—clean.

Ed Tittel
Ed Tittel is a long-time computing industry writer, consultant, and occasional expert witness. He’s the author of over 100 computer trade books, countless articles, and other stuff. For more info, please visit https://edtittel.com.