How to Use Managed Identities in Your Azure Logic Apps

Azure Logic Apps are a cloud-based service where you can create low code workflows to automate your business processes or to integrate different applications or services. The article How To Embed Your Azure Logic Apps in a Metadata-driven Data Platform gives a detailed introduction to Logic Apps and also explains how you can take it a step further by integrating them in a metadata-driven framework. At the end of the article, the following Logic App workflow was created:

A stored procedure is executed on an Azure SQL Database. The connection to this database was configured using SQL Server Authentication. The goal of this article is to show you how you can connect using managed identities instead, which was left as an exercise to the reader in the previous article.
I recommend that you go through this article first if you don’t have a solid understanding of Logic Apps, or if you want to follow along as an exercise. It’s not necessarily a prerequisite to understand the concepts of this article and if you’re just interested in learning how managed identities work for Logic Apps, then keep on reading.
What Are Managed Identities and Why Should You Use Them?
When developing applications or services that use multiple Azure resources, it’s not uncommon that those resources have to communicate with each other. Often the developer has to manage the secrets (such as usernames and passwords), credentials, certificates and keys to establish secure connections between those resources. For example, when you want to connect from an Azure Data Factory (ADF) pipeline to an Azure SQL Database, you need to create a connection and specify a username and password. You can store all those credentials securely in Azure Key Vault, but it’s always extra steps to implement and retrieve those credentials. And what if a password changes? Or if an account key is rotated? Then you have to remember to update those in the Key Vault as well.
With managed identities, all this is avoided. A managed identity is an object in Azure Active Directory (Azure AD), which can be used by the Azure resources to establish the connections (as long as Azure AD authentication is supported). All the credentials are managed by Azure (hence the name), so you don’t need to keep track of passwords or anything. Think of a managed identity as an identity impersonating an Azure service when it connects to another service.
In the example of ADF and Azure SQL Database, you would create a managed identity associated to the Data Factory instance, add this as a user to the database, and give that user the appropriate permissions. In the ADF pipeline, you just have to choose to connect with a managed identity and everything else is taken care of for you.
There are actually two types of managed identities:
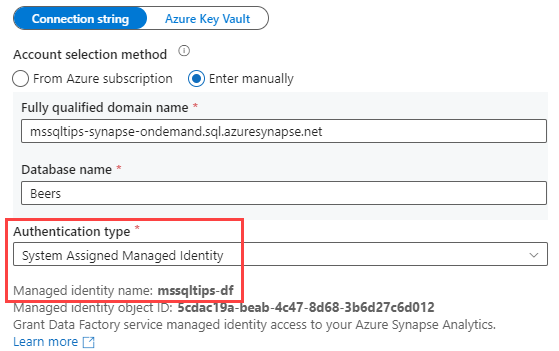
- System assigned managed identities. This is the one used in Figure 2. For each instance of an Azure resource, you can assign one system managed identity (MI). This MI will bear the name of the resource itself, as you can see in Figure 2. Since the name is unique, you can have only one system-assigned MI.
- User assigned managed identities. Here you create the MI yourself and it’s not tied to one single resource. A user assigned MI can be assigned to multiple Azure resources, allowing for easy reuse.
Depending on your use case, you choose the type that suits your needs. Personally, in most cases I use the system assigned managed identities as they’re specifically tied to the lifecycle of the resource. If the resource is deleted, so is the MI. It also makes it easier to track which resources have access to other resources (for example, as users in a database), since the name of the resource is the name of the identity.
In the case of our Logic App, we could use a system assigned MI if there was only one Logic App. But what if we have the same Logic App in multiple environments (for example, development, test and production environments)? If you want to use system assigned MI, you will need to change the name of the Logic App in each environment. Or what if you have 50 Logic Apps that need access to your database? Are you going to create 50 different users in the database? A more elegant solution would be to have one single user assigned managed identity to connect to the database, and let all Logic Apps use this MI. For these reasons, we’re going to use user assigned managed identities in this article.
If you’re not convinced yet to use managed identities, check out my blog post, Why Managed Identities are Awesome.
Using a Managed Identity in the Logic App
In the following sections I take an existing Logic App and modify it to use a managed identity so security is improved. If you want to follow along, you can take on of your own Logic Apps, or you can create a new one following the steps from the article How To Embed Your Azure Logic Apps in a Metadata-driven Data Platform.
Create a New Managed Identity
The first step is to create a user assigned MI. In the Azure Portal, I search for “managed identities” as shown in Figure 3:

I click on Managed Identities, which leads me to an overview of all existing managed identities in my environment.
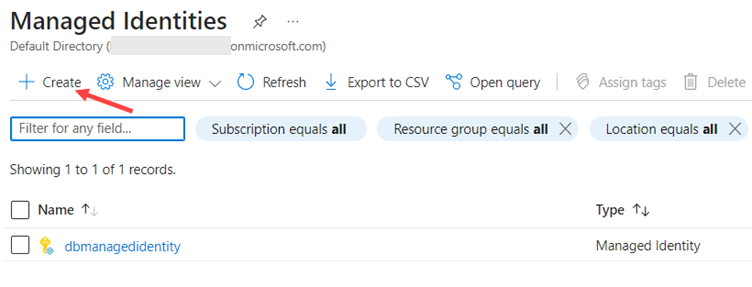
I click the Create icon in the top left corner, which brings me to a new screen where I can specify the necessary info.

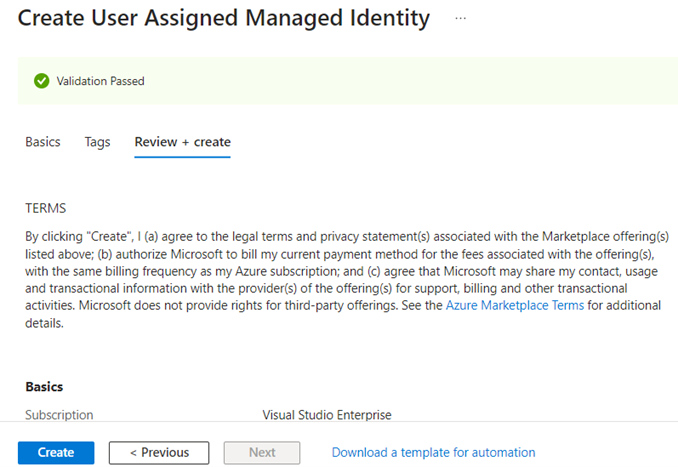
In the configuration, I specify the same subscription, location and resource group as my Logic App and then I give the MI a unique name. When I click Create at the bottom, Azure will run a validation check. If it passes, I can click on Create again (Figure 6) to start the provisioning of my new MI.
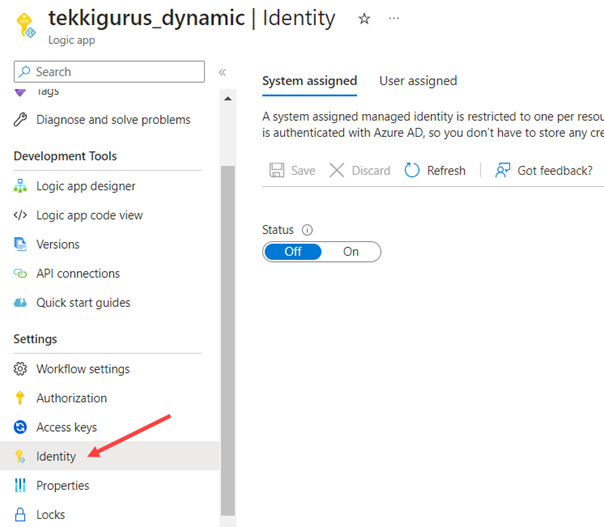
In the Logic App page itself, I go to the Identity section in Settings (figure 7). There I have the option to assign a system assigned MI or a user assigned MI.
I click on User assigned to go to configure the corresponding tab. I click on Add to assign my previously created user assigned MI.
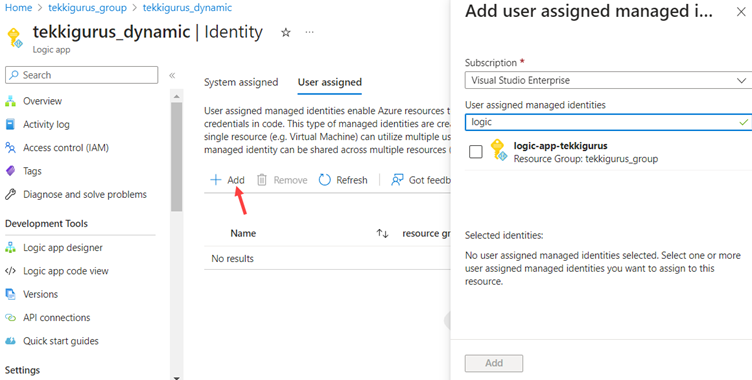
In the pop-up, I can search for the MI I created earlier, as shown in Figure 8. I select the MI and click on Add at the bottom.
Create a Connection Using the Managed Identity
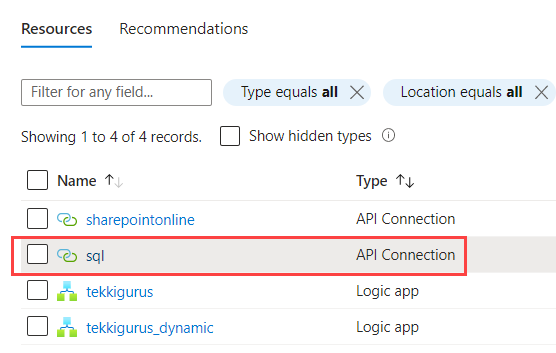
Now that the Logic App has an identity, I can configure it to use that identity to connect to my Azure SQL Database. In Figure 1 (in the bottom left corner) you can see there’s a connection defined with the name “sql”. This is an API Connection resource that can be found in the resource group of the Logic App.
In the API connection itself, I tried to edit the connection information directly. In the dropdown for Authentication Type (figure 10), there’s an option to use the Logic Apps Managed Identity.
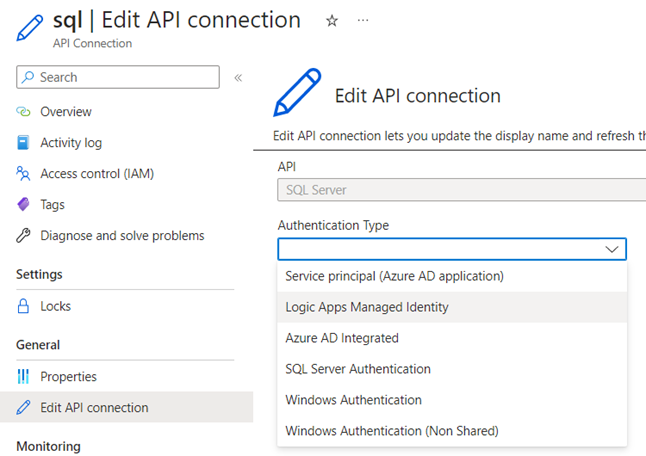
However, when I try to save my changes, it throws an error with no further explanation.

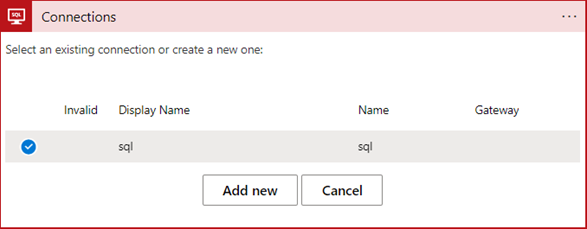
It seems I must create a new connection for my Logic App. In the Logic App editor, I go to the “Execute stored procedure” activity and choose to change the connection.
In the Connection form, I choose the Add new option to create a new connection.
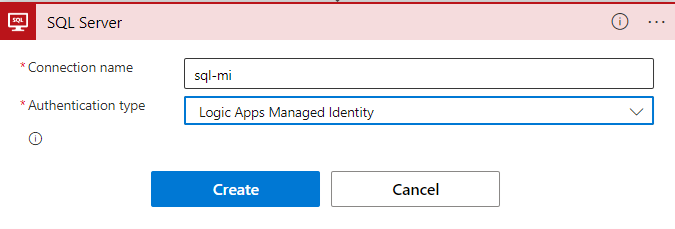
In the next step (figure 14), I simply need to specify a name for my new connection and set the authentication type to Logic Apps Managed Identity and then click Create.
When the connection is changed, it’s possible the server name is set to “default” (figure 15) and the database name to “Use connection settings”. The name “Test” is listed between parentheses as it was the name of the database in the previously used connection. However, the connection itself doesn’t store any actual connection information. It only knows it has to use the Logic App managed identity.
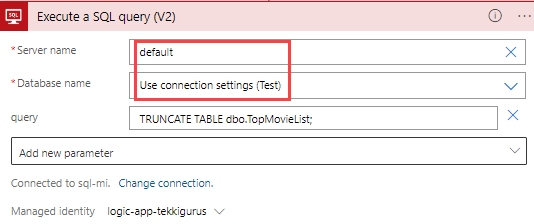
You can manually override these defaults, but a better option would be to pass the server and database name as parameters. This way, if you deploy the Logic App to another environment, you don’t have to change both names manually but rather supply different parameter values.
In the HTTP trigger, I add two extra fields to the JSON request:
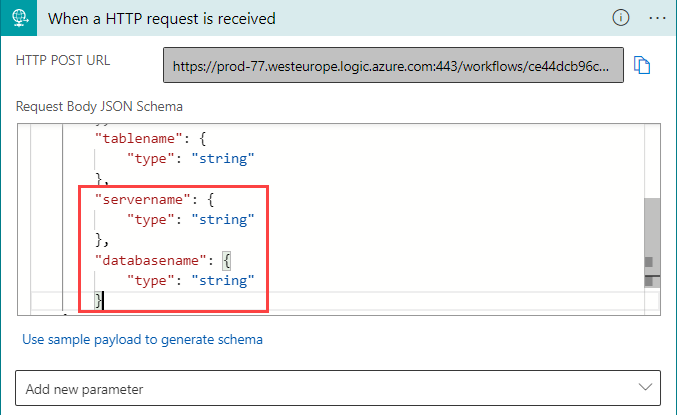
The total request body now becomes:
{
"properties": {
"databasename": {
"type": "string"
},
"listname": {
"type": "string"
},
"servername": {
"type": "string"
},
"sourcecol": {
"type": "string"
},
"tablename": {
"type": "string"
}
},
"type": "object"
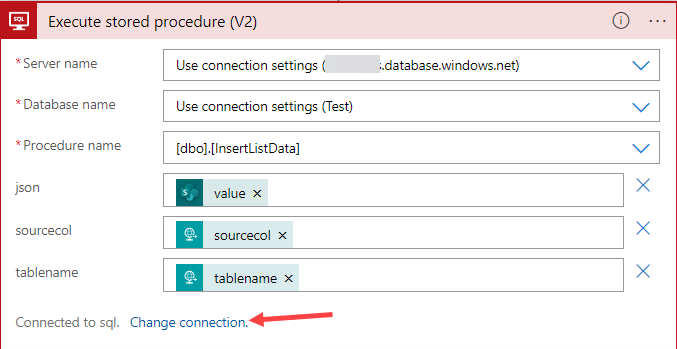
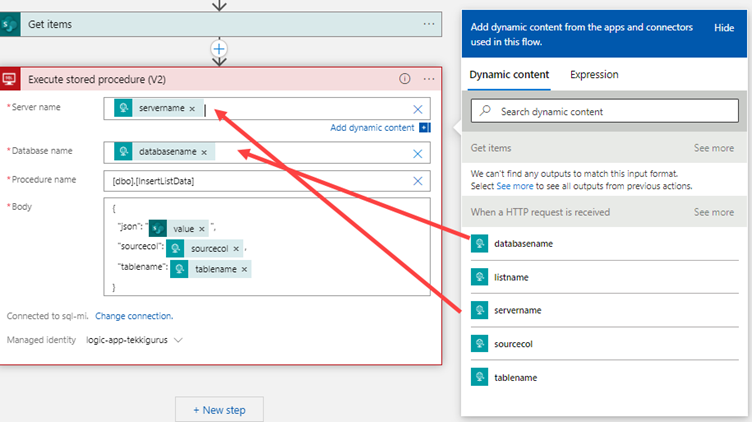
}With those two new fields added to the HTTP trigger, I can now go back to the “Execute stored procedure” action (figure 17) and configure the server and database name fields to use the values from the request body. I do this by selecting the relevant fields from the dynamic content list.
Configuring Permissions in the Database
The Logic App is now configured to use the managed identity to connect to the Azure SQL Database, but without the appropriate permissions the stored procedure will not be executed.
I log into my database using an account that has the necessary permissions to create a new user and assign permissions to that user. First, I create a user with the name of the managed identity:
CREATE USER [logic-app-tekkigurus] FROM EXTERNAL PROVIDER;Next, I assign a bunch of permissions that will allow the newly created user to connect to the database, read and write data, truncate tables (which requires db_ddladmin permissions) and execute stored procedures.
GRANT CONNECT TO [logic-app-tekkigurus];

ALTER ROLE db_datareader ADD MEMBER [logic-app-tekkigurus];

ALTER ROLE db_datawriter ADD MEMBER [logic-app-tekkigurus];

ALTER ROLE db_ddladmin ADD MEMBER [logic-app-tekkigurus];

GRANT EXECUTE TO [logic-app-tekkigurus];
Testing the Logic App
The Logic App can now be tested. In the editor, I select “Run with payload”, which allows me to specify a JSON request body for the HTTP trigger.
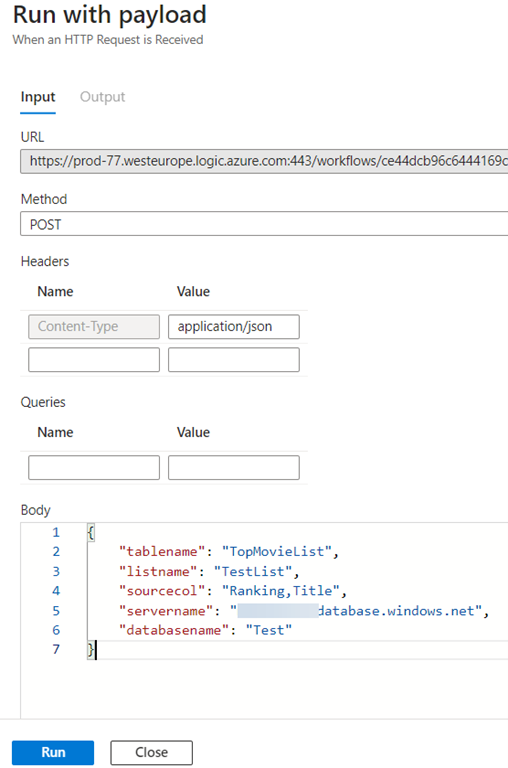
The Logic App runs without error, and it now connects to the Azure SQL Database using the user assigned managed identity. That is one password less that needs to be stored and managed.
Conclusion
By using managed identities, we can allow a Logic App to connect to another Azure resource without specifying any password, credential, or account key. This results in a better security practice and less management overhead. After all, the fewer passwords we need to remember, the better.
When your environment has many Logic Apps, it’s advisable to use user assigned managed identities. In this case, you only need to create one managed identity and reuse it between your Logic Apps.

Koen Verbeeck
Koen Verbeeck is a seasoned business intelligence consultant working at AE in Belgium. He has over a decade of experience in the Microsoft Data Platform, both on-premises as in Azure. Koen has helped clients in different types of industries to get better and quicker insights in their data. He holds several certifications, among which the Azure Data Engineer cert. He’s a prolific writer, having published over 250 articles on different websites and hundreds of blog posts at sqlkover.com. He has spoken at various conferences, both local and international. For his efforts, Koen has been awarded with the Microsoft MVP data platform award for many years.