To Try Out Microsoft Defender: Sign Up With the 90-day Free Microsoft 365 E5 Developer Program

Microsoft 365 presents you with different editions to try out Microsoft Defender. But when it comes to something as important as security, it’s best to test out the latest and the best version with its full set of features. That’s exactly what you get in the 90-day free Microsoft 365 E5 Developer Program. This edition helps you work with all the latest features of Microsoft Defender and the only catch is that it expires after 90 days – enough time to make your decision about whether to use Microsoft Defender security or not.
So, in this article, let’s understand how you can sign up for the Microsoft 365 E5 developer program that helps you explore all the aspects of Microsoft Defender service by following these instructions.
1. Click this link: https://developer.microsoft.com/en-us/microsoft-365/dev-program. You get directed to the sign-up page.
Note: Before you are directed to the sign-up page, you may have to set up a Microsoft Outlook account, if you don’t have one. This account is associated with the Microsoft 365 tenant you are about to create.
2. In the Microsoft 365 Developer Program sign-up page that opens up as shown in Figure 1, provide the Country, Company, and Language preference. You’ll also have to accept the terms and conditions. Click the Next button to proceed further.

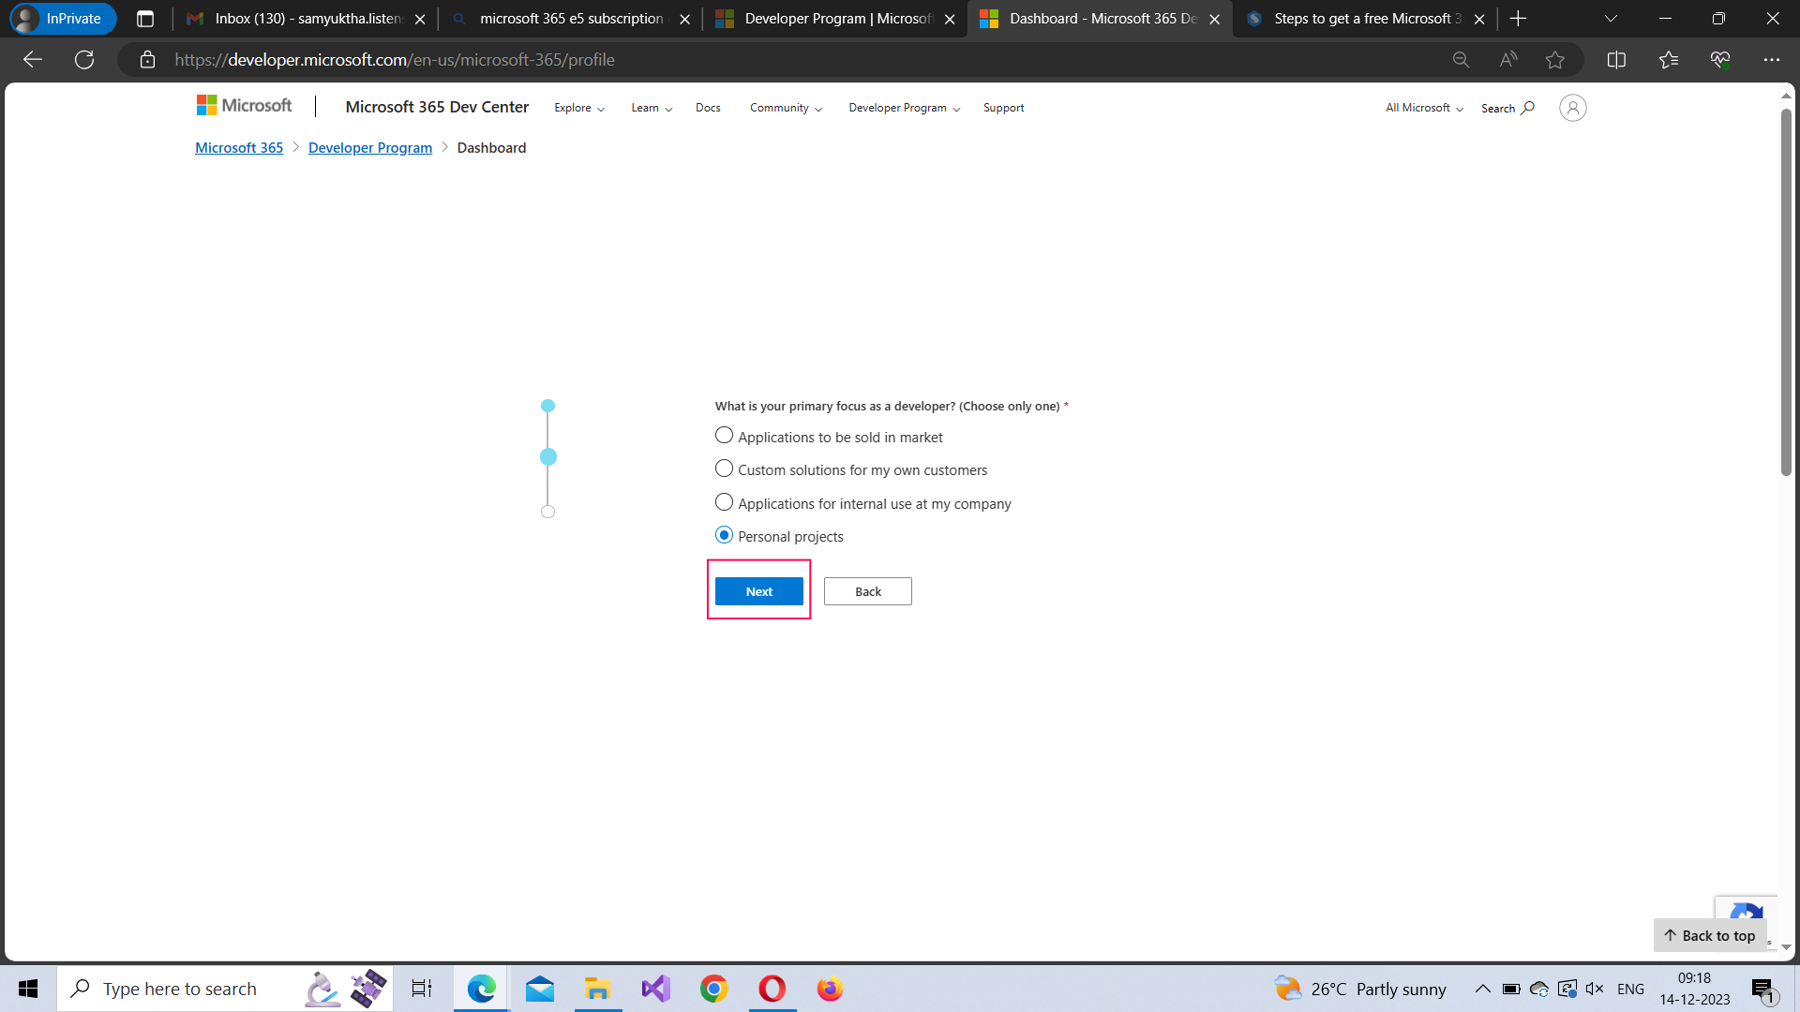
3. Select why you are trying out Microsoft 365. Personal projects is a good option as shown in Figure 2 since your goal is to try out Microsoft Defender in its entirety. Click Save to proceed further.

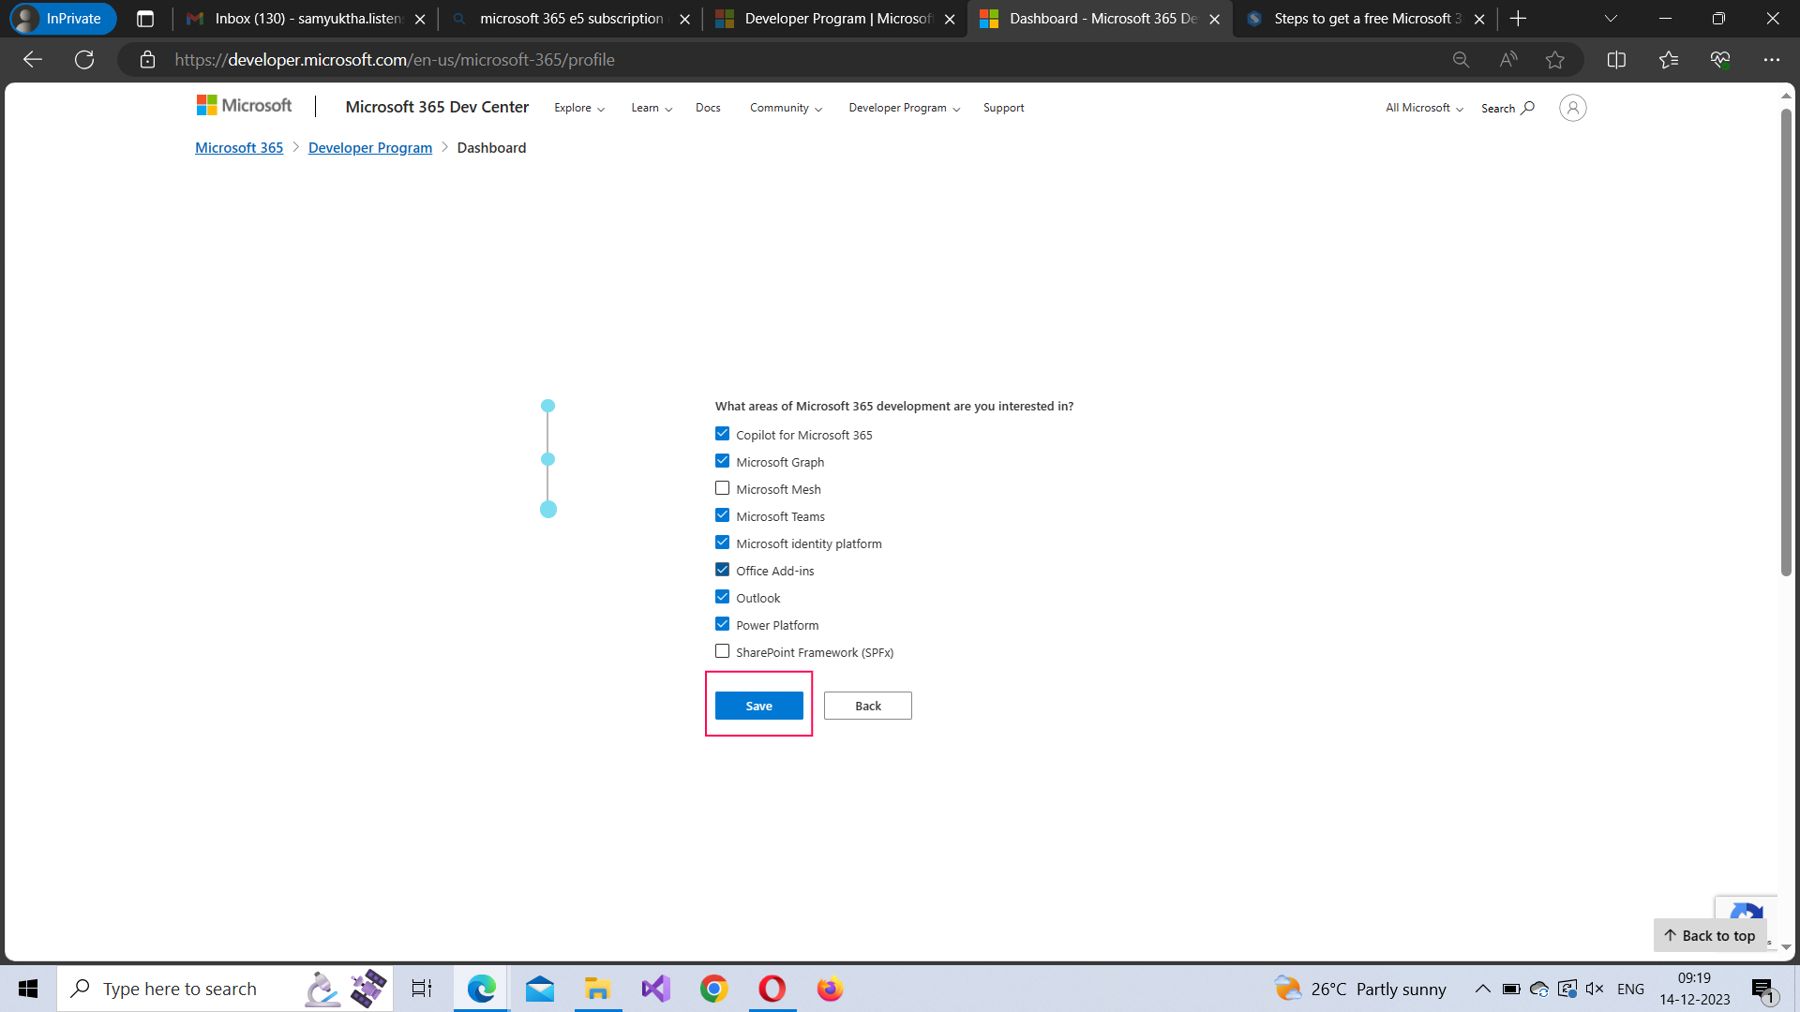
4. Select the areas of Microsoft 365 you are interested in. You can select all of them or leave some unchecked as shown in Figure 3. Then click Save to proceed further.
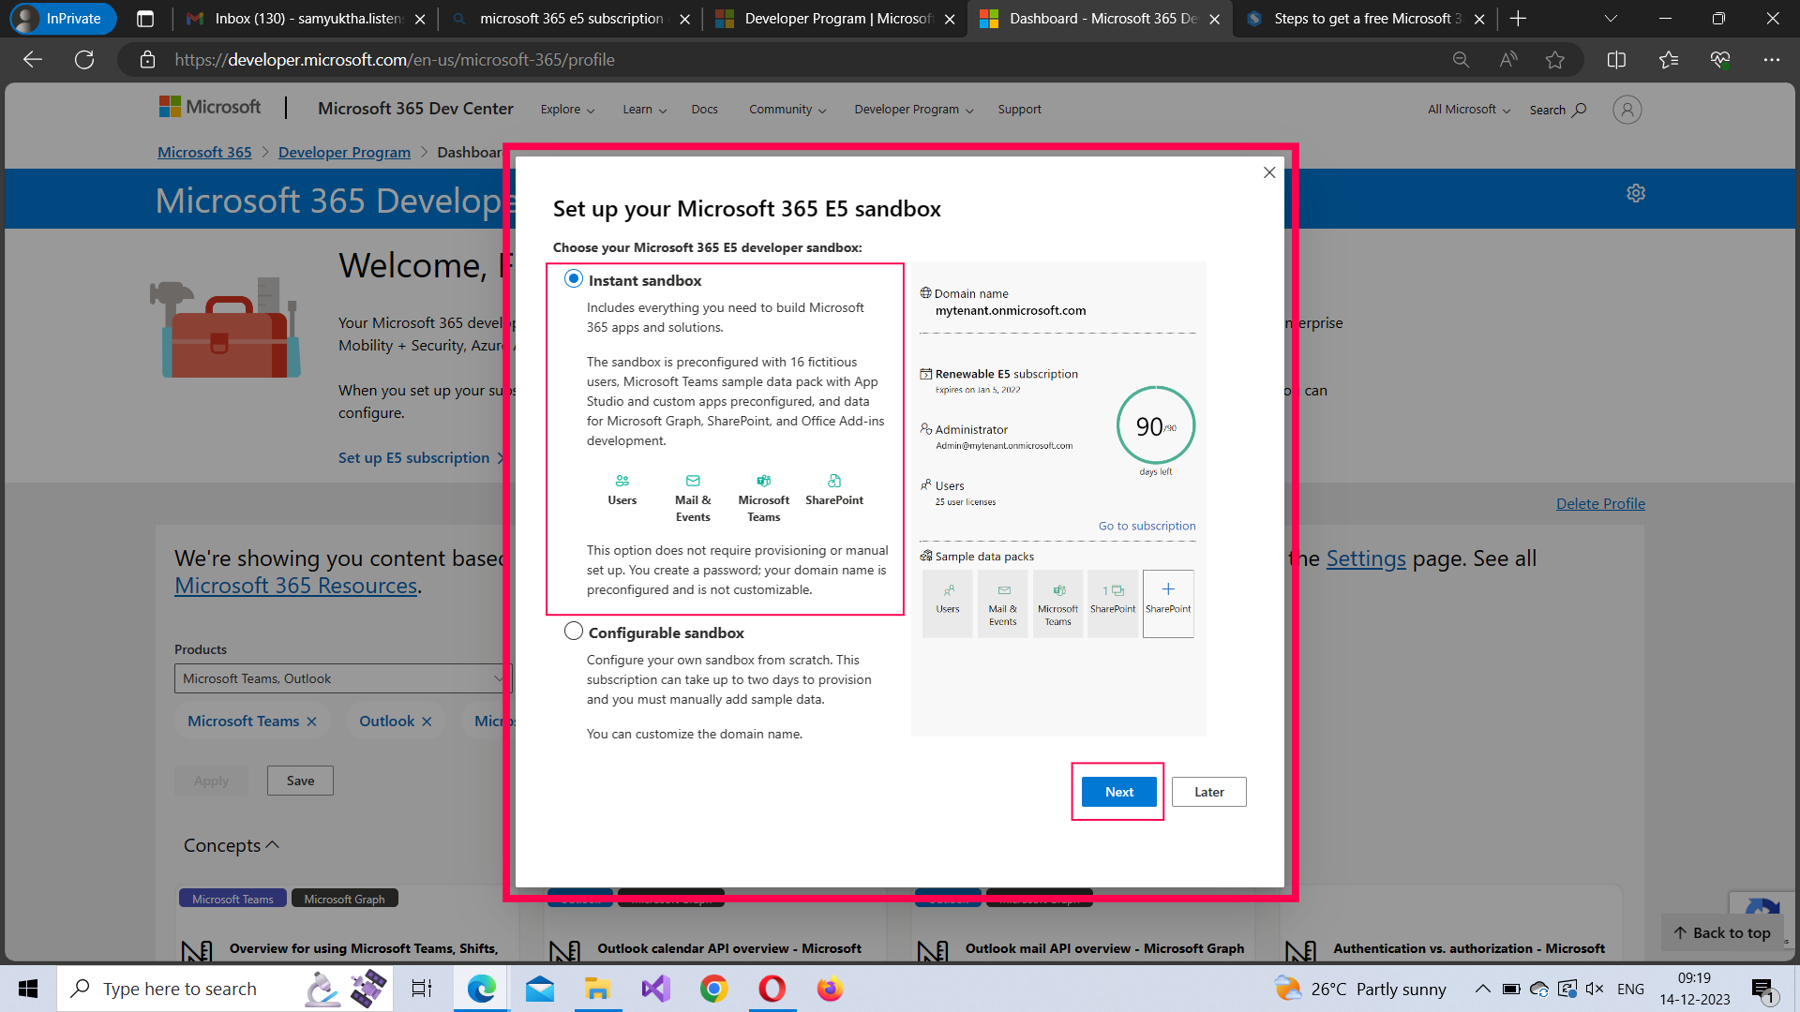
5. The Set up your Microsoft 365 E5 sandbox pop-up opens as shown in Figure 4. You have two sandboxes to choose from:
- Instant Sandbox (the default option) – this sandbox becomes available immediately for use and is, therefore, the best option. User provisioning and Teams data provisioning is pre-configured for you. But there is a catch: your domain name is also pre-configured and is not customizable.
- Configurable Sandbox – you get to configure your sandbox from scratch. But it usually takes two days for the sandbox to get activated. Moreover, you should manually add the sample data. Not an ideal option if you are just trying out a feature.
Click the Next button to proceed further after selecting the sandbox of your choice.

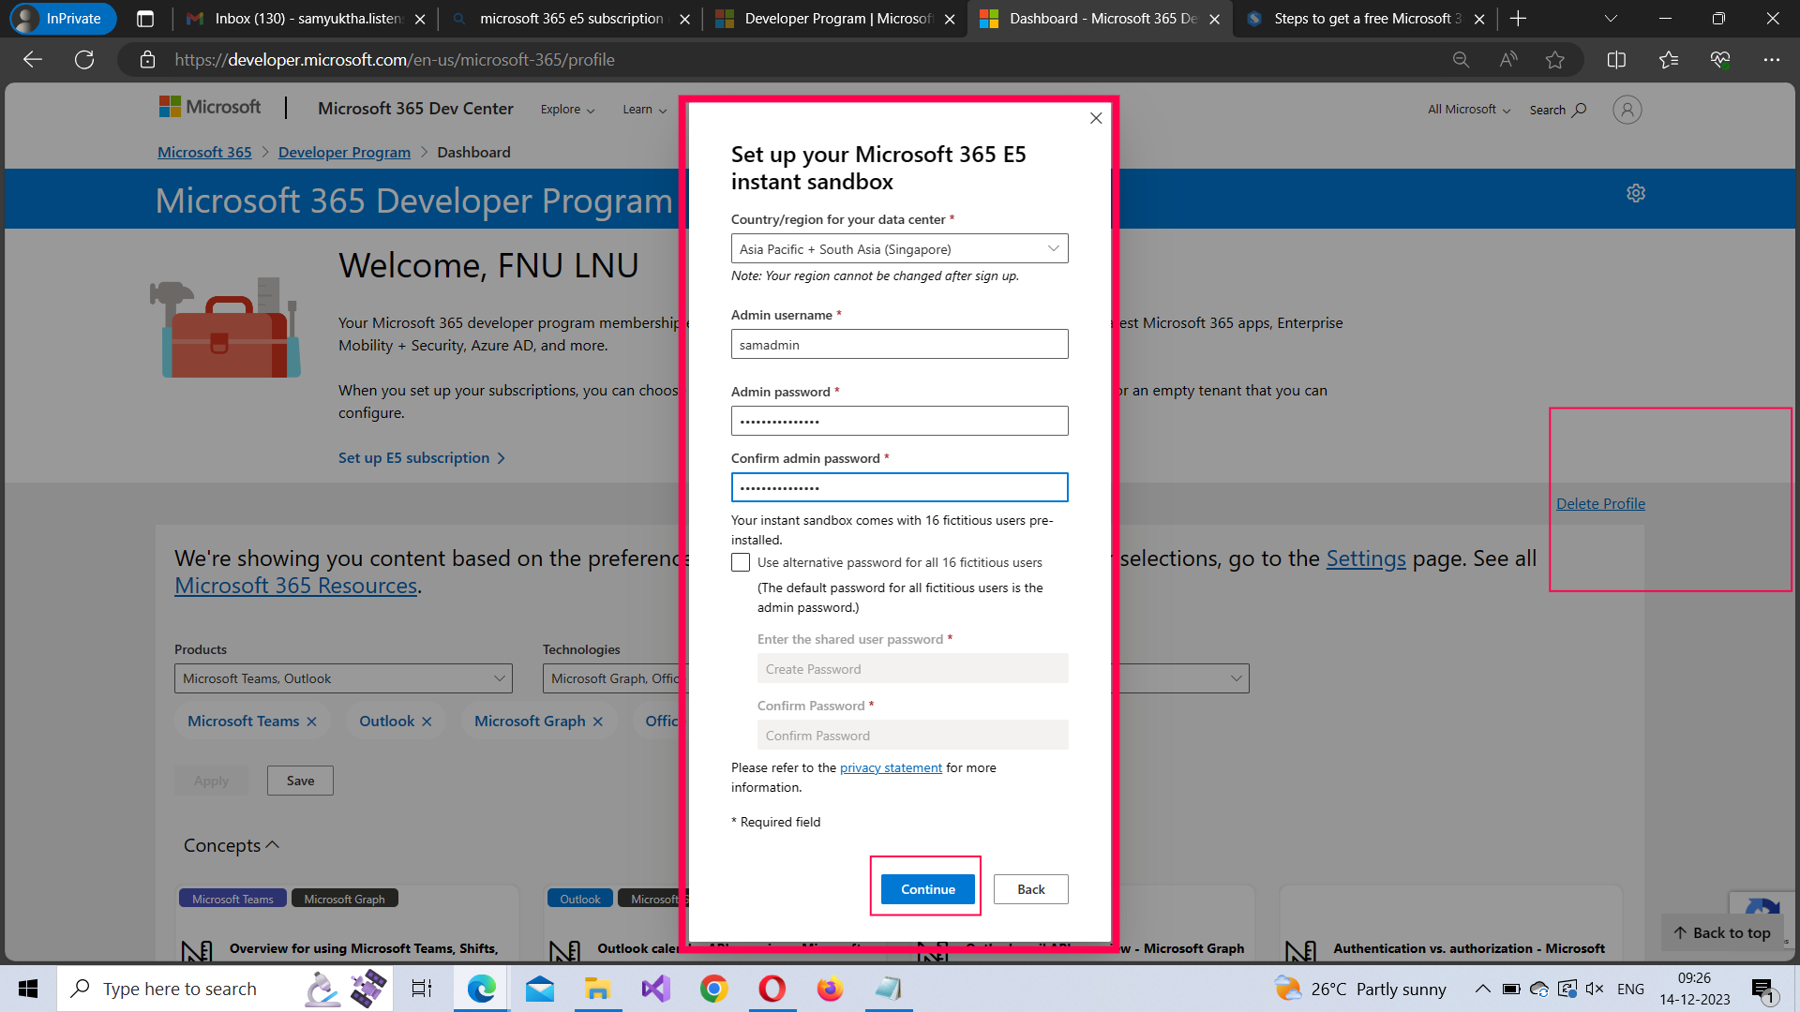
6. Select a country/region for your data center from the dropdown as shown in Figure 5. Next, enter an Admin username and Admin password, which you’ll be logging into your Microsoft 365 portal. Click the Continue button to proceed further.
Note: By default, the admin password you set will be used for all the fictitious users as well. But you have the option of using alternative passwords for the fictitious users by checking the Use alternative password for all 16 fictitious users checkbox.
7. Enter a phone number to receive the verification code from Microsoft as shown in Figure 6 and click Send Code button.

8. Reproduce the verification code you received on your mobile and click the Set up button to proceed further as shown in Figure 7.

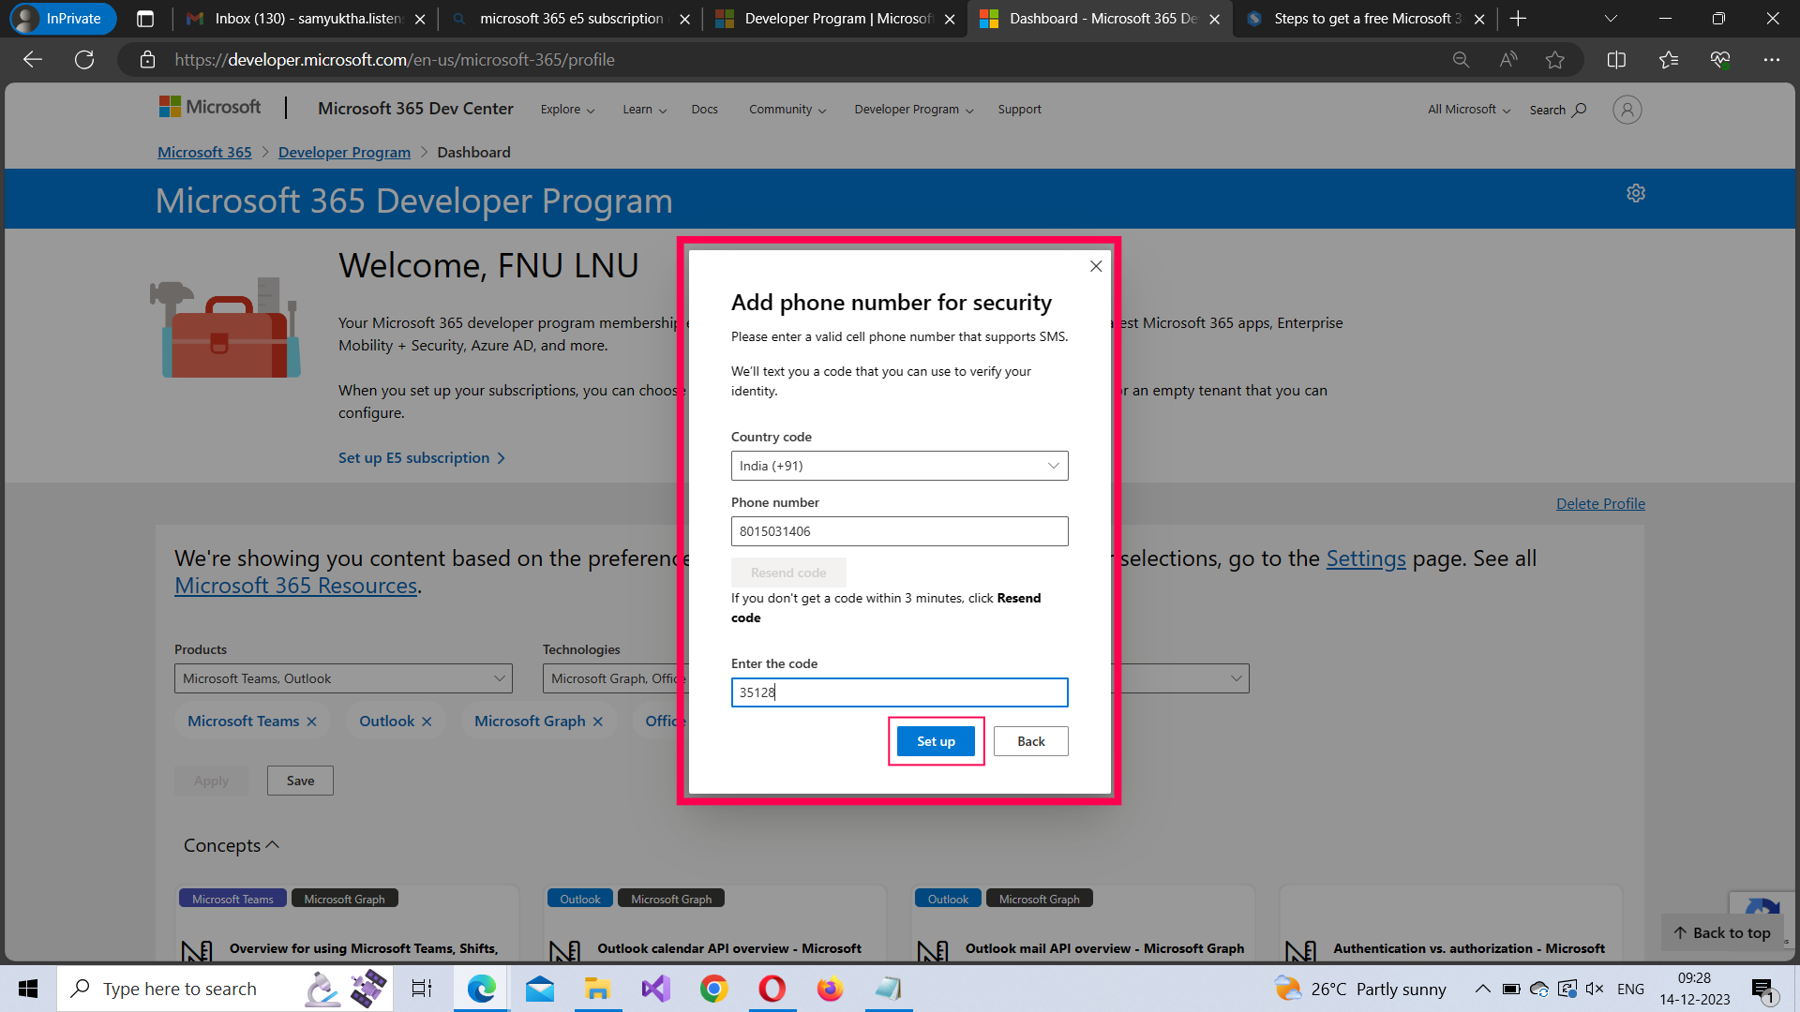
9. It might take a while for your Microsoft 365 tenant to be set up as shown in Figure 8.

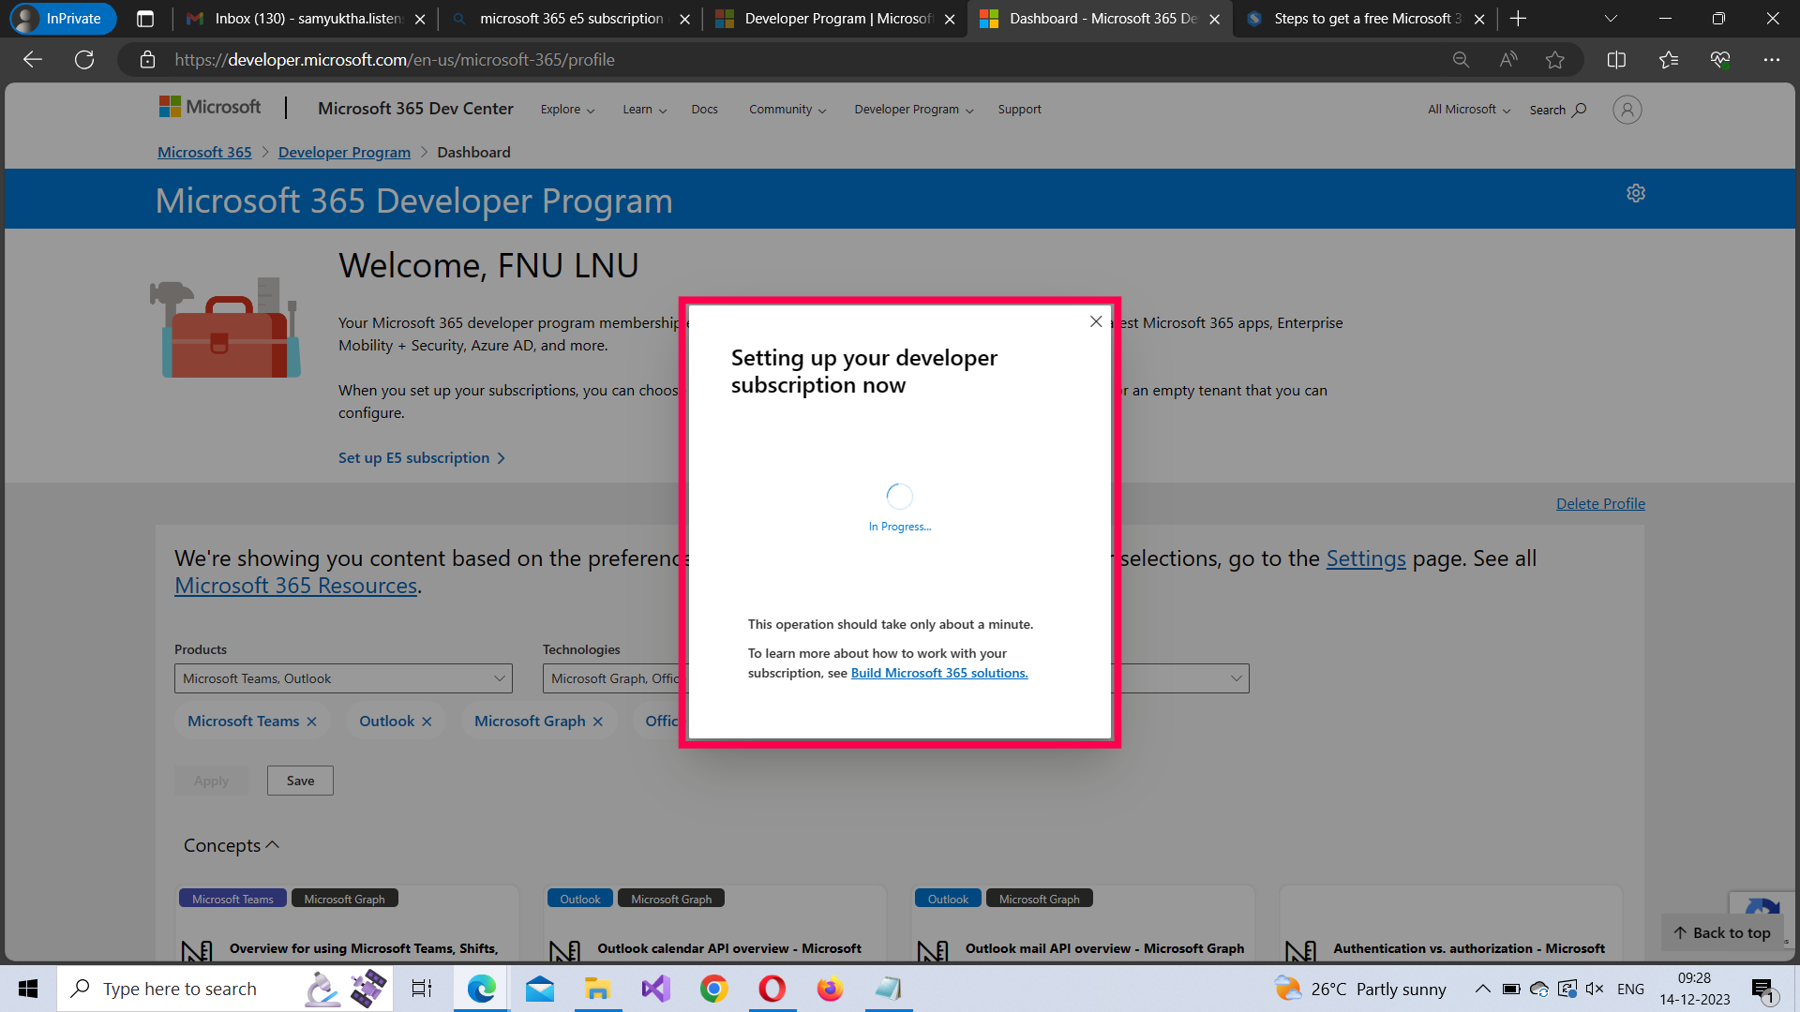
10. Once your Microsoft 365 tenant is set up, the domain name (along with the administrator username you created) gets displayed as shown in Figure 9.

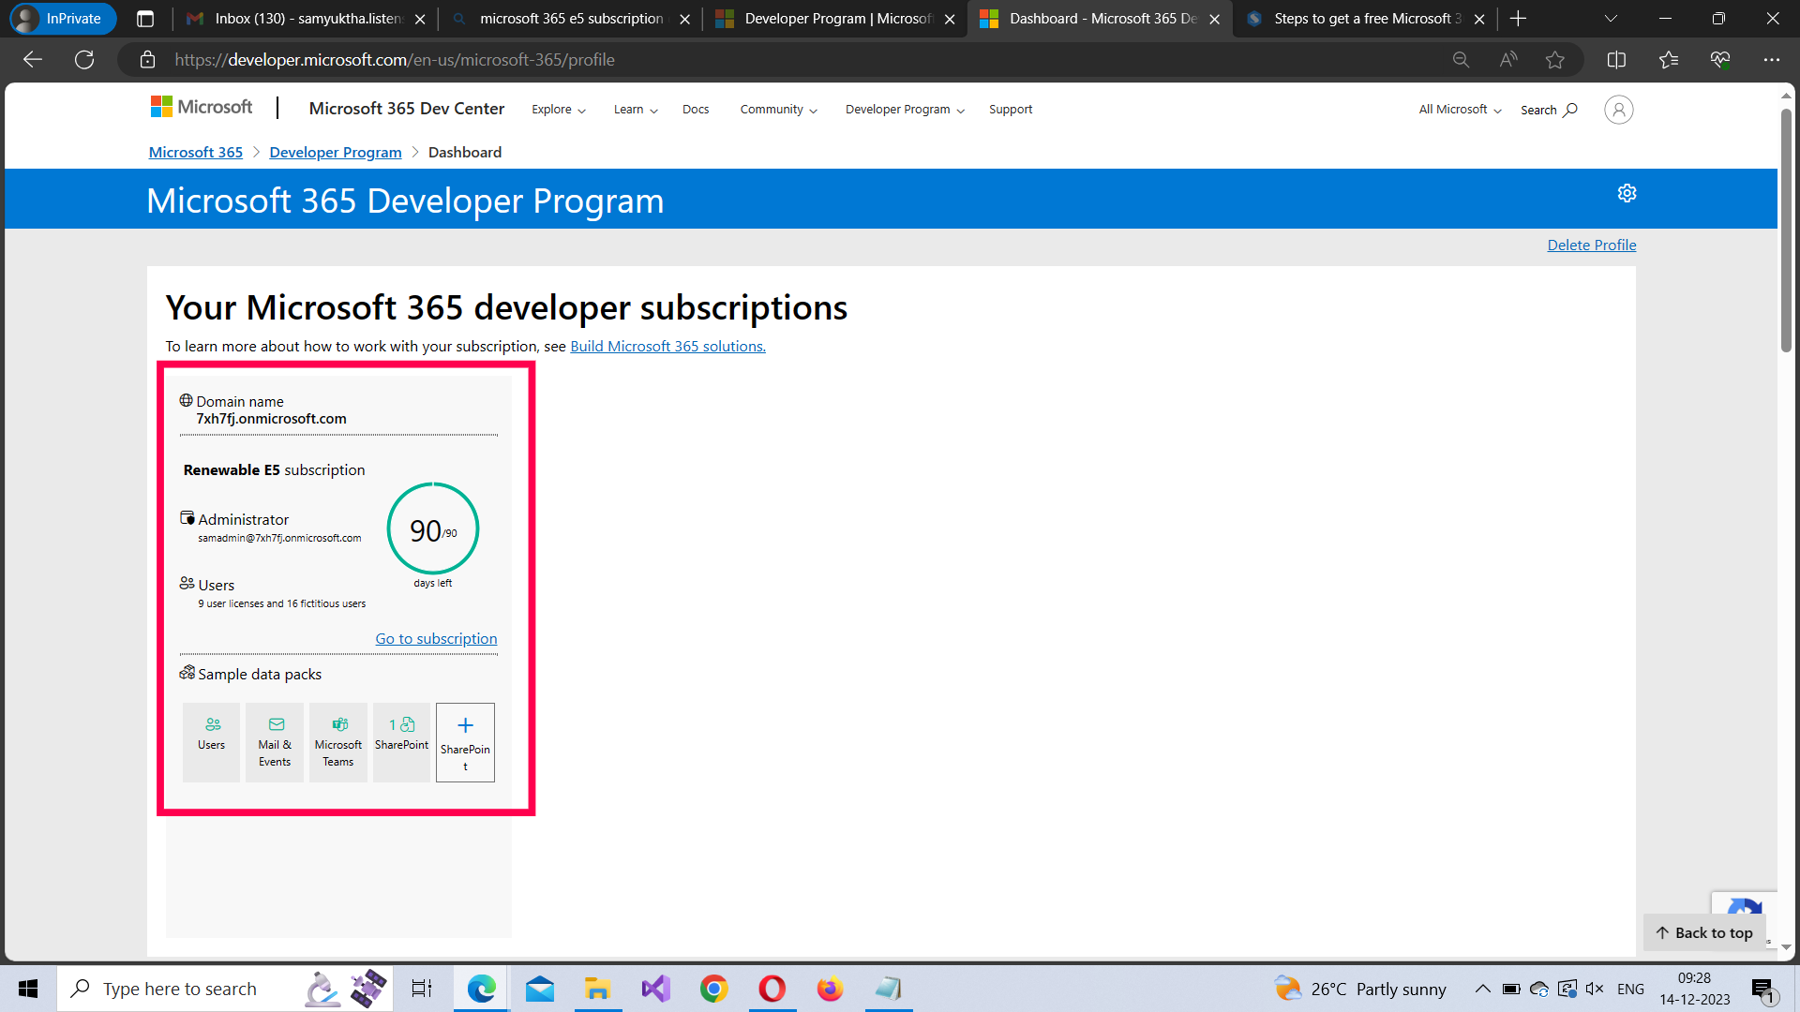
What’s Next?
Now that you have successfully set up your Microsoft 365 E5 developer account, in the next article, let’s start exploring the Microsoft Defender service.

Thilak Kumar Singh
Thilak Kumar Singh is a trainer who believes in teaching about IT in the simplest possible way with more emphasis on visual mode of learning. He firmly believes in democratizing IT knowledge, especially of Microsoft solutions, in which he specializes as a trainer and consultant.
He observes that in this era dominated by cloud computing and collaboration, where IT has reached users unimaginable hitherto, IT knowledge must not be an obscure science, but rather be available to anyone who wishes to engage with IT.