On the Third Day of Christmas, the Waffle Brings to Me...Agendas in My OneNote

We’ve reached the tenth day in our tech-filled journey through the “12 Days of M365.” It's time to unwrap one of the most valuable gifts of organizing: OneNote! OneNote can be used for almost anything, but today, let’s focus on why you would use it for crafting agendas. In a world spinning with tasks and meetings faster than a dreidel, harnessing the power of OneNote transforms meeting management into seamless coordination. It's the ultimate tool for structuring agendas and ensuring that meetings are purposeful, efficient, and remarkably organized. If you prefer your gravy without lumps, you are going to love OneNote!
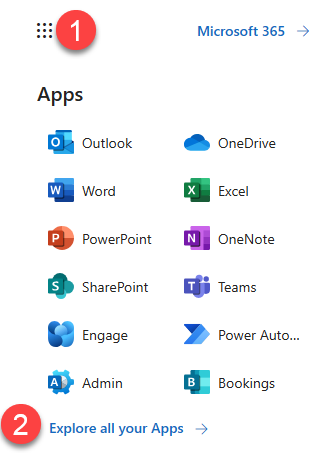
To check out OneNote, let’s turn the sleigh back to the waffle button. It’s still in the top-left corner (as shown in Figure 1 at number 1) and select it from the options. Not spotting OneNote? Click on "Explore all your Apps" (2) and rummage through the apps.
Click the OneNote card (shown as number 3 in Figure 2) to open the App.

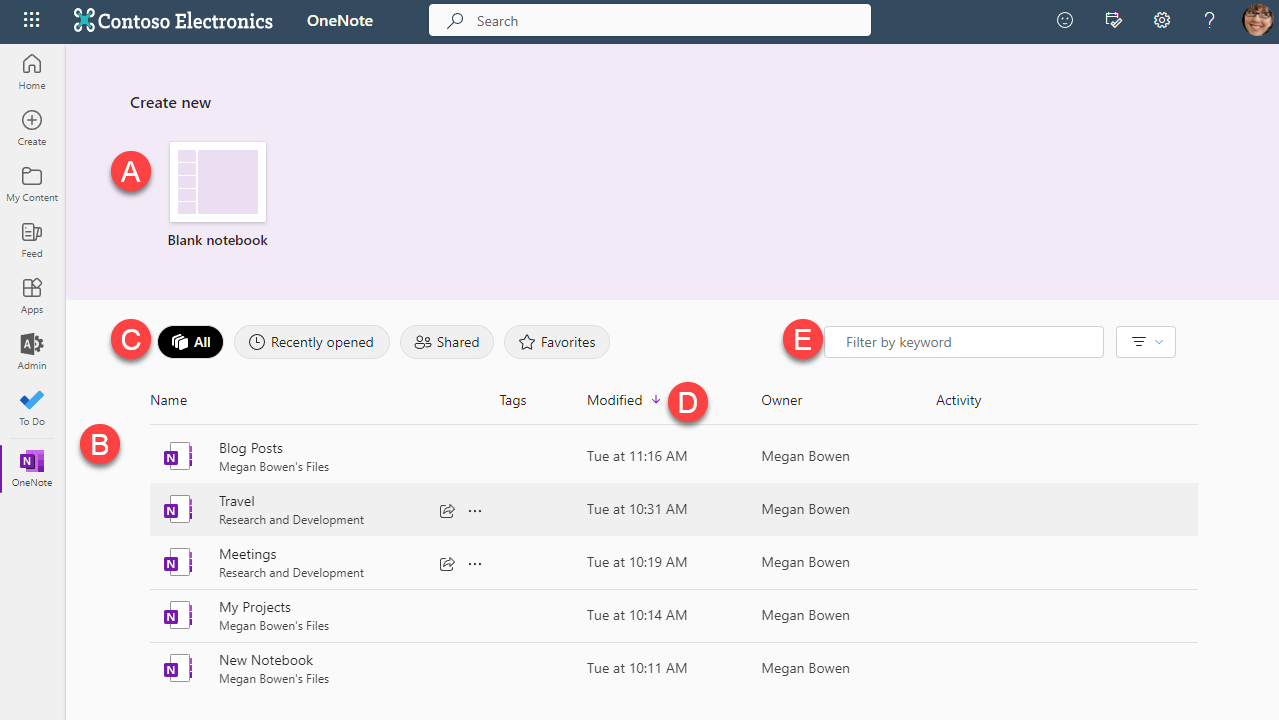
Let’s start with the OneNote home page, shall we? It’s shown in Figure 3. Oh, I never assume anyone knows things about the tools in M365, so let’s take a quick tour.
Here’s what’s on the page:
A. Create New: New to OneNote? Spin up a new Notebook just to see what happens!
B. Notebook: All the existing Notebooks. (I fess up, my list is a lot longer than this!)
C. Quick Filter: Can’t find your notebook? Use the quick filters for All, Recent, Shared, or Favorites
D. Sort: Use the column titles to sort your Notebook list.
E. Filter: Use search keywords if you already have a good idea what you’re looking for.
Let’s rip off the wrapping paper to open the Meetings notebook and take a peek. When you have a brand-new notebook, your notebook includes one Untitled section and a blank Untitled page to get you started, as you can see in Figure 4.

There’s a lot of great space to use here. Let’s take a look.
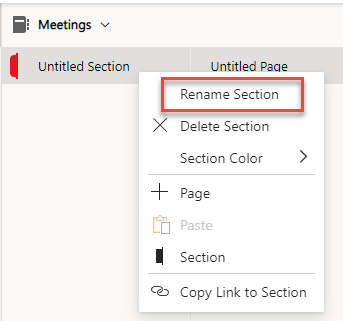
Pro Tip: You can right-click the section to rename it. Remember, these are like dividers in a binder!
E. Active Notebook: Here are all your open notebooks. Think of them as digital three-Ring binders. This one is named Meetings. You can expand the menu to see them all.
F. Section Pane: This section is named Research Updates. Create sections for meeting types, topics—whatever you find helpful. It’s almost as fun as naming reindeer!
G. Page Pane: You can have many pages in each section. Pile them on!
H. Page: The active page displays here. This is where you take your notes.
Of course, you’ll need to give meaningful names to things, just like you need to put tags on those gifts under the tree. See Figure 5 for how to do this.
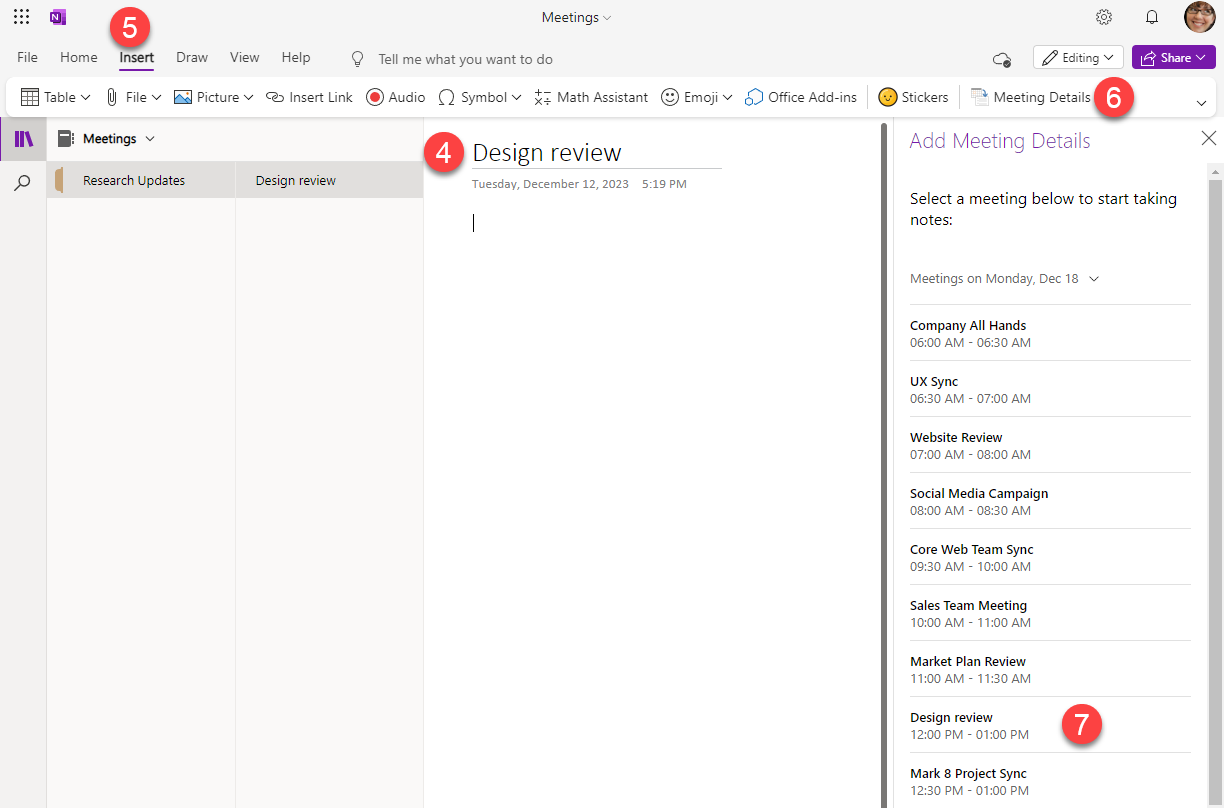
Have a meeting coming up? It’s time to herd the cats! Let’s set up the meeting agenda. Have a look at Figure 6 to see how to check this task off your list.

Let’s fill it out.
4. Page Title: Update the title of the page. Make it simple!
5. Insert tab: This is the tab with all the magic.
6. Meeting Details: Which of the crazy meetings is this agenda for? This area rather handily pulls information from your Outlook meeting into this page.
7. Meeting: Select the meeting to insert the details onto the page.
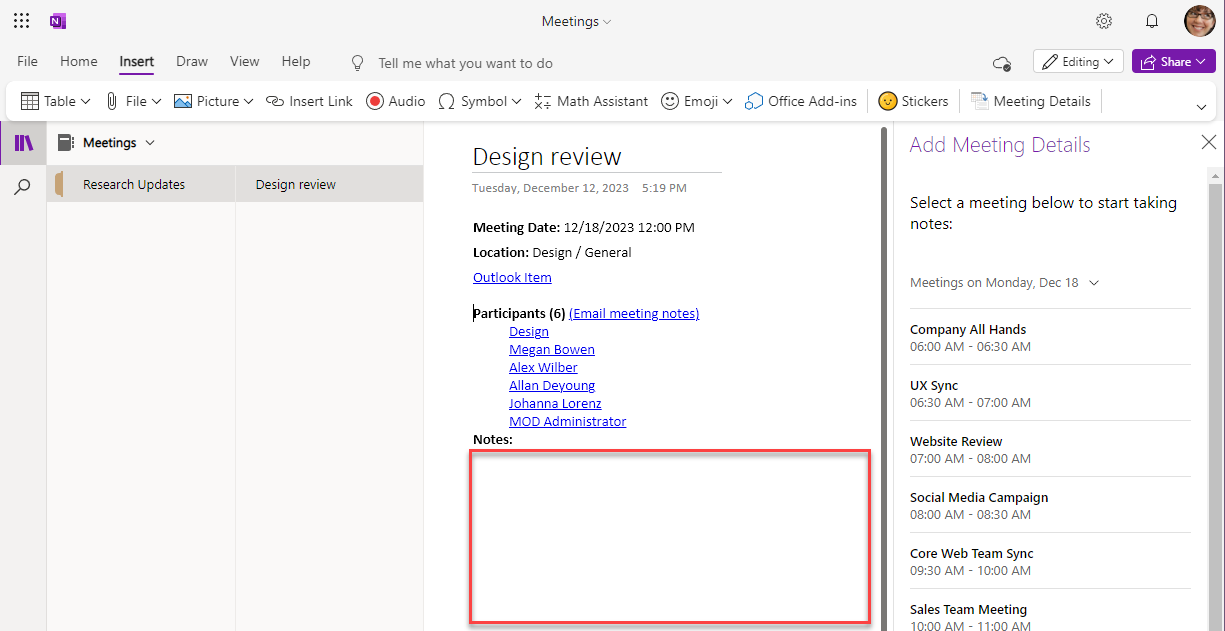
Time to add all the details to the page. The result of your efforts (as seen in Figure 7) is shared in the Microsoft Team and then it’s connected to a SharePoint site so everyone can add their notes before, during, and after the meeting.

The only thing OneNote can’t do is bake all those cookies for you—but it CAN organize your baking schedule and cookie delivery plans.
I’d be remiss if I didn’t mention that there are several versions of OneNote, and the web-based version is NOT my preferred option. I prefer the desktop version. Want to know why? Join me on January 9, 2024 for the “Getting Started with OneNote” session of our Kick Start 2024 emPOWER!Hour series.
For more information, check out our 12 Days of Christmas promotion at: https://poweruplearning.com/2024-kickoff/
Stay tuned for the next tip in our 12 days of Christmas series. Until next time, I’m Shortcut Shari and it’s my job to make your job easier.

Shari Oswald
Shari is known as Shortcut Shari because she believes we should all work smarter, not harder, and she loves to share keyboard shortcuts. Shari has been using SharePoint since before it was called SharePoint and is excited to share her knowledge and expertise with those who are as excited about technology as she is. Shari's focus is the “People Side of Change.” As a Microsoft 365 Solutions Architect and Consultant that grew up right along with SharePoint, her practical knowledge of the Microsoft Productivity stack coupled with her passion for empowerment via learning makes Shari an excellent resource as a consultant and evangelist for Microsoft 365. Her philosophies for information architecture and SharePoint design are centered on solving business challenges with technology and ensuring usability and adoption for the organization. Shari is a Microsoft Certified Trainer, a Microsoft Certified Specialist Master, consultant, presenter, author, and evangelist. When she is not architecting SharePoint magic as a consultant, Shari is in the classroom or creating online learning for LinkedIn Learning, ClipTraining.com, and Pluralsight.