How to Organize Mail in Microsoft 365 Outlook on the Web

Searching for emails that really matter to you can be a tough task. This is especially true if your organization has added you to a generic group that is supposed to receive all kinds of emails. In this article, I’ll show you how to keep your inbox organized so that you don’t miss out on emails that really matter.
For those who like to watch and learn, check out the 15-minute video at the end of this article.
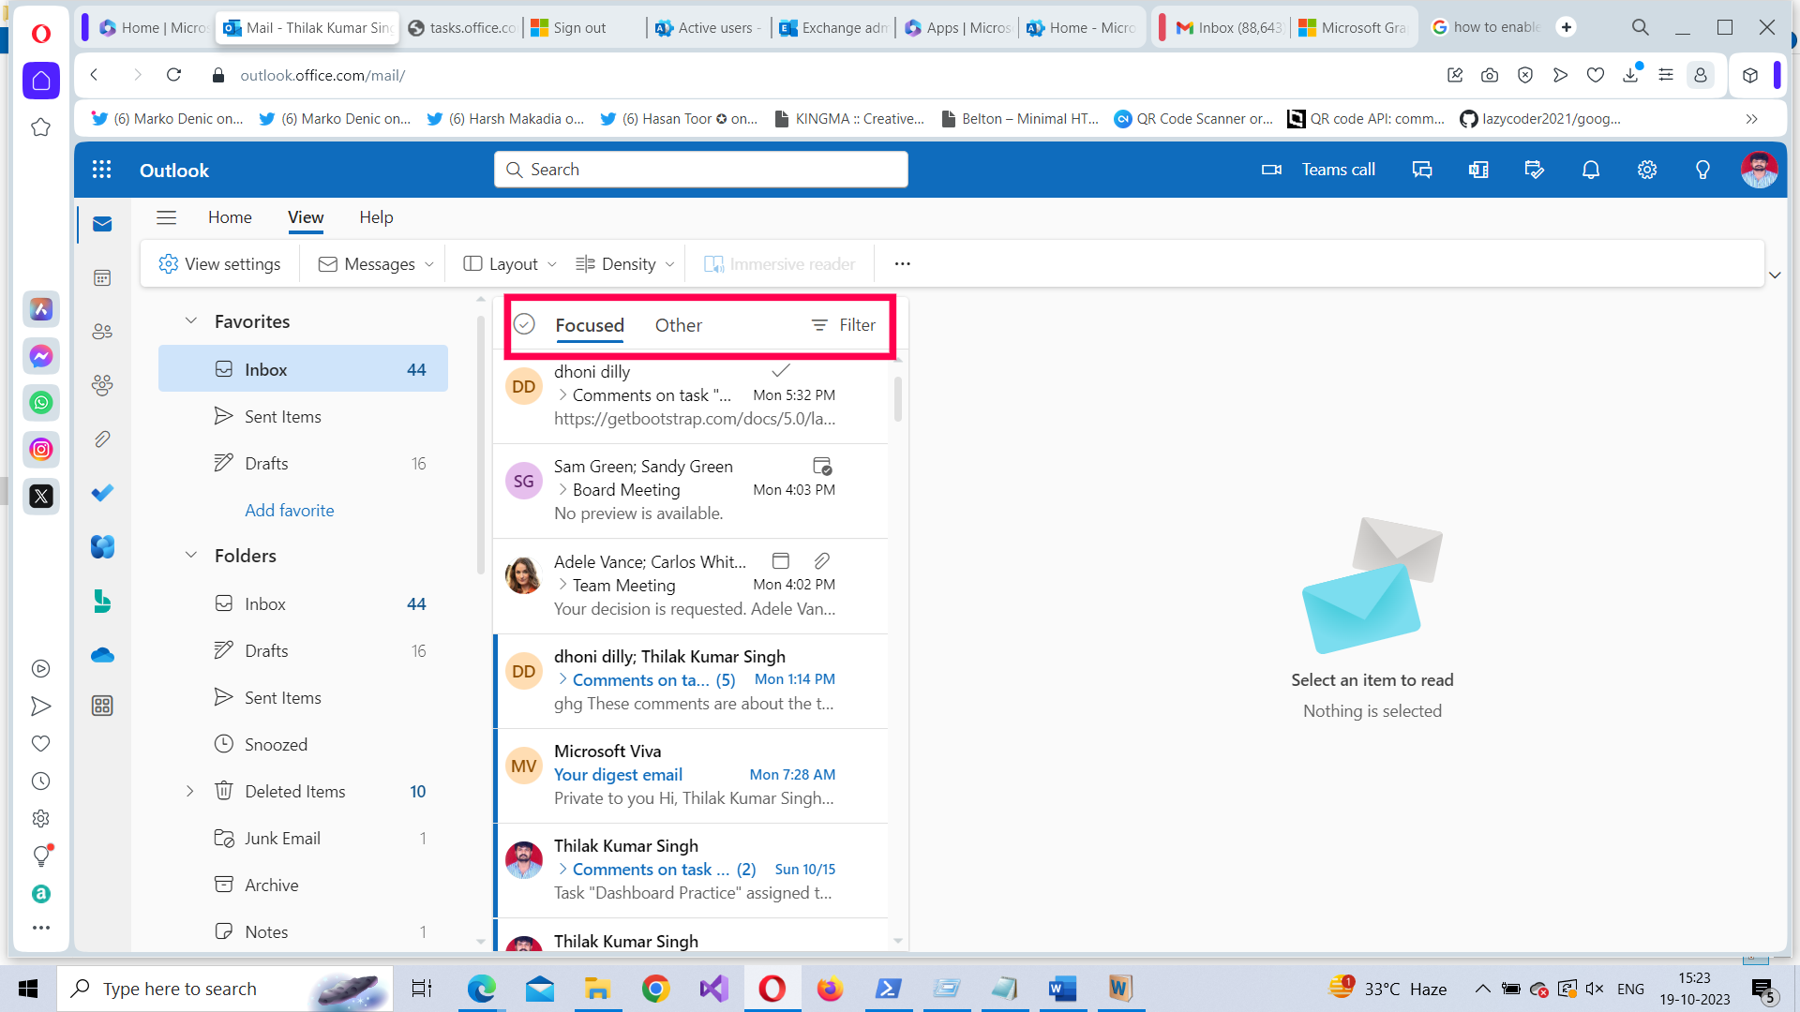
The New Focused Inbox
One of the good things about the latest Microsoft 365 edition is that it ships with a built-in new Focused inbox that sorts emails for you. But the Focused inbox needs time to read or analyze your mail-reading pattern before it can make informed decisions. You might miss crucial emails during this time.
So, it's best to organize your Outlook emails on your own and let the Focused inbox do its job in the background.
Creating Folders
Folders help you organize emails efficiently. For example, you could move all the emails requiring immediate attention to a folder called ‘‘Urgent.’’ Similarly, you could have an ‘‘Awaiting Response’’ folder that contains all those emails where you expect a user response.
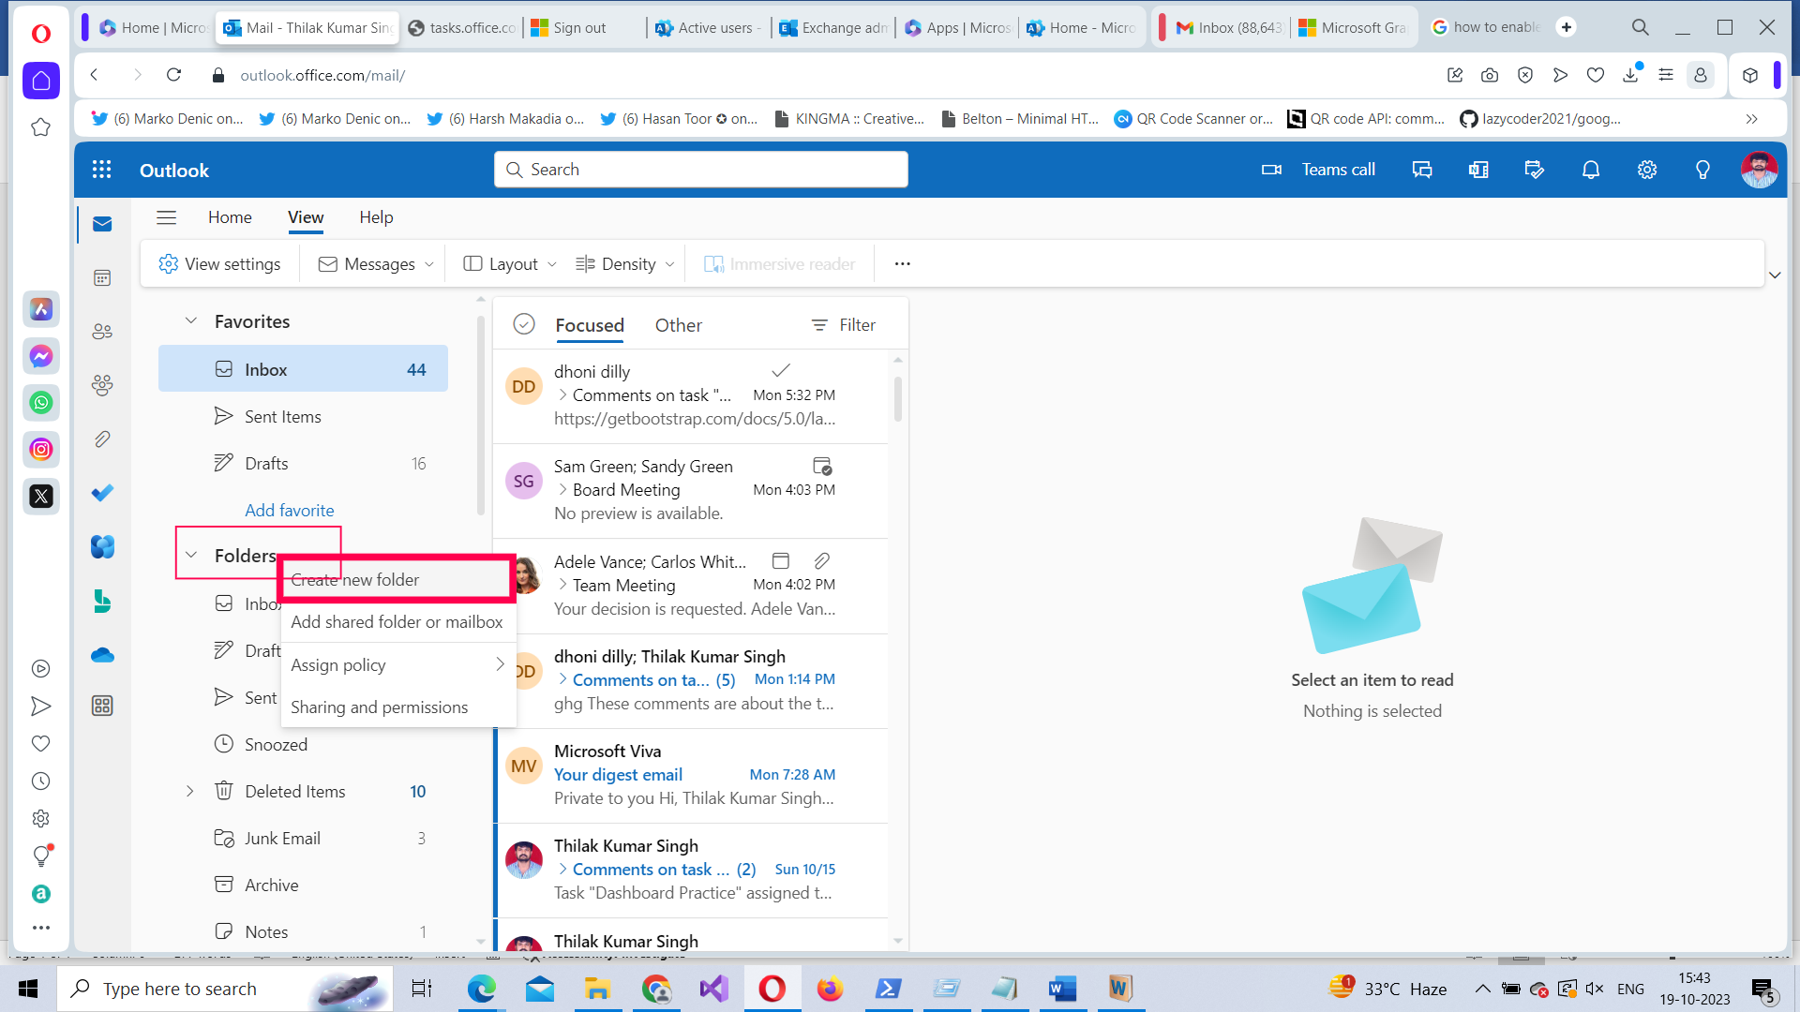
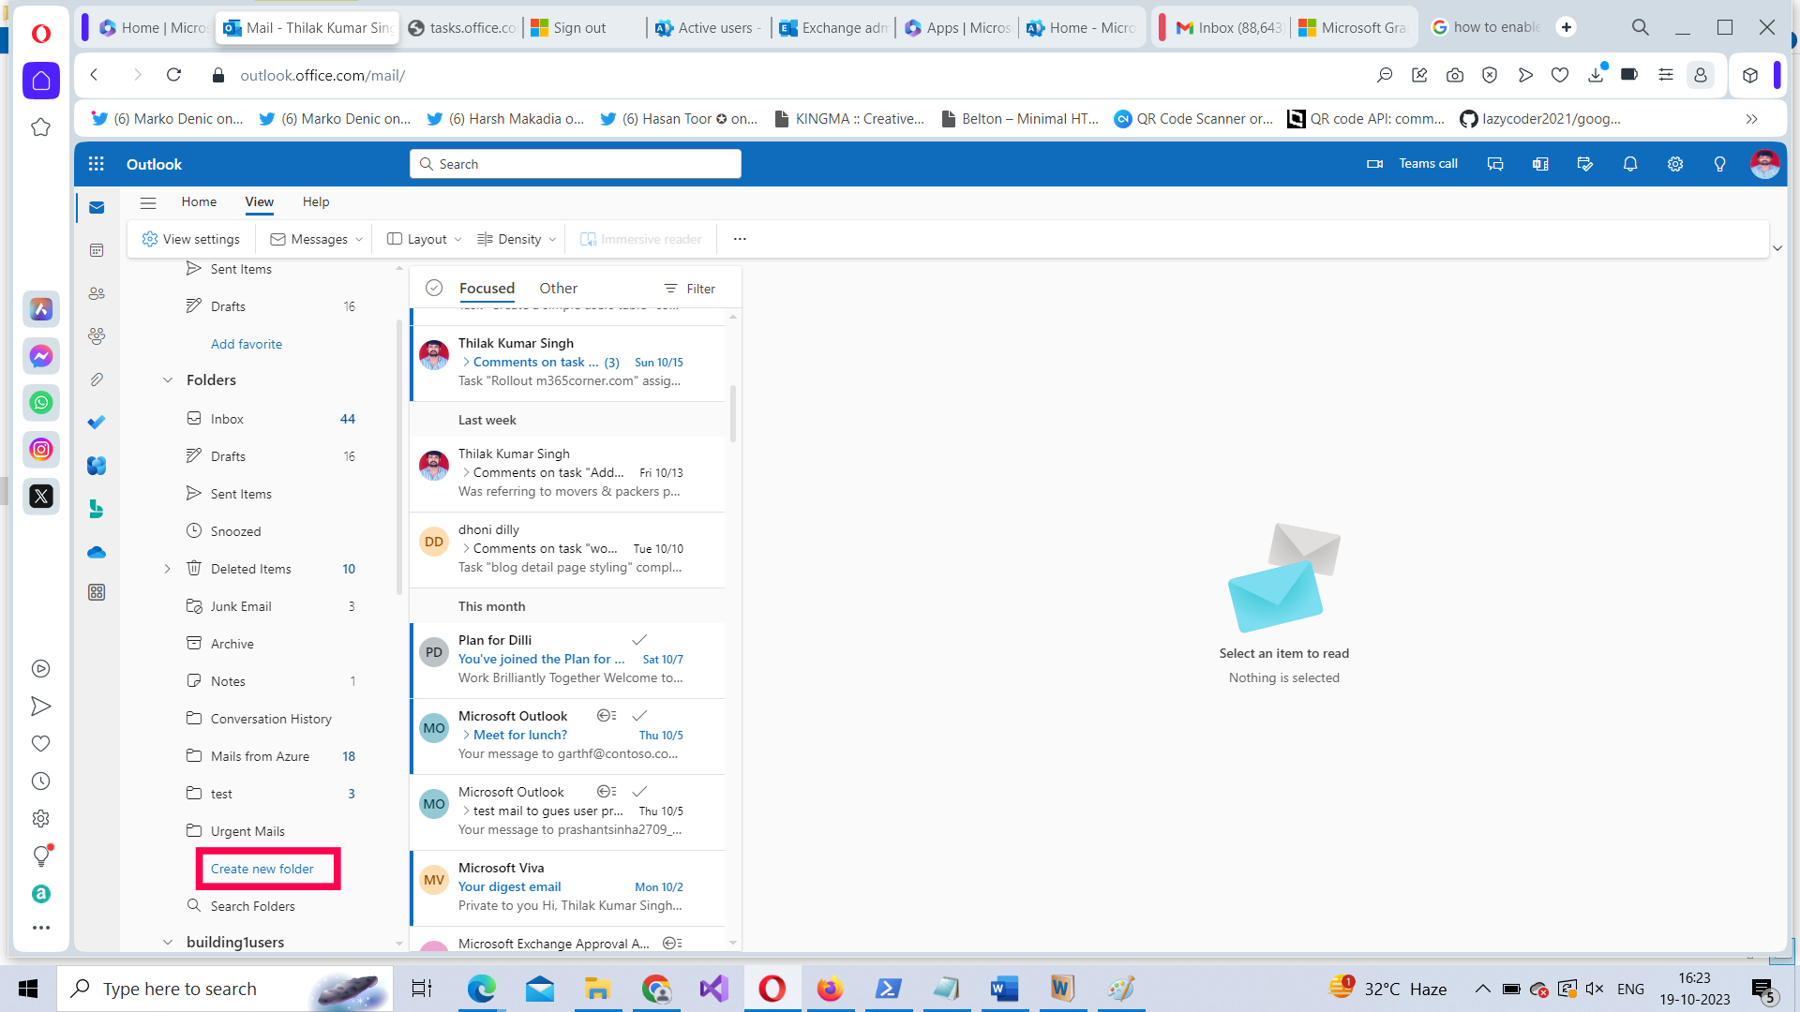
To create separate folders for your emails, you can use the right-click option (right-click on Folders) or the Create new folder option.
Using the Right-Click Option
To use the right-click option, follow these instructions.
Right-click Folders, and then select Create new folder, as shown in Figure 2.
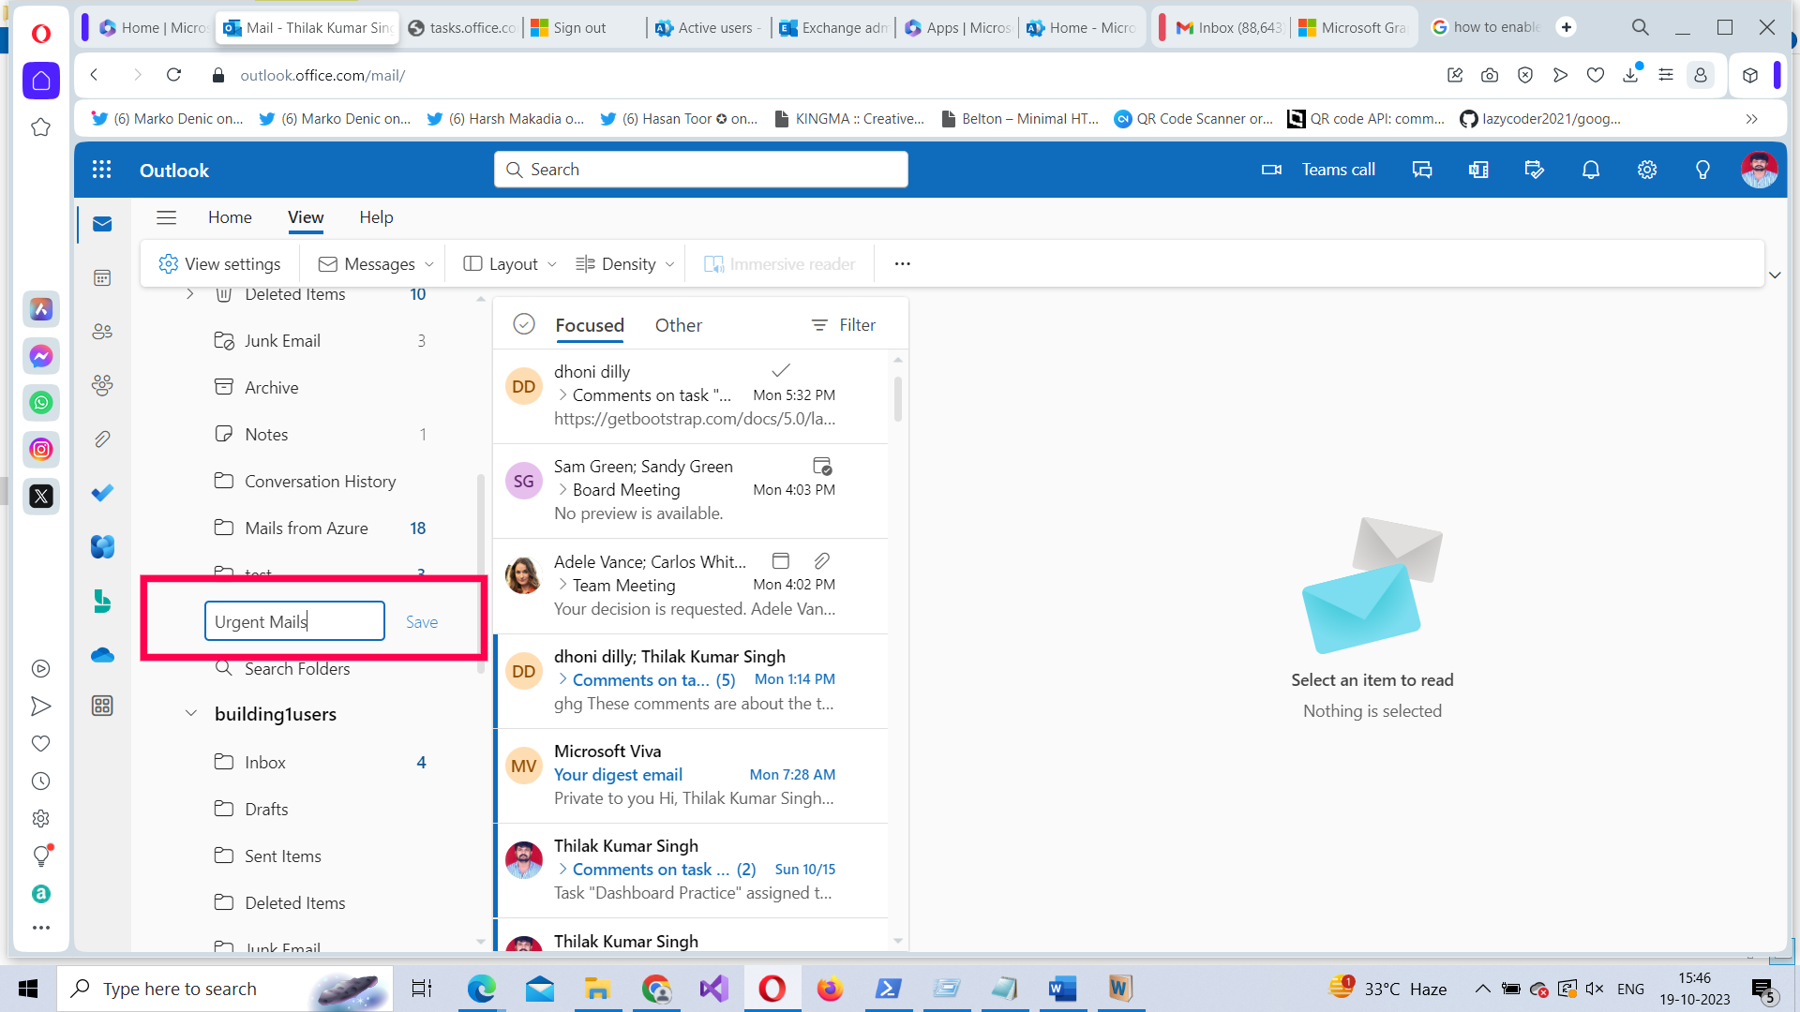
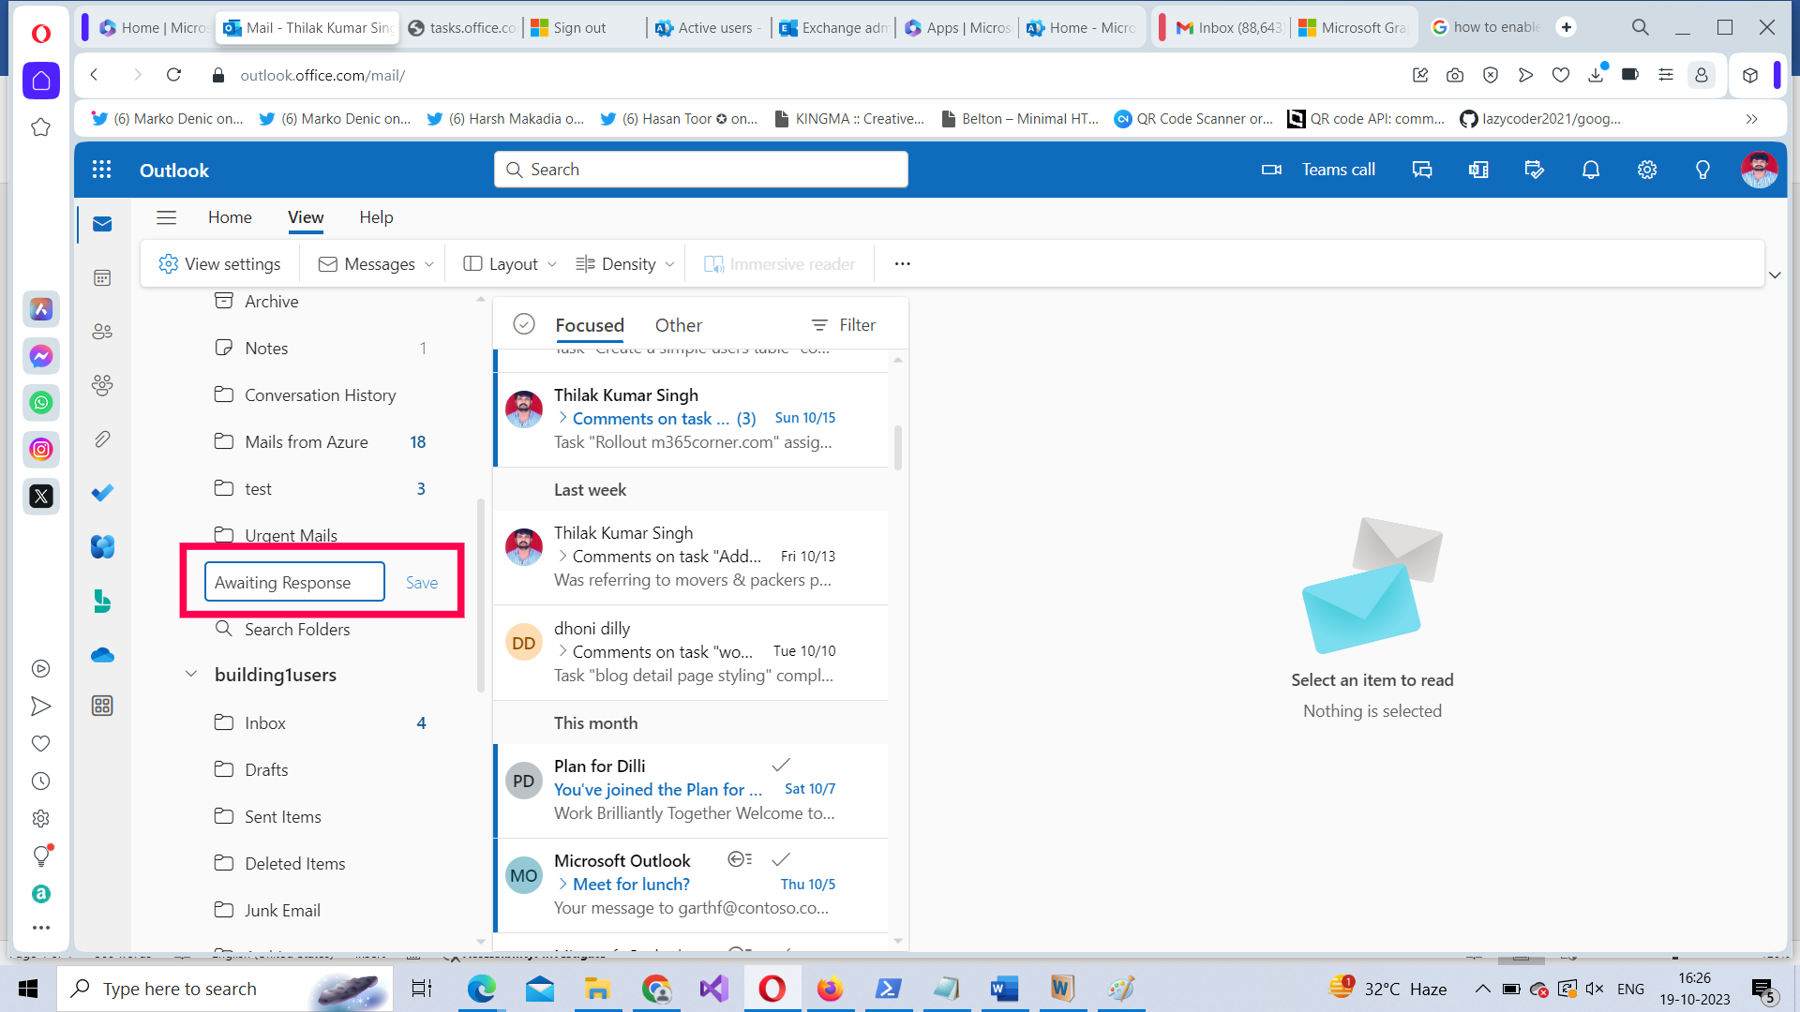
Enter the folder name, as shown in Figure 3, and then select Save.
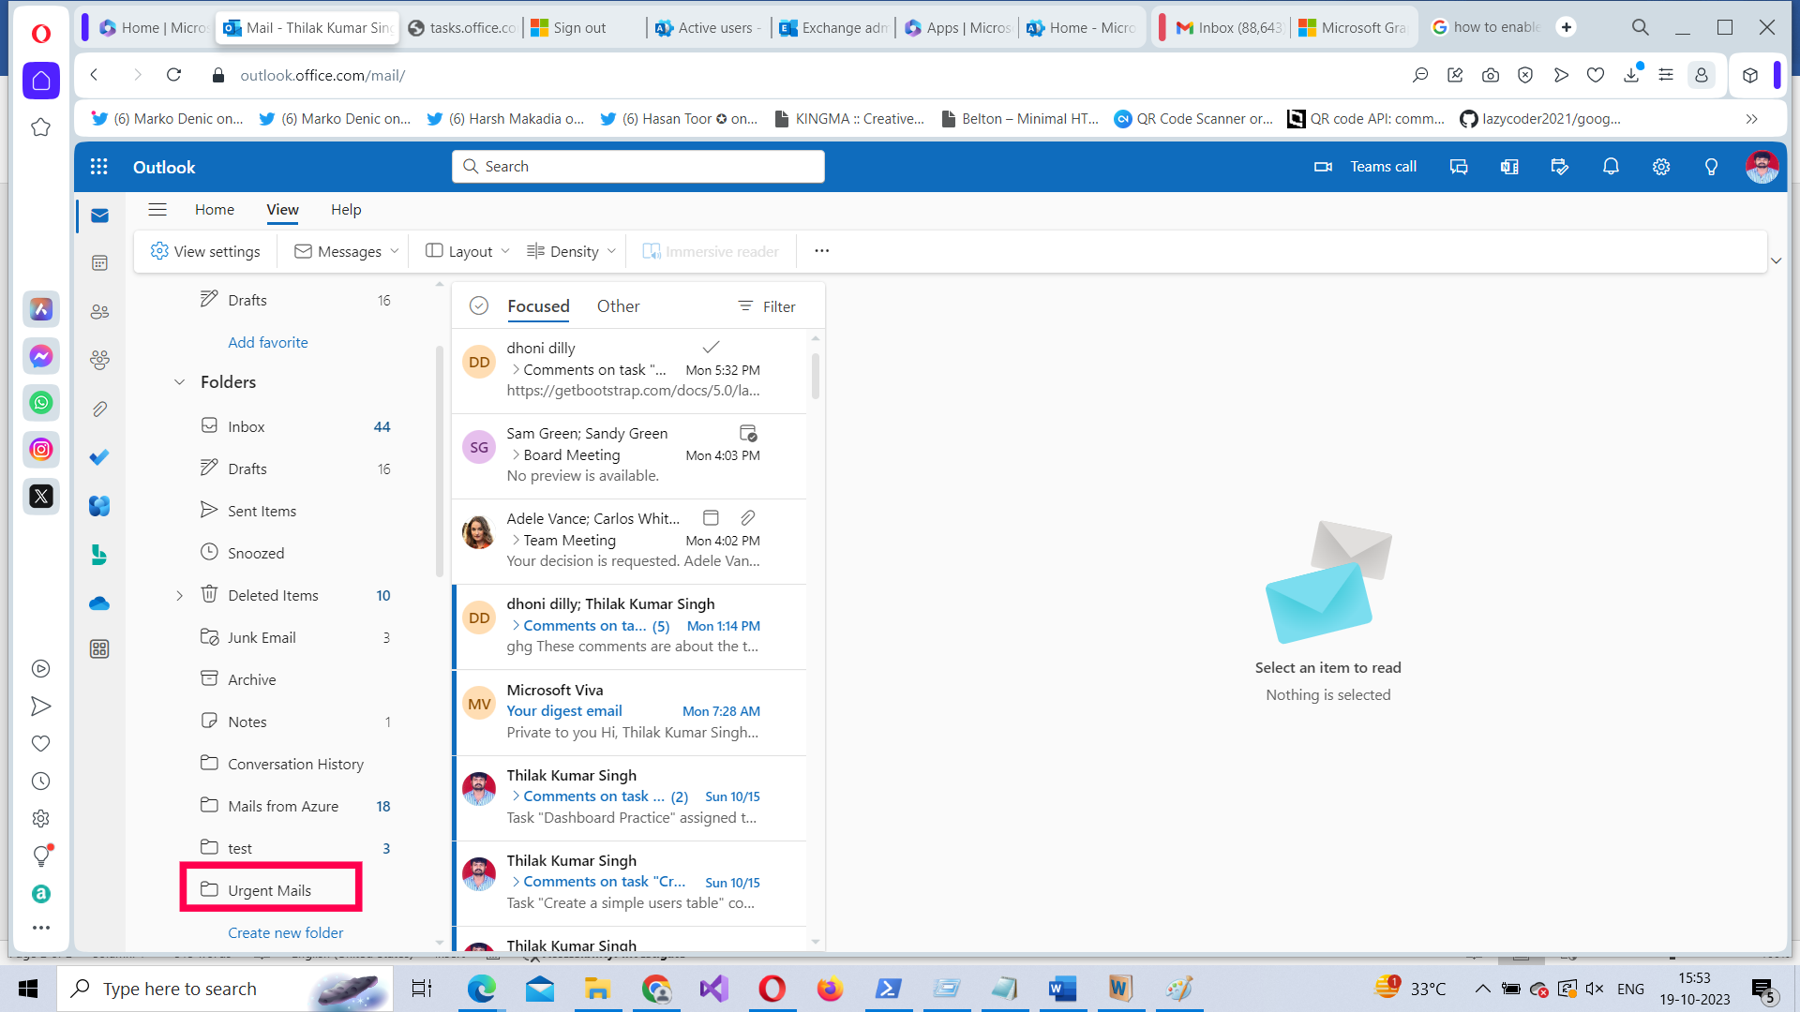
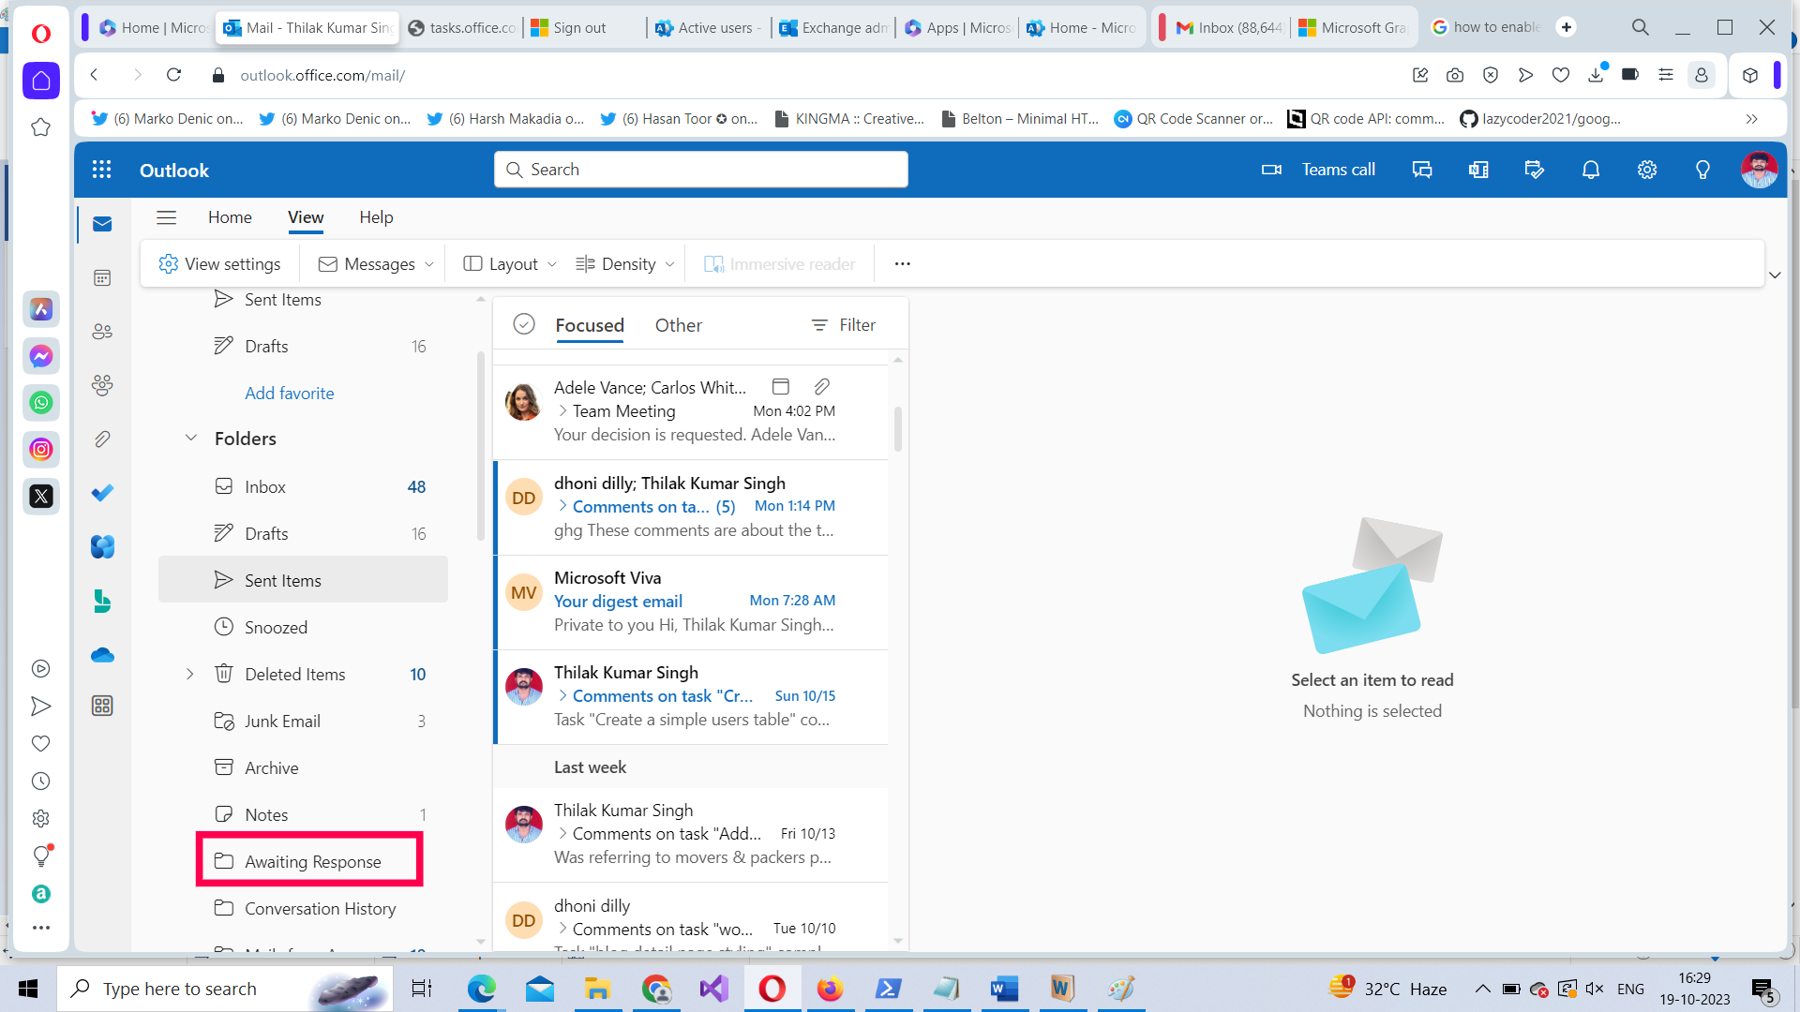
The newly created folder gets listed under the default folders, as shown in Figure 4.
Using the Create New Folder Option
To use the Create new folder option, follow these instructions.
Scroll down the Folders list to the Create new folder option, as shown in Figure 5.
Select Create new folder, enter the folder name (Awaiting Response, in this case), as shown in Figure 6, and then select Save.
The newly created folder gets listed under the default folders, as shown in Figure 7.
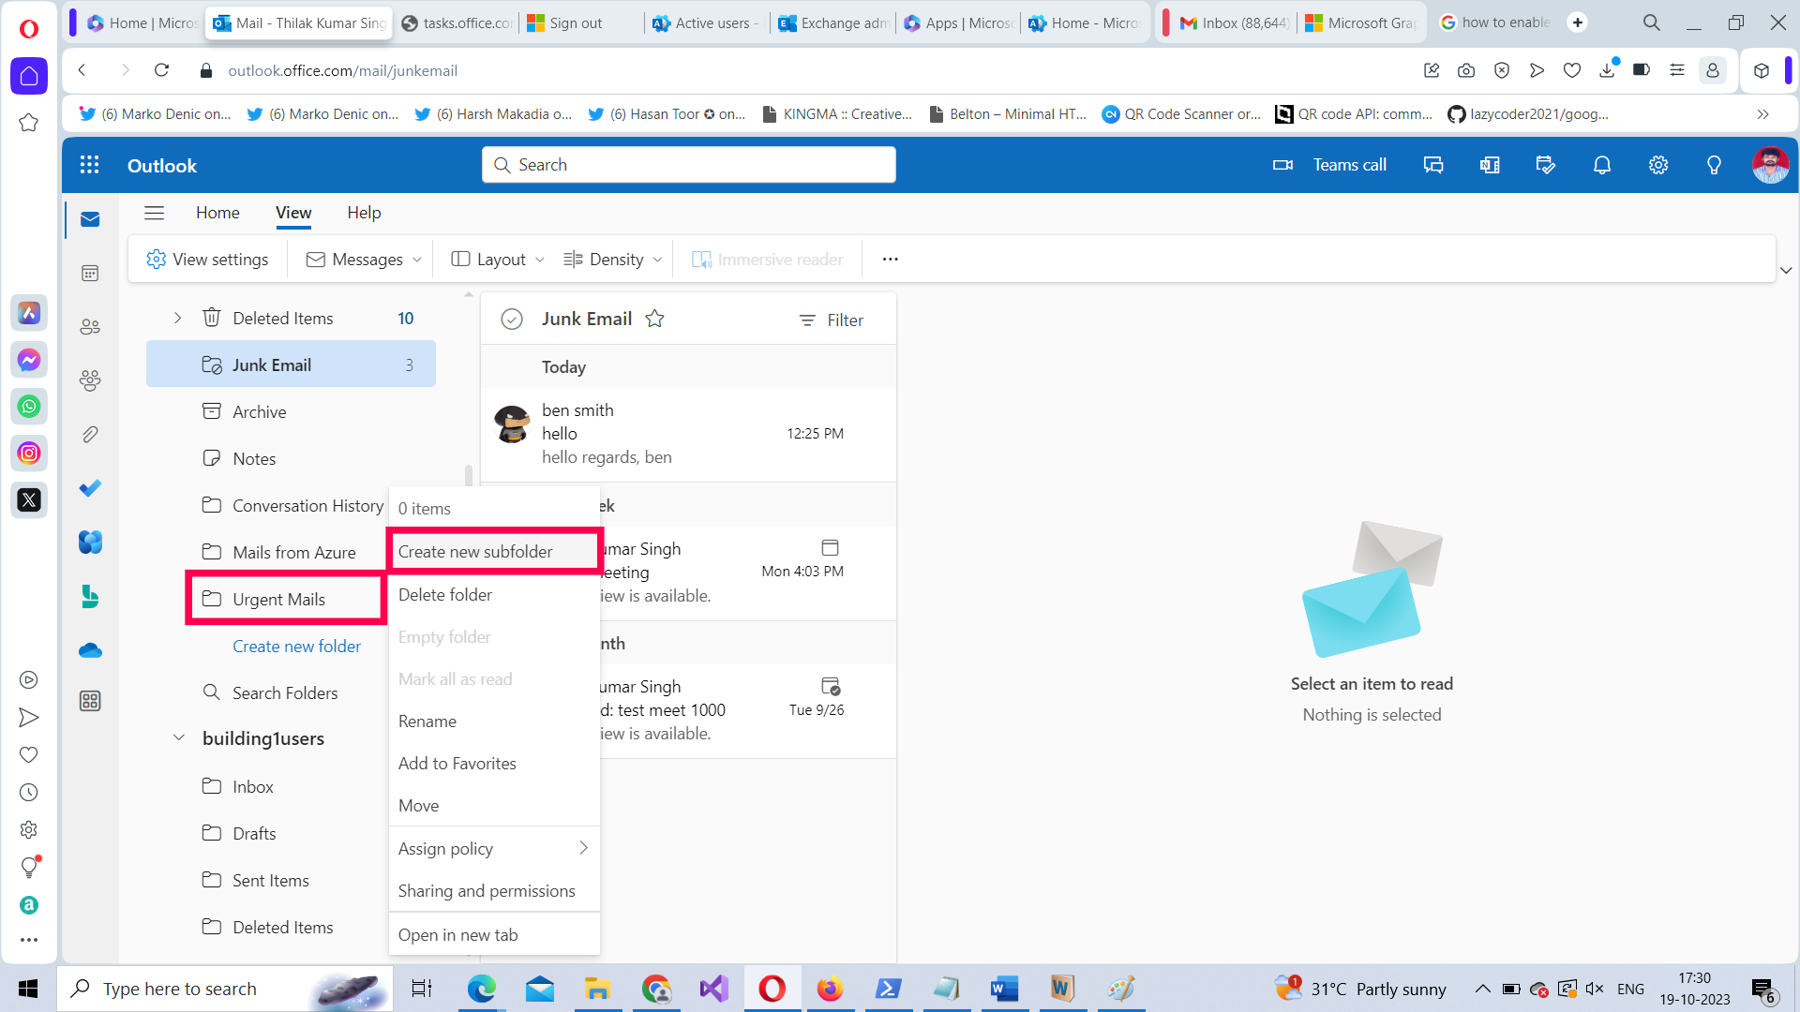
Note: You can also create subfolders in one of two ways:
- By right-clicking the parent folder and selecting Create new subfolder, as shown in Figure 8. (or)
- By creating a new folder and dragging/dropping it in the relevant parent folder.
However, creating folders can help you only so much because you have to manually move your emails into these folders to maintain a sorted inbox. This is where Outlook inbox rules come to your rescue, by helping you create rules that automatically redirect your emails to these folders.
Inbox Rules
Inbox rules are a great choice if you want to automatically route your emails to different folders and keep your inbox organized. They have three components:
- Conditions: These help you set the criteria for selecting the emails to be routed. (Example: if “Subject includes”, “From”, “Recipient address includes”, etc.).
- Actions: These help you set the actions that need to be taken when the conditions are met. (Example: “Move to”, “Forward to”, “Mark as Junk”, etc,).
- Exceptions: These help you override the configured condition if necessary. (Example: “Has attachment”, “I’m on the CC line”, “ Received Before or After”, etc.)
To help you understand how Outlook inbox rules are created, here is an example that moves all the incoming emails containing the word “Urgent” in the subject to a folder named “Urgent Mails.”
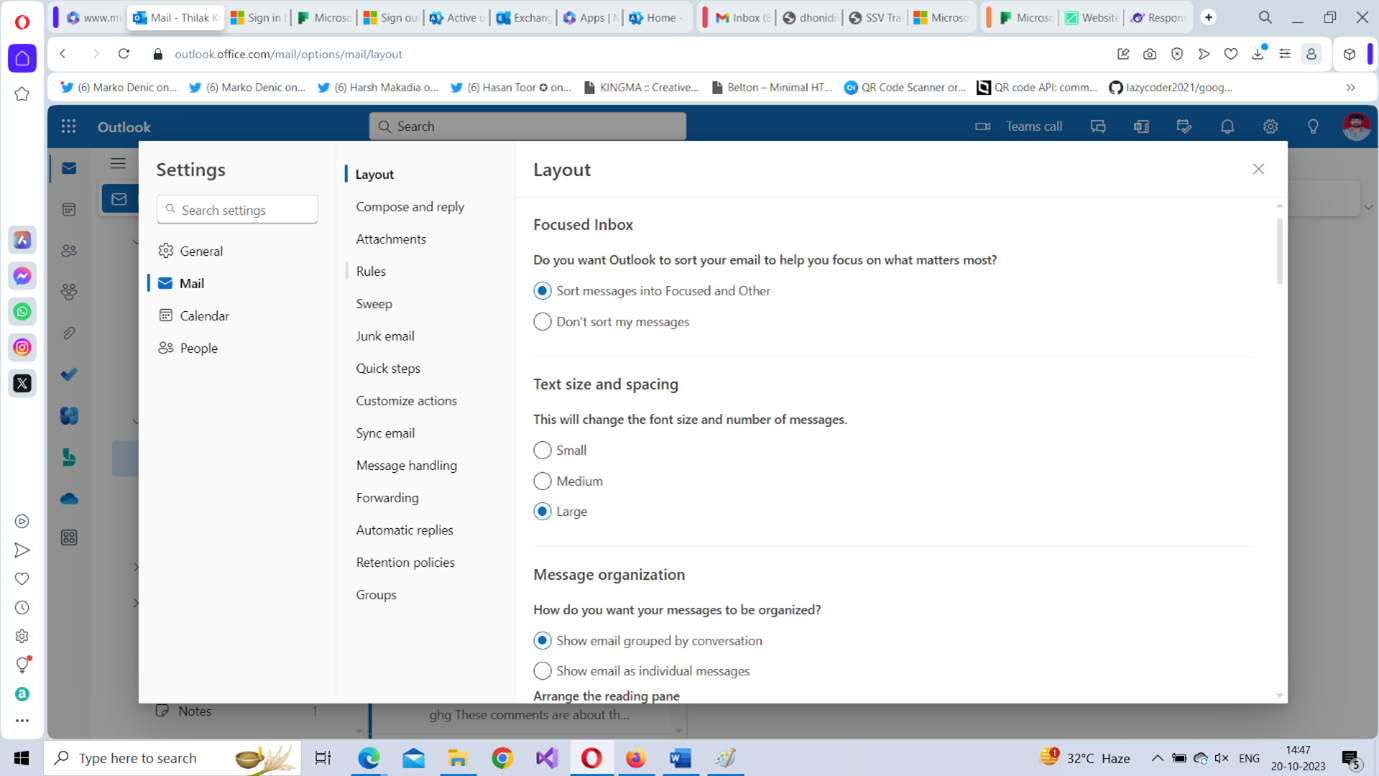
Select the Settings icon at the top-right corner of Outlook mail. The Settings pop-up opens, as shown in Figure 9.
![]()
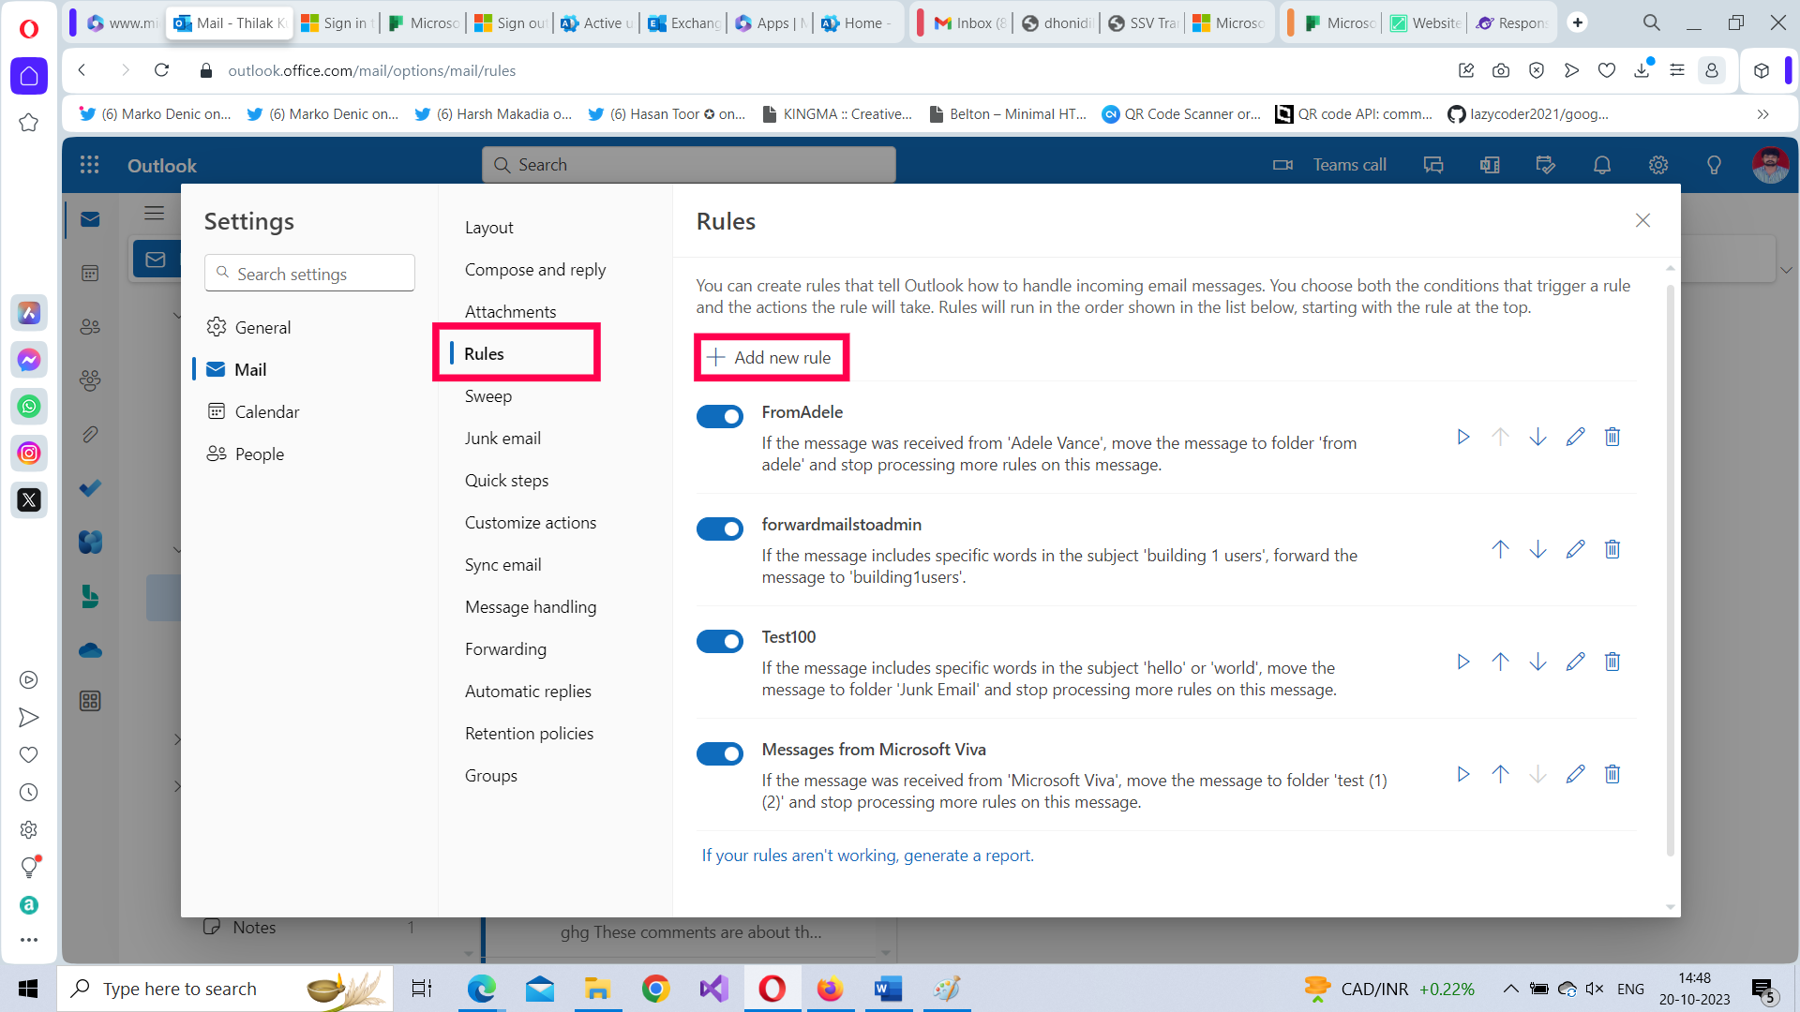
Select Rules, and then select Add new rule, as shown in Figure 10.
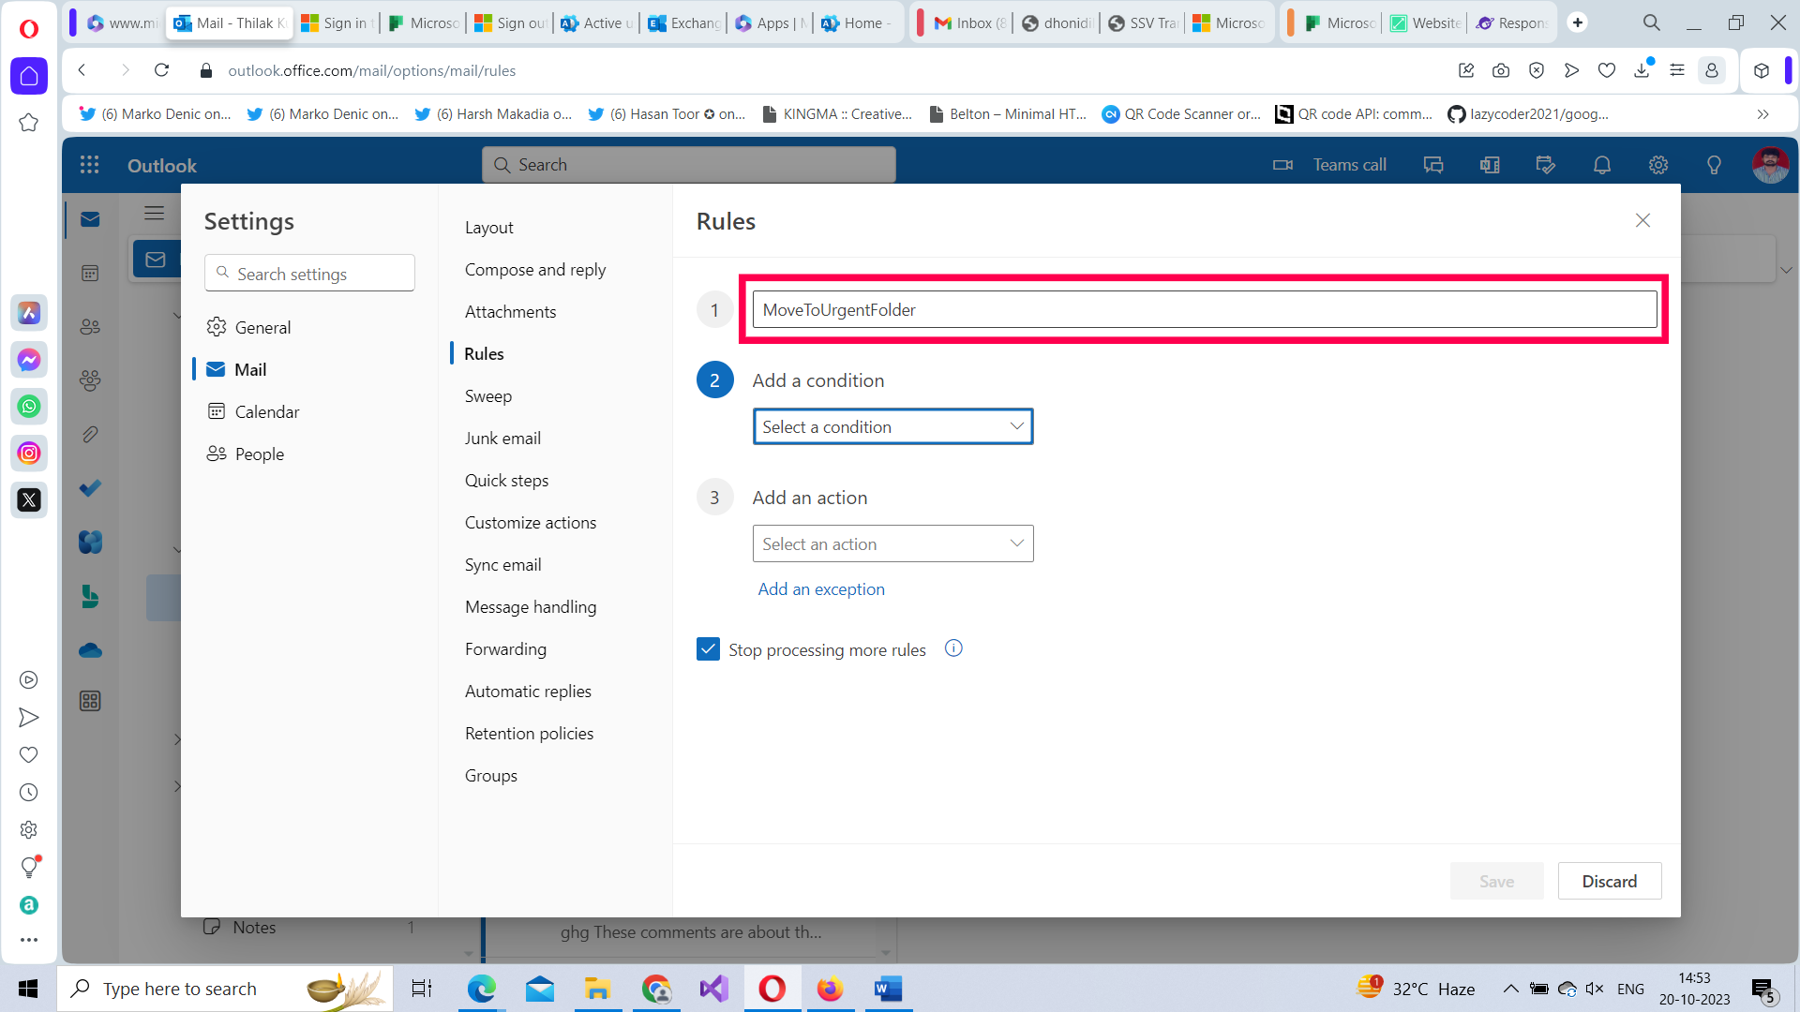
Name the rule “MoveToUrgentFolder” as shown in Figure 11.
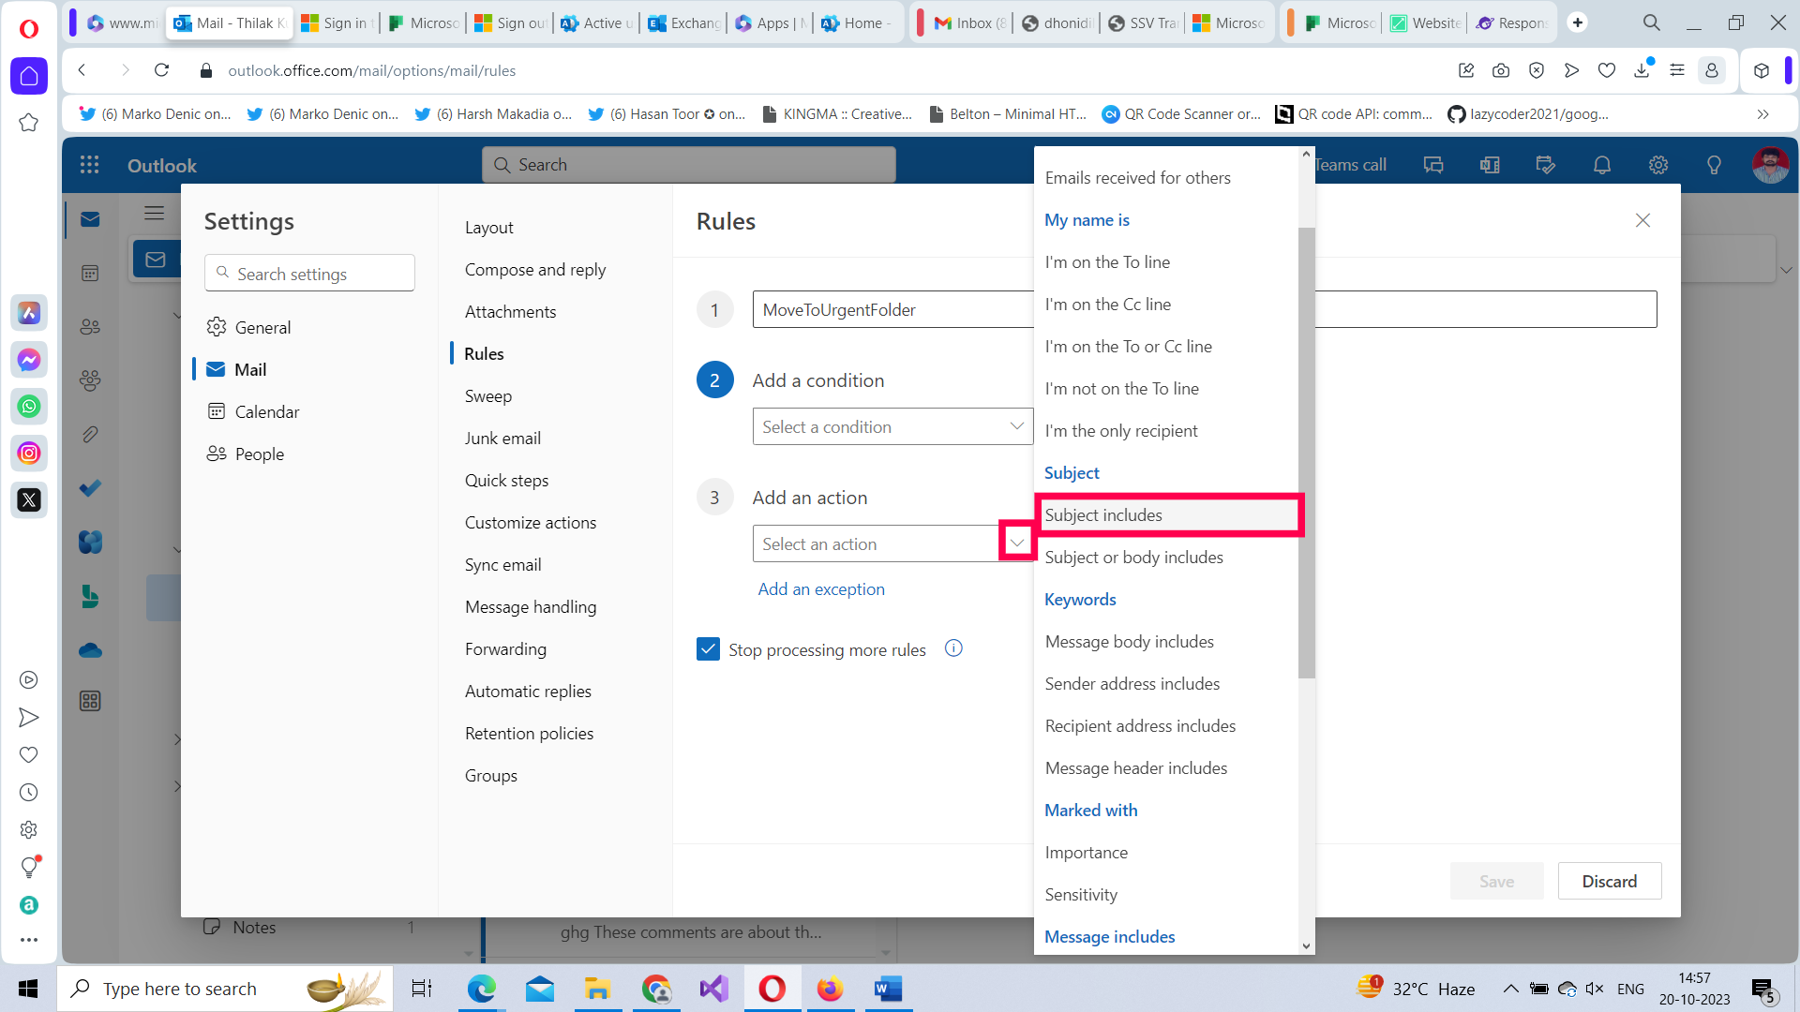
Under Add a condition, in the Select a condition dropdown, select the Subject includes condition, as shown in Figure 12.
Enter the Subject includes value as Urgent, as shown in Figure 13.
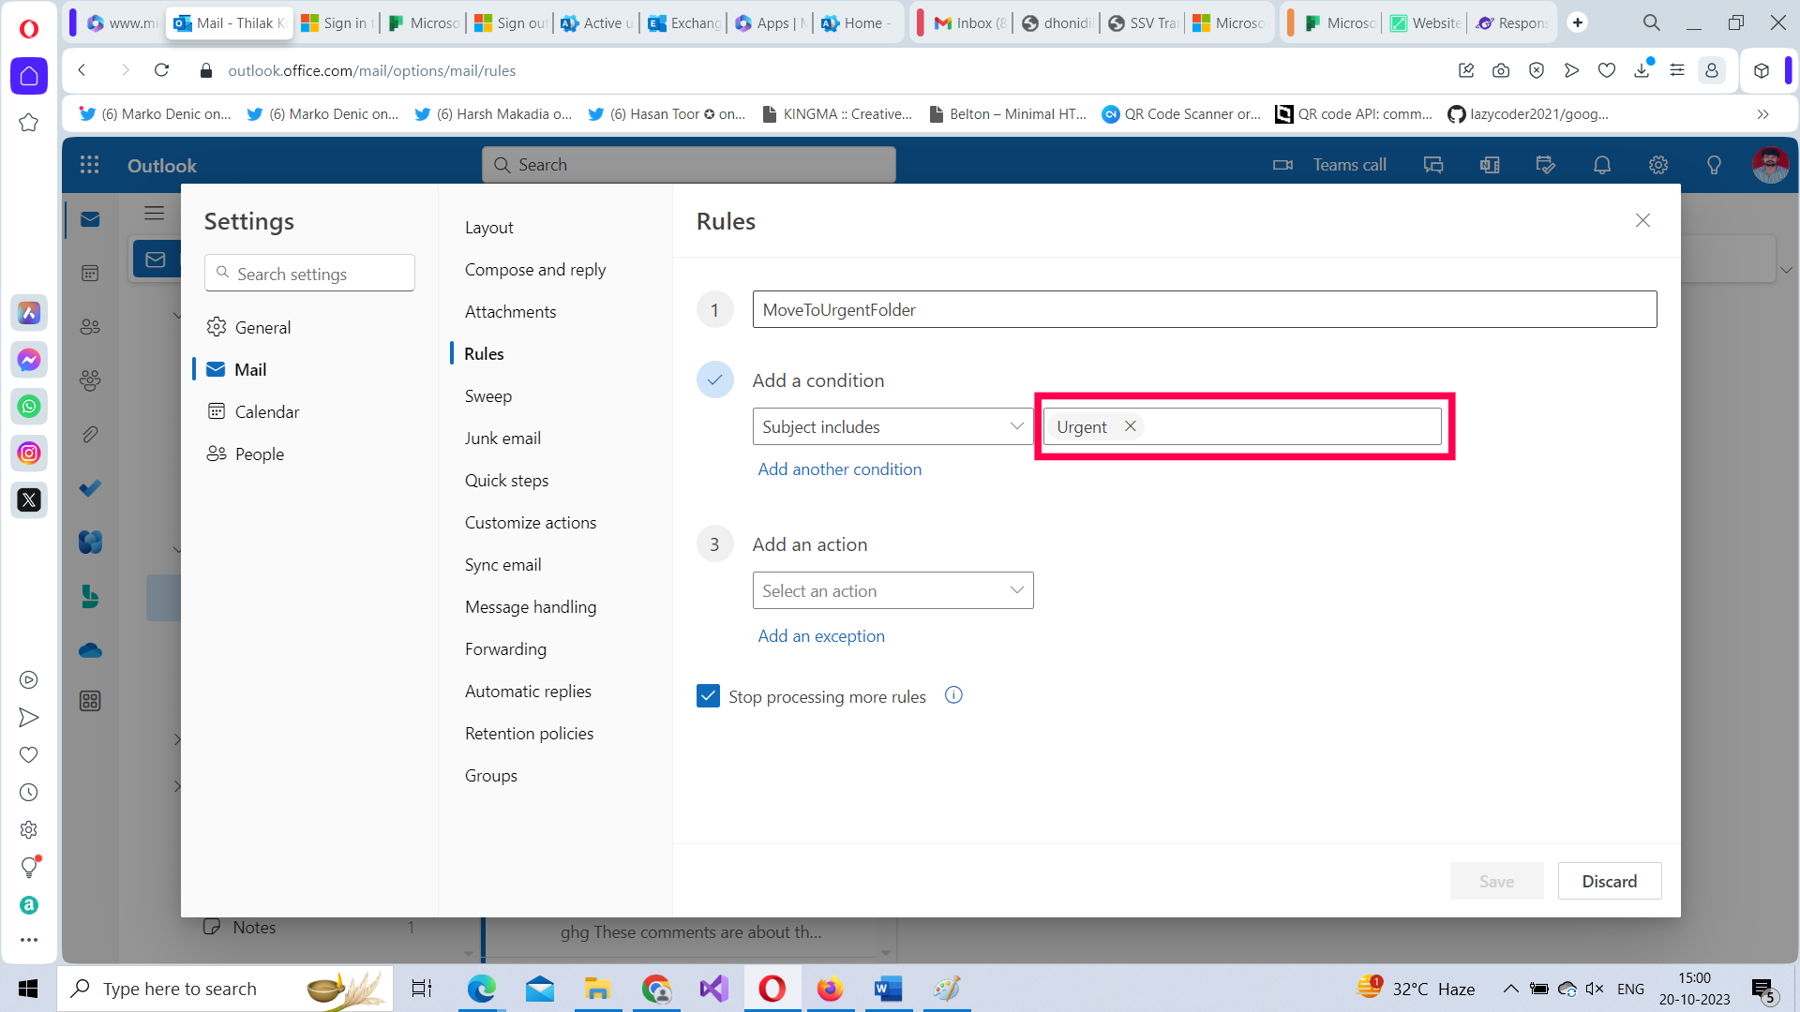
Note: You can supply or add multiple words as values to Subject includes.
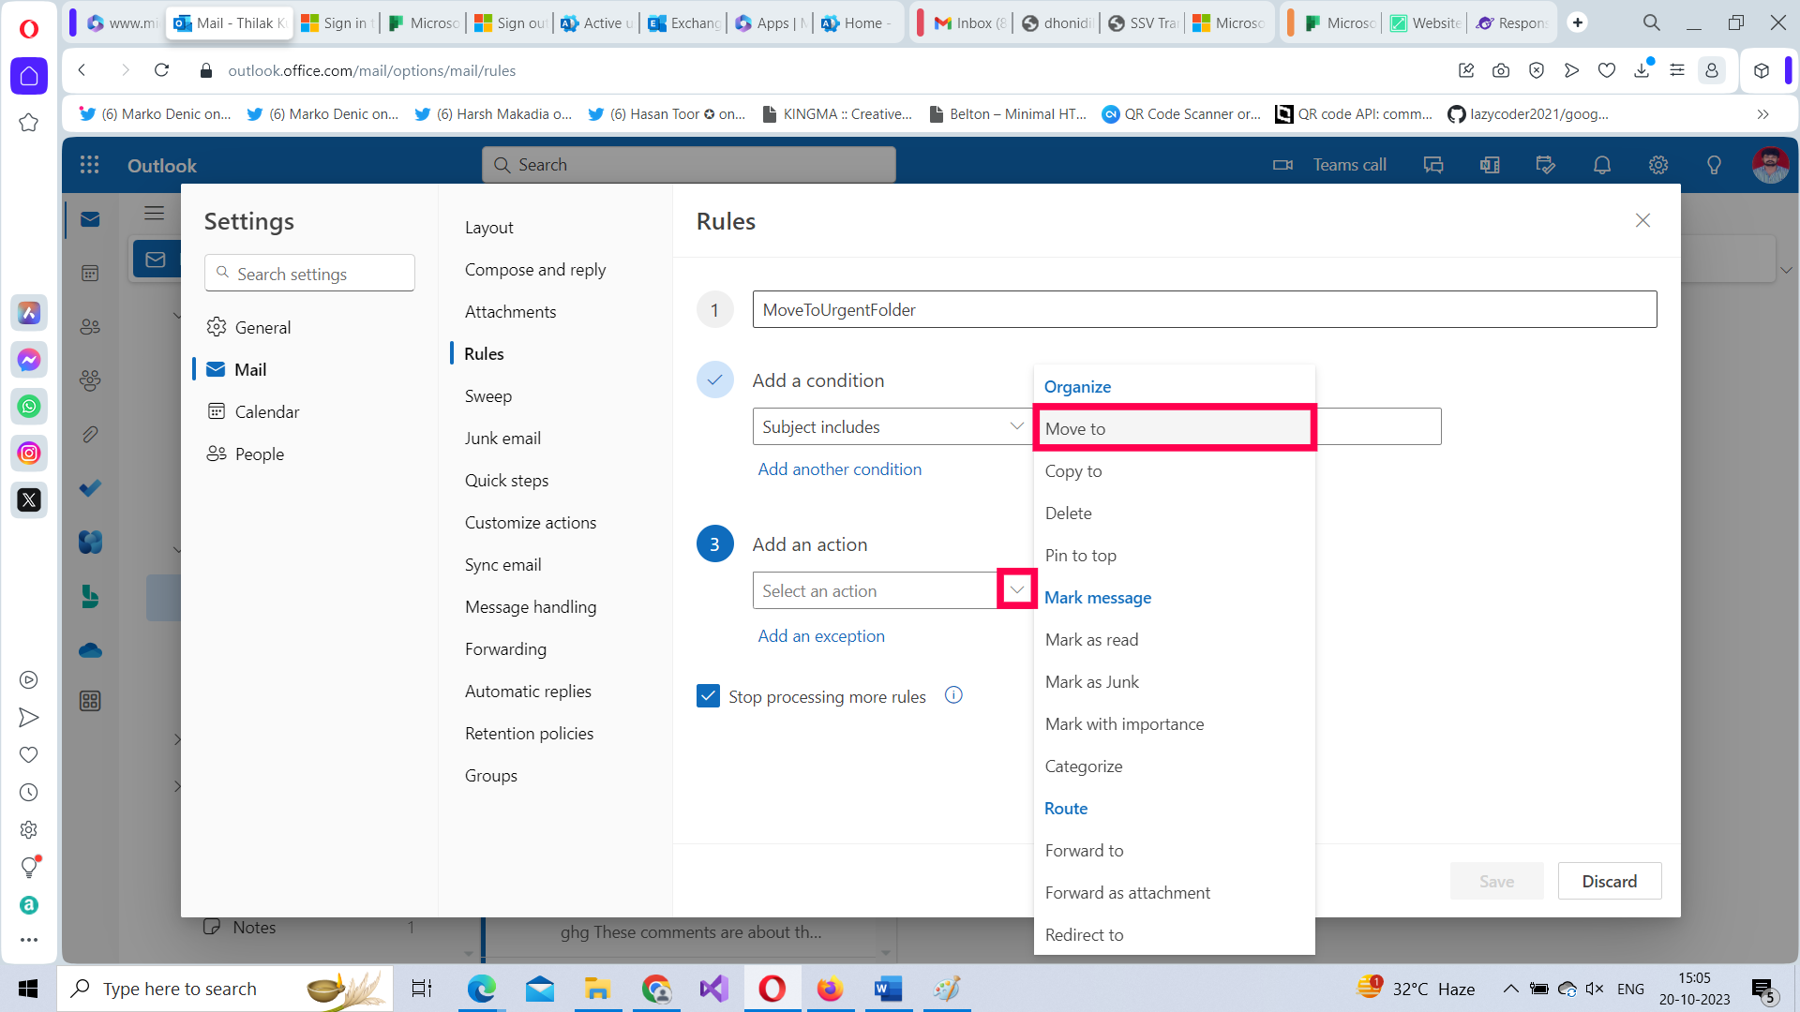
From the Select an action dropdown, select Move to, as shown in Figure 14.
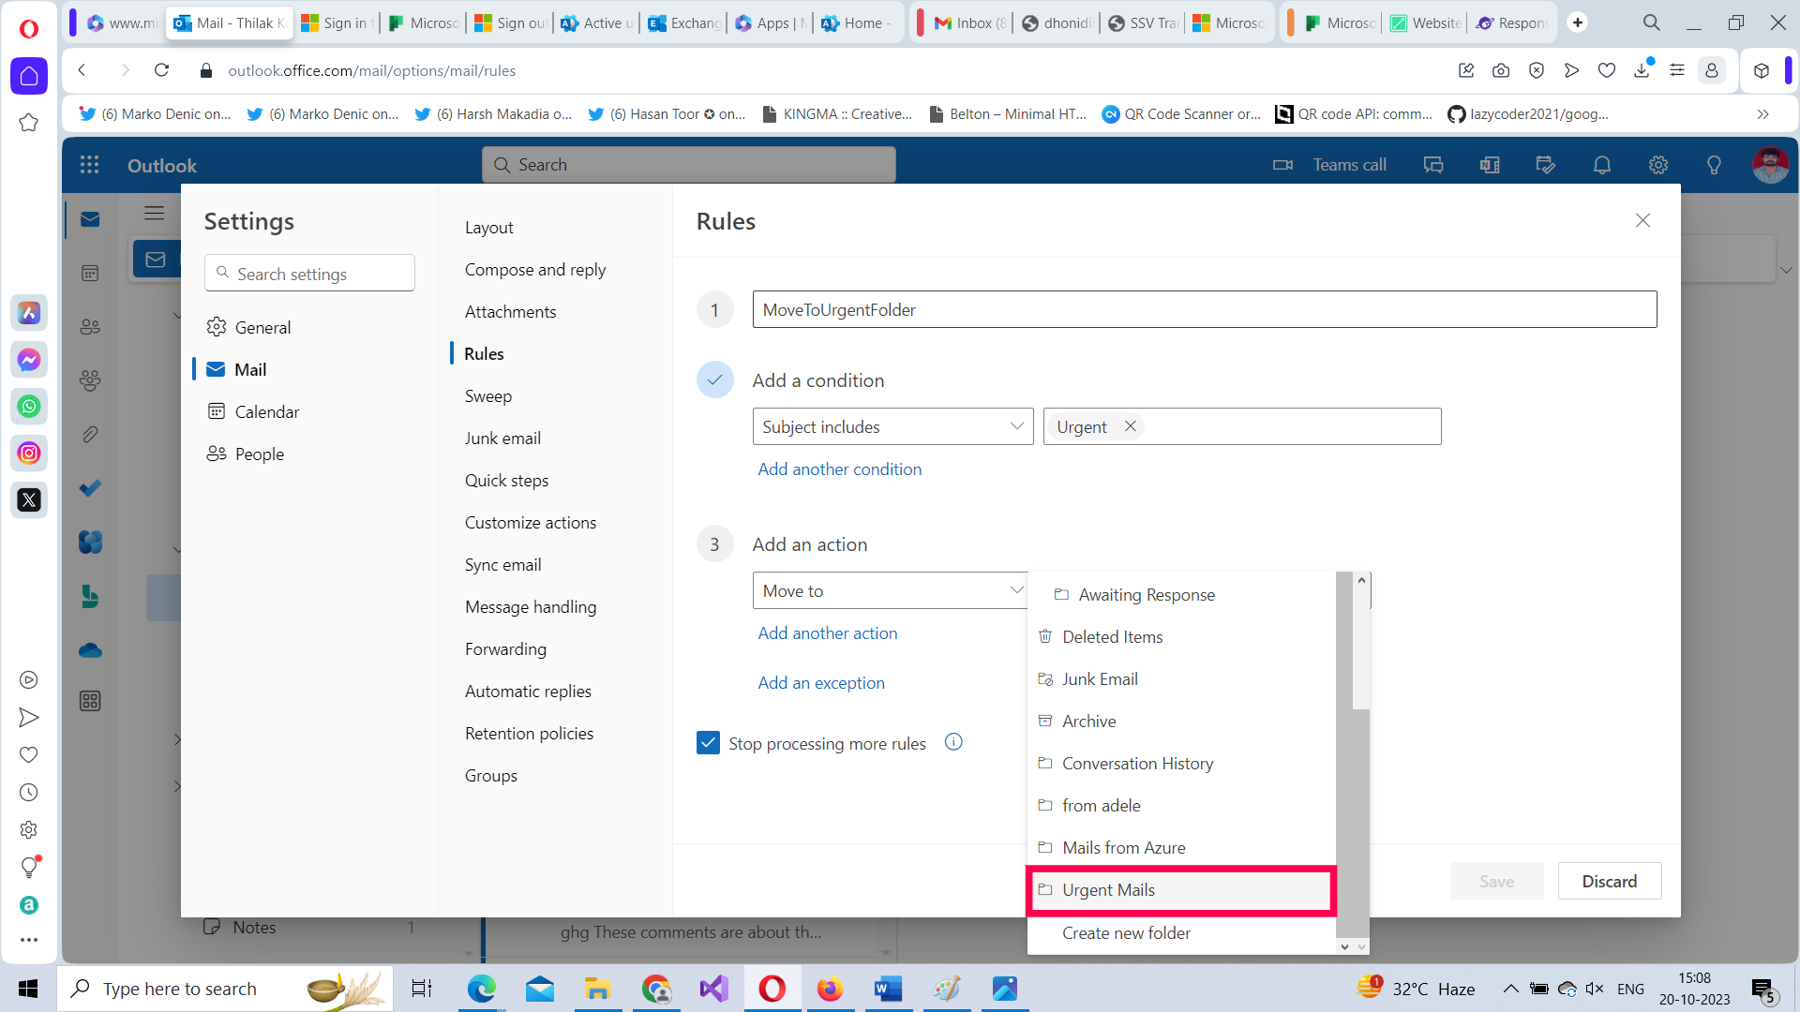
Select the Urgent Mails folder from the list of available folders, as shown in Figure 15.
Select Run rule now, and then select Save, as shown in Figure 16.
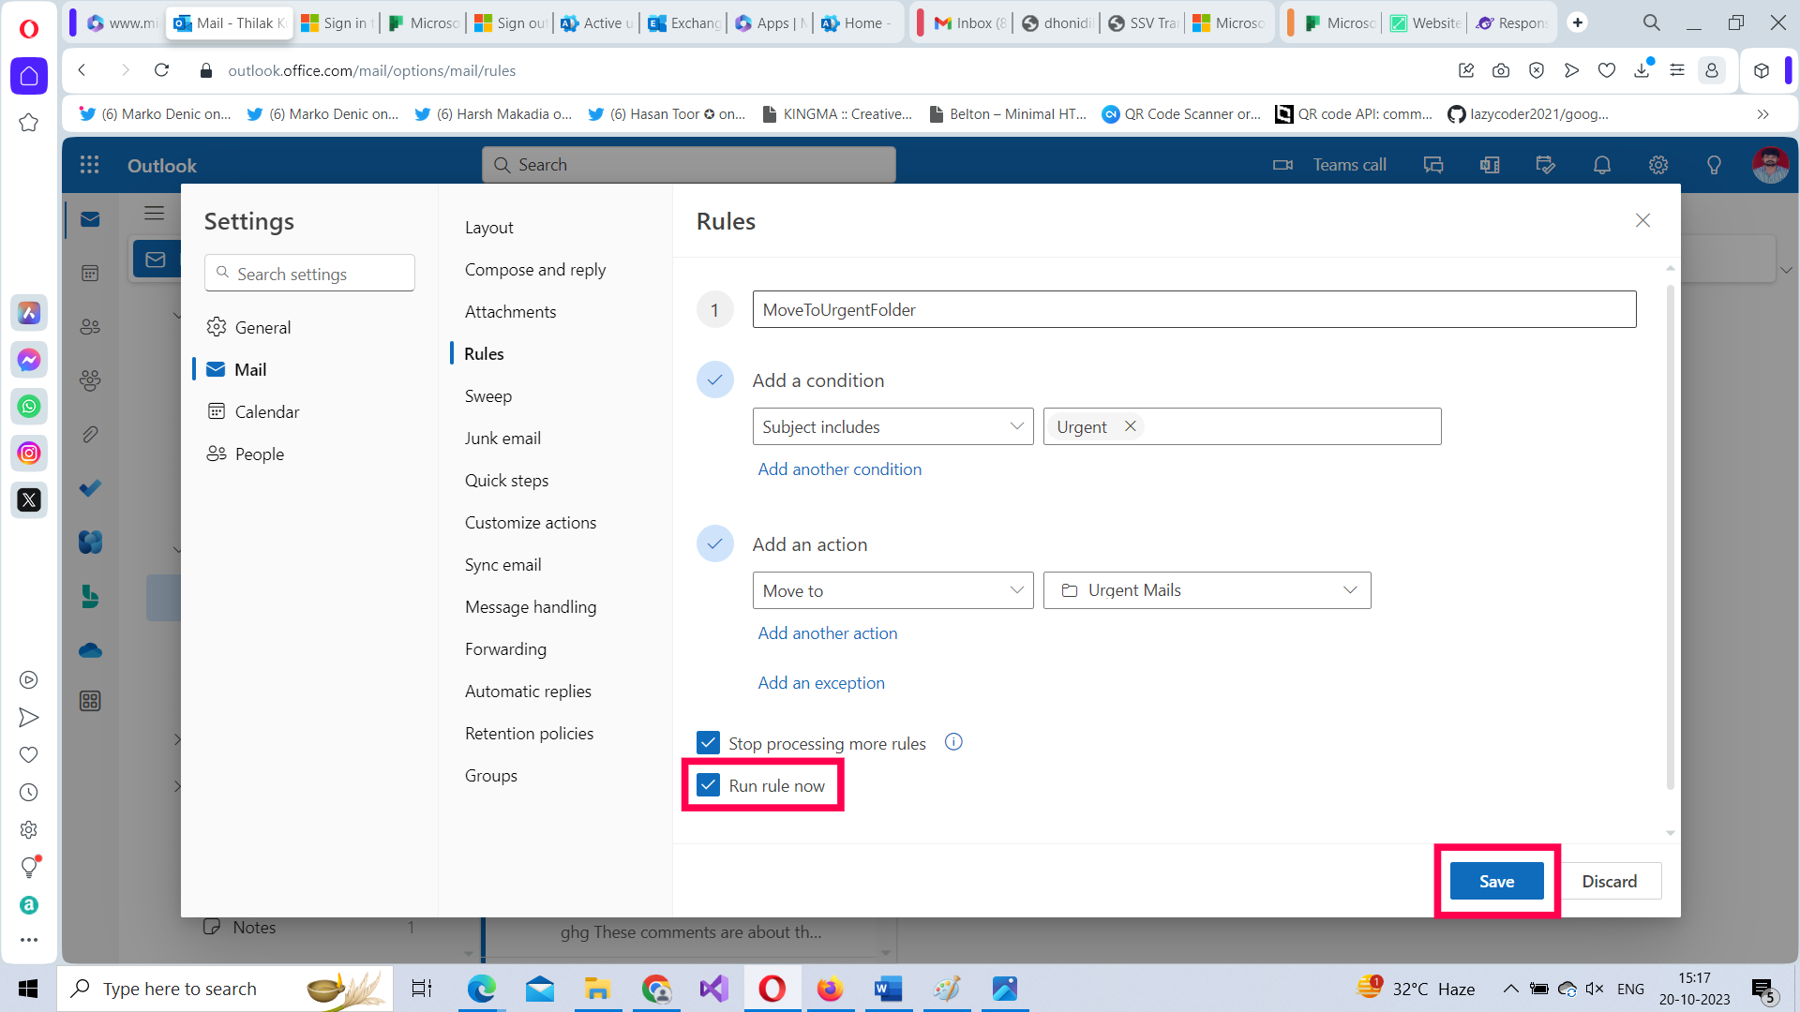
Note: You can also save the rule and then choose to run the rule at a later date.
The newly configured rule gets listed in the Rules pane, as shown in Figure 17.
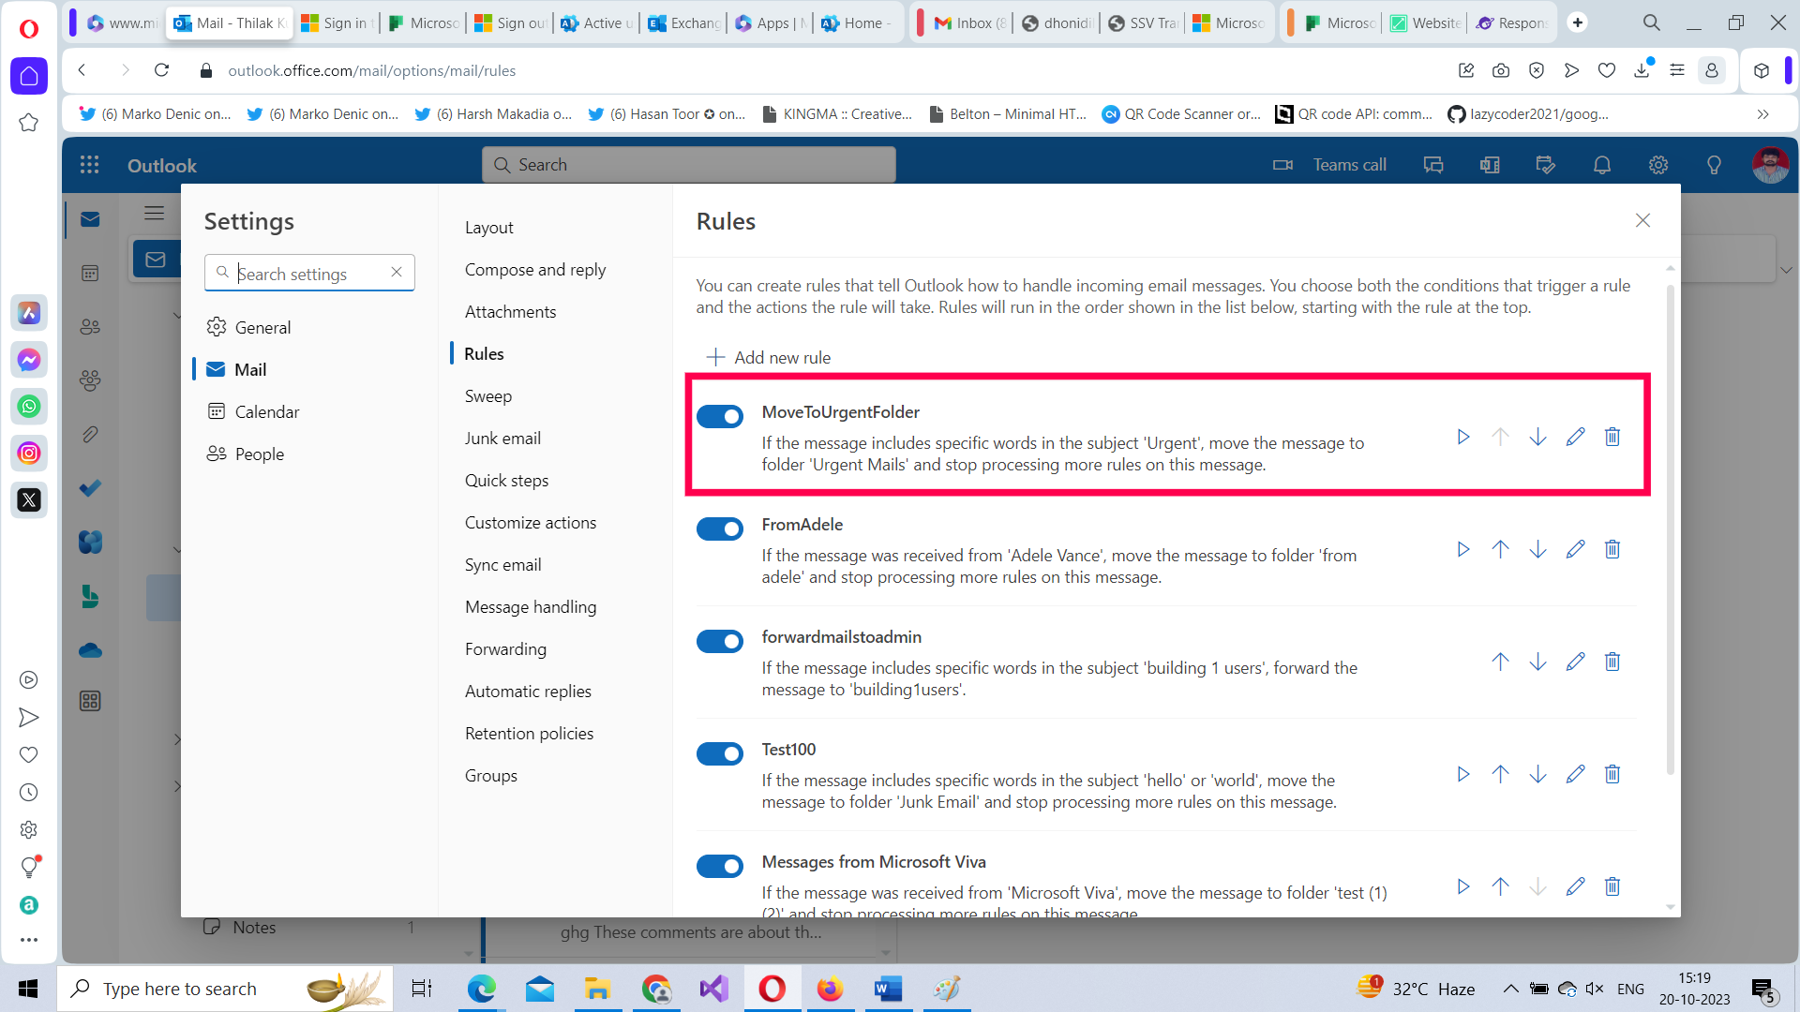
This rule will ensure that all the emails flowing into your inbox containing the word “Urgent” in the subject get moved to the Urgent Mails folder automatically.
Sweep Rules
These rules help you move emails in bulk. They are an easier alternative to ‘move emails from [user@contoso.com] to [sample] folder’ inbox rule. You don’t have to deal with the conditions, actions, or exceptions, since sweep rules move your emails with a couple of clicks.
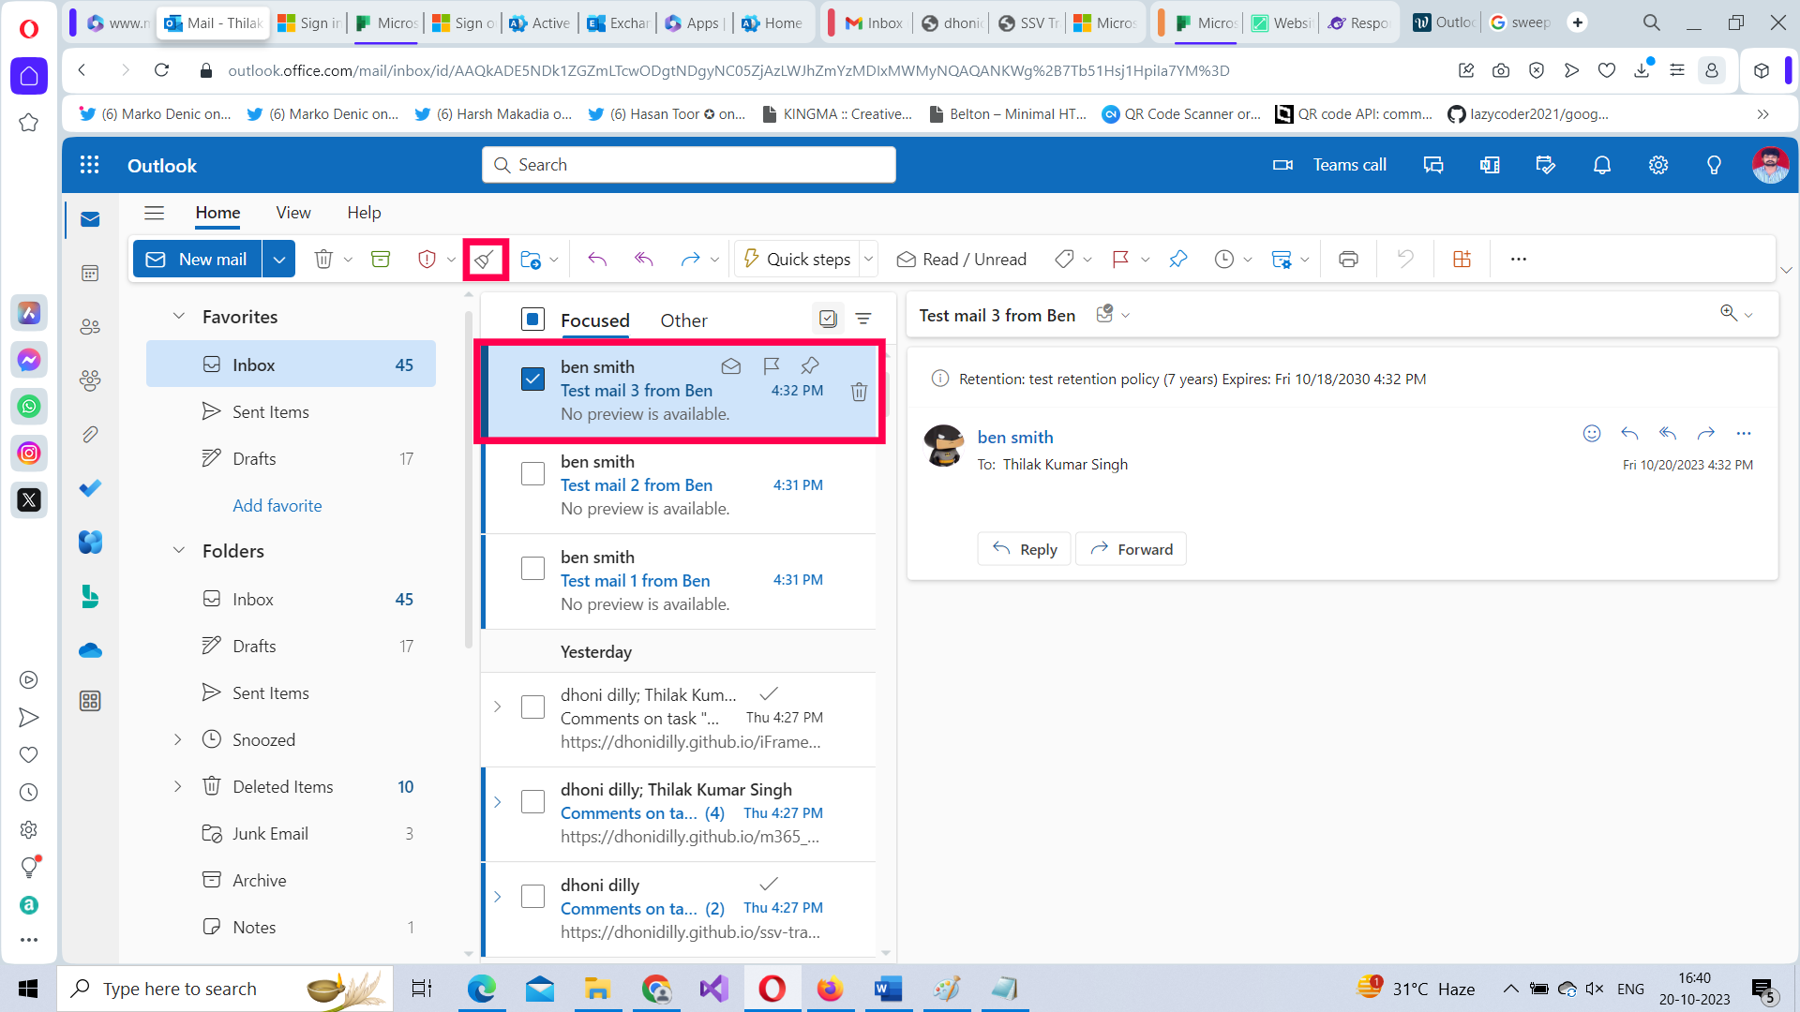
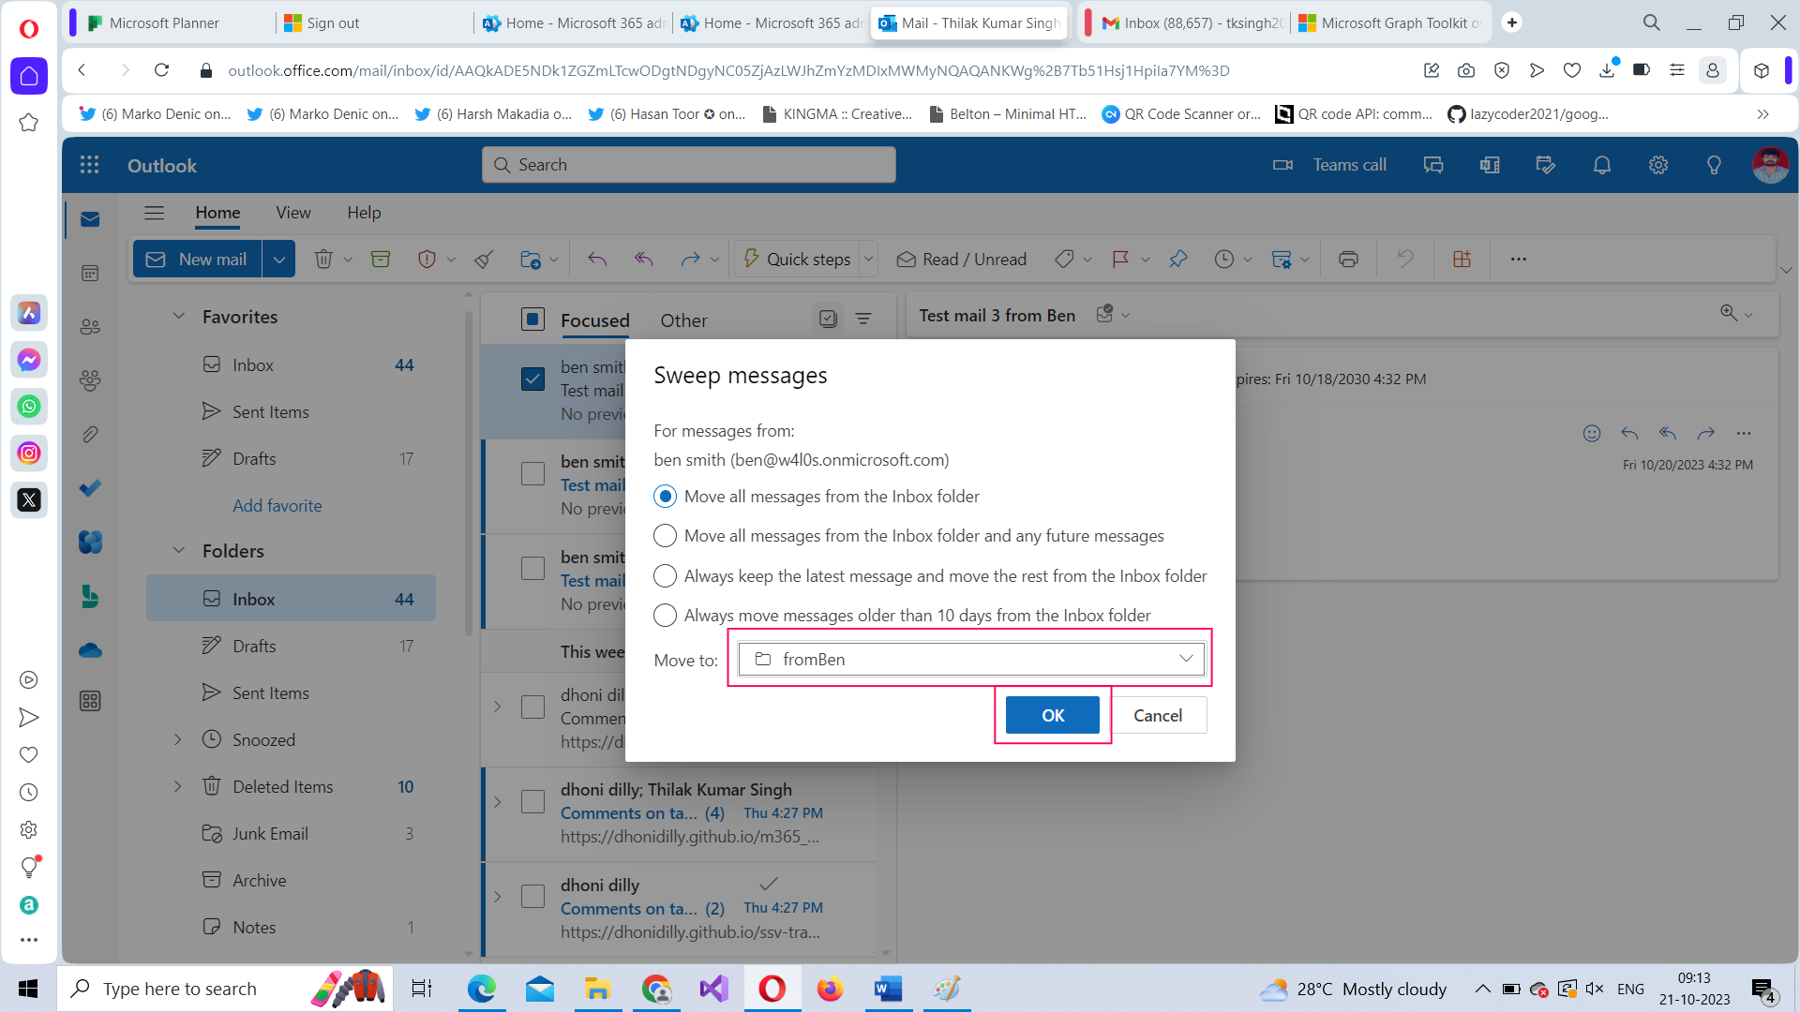
To understand sweep rules better, take the example of moving all the emails from the user called Ben to a separate folder.
Select an email from the user whose emails you are going to move to a separate folder, and then select the Sweep icon, as shown in Figure 18.
The Sweep messages pop-up opens, as shown in Figure 19.
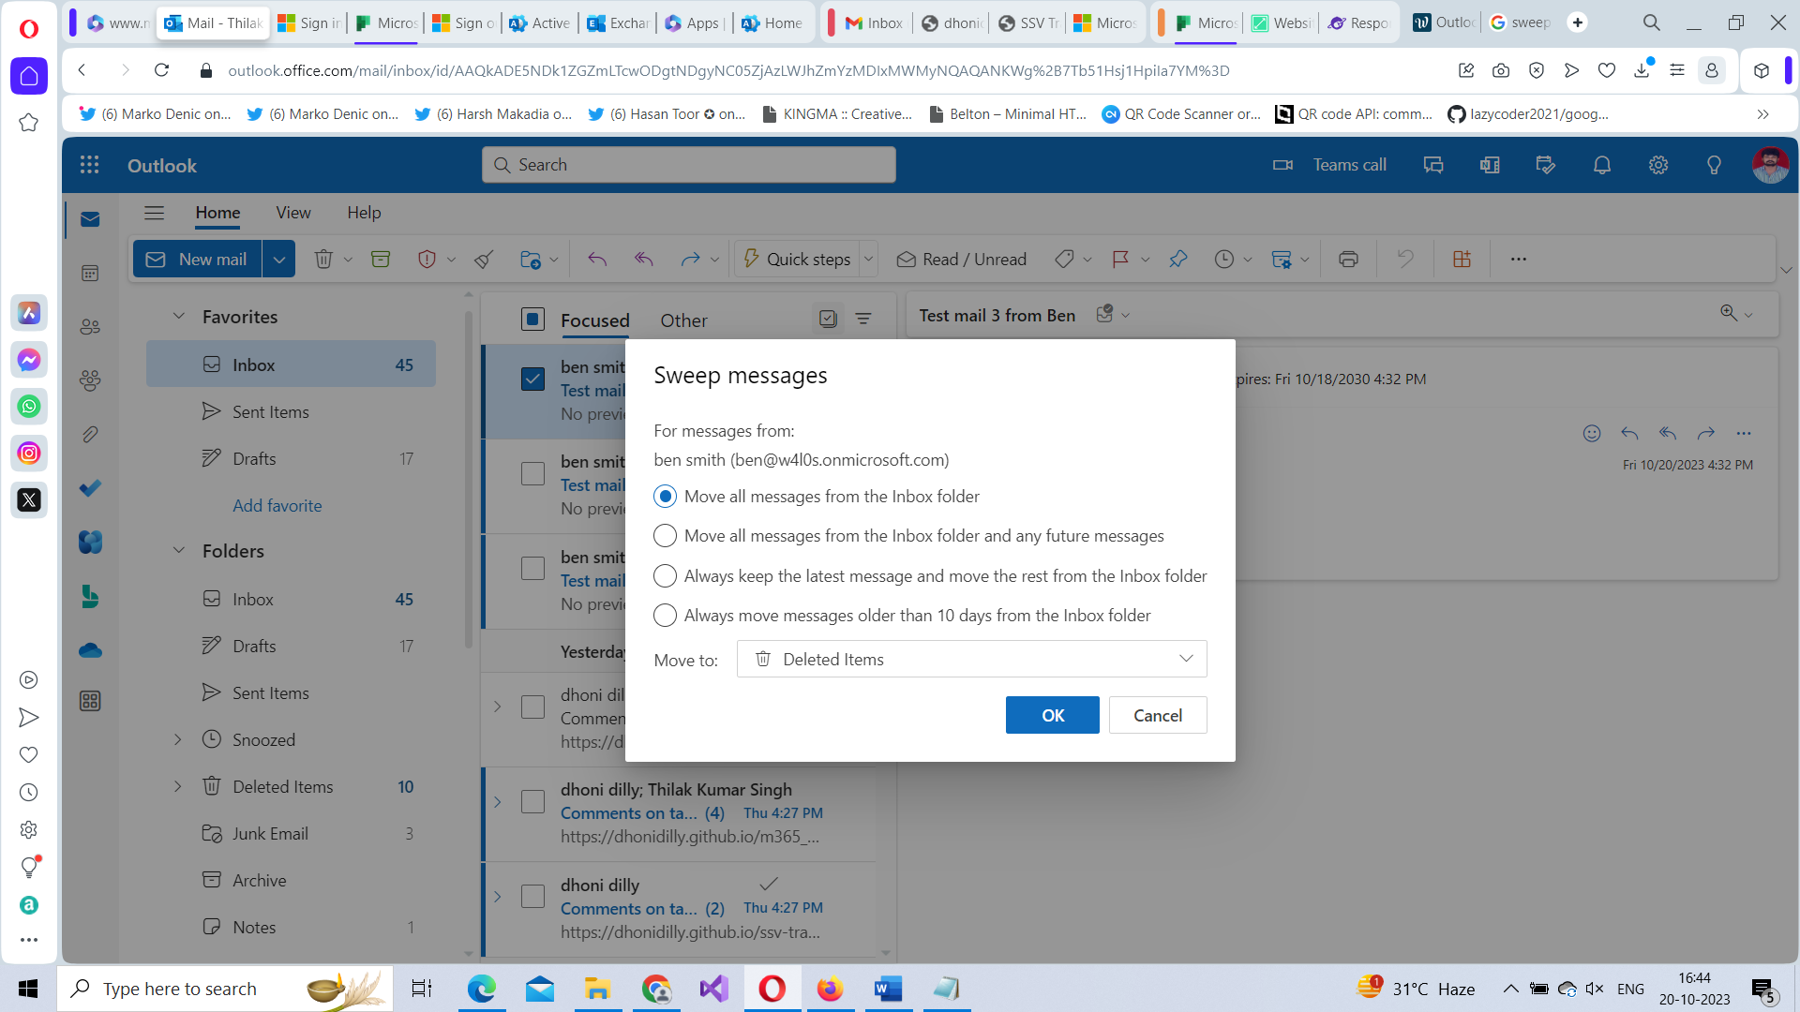
You are provided with four, self-explanatory options for moving the emails. All of them help you move emails out of your inbox and into a different folder, each with a slightly varying condition.
- Move all messages from the Inbox folder: This moves messages from the selected user into a folder that you choose. However, it does not apply to future messages.
- Move all messages from the Inbox folder and any future messages: This move applies to future messages as well.
- Always keep the latest message and move the rest from the Inbox folder: This move keeps the latest message (the one you just selected) in your inbox and moves the rest.
- Always move messages older than 10 days from the Inbox folder: This moves all the messages (from the selected user) older than 10 days out of the inbox.
Once you have selected the option for moving emails, select the folder where you want the emails to be moved to using the Move to dropdown, as shown in Figure 20.
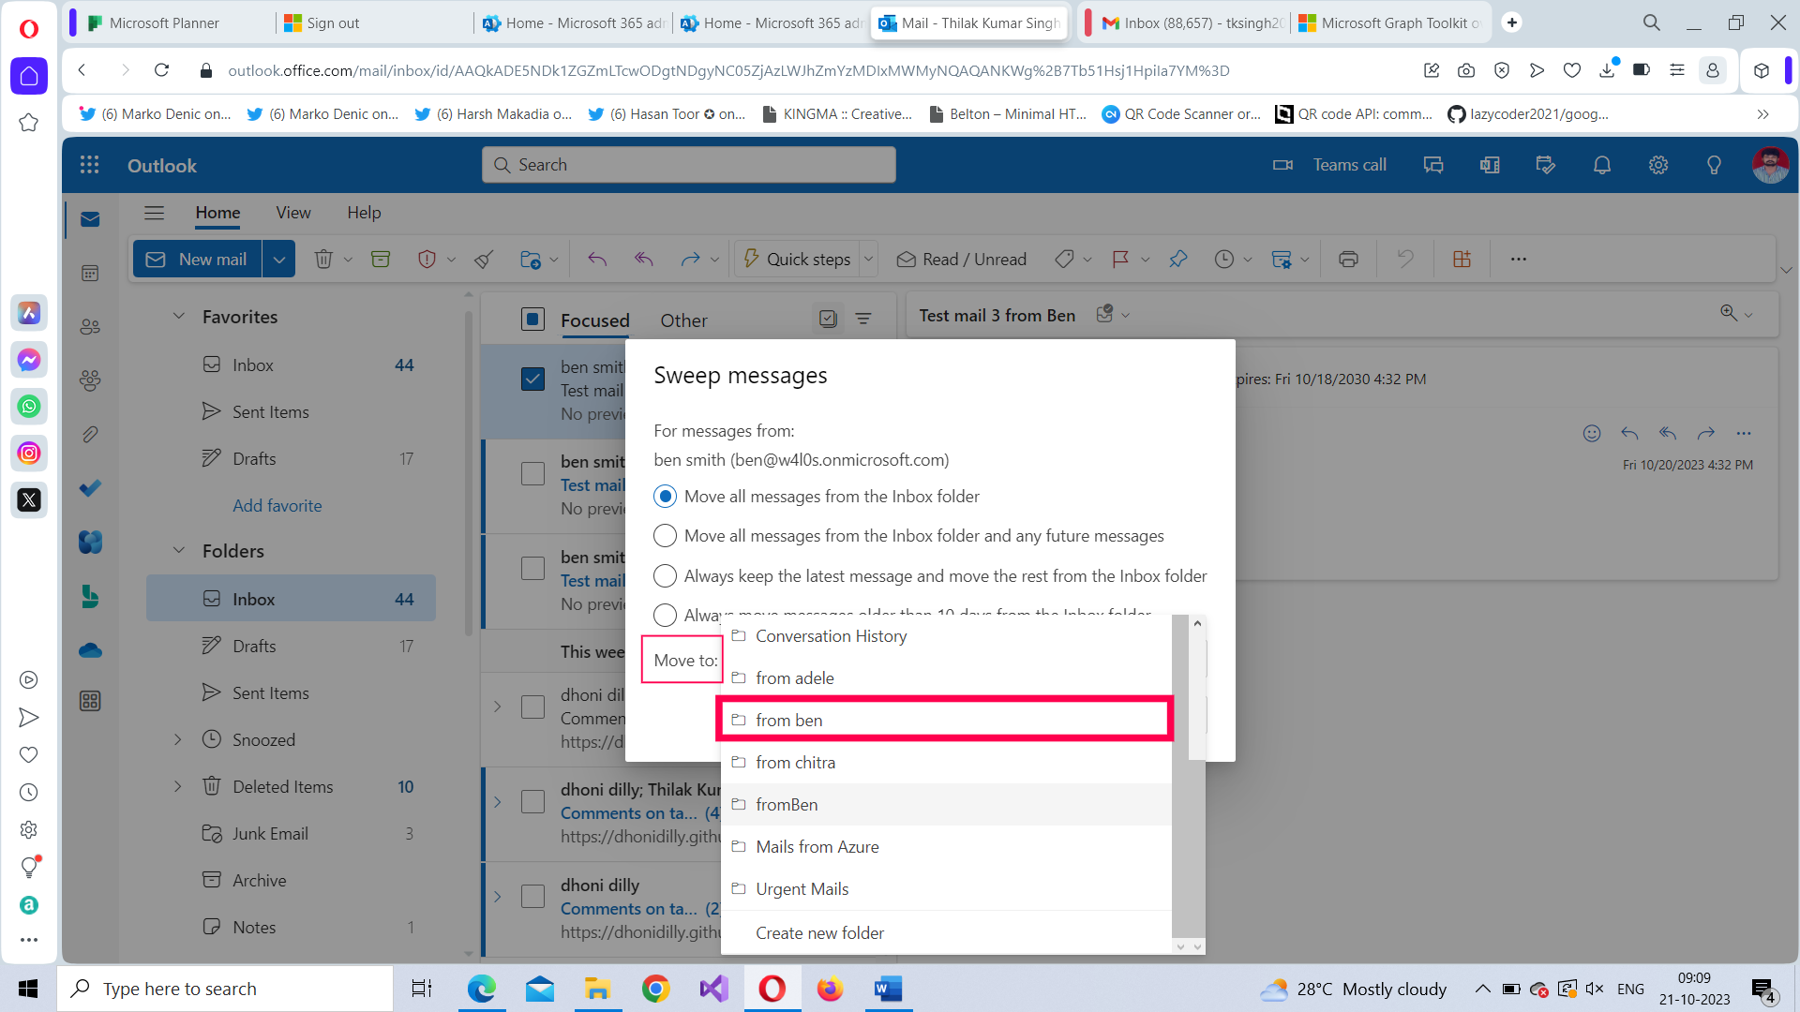
To confirm your action, select OK, as shown in Figure 21.
Note: The main object of sweep rules is to bulk-delete emails. That’s the reason Deleted Items is chosen as the default Move to folder. However, as you saw, you could also use it to move the emails to a different folder.
Categories
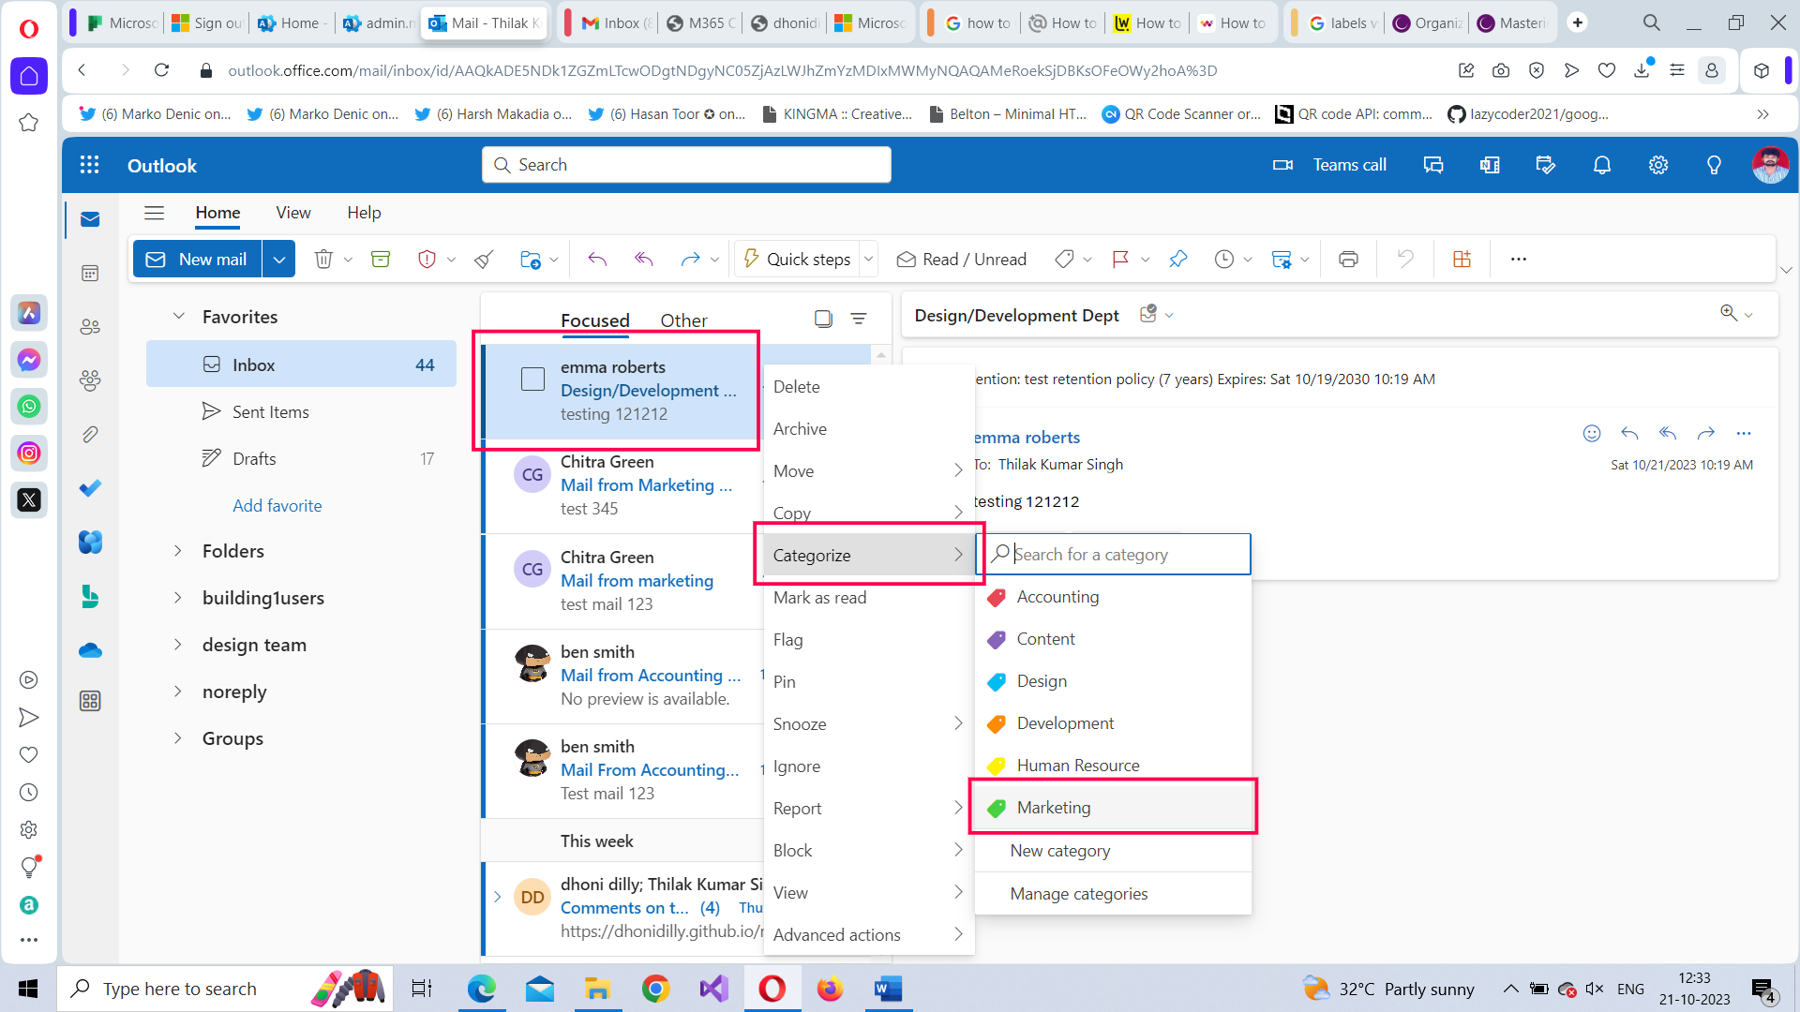
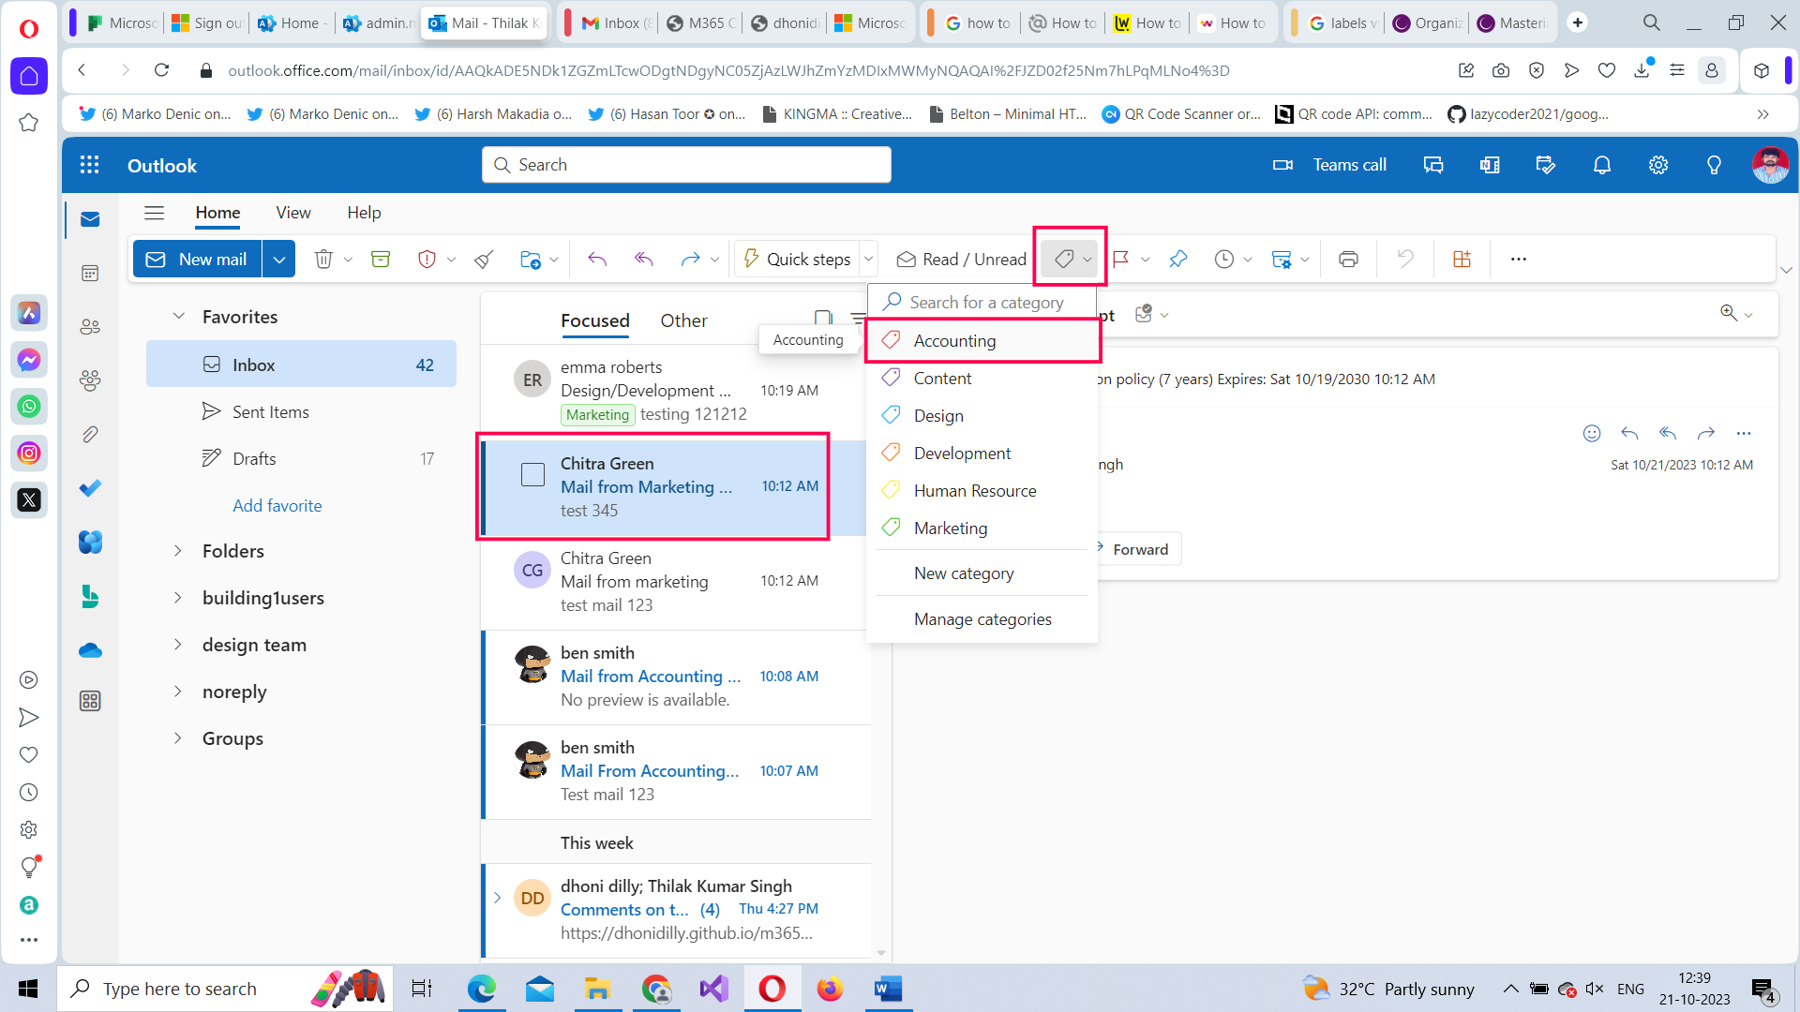
You can also use categories to group your emails. Categories help you organize emails based on the departments you interact with. For example, an accounting category can store all your interactions with the accounting department; a marketing category can contain all your interactions with the marketing department, etc.
To move an email under a specific category, do one of the following:
- Select the email by right-clicking on it, select Categorize. and then select the category you want to move the email to, as shown in Figure 22.
- Select the email, select the Categorize icon, and then select the category from the category dropdown that you want to move the email to, as shown in Figure 23.
Adding Categories Under the Favorites Folder
You can ensure the categories you are using show up under your Favorites folder by doing the following.
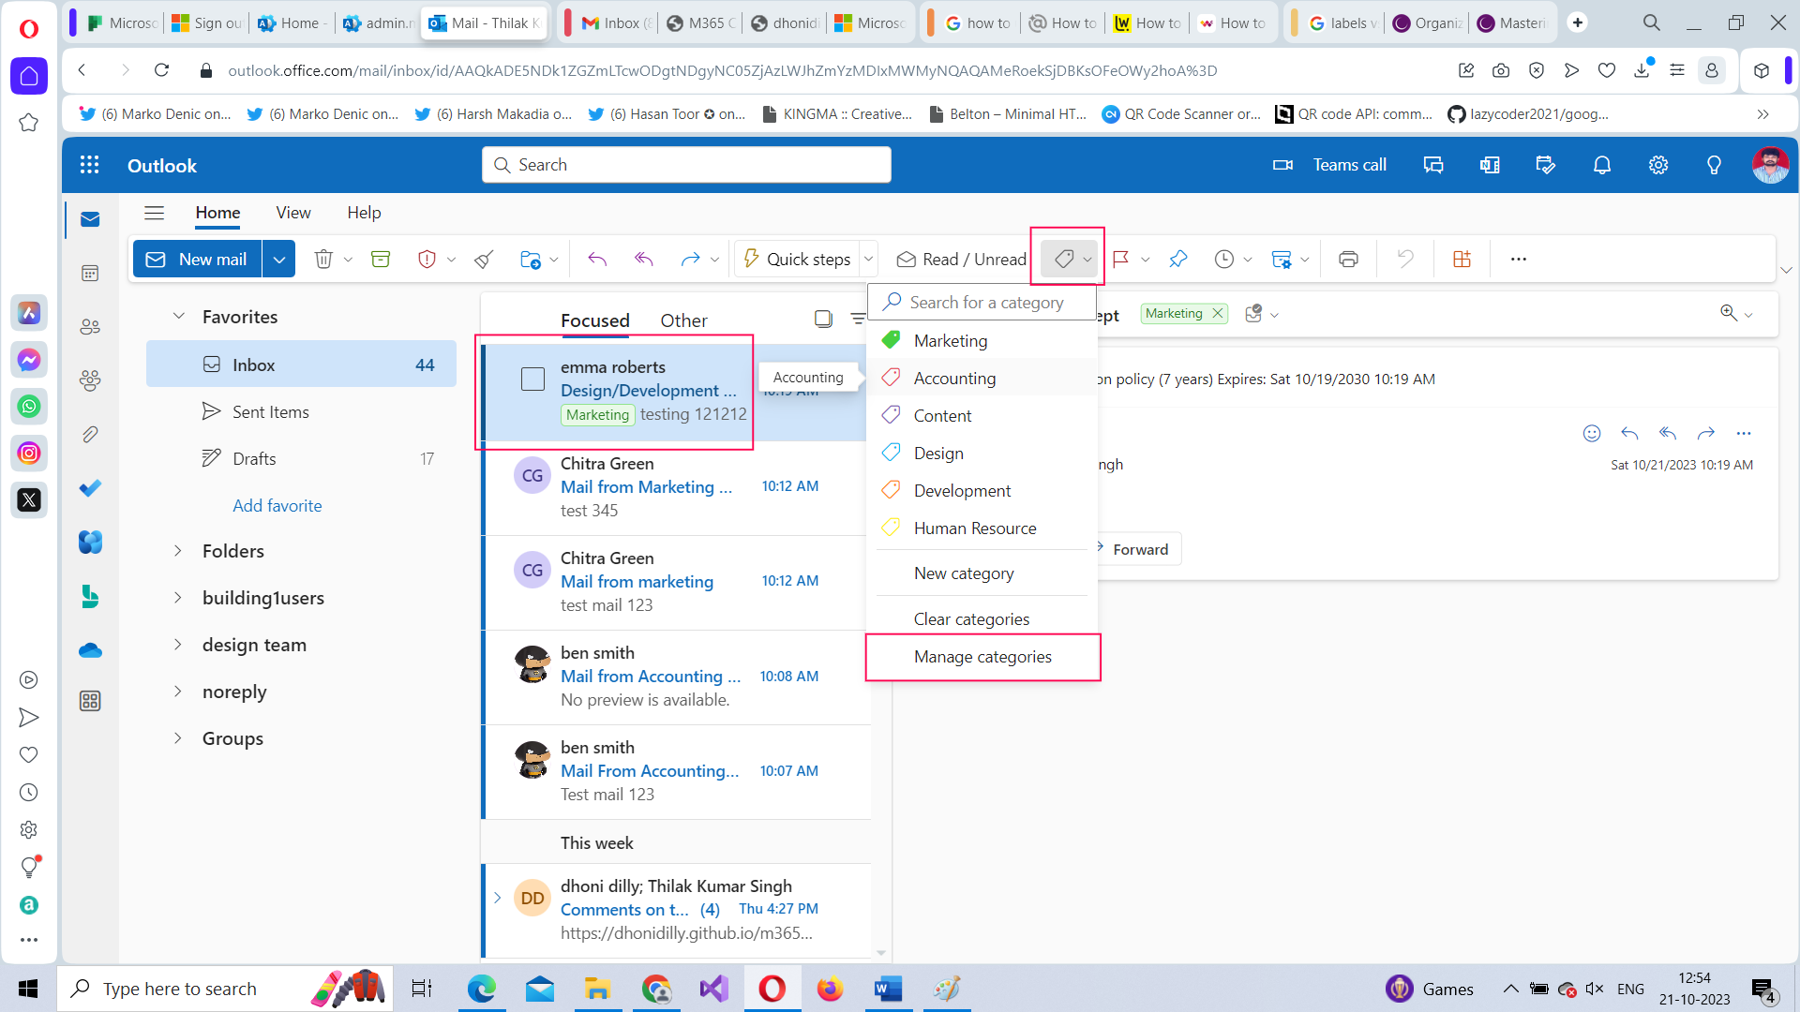
Select Manage categories using either of the following methods:
- Select the email > Categorize > Manage categories, as shown in Figure 24.
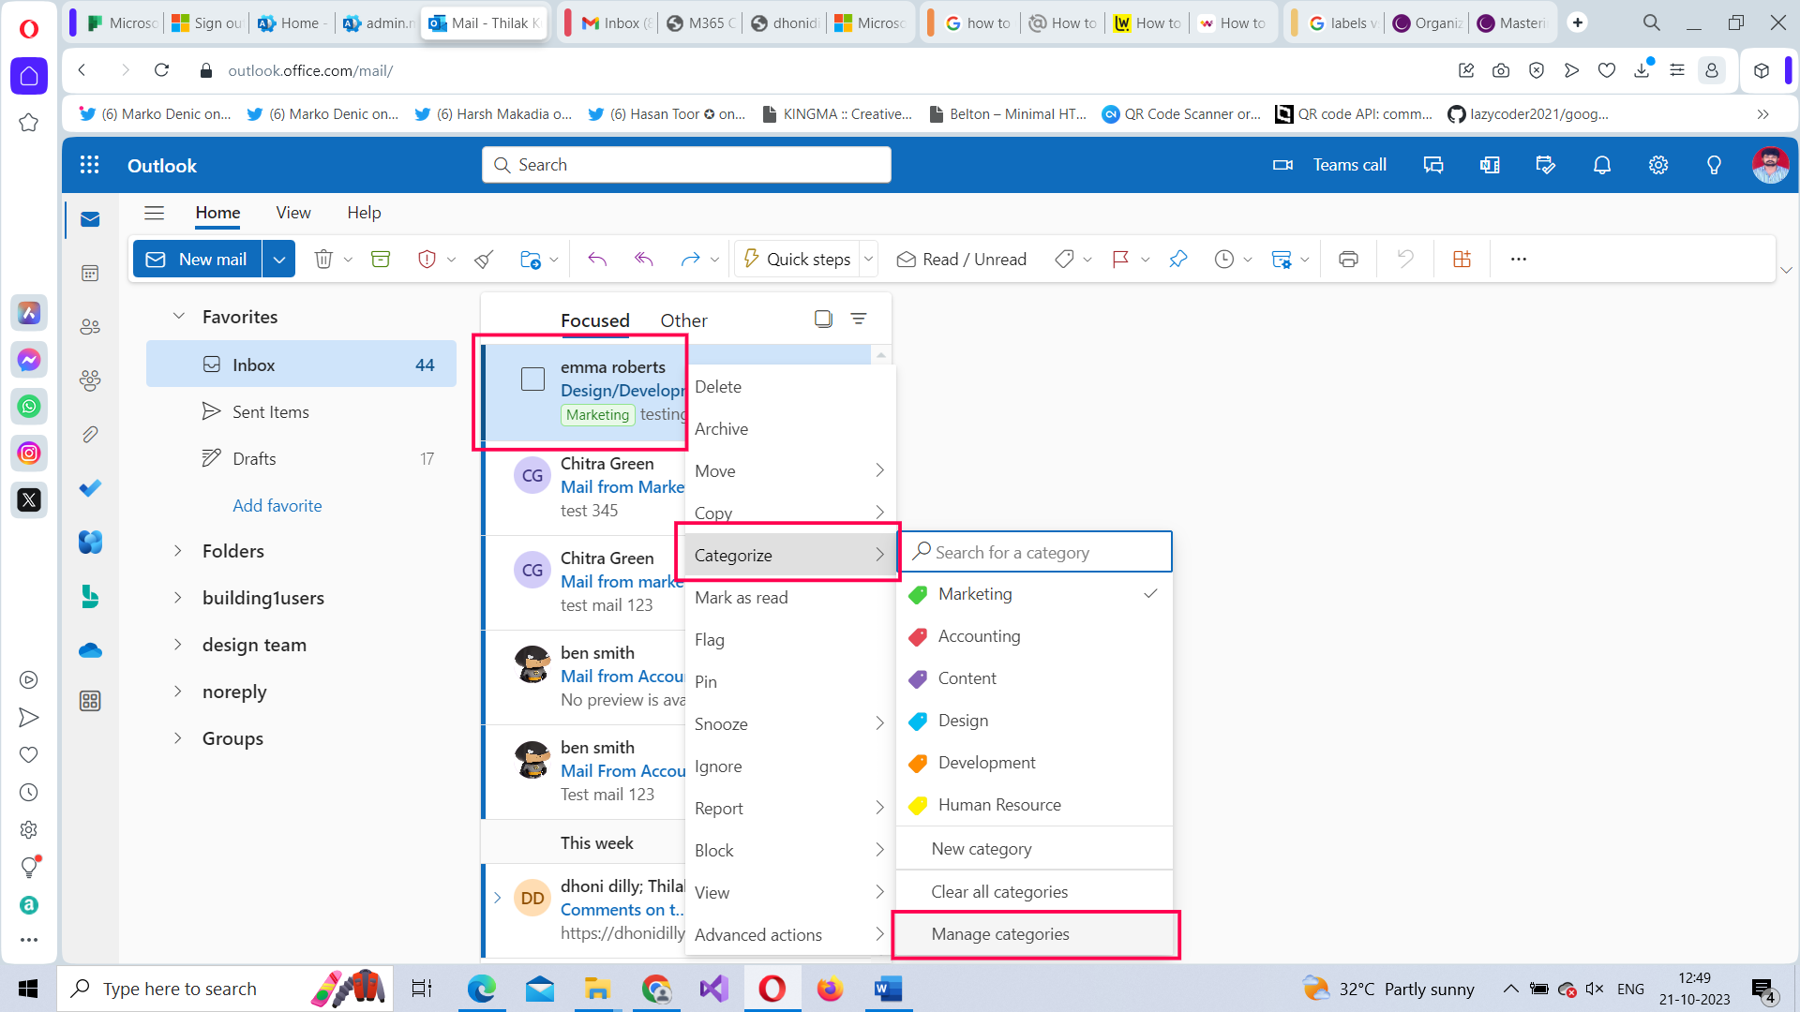
- Select the email, select the Categorize icon, and then select Manage categories from the category dropdown as shown in Figure 25.
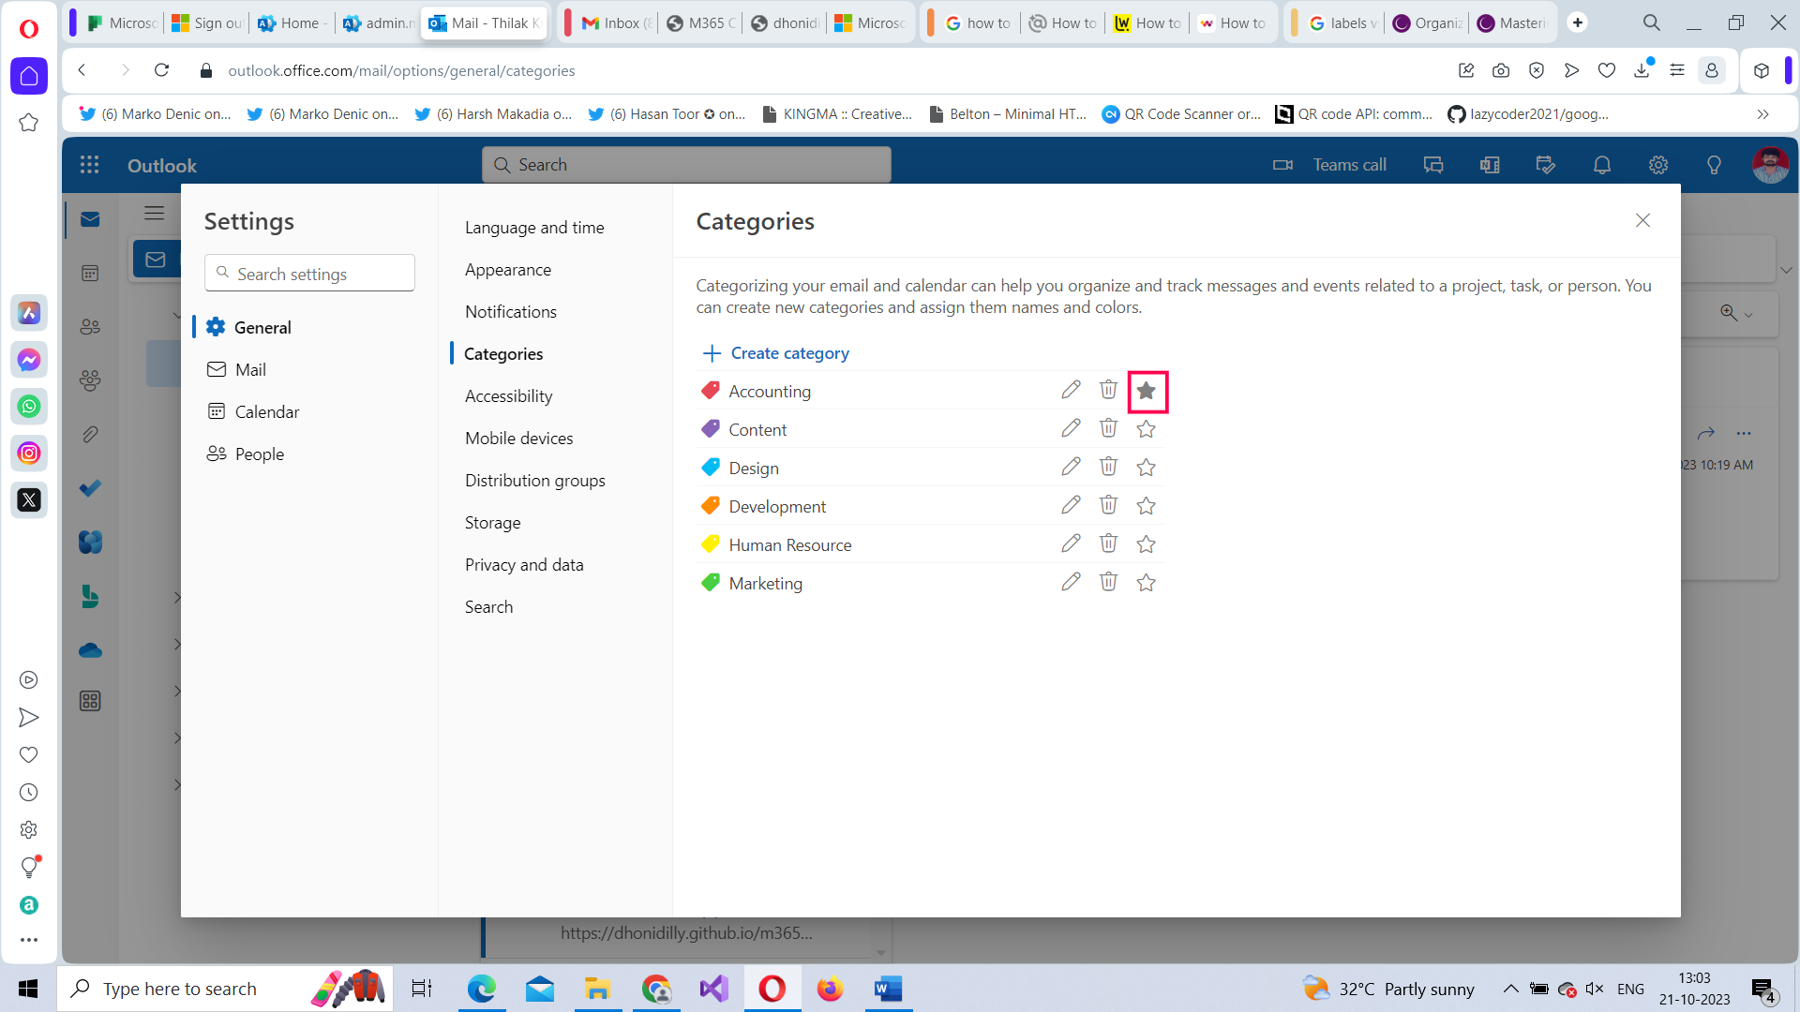
The Categories pane opens. Select the Star icon against the Category that you want to add to your Favorites folder, as shown in Figure 26.
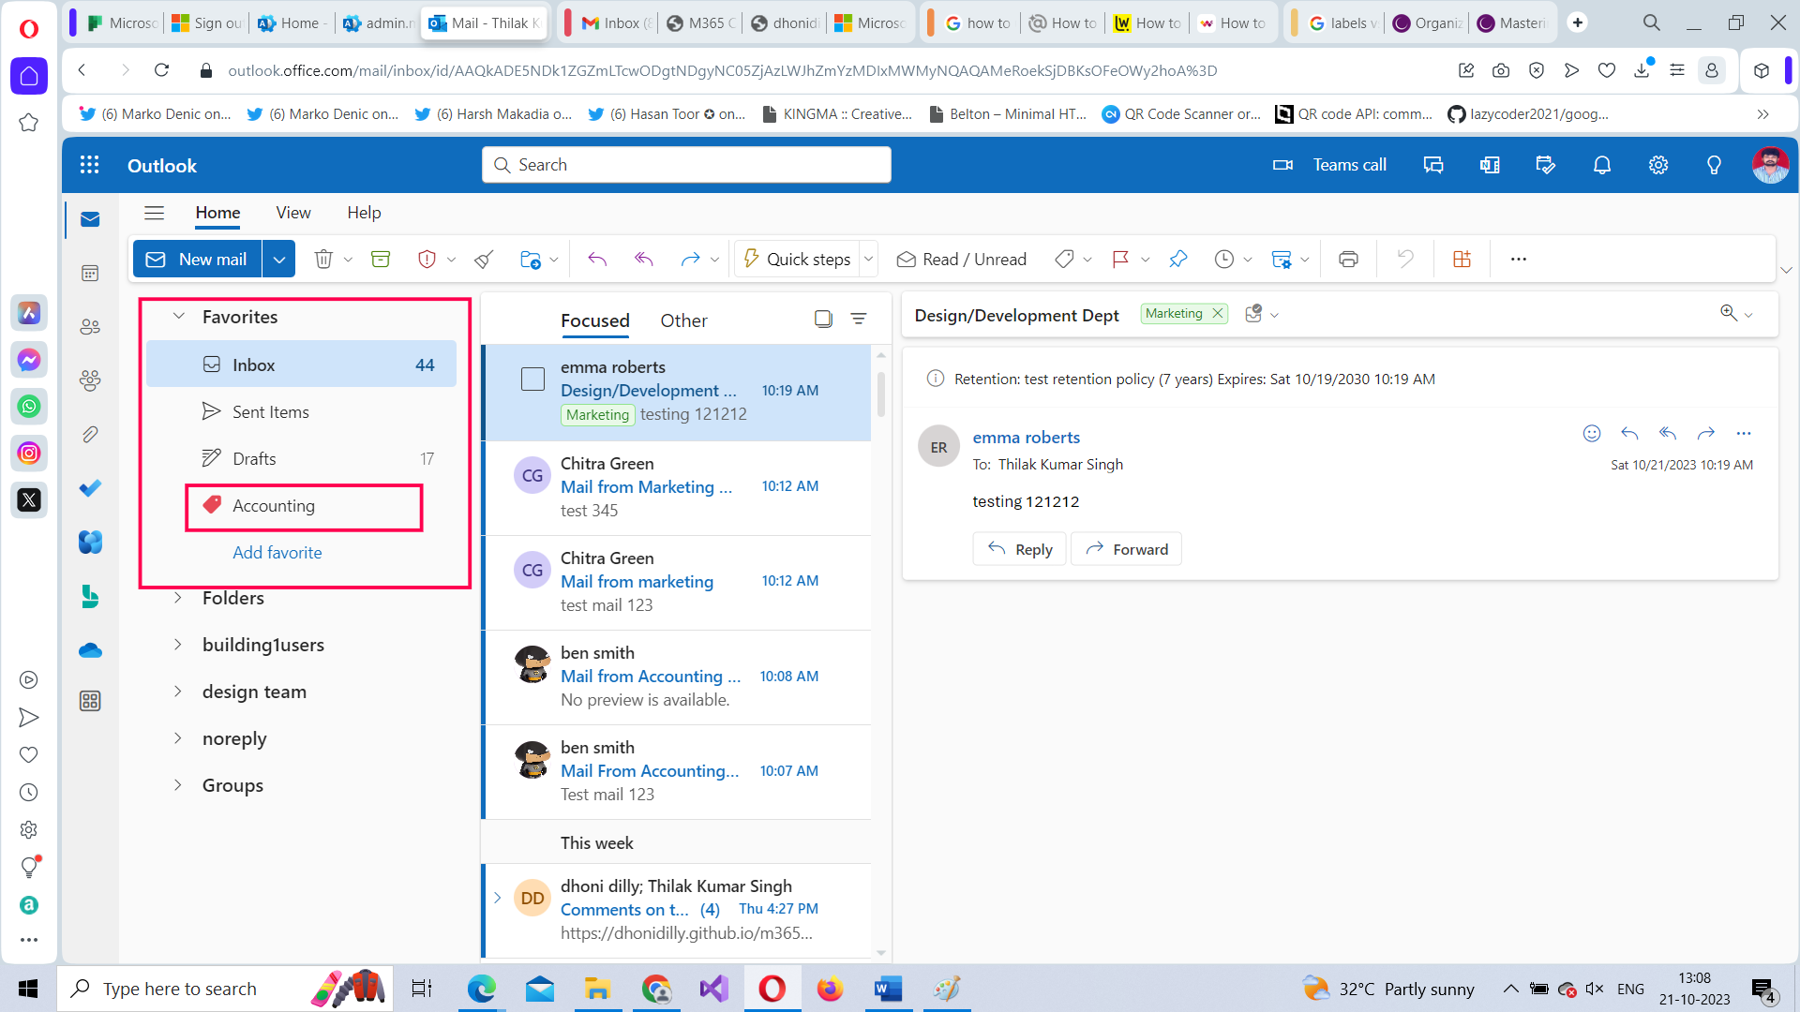
The Category you selected should show up under the Favorites folder, as shown in Figure 27. This will contain all the emails you add to the Accounting category.
Flagging and Pinning Emails
If you have too many folders in your inbox and just need to mark important emails so that they can be retrieved easily, you can either flag or pin emails.
Flagging
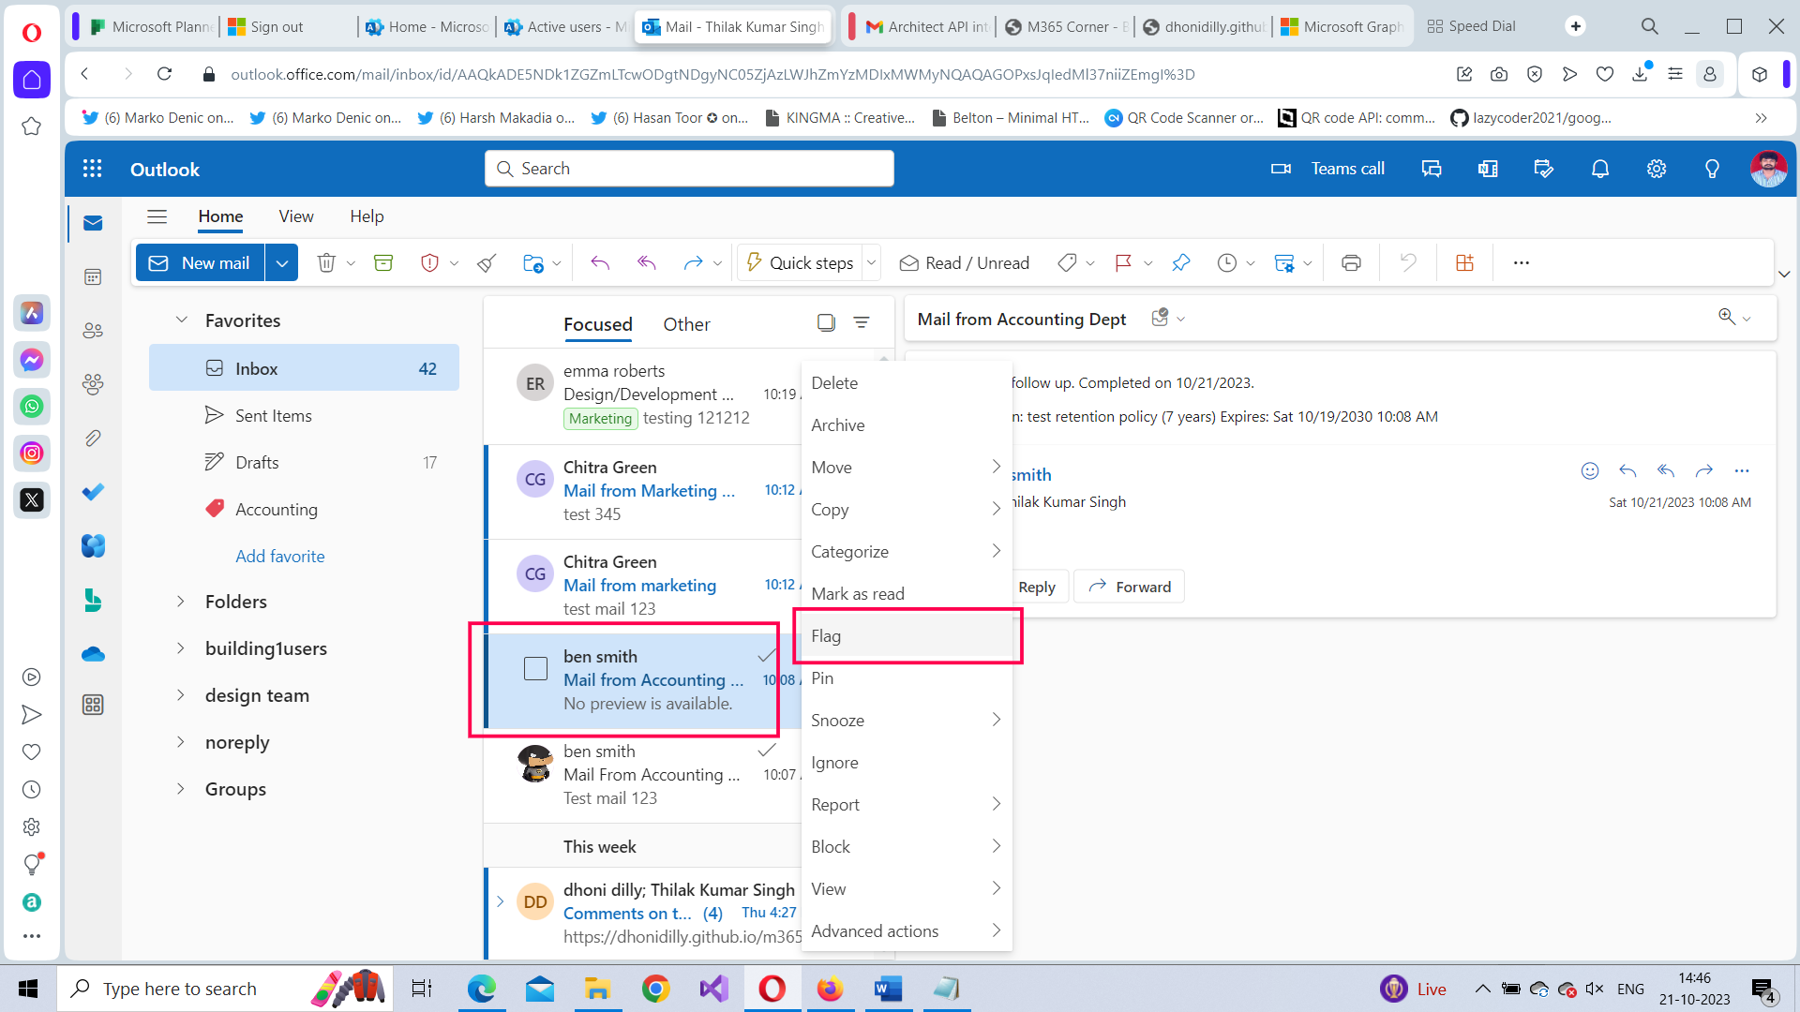
All emails you flag as important can be retrieved easily. Just ensure you don’t flag too many emails because this can lead to confusion. You can flag an email as important by doing one of the following:
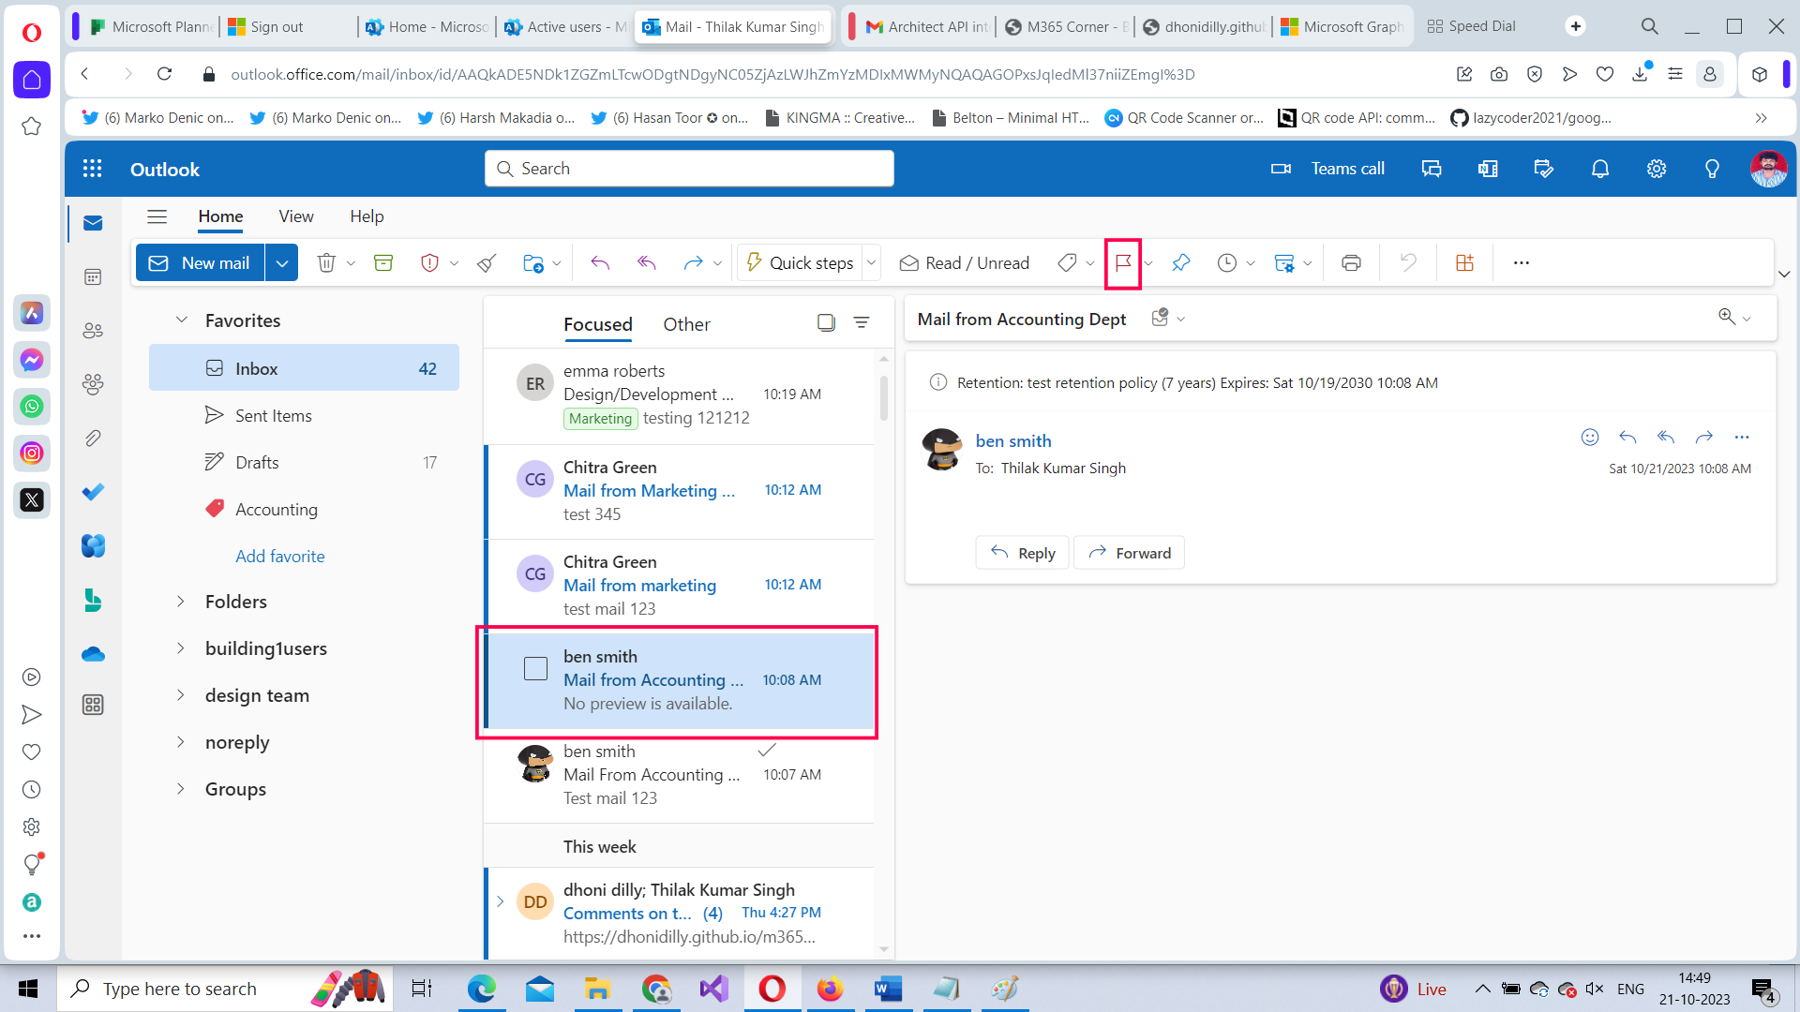
- Right-click the email, and then select Flag, as shown in Figure 28.
- Select the email, and then select the Flag icon, as shown in Figure 29.
Viewing Flagged Emails
To view all your flagged emails:
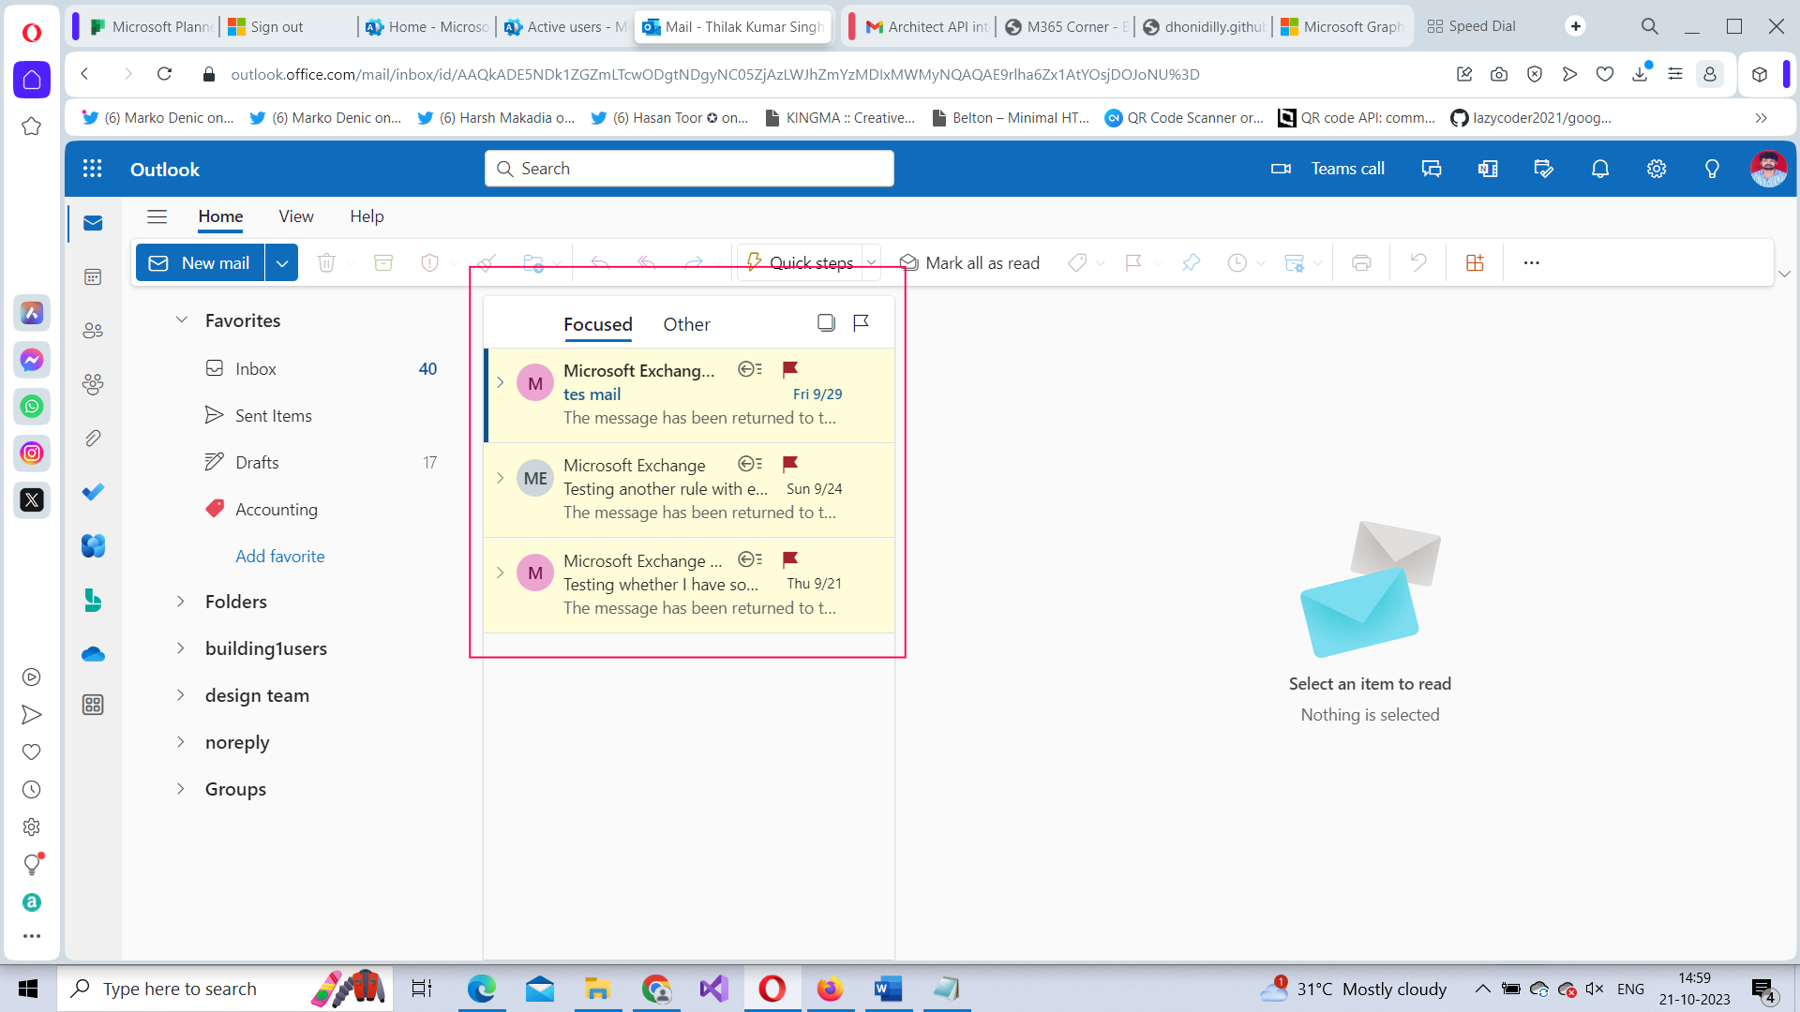
- Select the filter icon, and then select Flagged, as shown in Figure 30.
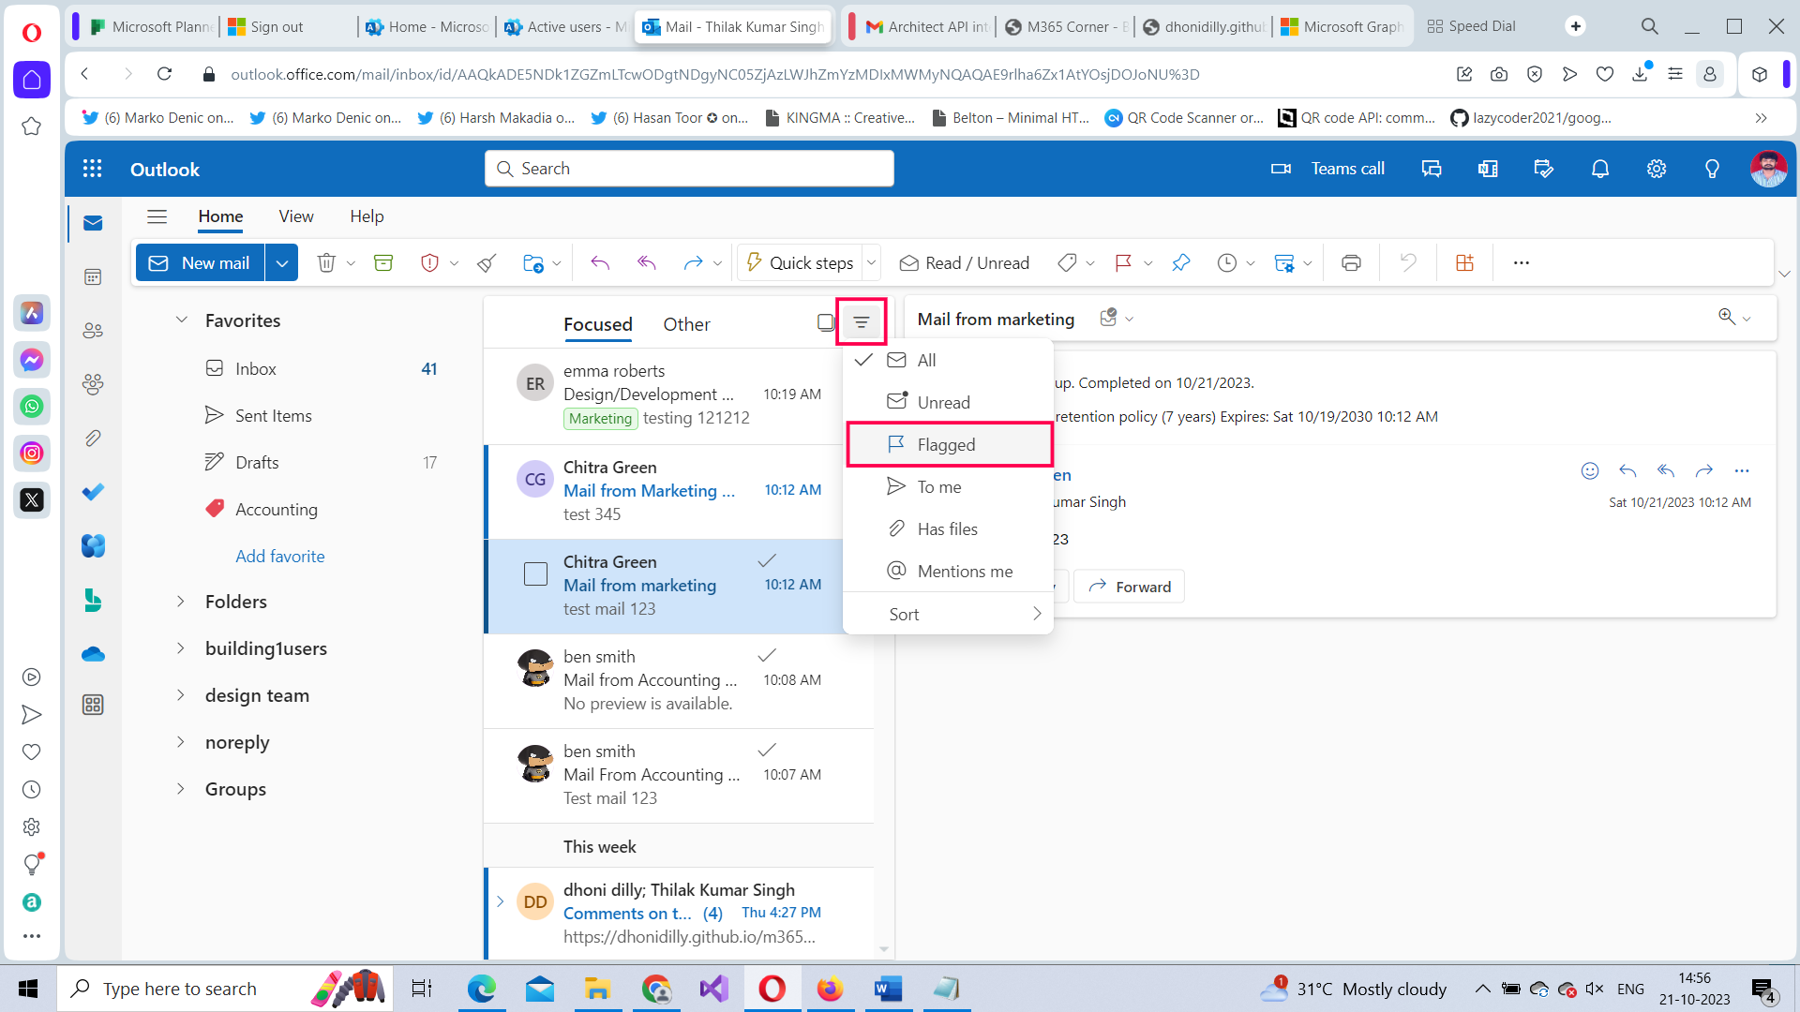
- All your flagged emails get listed, as shown in Figure 31.
Pinning
Pinning is another option you can resort to for marking emails. Ensure you only pin important emails. This is because when you pin emails, they stay pinned to the top of your inbox, appearing even above your latest emails.
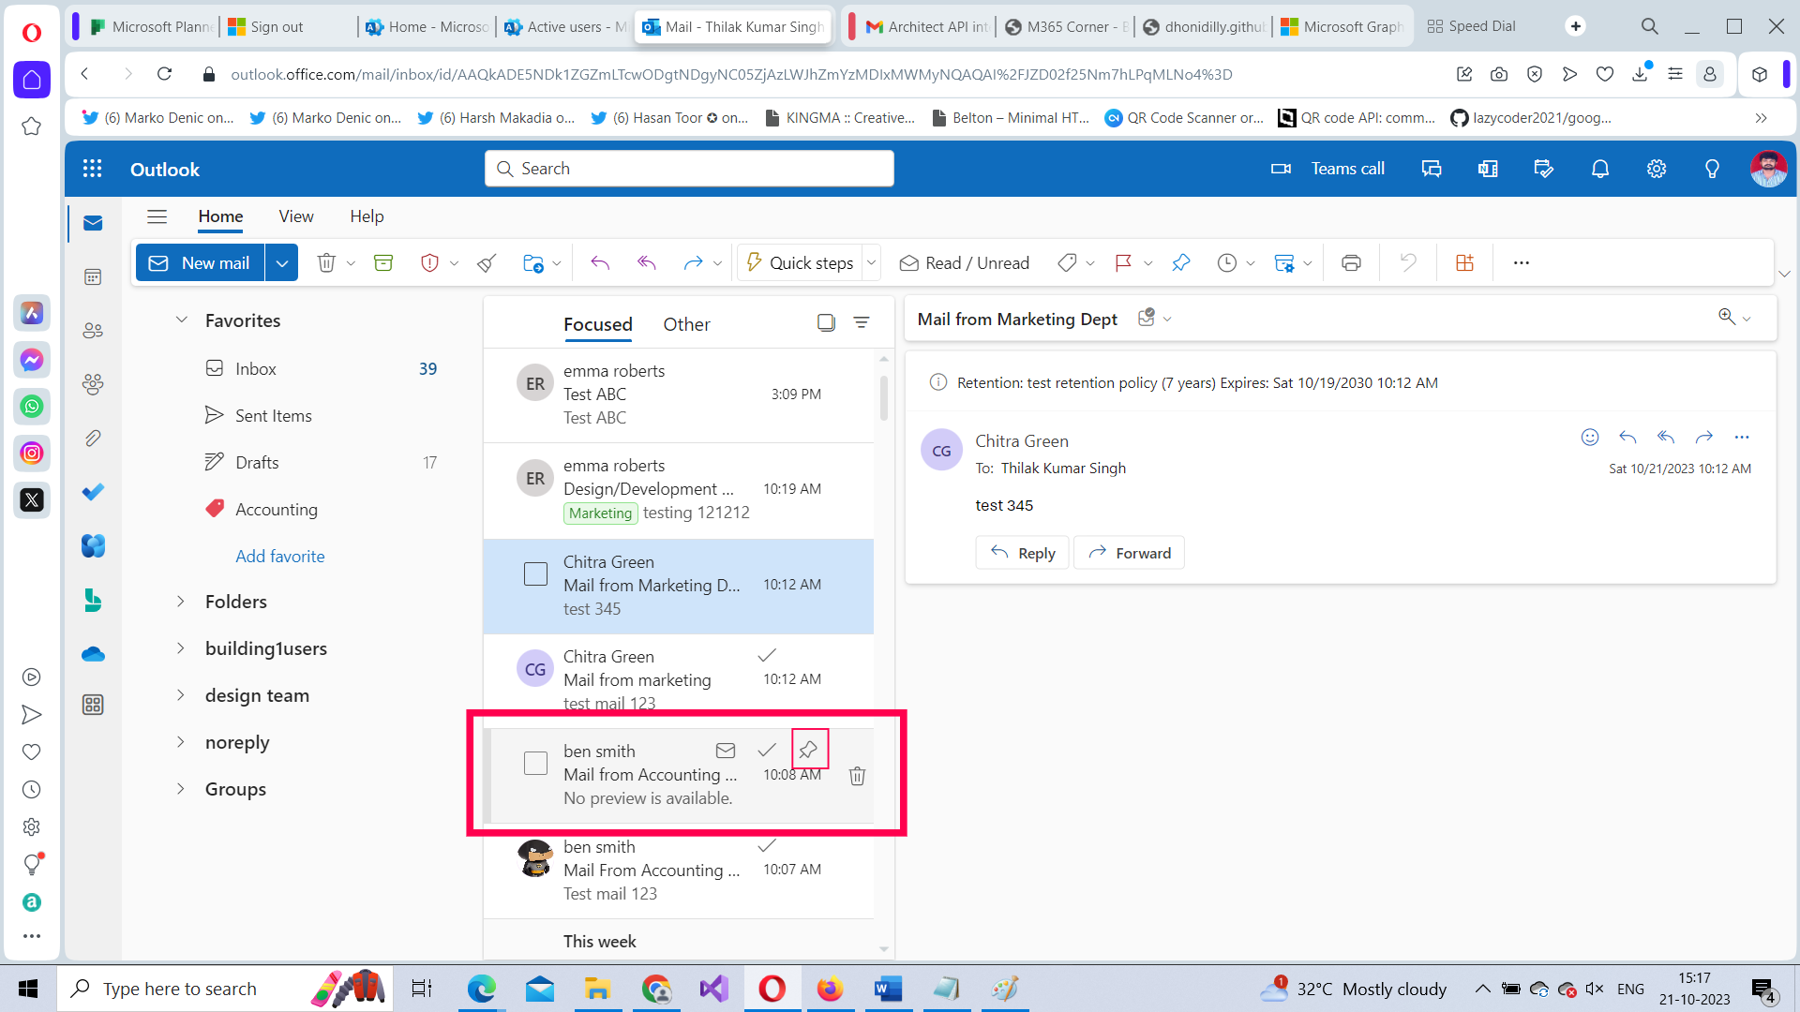
To pin an email to your inbox, do one of the following:
- Select the Pin icon, which appears when you hover over the mail as shown in Figure 32.
- Right-click the email, and then select Pin, as shown in Figure 33.
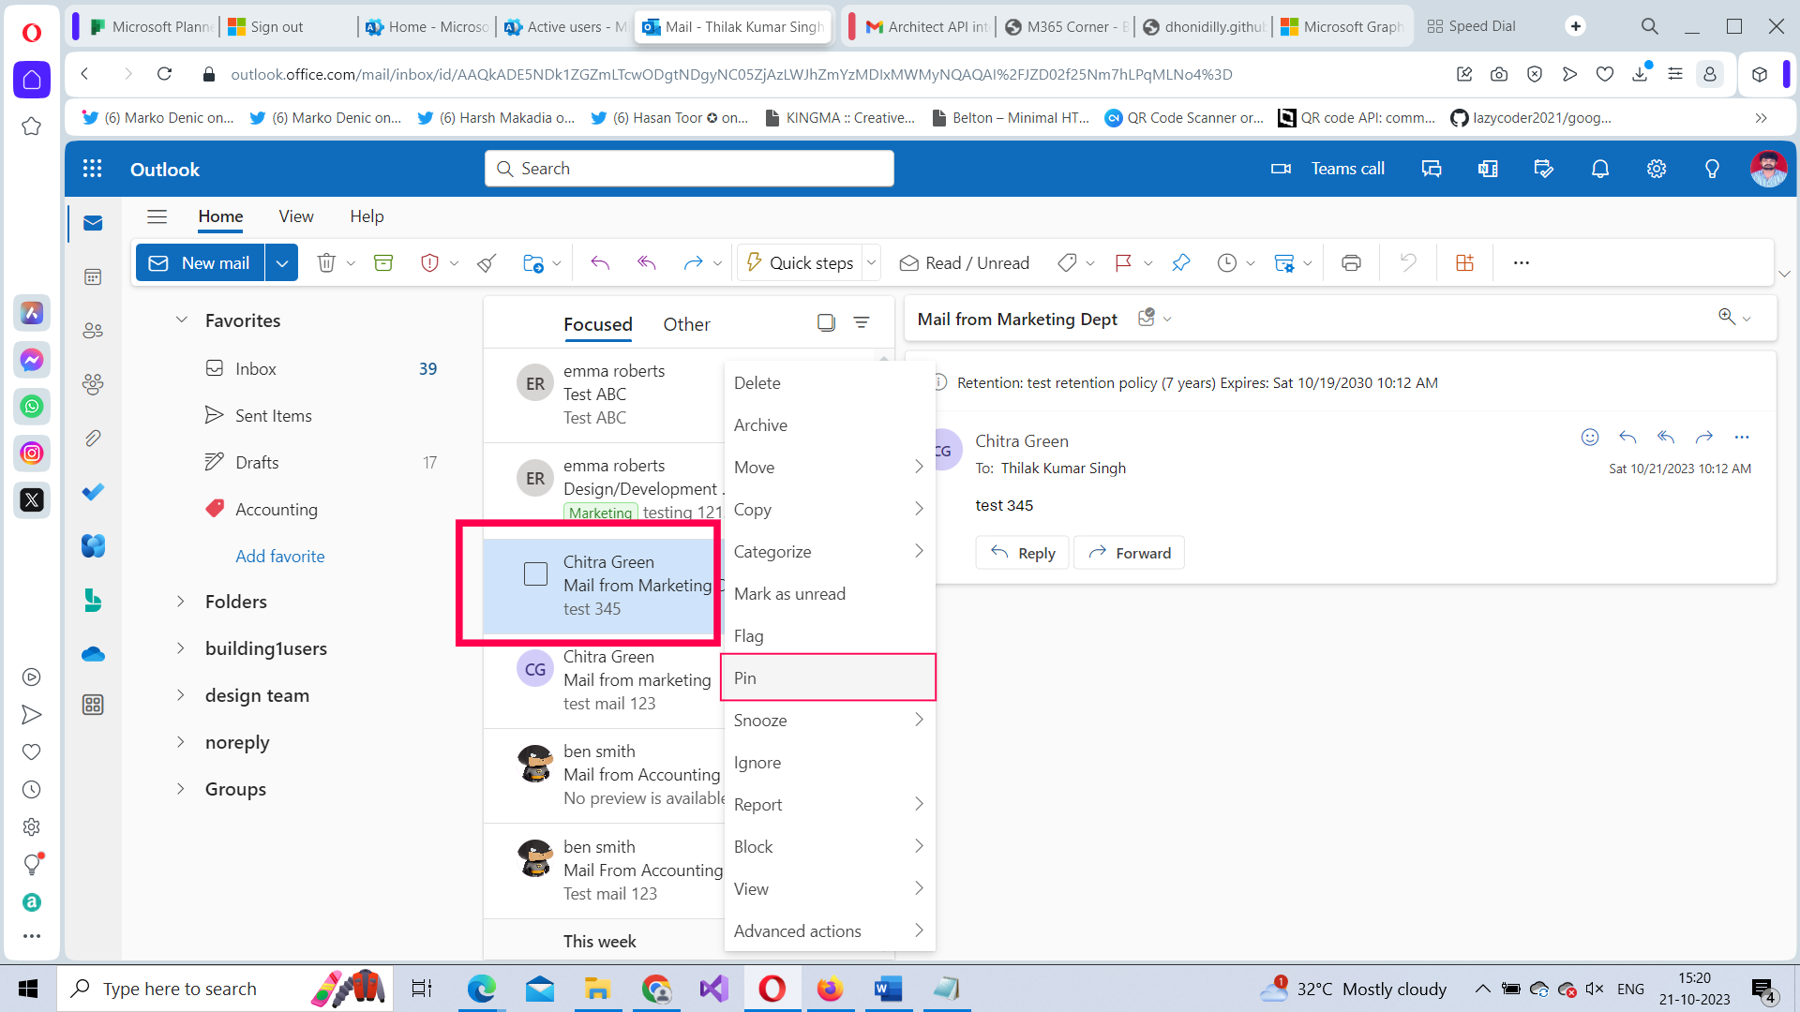
- Your pinned emails will appear at the top of your inbox, as shown in Figure 34.
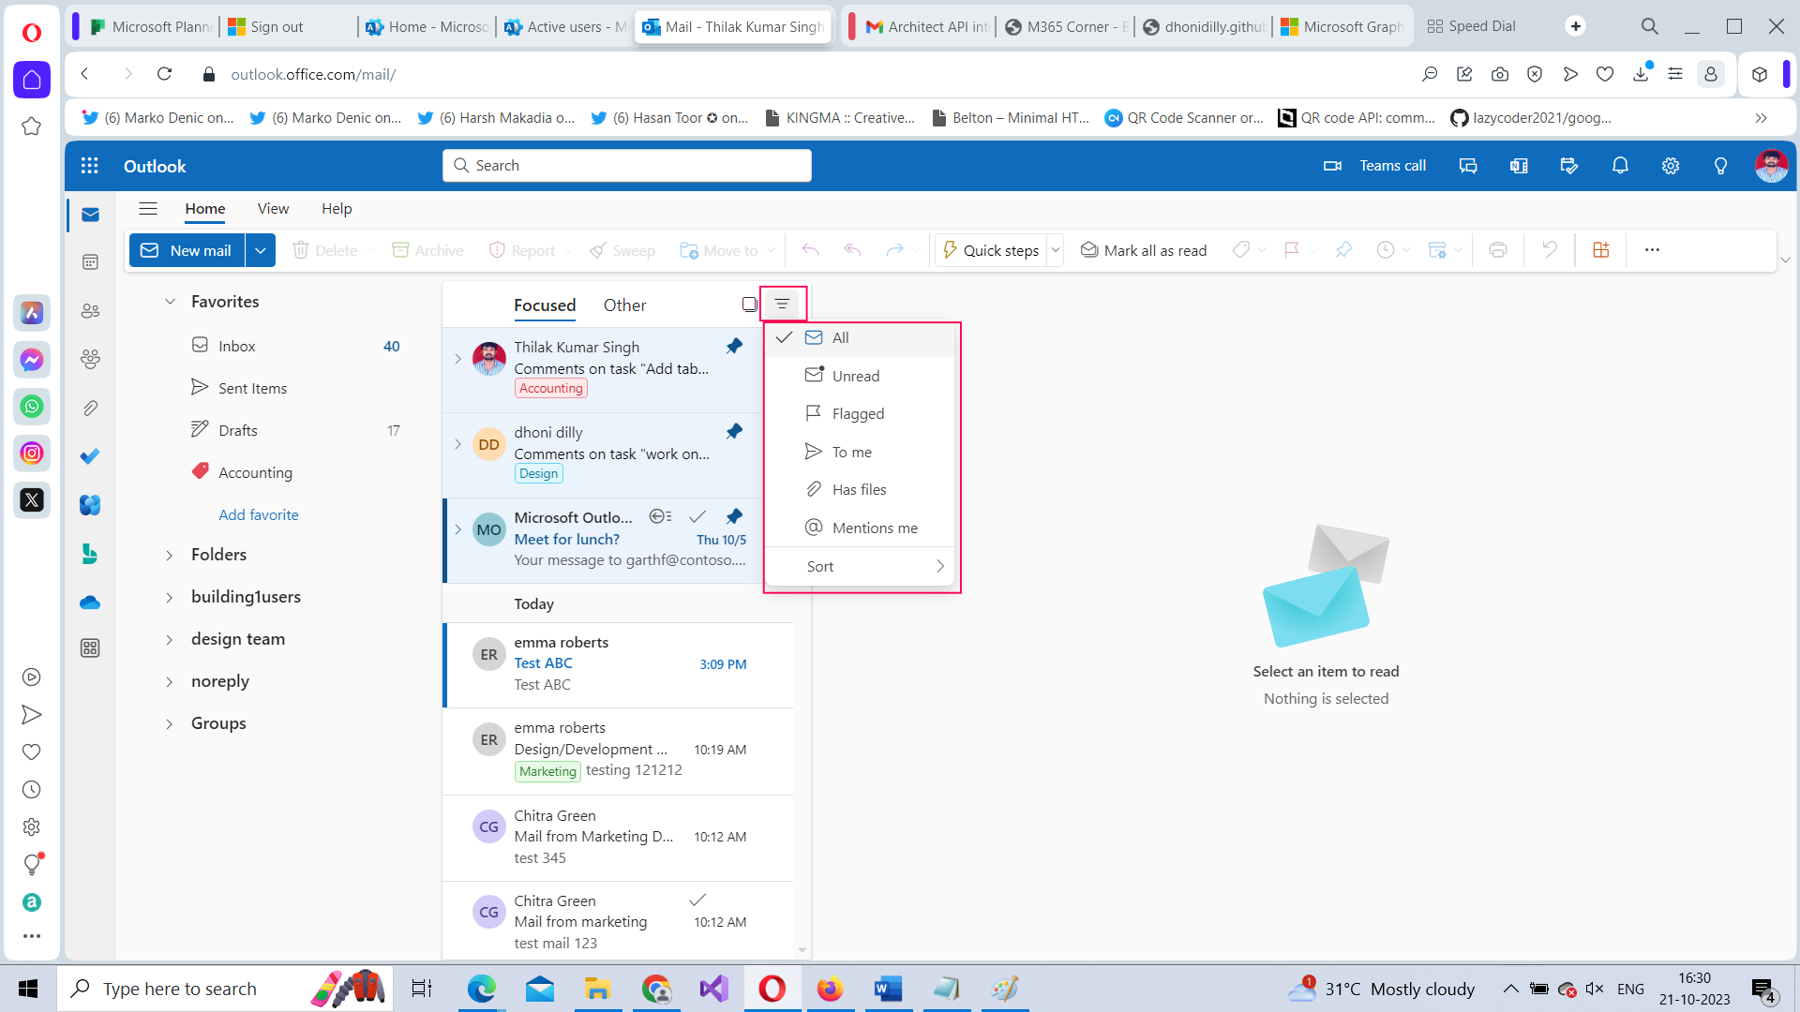
Filter-Based Sorting
You can also sort your inbox emails by using the filter-based sort shown in Figure 35. This enables you to sort emails based on the date, importance, size, and subject of the emails. You can also sort emails based on the sender and by changing the sorting order (newest on top or oldest on top). The best way to sort your emails would be to sort them by date and have the sort order as Newest on top.
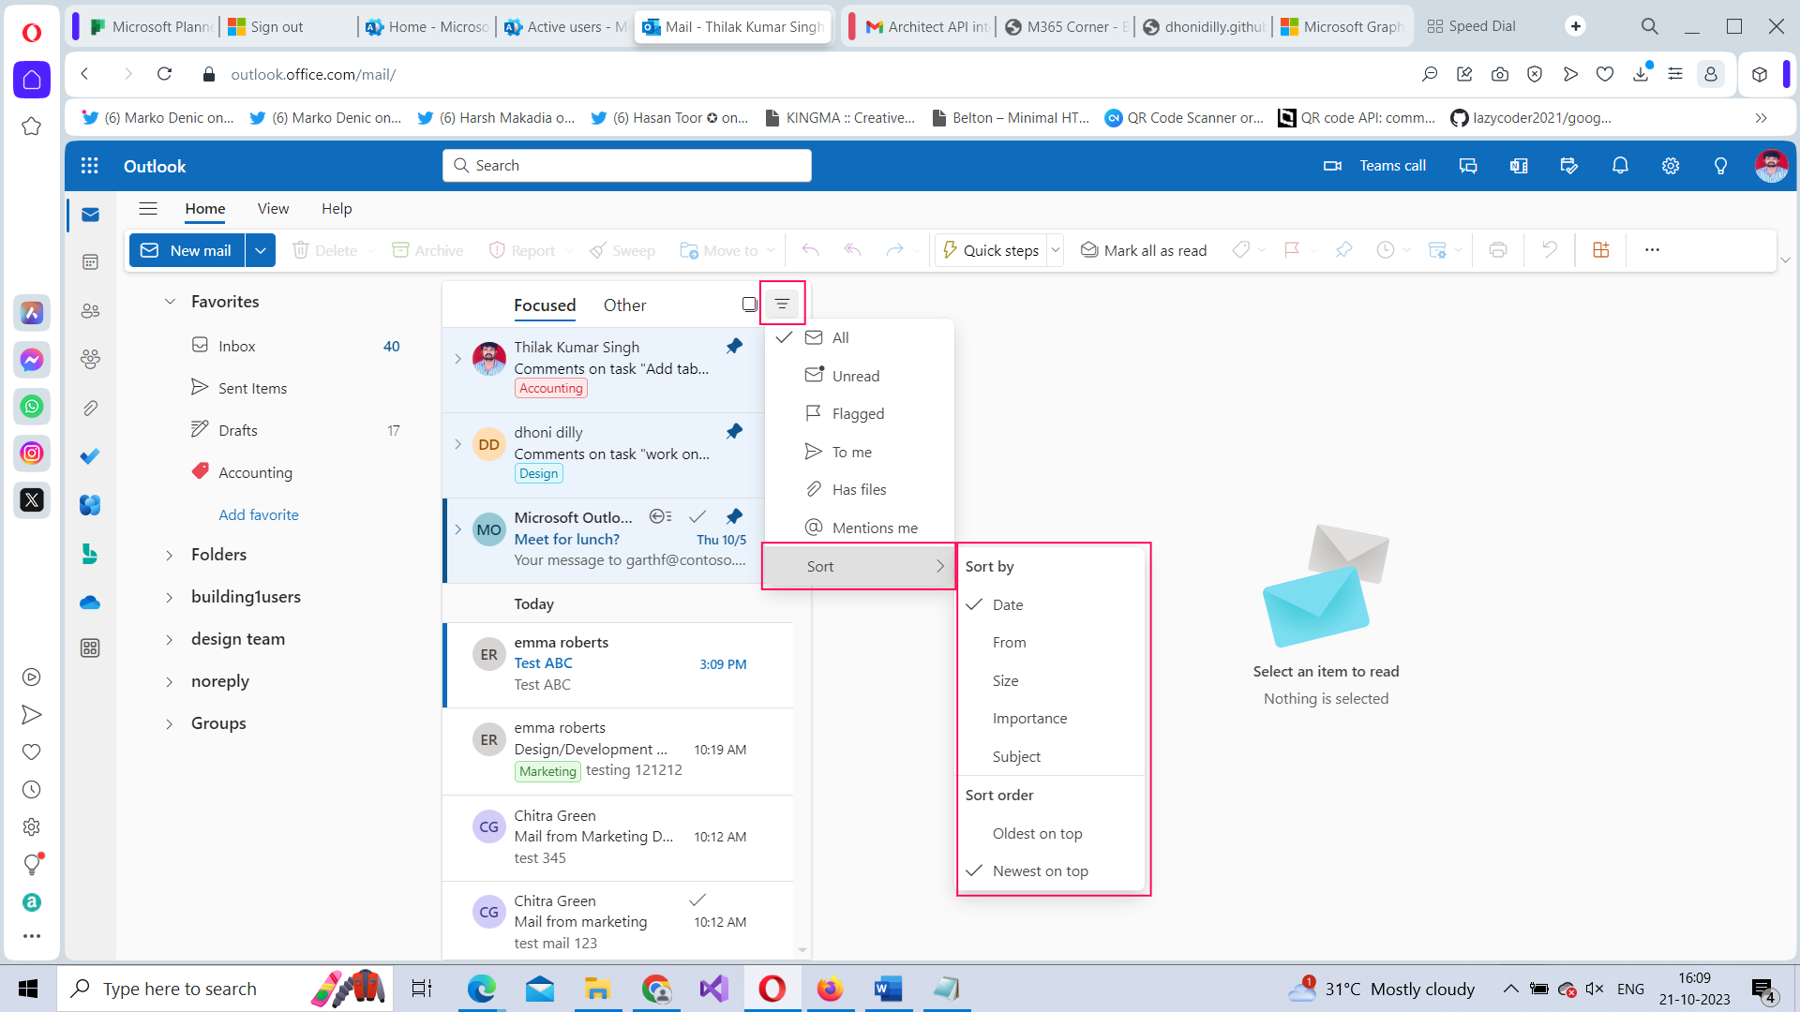
The filter also allows you to filter your inbox for the following emails (as shown in Figure 36):
- Unread: Emails you haven’t opened yet.
- Flagged: Emails flagged by you as important.
- To me: Emails that were directly sent to you.
- Has files: Emails in your inbox with attachments.
- @Mentions me: Emails in which you were mentioned.
Final Thoughts
Keeping your inbox organized is important. It saves you time spent searching for important emails amongst a pile of others that might hardly relate to you. Therefore, implement the inbox organization tips discussed in this article, so that the next time you miss out on an important email, you can track it down easily.
For Those Who Like to Watch and Learn
The following video is a 15-minute version of this article. It shows you how to organize mail in Microsoft 365 Outlook on the web. It also explains how you can create folders, inbox rules, sweep rules, categories, flag/pin emails, and filter mail based on the default filters available.

Thilak Kumar Singh
Thilak Kumar Singh is a trainer who believes in teaching about IT in the simplest possible way with more emphasis on visual mode of learning. He firmly believes in democratizing IT knowledge, especially of Microsoft solutions, in which he specializes as a trainer and consultant.
He observes that in this era dominated by cloud computing and collaboration, where IT has reached users unimaginable hitherto, IT knowledge must not be an obscure science, but rather be available to anyone who wishes to engage with IT.