Build a Complete Mobile Audio Player With Track List

Power Apps is a low-code platform developed by Microsoft that you can use to create custom business applications, from simple data entry forms to complex line-of-business systems. With Power Apps, you can build apps that integrate with data sources, including SharePoint, Excel, Dynamics 365, and more. The platform offers a drag-and-drop interface and pre-built templates and connectors, making it easy to design and deploy your applications quickly.
In this article, I’ll show you how to build a Power Apps canvas application from within SharePoint that integrates a SharePoint list backend for storing and retrieving images and audio files. The app that you create will have labels, icons, navigation, image containers, and other elements. You’ll use a layout template and customize the built-in audio control to have a distinct appearance and behavior.
By following the step-by-step instructions in this article, you will be able to create a powerful and fully functional canvas application that's integrated with SharePoint. By using SharePoint lists for storing and retrieving images and audio files, you can ensure that your app is efficient and easy to manage. The customization options available through Power Apps make it possible to create a unique and visually appealing user interface that's tailored to your needs. Additionally, you can customize the built-in audio control for a distinct appearance and behavior that will enhance the user experience. With the help of this article, you can create an application that's sure to impress and provide a valuable tool for your organization.
To begin, you need to have:
- A Microsoft 365 license or Microsoft 365 developer account.
- A basic understanding about SharePoint (site, list and document library) and Power Apps development.
The high-level sequence of tasks is as follows:
- Create elements in SharePoint.
- Design and configure the application interface and controls in Power Apps.
Creating a Track List, Picture Library, and Document Library in SharePoint
First, you’ll build the elements in SharePoint.
Step 1: Build the Track List in SharePoint List
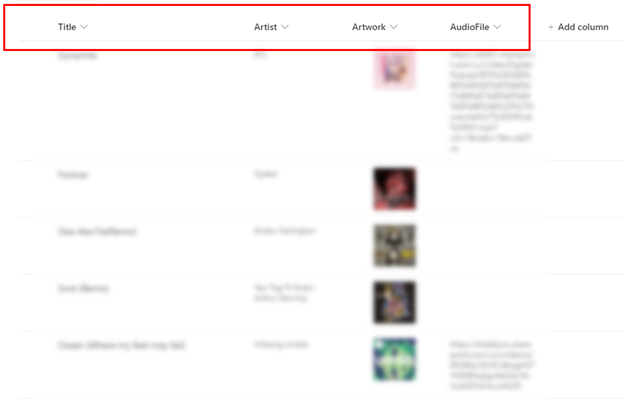
In the track list, you'll create columns for title, artist, artwork, and audio file, where you will add associated data.
- Open SharePoint, and then create a new SharePoint site or use an existing site.
- Create a new list with the following sample columns (Title, Artist, Artwork, AudioFile), as shown in Figure 1.

The list columns have the following associated data types:
- Title – Text
- Artist – Text
- Artwork – Image
- Audio file link – Multiple lines of text
You’ve now created the track list with data. Next, you’ll create the picture library.
Step 2: Create the SharePoint Picture Library to Hold Your Images
Create a picture library to hold all your audio image covers.
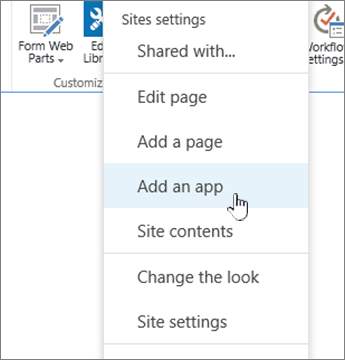
To do this, navigate to the site where you want to create the picture library. Select Settings, and then select Add an app. If you don't see Add an app, select Site contents, and then select Add an app, as shown in Figure 2.

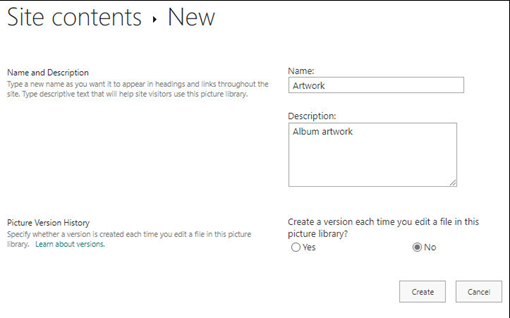
On the Your Apps page, enter Picture into the search box, or select Picture Library. Then in New, select Advanced Options. In Name, enter a name for the library. The library name is required. Enter a description of the library (this is optional), and then choose whether to create a version each time you edit a file in the picture library.
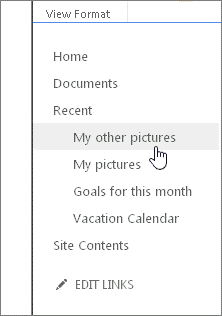
Select Create. The name of the picture library appears under Recent in the Quick Launch panel, as shown in Figure 4.
Step 3: Create a SharePoint Document Library to Hold Audio Files
This is the final development stage in SharePoint, where you will create a placeholder for storing image files in SharePoint. In your SharePoint site, select New > Document library > Create (after naming it), as shown in the following video demo.
Video 1: Demonstrates how to create a SharePoint document library.
Developing the Power Apps Application
You can use Power Apps to build custom apps for business scenarios such as data collection, data management, and data visualization, without having to write complex code.
At this point, you’ll develop the Power Apps application UI to feed on the data that you created in SharePoint. Although you could visit https://make.powerapps.com to start a new blank canvas app and connect to SharePoint to build the app for you, you’ve now integrated this data into a SharePoint list.
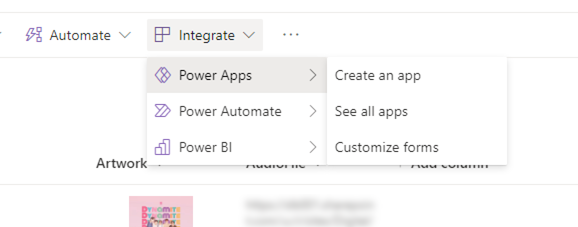
- Open your track list.
- Select Integrate > Power Apps > Create an app (figure 5).
- Enter a name for your app, and then select Create.
Designing the Application Controls
Once you’ve generated the app from your SharePoint list, you will construct the interface and configure the controls within the app.
Step 1: Configure and Design the Track List Screen – First Screen
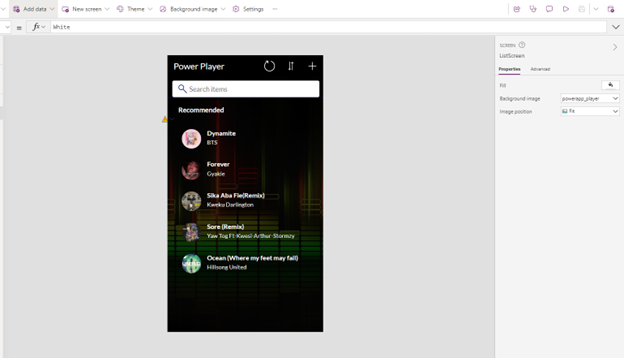
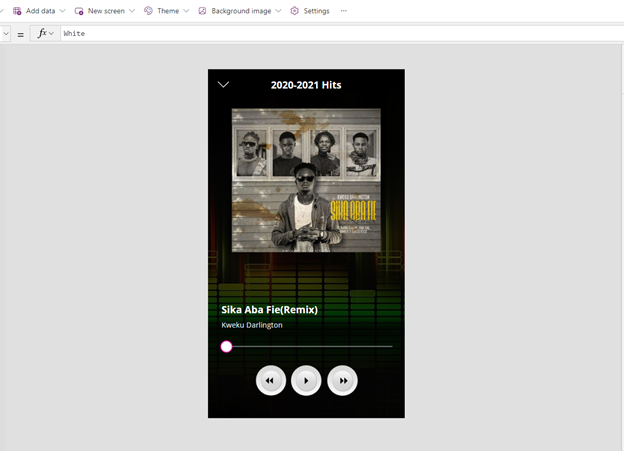
Modify the background properties of the application, and then update the style of the artist image cover to have a circular shape.
- To change the background image in PowerApps:
- In Power Apps Studio, select the screen.
- In the right-hand pane, go to Properties.
- From the background image dropdown options, select Add an image file.
- Browse to the file you want to use, and then select Open.
- To make the image control have a circular shape:
- Select the image control that has the artist album cover.
- In the right-hand pane, select the Properties tab, if not selected.
- Change the Border radius properties to 360.
The aspect ratio of the image will be preserved. If the image isn’t square, it may appear distorted in the circular shape. Figure 6 shows how mine looks after editing the properties.

Step 2: Build the Play Screen – Second Screen
Now you’ll create the play screen, which includes various controls and displays whatever track is playing. After you’ve built the screen, establish a connection between the first screen (the track list screen) and the play screen. Once you’ve connected the screens, you can navigate, when a track is selected.
To do this:
- Go to the first screen (track list screen).
- Select the first track, and update its OnSelect property to Navigate(PlayScreen,ScreenTransition.CoverRight). This will navigate the screen to the play screen when you select it.
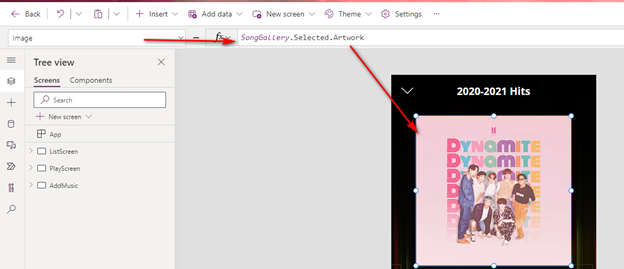
Build the second screen (play screen) by adding the image control from the selected track:
- From the Insert tab, add an image control.
- To set the image in your gallery image from the SharePoint database, you can update the image function by using the provided sample code: SongGallery.Selected.Artwork. This is based on what I have. Yours might be a different name.
The Selected property in PowerApps references a currently selected item in a gallery, form, or data table. The SongGallery.Selected refers to a currently selected item in the SongGallery gallery.
The Artwork in this formula is the name of the field that contains the image of the artwork in the data source used by the SongGallery gallery. This field is the column in a SharePoint list that has the track title.
Therefore, SongGallery.Selected.Artwork refers to the image of the artwork that’s associated with the currently selected item in the SongGallery gallery. It enables you to display the artwork in an image control or perform other actions with it.
After making all the necessary editing, Figure 7 shows how your image should look.
Add the Text Labels
On the Insert tab, add two text labels.
Just like the previous updates that you made on the image preview of the selected track, you will apply similar code here to view the artist name and the track title.
- Set the text function of one of the text labels to SongGallery.Selected.Title. The Title in this formula is the name of the field that contains the title of the item in the data source that the SongGallery gallery uses. This field is the column in a SharePoint list that has the track title.
- Set the second text label function to SongGallery.Selected.Artist.
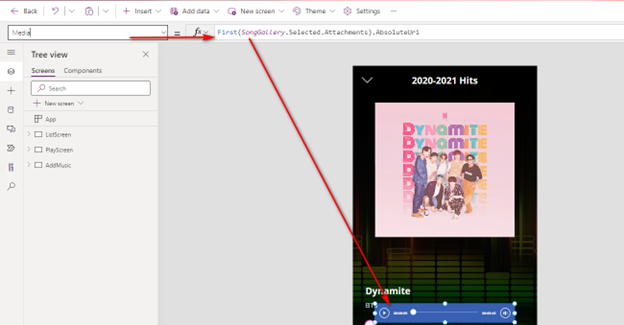
Add the Audio Control
This is the control that will play the selected track from the previous screen.
- From the Insert tab under Media, add an audio Control.
- Update its Media function with First(SongGallery.Selected.Attachments).AbsoluteUri. This will enable the audio player to play the selected track.
- The following is similar to earlier code, except:
- The First function is used to return the first attachment in the attachments collection associated with the currently selected item in the SongGallery gallery.
- The AbsoluteUri is a property of the attachment object that returns the URL of the attachment. First(SongGallery.Selected.Attachments).AbsoluteUri is a reference to the URL of the first attachment associated with the currently selected item in the SongGallery gallery, which enables you to display or download the attachment or perform other actions with it.
- Change the visibility of the control to False. This is to hide it from showing, since new controls will be created.
- Enter the variable varStarPos into the StartTime function.
- Enter varPlayinto the Start function.

Add the Slide Bar, Forward, Backward, Play, and Pause Buttons
You will need to add a slide bar and four image controls. You can find these on the Insert tab. After you’ve added them, update each control as follows.
Update the image of the button by browsing an image from your system through the image property of the image control on the Properties tab in the right-hand pane, as shown in Figure 9.

Slide Bar:
You can use the slide bar to fast-forward or rewind the currently playing audio.
- Update the OnSelect function to Set(varStarPos, Self.Value). Here you’re setting a variable called varStarPos that you used in the StartTime function of the audio control.
- Update the Max function to Audio1.Duration. Audio1 is the default name of the audio control.
- Set the Default function to varStarPos. This is the default position of the slide bar.
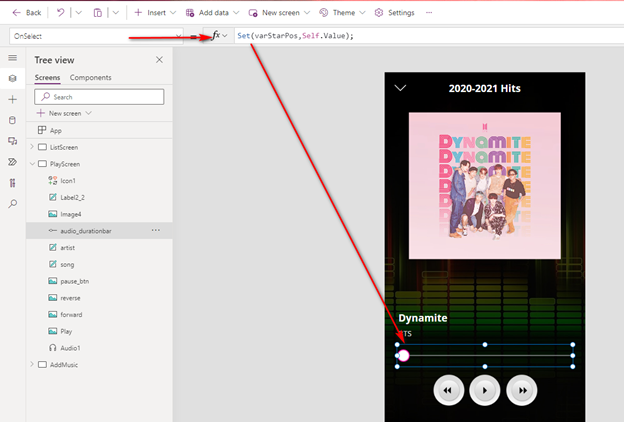
Forward Button:
Update the OnSelect function of the button with the following:
Set(varStarPos,Audio1.Time - 2);
Set(varPlay, false);
Set(varPlay, true);
Backward Button:
Update the OnSelect function of the button with the following:
Set(varStarPos,Audio1.Time + 2);
Set(varPlay, false);
Set(varPlay, true);
Play Button:
Update with the following:
- Update the OnSelect function to Set(varPlay,true).
- Set its Visible function to !varPlay. The button should not be visible when the audio is playing.
Pause Button:
Update with the following:
- Update the OnSelect function to Set(varPlay,false).
- Set its Visible function to varPlay. The button should be visible when the audio is playing.
Place the play button on the pause button. The visibility function will make one appear and disappear based on the audio.
Figure 11 shows the resulting app interface for the play screen (second screen).

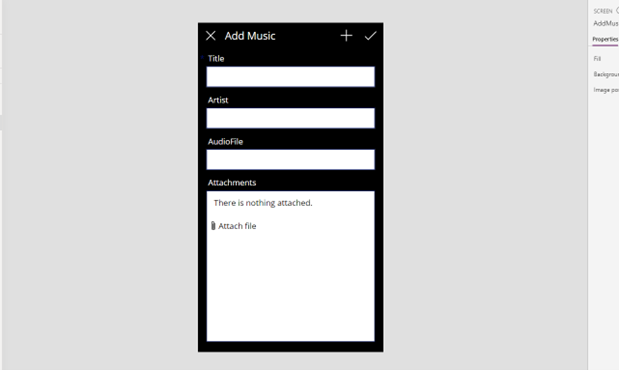
Step 3: Build the Add Track Screen – Third Screen
Because you created the app from a SharePoint list, the screen has already been generated for you. You can update the interface by using the available properties.
Figure 12 shows the resulting added track screen (third screen).

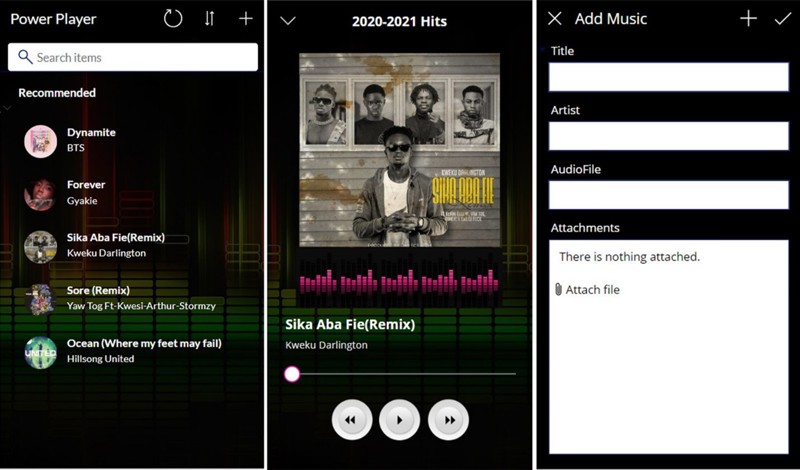
Step 4: View the Completed App Screens
And there you have it! Don’t forget to add a sound bar .gif file on the screen to display.

Summary
You’ve learned how to build an audio player with a track list. You started by creating a track list, picture library, and document library in SharePoint, and then used Power Apps to design and configure the application controls.
With this audio player, users can easily browse through the track list, select a track to play, and even pause or skip to the next track. The user interface is sleek and intuitive, allowing for a seamless experience for users of all skill levels. Furthermore, the integration of SharePoint and Power Apps makes it possible to store and manage the audio files, in addition to any related pictures and documents, all in one central location. This not only improves organization and accessibility but ensures that the latest versions of files are always available to users. The possibilities for customization and expansion of this audio player are endless, making it a valuable addition to anyone's digital toolkit.
Resources

Shadrack Inusah
Shadrack is a Power Platform specialist at Fidelity Bank Ghana and a recipient of the Microsoft Business Applications MVP award. He has expertise in tech community building and management. Shadrack is a former Gold Microsoft Learn Student Ambassador and First Runner-Up for the inaugural Africa Power Platform Challenge with 300 participants. He's also a senior member on the Microsoft Tech Community platform, writes about the Power Platform to assist people globally, and has spoken at Power Platform Community events. Shadrack is dedicated to assisting others in learning and collaboratively solving technical issues.