Build and Deploy Web Applications With Azure DevOps
In this article, I will be exploring one way to build and deploy web applications using Azure DevOps as a Continuous Integration and Continuous Delivery (CICD) service. I will cover some quick concepts about building and deploying with Azure DevOps and then proceed to build and deploy an ASP.NET Core Application using pipelines to an Azure web app, going step-by-step through the following outline:
- Azure DevOps services
- Creating an Azure web app
- Connecting your Azure DevOps Pipeline to Azure
- Setting up a build
- Setting up a release
This article will assume you have the following:
- An Azure account: you can quickly get started at https://azure.com/free.
- An Azure DevOps account: sign up at https://dev.azure.com.
If you do not, please get those in place before continuing.
Let us get started.
Azure DevOps Services
Azure DevOps is a suite of cloud services that enables organizations to build and deploy applications, plan and manage work, store and control source code access, test applications, and store application artifacts. Being a suite of services, Azure DevOps offers individuals and organizations the choice of tools where they can pick one, a couple, or all the Azure DevOps offerings for use in their application development process.
There are five main Azure DevOps service offerings:
- Boards: for managing work items like bugs, features, epics, and user stories.
- Repos: used to store code repository using either Git or Team Foundation Version Control.
- Pipelines: used for building and deploying code to cloud or on-premises servers.
- Test: helps to manage test plans and manual tests.
- Artifacts: enables developers to share code and packages.
You can extend these services by using extensions from the Azure DevOps Marketplace.
Connecting Your Azure DevOps Pipeline to Azure
Because Azure DevOps Pipelines is a paid service and free pipeline runs have mostly been disabled, configuring your build and release pipeline to use the Microsoft hosted agents will require some sort of billing. If you currently have Azure DevOps billing enabled in your organization, you can ignore this section.
To avoid having to pay the cost of the pipeline agents through Azure DevOps, you can follow these steps to connect your pipeline runs to your Azure account.
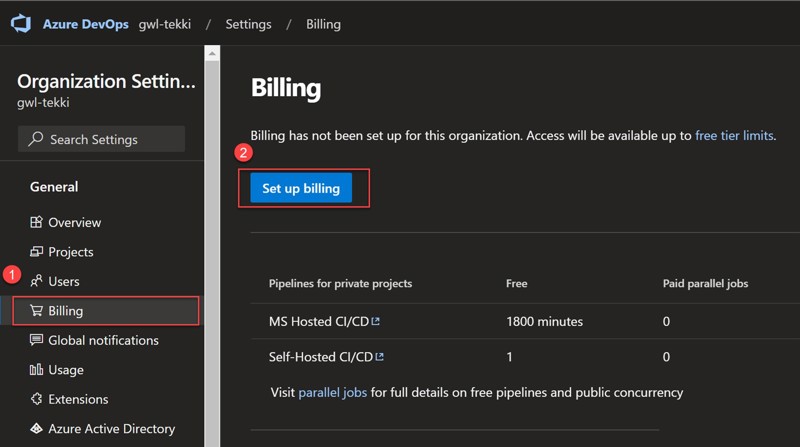
- In your Azure DevOps organization home, select Organization settings.

2. Then Billing > Set up billing.

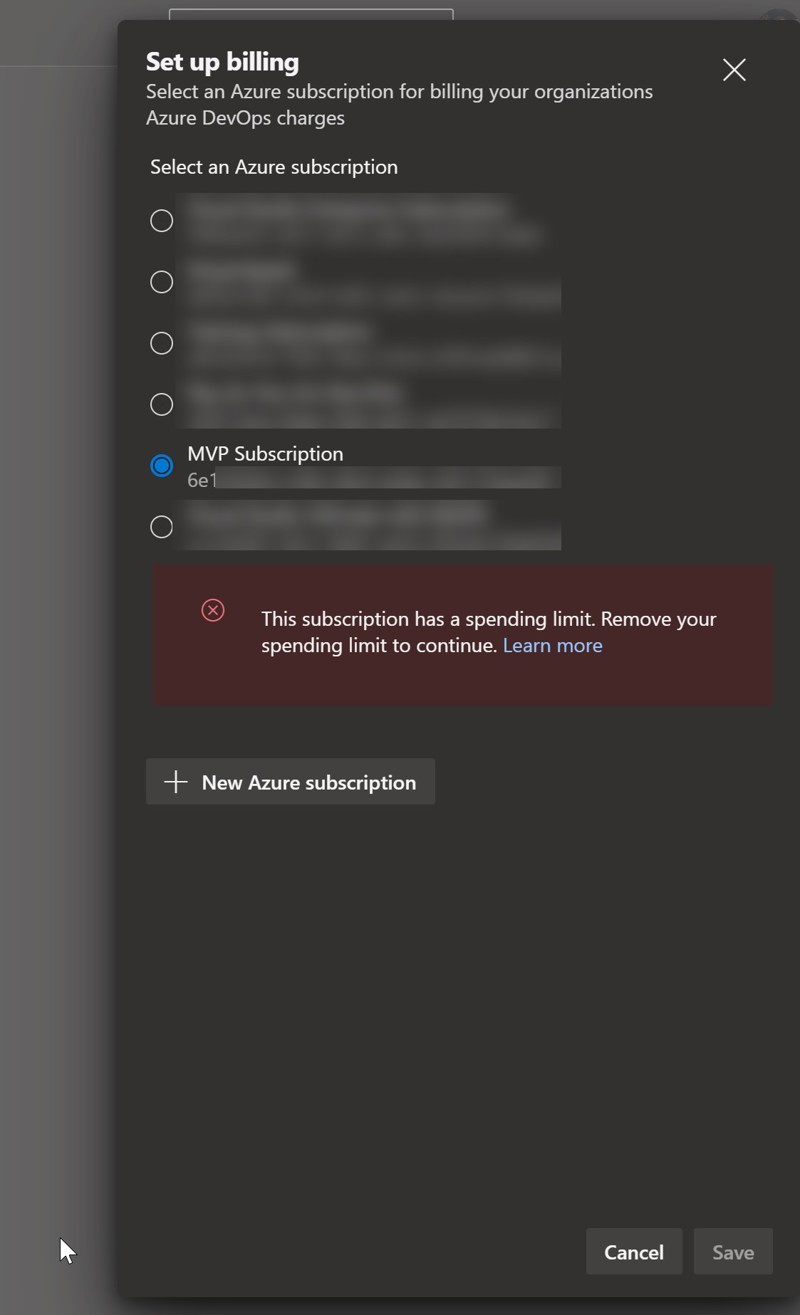
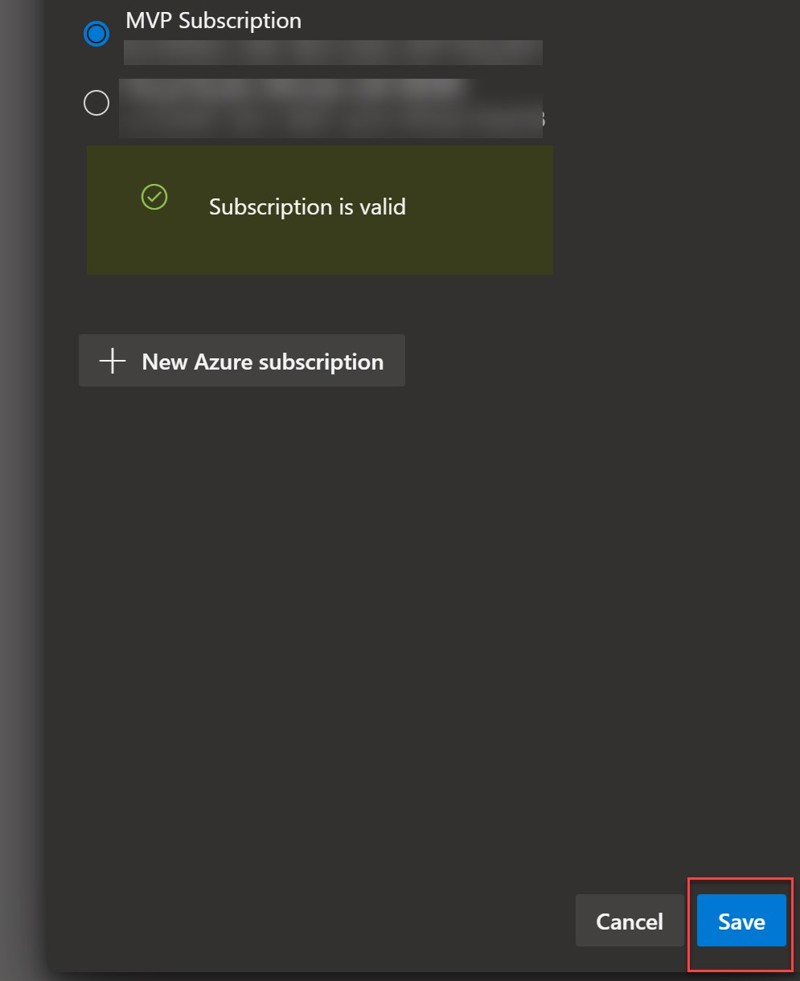
3. Selecting the Set up billing button will load a pop-up to the side of your screen, where you will select your desired Azure subscription.

If you see the red warning section like above, follow this Microsoft documentation to fix that or go through these steps:
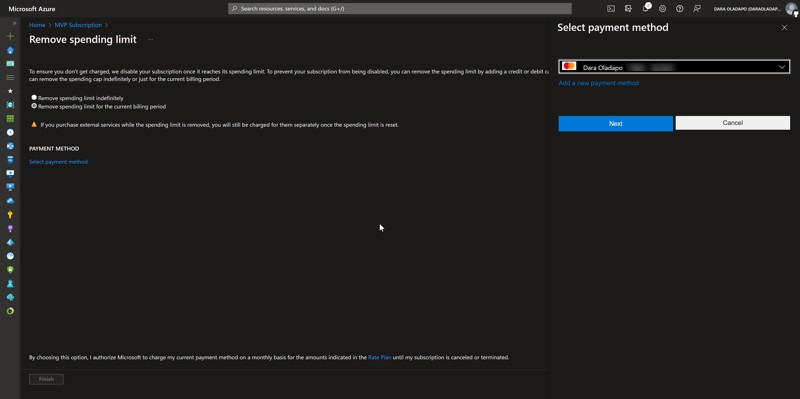
3a. Go to your Azure subscription from the Azure Portal and click on the spending limit prompt.

3b. Follow through the prompts and input your credit card information as needed.

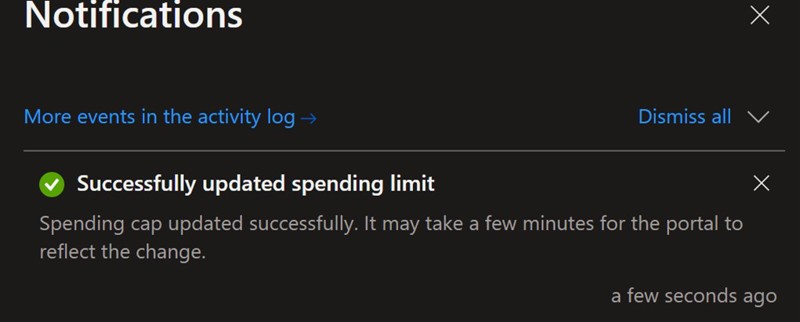
3c. After a few minutes, you should be able to now activate the subscription for Azure DevOps
4. Select Save and you will be good to go after a couple of seconds.
Creating an Azure Web App
Although it is recommended to deploy infrastructure for apps as part of your CICD process, I will be using the Azure Command Line Interface with PowerShell to create an Azure web app for this article.
Run the following commands to create the Azure web app:
$resourceGroupName = “gwl-tekki-rg”
$location = “uksouth”
$webAppName = “gwltekki-webapp”
$appServicePlanName = “gwltekki-app-plan”
az group create --location $location --name $resourceGroupName.
az appservice plan create --name $appServicePlanName --resource-group $resourceGroupName --location $location --sku “B1” --is-linux
az webapp create --name $webAppName --resource-group $resourceGroupName --plan $appServicePlanName --runtime “DOTNETCORE:7.0”Note: Remember to replace the Azure web app name with something globally unique.
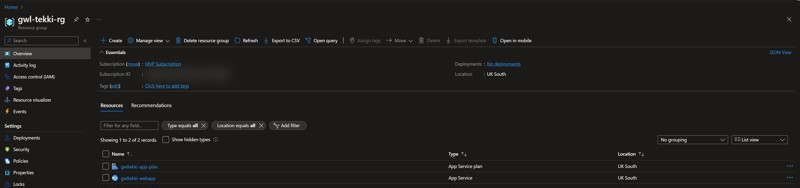
There should now be two resources inside the resource group created.

Once this step is completed, we are ready for the next step.
Setting Up a Build
To set up a build pipeline in Azure DevOps, there are two options – the pipeline-as-code (YAML), and the visual editor method. I will be using the YAML method here, but feel free to explore the visual editor if you wish to.
With pipelines, you can connect to your code repository in Azure DevOps or from any code repository service like GitHub, Bitbucket or a local git server you own. In this article, I will be using repos in Azure DevOps.
I will use a sample ASP.NET Core application in this article. You can get the source with pipeline code and scripts here that I will be using to set up our build and release.
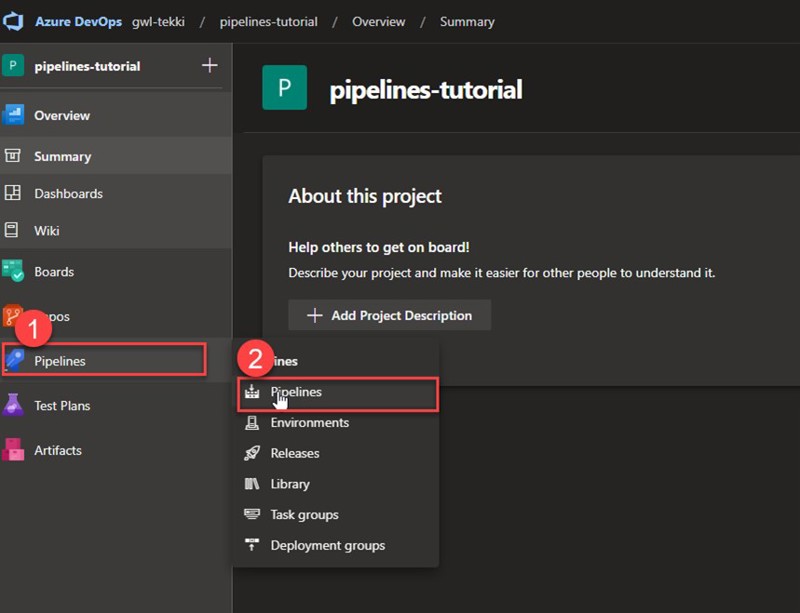
From your Azure DevOps homepage, navigate to your project (see here for instructions to set up an Azure DevOps project) and go to Pipelines > Pipelines.
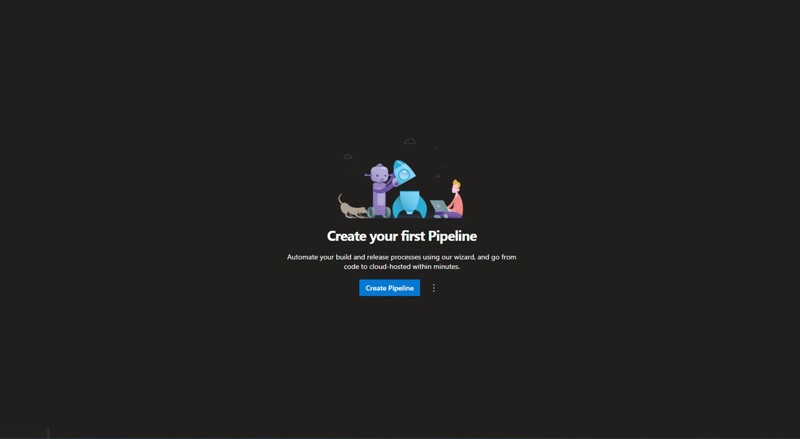
If this is your first time working with Azure Pipelines, you will see a screen that looks like the picture below.

Select the Create Pipeline button and you should get some options on how to get started with your pipeline.
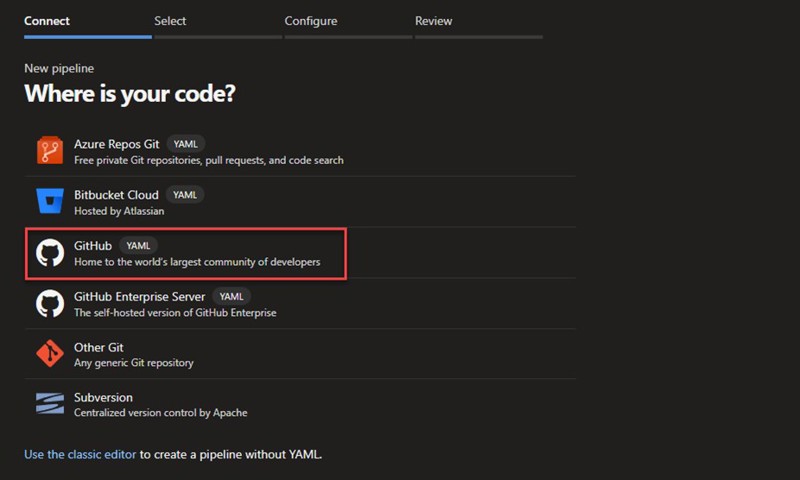
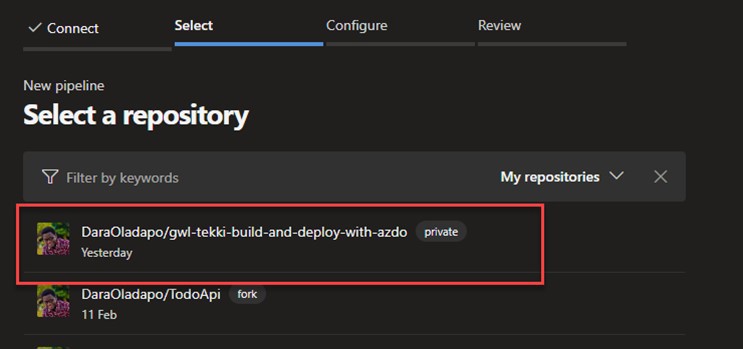
I will be using GitHub with the YAML option for this tutorial. This will require an authentication with GitHub for the first time. So, complete the GitHub prompts and sign-in flow and you should get a list of all the GitHub repositories you have access to. I will be using the gwl-tekki-build-and-deploy-with-azdo repository.
In your case, you may need to fork the repository or just create a simple ASP.NET Web API using the dotnet new command on your computer and push to your GitHub repository.
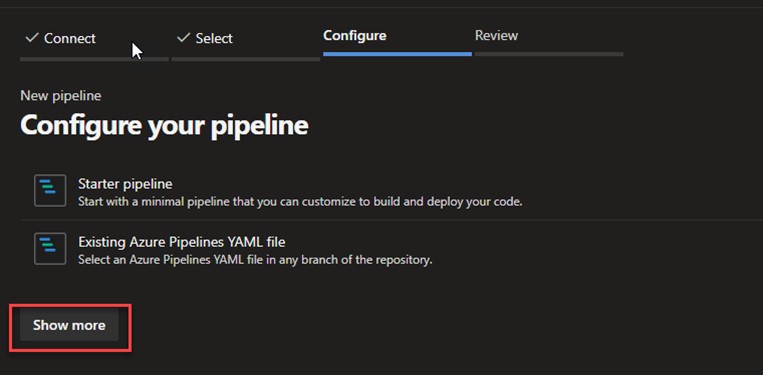
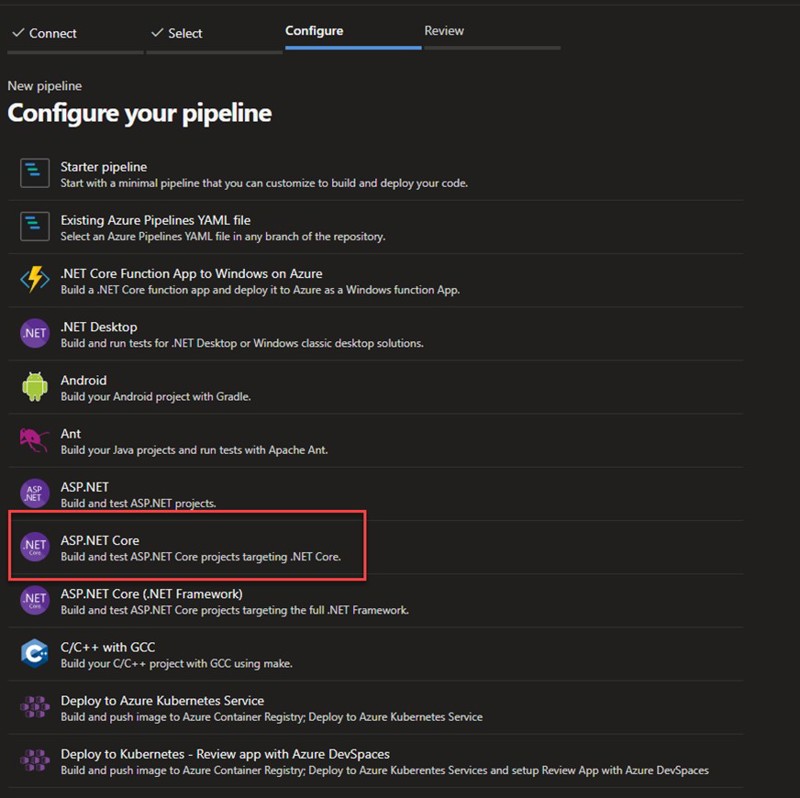
After selecting the repository, you will get a list of options that looks like the image below. Select the Show more button to explore the diverse options available.
Among the many options, you should see an ASP.NET item. This is what I will be building upon in this tutorial, but you can explore the options to see what YAML code is generated for you.
Some YAML code will be generated for you. Let’s look at the four main sections of that code and what they mean.
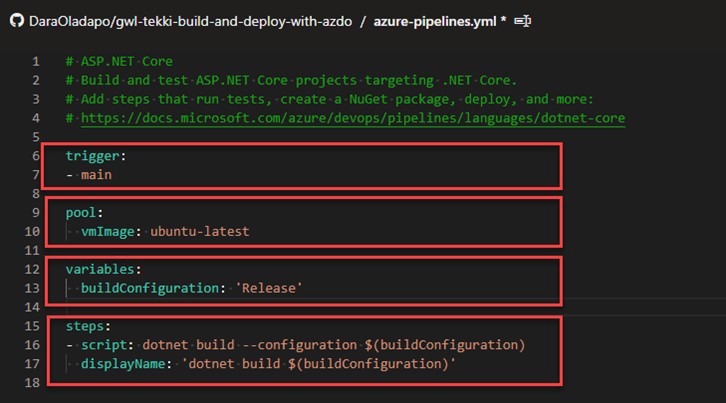
- The first section is a trigger, which specifies that Azure DevOps should kickstart the build commands whenever there are changes in the main or any of the listed branches.
- The second section declares the type of build agent that should be used to run the build commands. In this case, it is telling Azure DevOps to use the latest version of Ubuntu build server.
- The third section helps you set up the key-value pairs of variables you will be using in your pipeline.
- The fourth section is where most of the fun happens. This is where I will set up what actions should be performed on the build server.
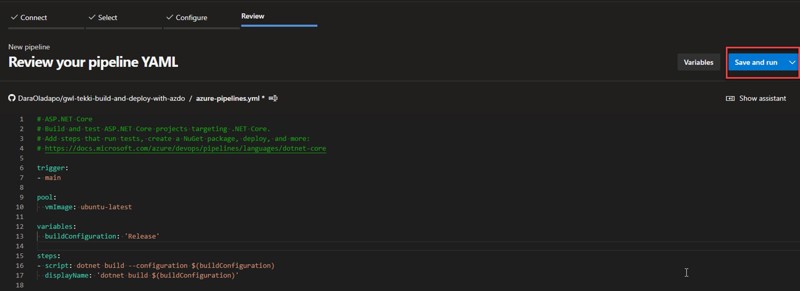
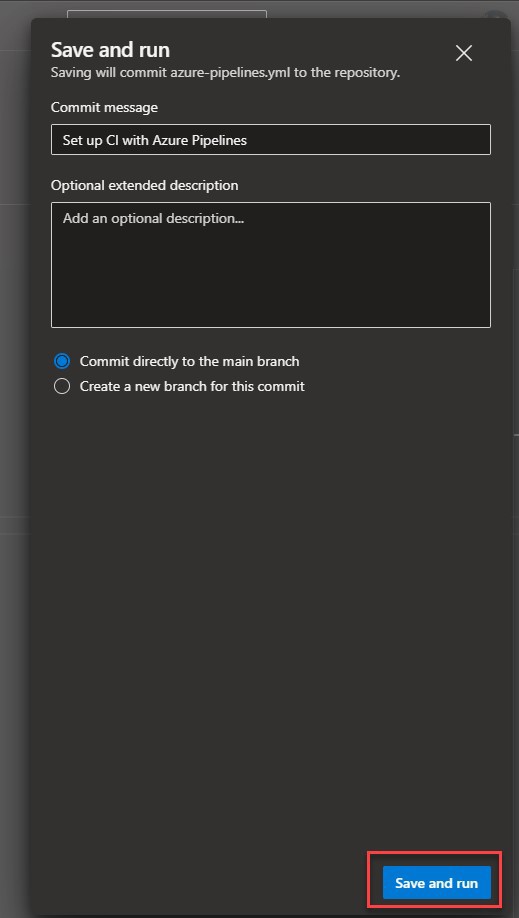
Let’s Save and Run and see what happens first. I will use main branch for this demo, but best practice is to create a new branch for such activities.

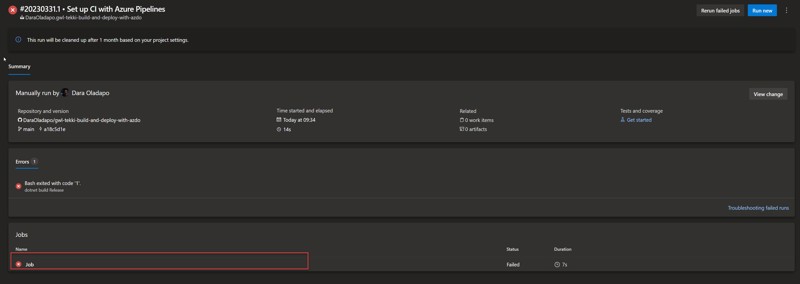
The changes are committed, and a pipeline run is triggered immediately. At first, it will fail with this configuration, which is fine, because you have not yet set the right folder for where the pipeline should pick the ASP.NET Core code from.

If you select the job, you will see the reason for failure.

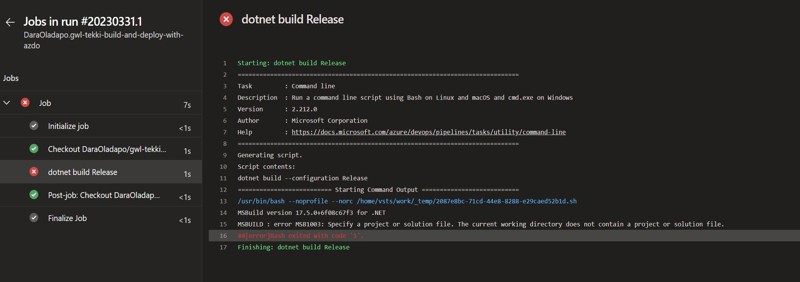
Now, set the pipeline to build your code from the correct directory. Go back to Pipelines, select the ellipsis beside the failed pipeline run, then select Edit.

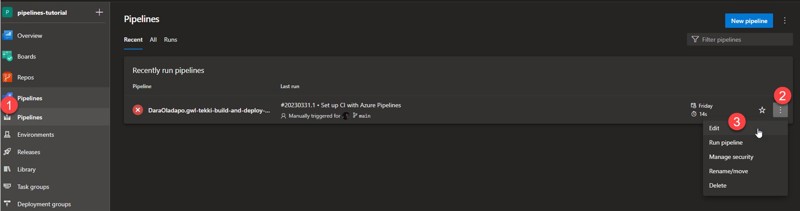
On line 16, add TekkiGurus.WebAppDemo so the line looks like the screenshot below, then save.
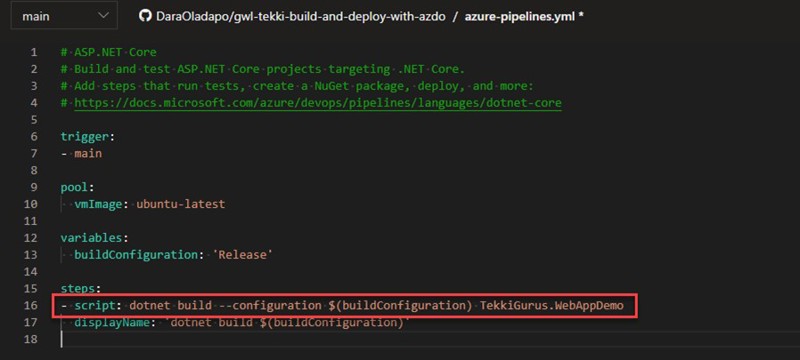
If you then go back to Pipelines, you should see an active run (or a completed build).

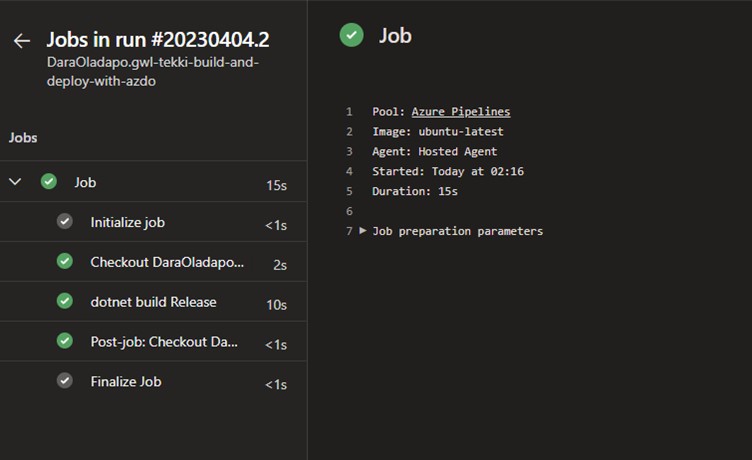
Go into the most recent run and select Job to see the details of the build.
At this point, you have now completed the fundamental parts of the build steps. But, in order to completely build a .NET project in Azure DevOps, you also need to get the build output into an artifact so that you can publish it to Azure. Let’s start that now.
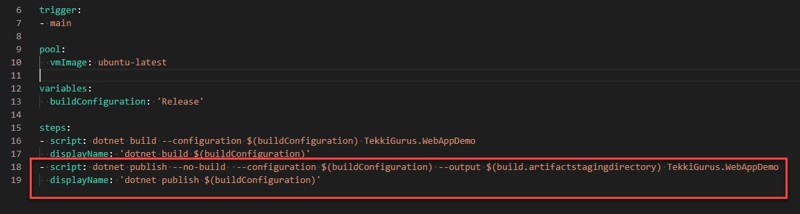
Go back to Edit Pipeline and add the following to the azure-pipelines.yml file to enable the pipeline to run copy and publish build artifacts.
- script: dotnet publish --no-build --configuration $(buildConfiguration) --output $(build.artifactstagingdirectory) TekkiGurus.WebAppDemo
displayName: 'dotnet publish $(buildConfiguration)'
The script should look like this:
After that, you will use the publish task in the Azure Pipelines Tasks library. Create two new lines after line 19, go the Tasks pane and search for publish. Then select the Publish build artifacts option.
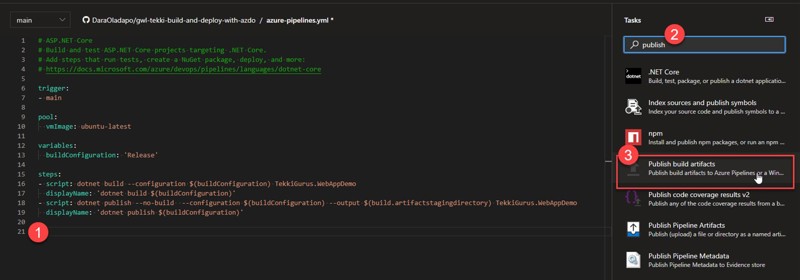
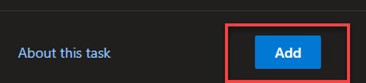
In the prompt that follows, just select Add, leaving all other fields as they are.
Your pipeline code should then look like this:

Save and go back to Pipelines to see it run. The pipeline run should complete successfully with a message that looks like this:

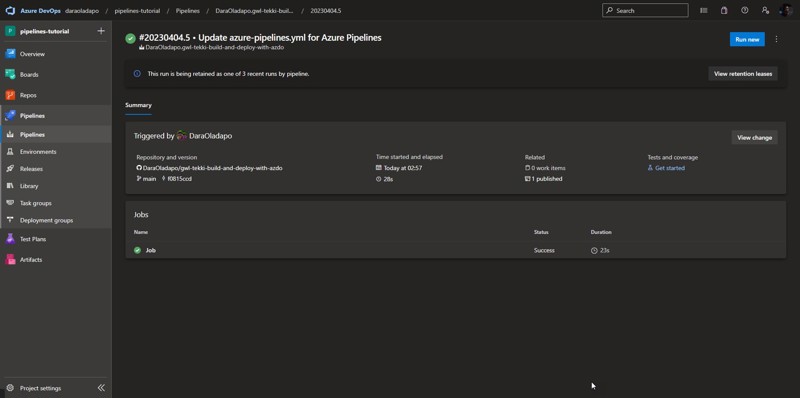
And the job summary should look like this:

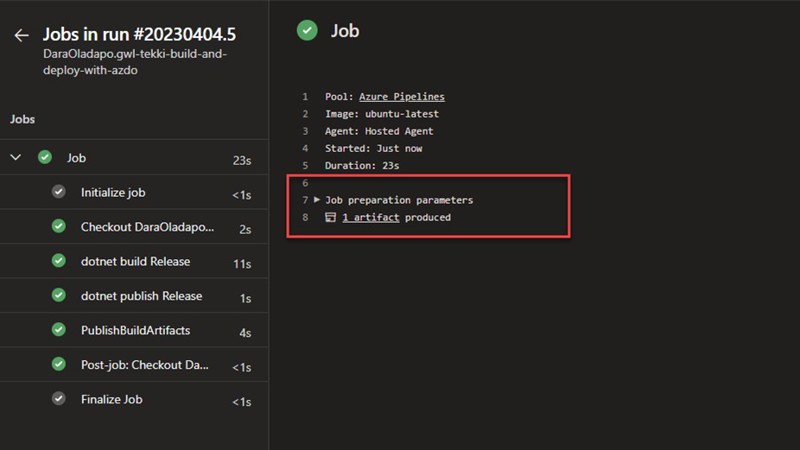
To deploy our generated code artifacts to Azure, I will modify our pipeline file to utilize stages so I can separate the build portion from release.
After line 7, create a new line and enter the following to set the pipeline run variables:
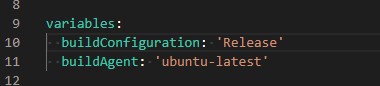
Then enter the following to declare the two stages of your pipeline:
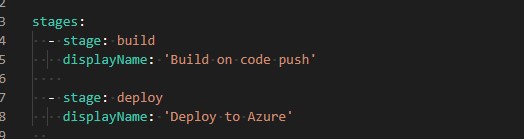
This splits your pipeline run into two separate sections – one for building and the other for deploying to Azure. You will remove some bits from this code in a short while.
You will now expand the build stage to contain the previous build code, then add some tasks to compress the folder and publish it.
Modify the first stage (build) by adding the following code after the dotnet publish task:
jobs:
	- job:
	displayName: 'Build code and publish artifacts'
	pool:
		vmImage: $(buildAgent)
	steps:
		- script: dotnet build --configuration $(buildConfiguration) TekkiGurus.WebAppDemo
		displayName: 'dotnet build $(buildConfiguration)'
		- script: dotnet publish --no-build --configuration $(buildConfiguration) --output $(build.artifactstagingdirectory) TekkiGurus.WebAppDemo
		displayName: 'dotnet publish $(buildConfiguration)'
		- task: ArchiveFiles@2
		inputs:
			rootFolderOrFile: '$(build.artifactstagingdirectory)'
			includeRootFolder: false
			archiveType: 'zip'
			archiveFile: '$(Build.ArtifactStagingDirectory)/$(Build.BuildId).zip'
			replaceExistingArchive: true
		- task: PublishBuildArtifacts@1
		displayName: 'Publish build to artifacts directory'
		inputs:
			PathtoPublish: '$(Build.ArtifactStagingDirectory)/$(Build.BuildId).zip'
			ArtifactName: 'drop'
			publishLocation: 'Container'
The whole build stage should look like this:
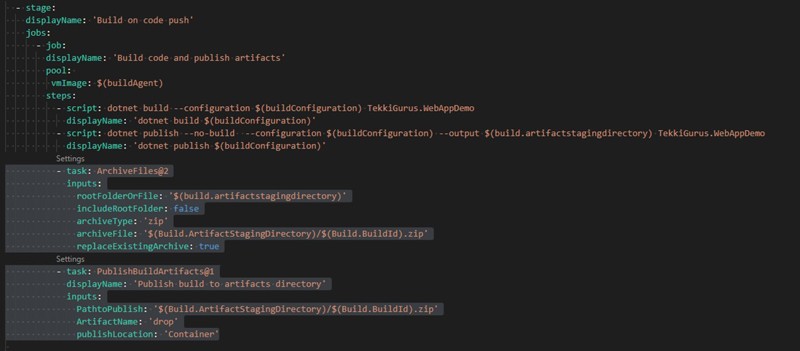
This performs the same actions as your previous build, but now in this sectioned stage.
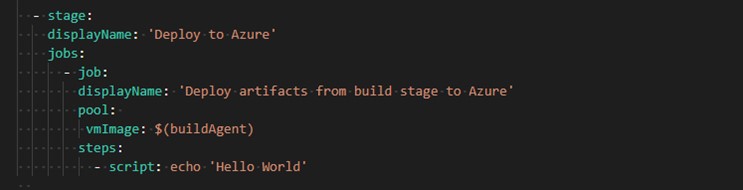
Let’s now add a dummy job to the release stage before putting in real code to assess if our stages are configured correctly. Modify the second stage (deploy) to look as below:
Save and go check out the pipeline run. The run should now contain two steps as below:

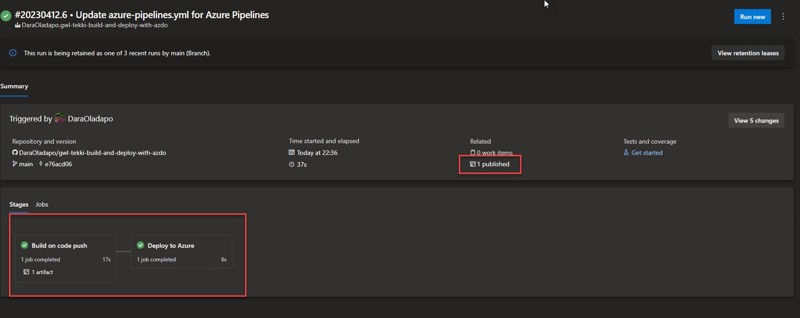
Below is a summary of what you have done in the build stage:
- Run a dotnet build command to compile your code.
- Run dotnet publish to strip out any unnecessary code for deployment.
- Compressed the published folder into a zip file.
- Set it as an artifact ready for deployment to Azure.
With that, you are ready to create a release.
Setting up a release
The rest of your work is now on the release stage. Here, you will do the following:
- Download the zip artifact from the build stage.
- Deploy the zip folder to your created Azure web app.
To download the zip artifact, you need to add a download task to the release stage.
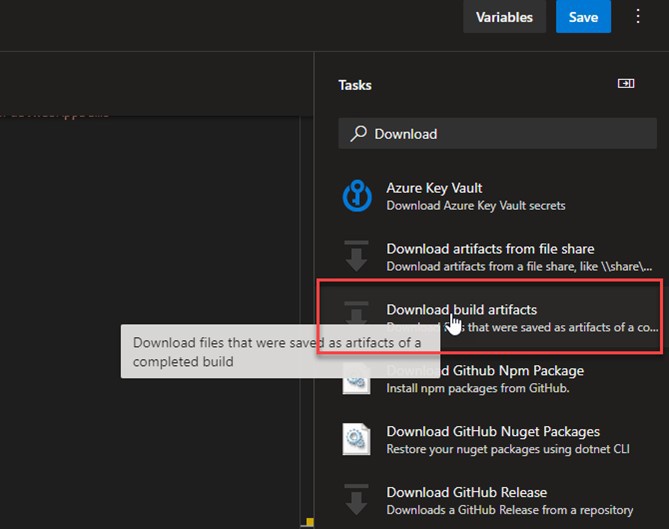
First, remove the dummy script to add the download task and in the Search task box, search for Download build artifacts and select.
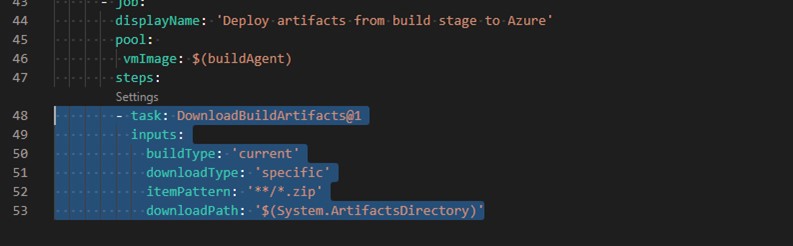
In the pop-up blade, set the download type to specific, and set the matching pattern as **/*.zip.
Save and check what happens. Feel free to set a displayName.
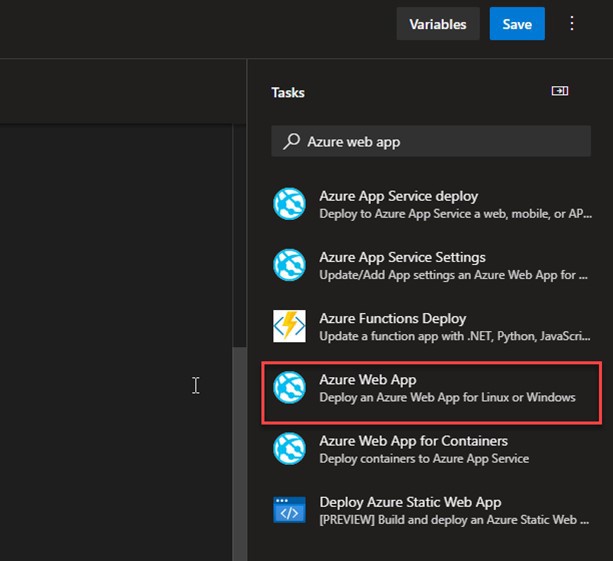
After the download stage, you can now add the task to deploy the application to Azure. Search for the Azure web app task and select it.
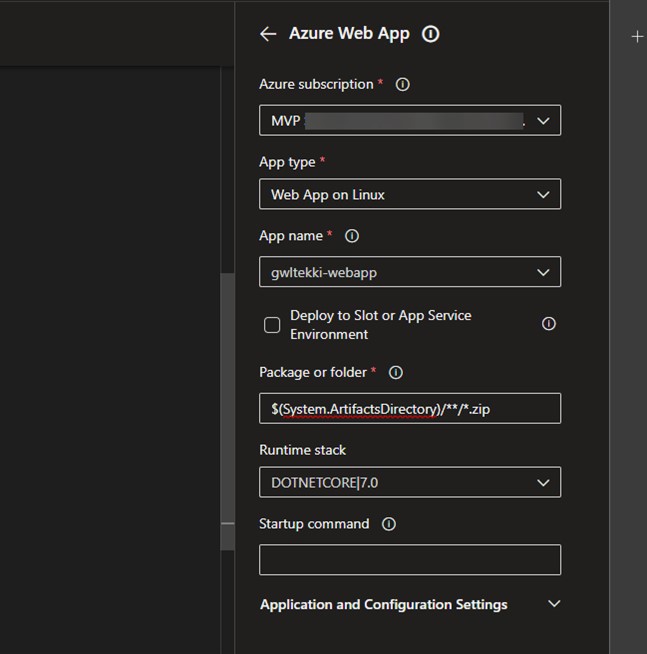
Select the target Azure subscription, app type and app name and change $(System.DefaultWorkingDirectory)/**/*.zip to $(System.ArtifactsDirectory)/**/*.zip , then set the runtime stack to DOTNETCORE|7.0 and save.
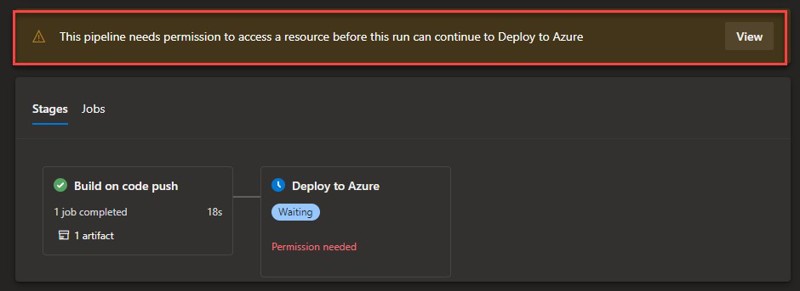
Save and check the pipeline run. For the first time, you will need to allow the pipeline to access Azure again.
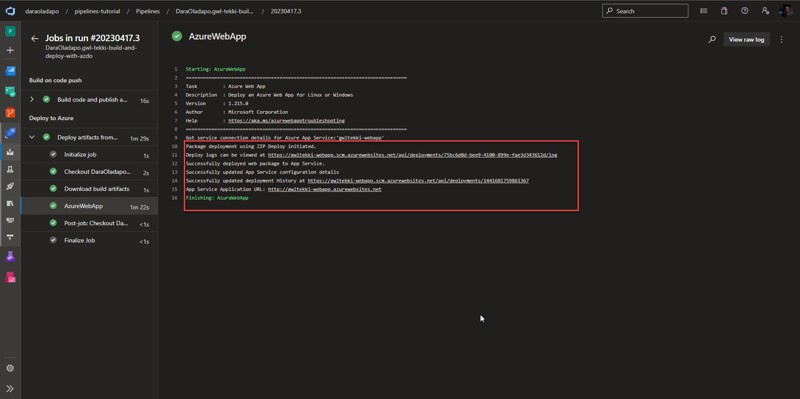
Follow the prompts and permit. The pipeline run should then continue normally. After the run, you should have a successful deployment that looks like this.

When you select the link to visit the web application from the Azure Portal, it should load up fine.

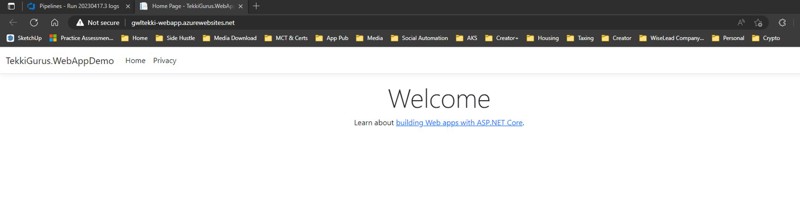
Summary
In this article, I have shown you some Azure DevOps service offerings, how to connect your Azure DevOps pipelines and billing to Azure, how to create an Azure Web app, and how to set up a pipeline to build and release to your code. There is still a world of possibilities you can achieve with Azure DevOps and Azure, and I hope you enjoy working with them. Happy deployments!
Dara Oladapo
Dara Oladapo is a technology lover with almost a decade of professional experience in Azure and DevOps technologies. He comes from a software development background and is a Microsoft Developer Technologies MVP and a certified trainer in Azure Fundamentals, Development, Administration, and DevOps. He frequently speaks to a wide variety of audiences, from beginners to industry professionals, and across different age groups. His core passion is to learn and teach technology, and his lifelong goal is to speak about awesome technology and innovation that drives developer productivity.