Azure OpenAI QuickStart Guide

Everyone is talking about OpenAI and ChatGPT! Many organizations want to know how they can take advantage of large language models (LLMs) such as ChatGPT in their own organization. They want to ensure the data they send to an LLM is safe from leakage and misuse. Now that Microsoft Azure has an OpenAI offering, organizations can integrate artificial intelligence (AI) with their own apps and automations! They can feel comfortable knowing their data is governed by the privacy and security they expect from Azure services.
This video plus QuickStart guides you through the shortest path to creating Azure OpenAI (AOAI) services and deploying state-of-the-art LLMs to your organization. This tutorial assumes:
- Your organization has an Azure account
- You have been granted the necessary permissions to create Azure OpenAI resources
- You have basic familiarization with the Azure Portal
Let’s get started!
Watch the video—it is linked to this QuickStart at the end of this article in case you are a “read it first” person. There are places in the steps below where I assume you have watched or are watching the video that I created for this article. Later I’ve added timecodes where you can watch the video again and then follow the steps and it will make sense faster.
Steps to provision a new Azure OpenAI Resource
Before you can deploy generative AI models such as GPT-4, you first need to create an Azure OpenAI resource. It is very easy to do by following these steps.
- Navigate to portal.azure.com and login with your Azure Entra ID (formerly known as Active Directory) credentials.
- If you have an existing Resource Group in mind where your new AOAI resource will live, navigate there, otherwise create a fresh Resource Group. Note: To stay consistent with your Azure deployments, ensure the Resource Group is created in one of the regions where AOAI is available.
- From within the Resource Group, click the “+ Create” button.
- In the “Search the Marketplace” bar, type “Azure OpenAI” and select the corresponding result.
- Near the bottom of the AOAI resource card, click the dropdown next to “Create” then select the result.
6. Enter the appropriate values to configure your new AOAI resource
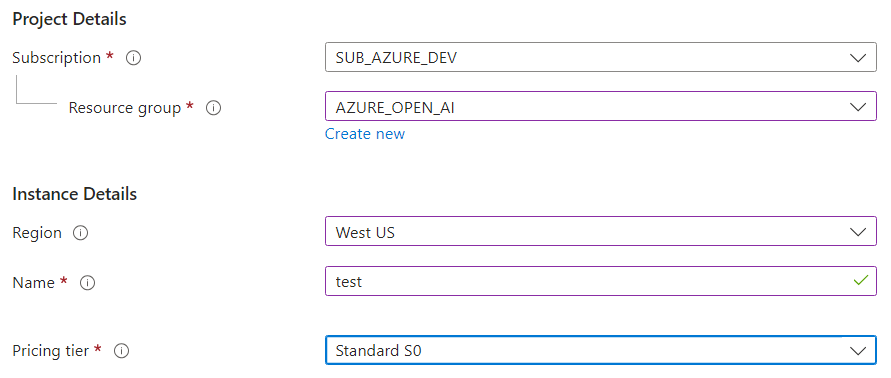
- Note: The “Name” value is critical. It must be globally unique and can only contain alphanumeric values and hyphen characters.
- It is advisable to read the full pricing details and other hyperlinks on this page.
- Click “Next.”
7. Select the network that clients will use to connect to your new Azure OpenAI resource.
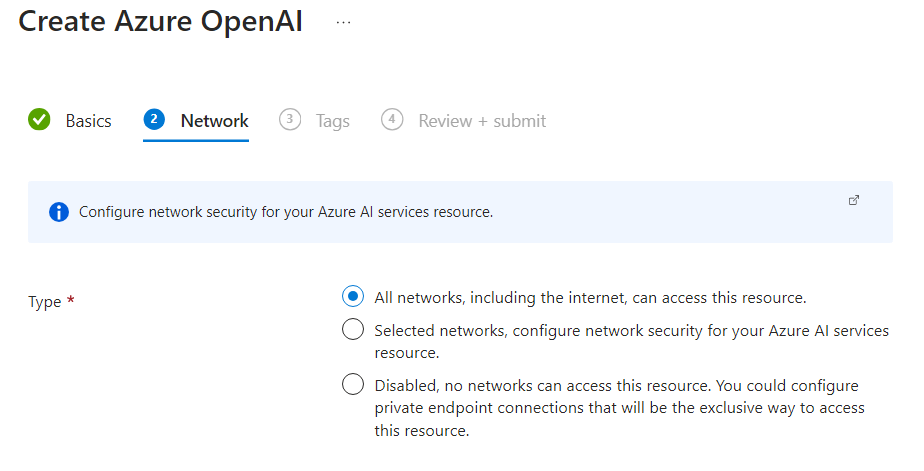
- All networks, including the internet, can access this resource. This does not mean that anyone can *use* your Resource. The client will still need to authenticate using an API key or Entra ID.
- Only selected networks can access this resource. This refers to Azure virtual networks and subnets. You would need to create a VNET to select this option. Azure VNETS have a nominal fee per gigabyte of ingress and egress data.
- Disable network access and only allow Azure private endpoints.
- For this tutorial, we'll select the first option, All networks….
- Click “Next.”
8. Enter some useful tags to apply to this resource.
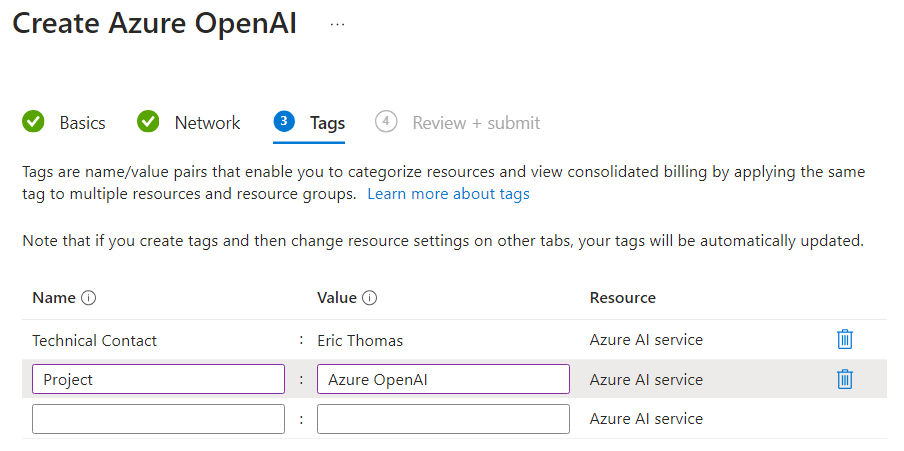
- As a minimum, I like to add “Technical Contact” and “Project” tags.
- Click “Next.”
9. The “Review + submit” tab automatically kicks-off a validation step. If all values are acceptable, your new AOAI resource will be generated.
- If there are any issues with the values entered, you can correct them now.
- And I do have an error. You’ll remember back in step 6 that I entered the resource “Name” of “test”. Recall that AOAI resource names need to be globally unique. In this case, there is already an AOAI resource with the name “test”.
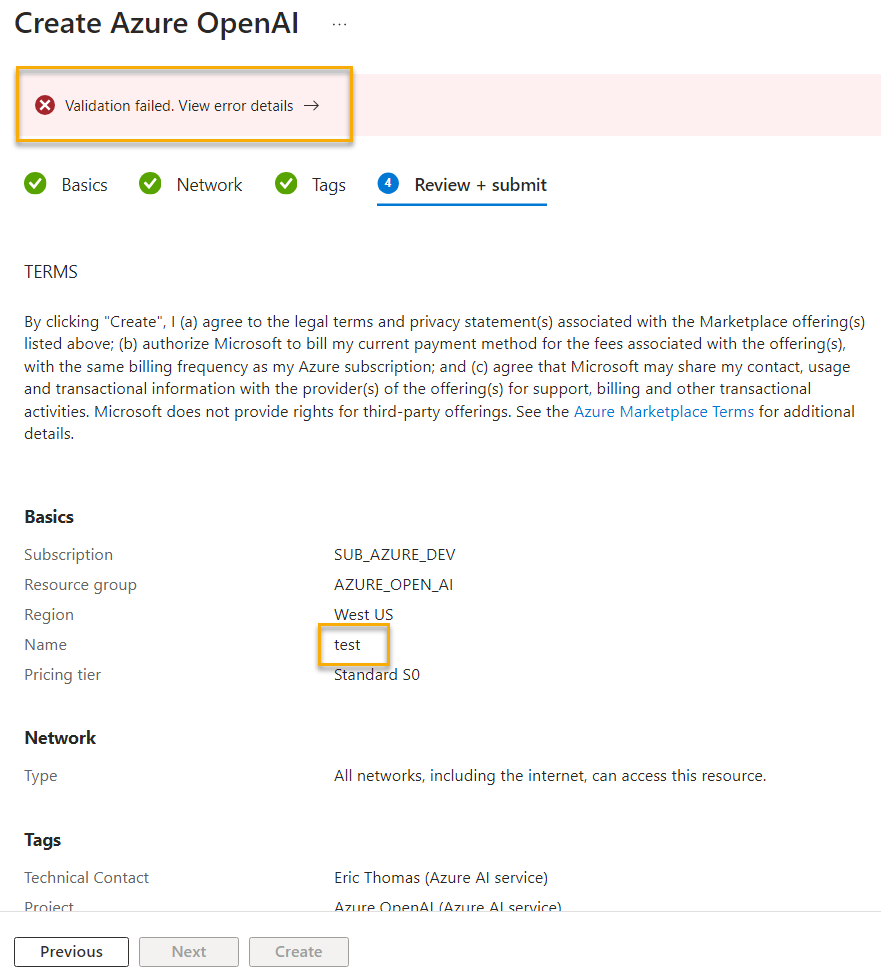
I’ll change the “Name” value to “aoai-west-us-dev” and will submit again. That passes validation. Go ahead and click “Create.”
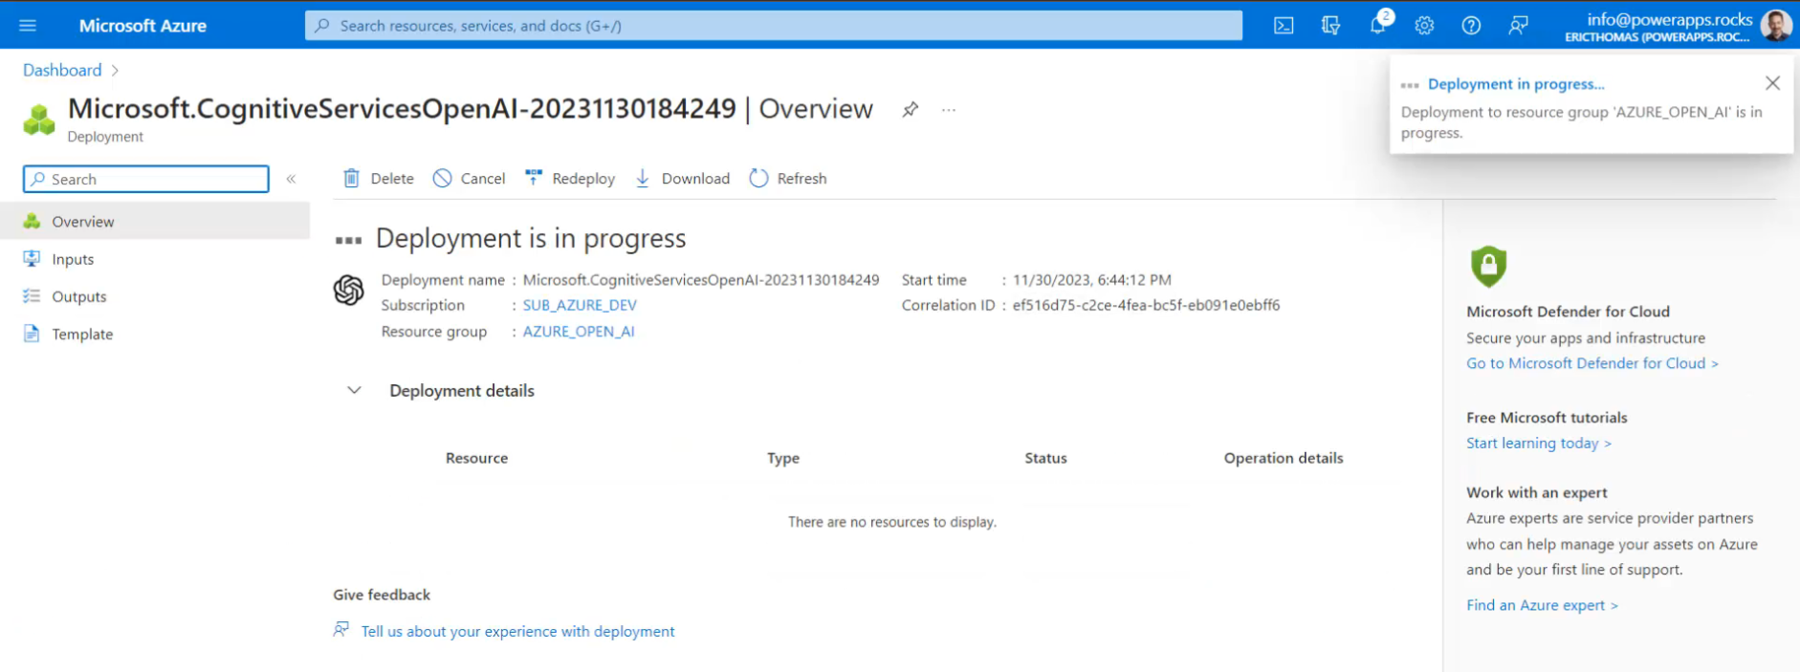
10. Your AOAI deployment is now in progress. In just a few moments, you will be able to deploy cutting edge LLMs to your organization!
11. Once deployment has been completed, click the “Go to resource” button.
- Two of the most-used sections of the AOAI resource are the “Keys and Endpoints” and “Model deployments” blades.
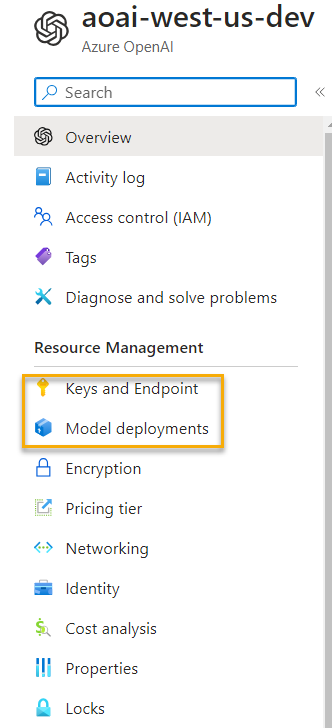
- Keys and Endpoints refers to your Azure Open AI API keys and endpoint URL. You use these values when using the Azure Open AI rest endpoint.
- Model Deployments is where you deploy LLM’s such as GPT-3.5 and GPT-4.
12. Click the “Manage Deployments” button. This will navigate you to the Azure Open AI Studio.
Deploy LLMs to Your AOAI Resource
If you are following along with the video for this article, you should be about 3 minutes and 32 seconds in.
Since this is a QuickStart guide, focused on getting you interacting with cutting edge AI models as fast as possible, I won’t deep-dive into the AOAI Studio. Though I encouraged you to spend some time after this tutorial exploring this wonderful toolset!
13. Click “Create new deployment.”
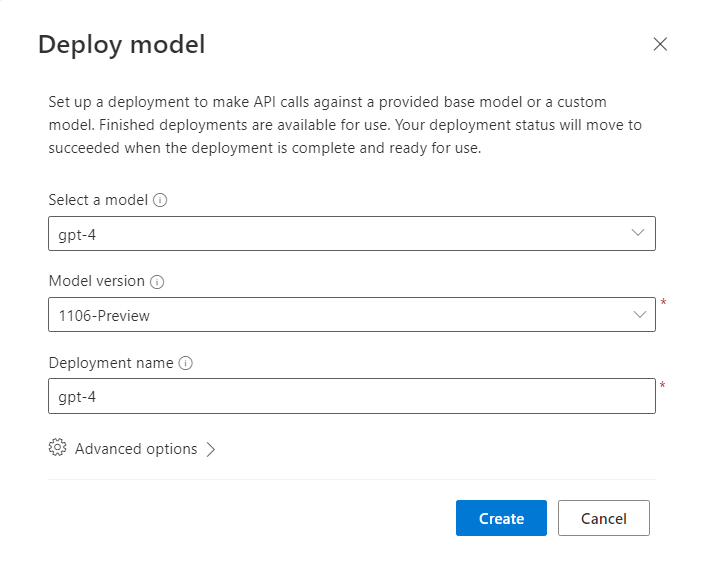
- From the first list in figure 9, select the gpt- model.
- From the second list in figure 9, select the model version. There are two options for model version:
- Select “Auto-update to default” to have AOAI upgrade your deployed models to the latest default version automatically.
- Select a specific version. In this case, version “1106-Preview” is the new GPT-4 Turbo. I’ll select this version.
14. Enter a Deployment name for the deployed model. I prefer to duplicate the model description (in this case “gpt-4”), but you can name it as you wish.
- Note: This deployment name will become part of your organization’s AOAI URL, so put some thought into what you name it.
- Example: If I wanted to call my organization’s Chat Completions API, the request would be
https://{my-aoai-resource-name}.openai.azure.com/openai/deployments/{deployment-id}/chat/completions?api-version={api-version}
where my “deployment-id” is the name we are creating in this step (“gpt-4”).
15. You can peek around the Advanced Options if you’d like, but for the sake of simplicity, keep the defaults and click “Create”.
16. Go ahead and try duplicating the same steps, but this time deploying the GPT-3.5 Turbo model. This model is less expensive than GPT-4 and provides great results; perfect for testing.
If you are following along in the video, we’re at 5 minutes and 07 seconds.
You’ve now completed the creation of a new Azure OpenAI resource and deployed cutting-edge large language models to your resource. Next, let’s start interacting with the AI!
Interact with the Azure AI Studio Chat Playground
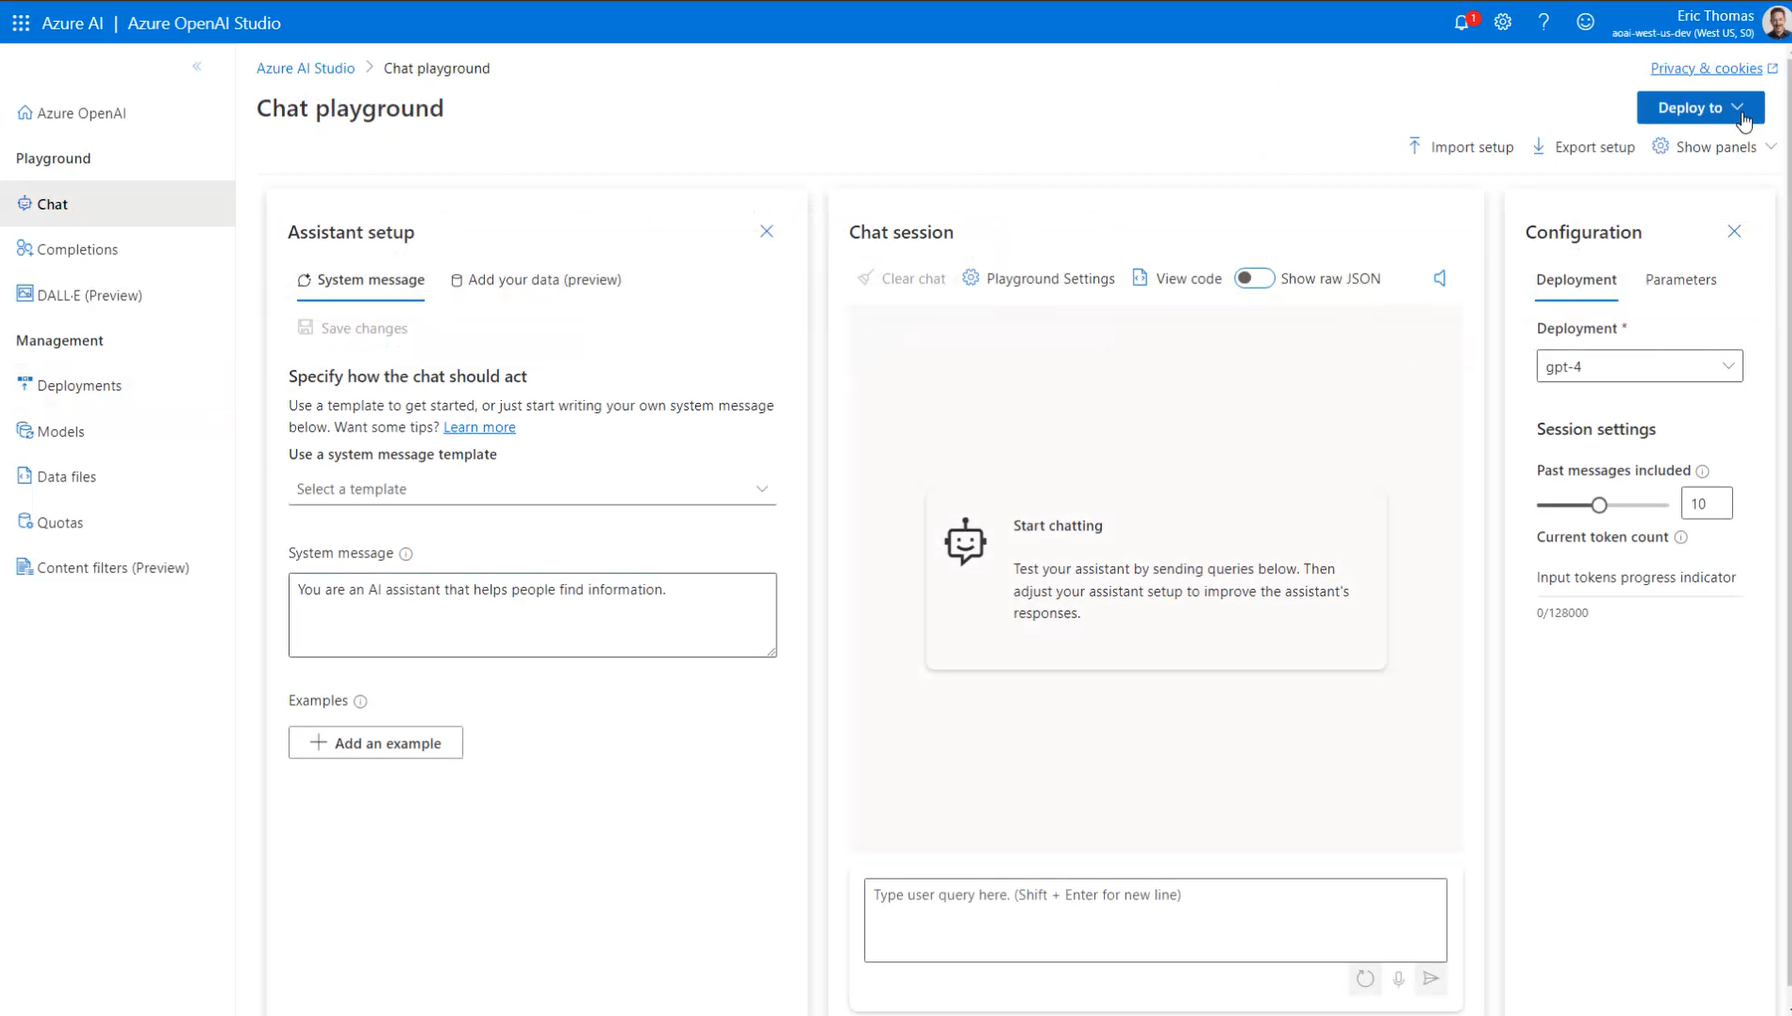
Now that our resources and models are deployed, it’s time to put them to use. Azure AI Studio comes with a great interactive chat application called the Chat playground. Click “Chat” in the left navigation bar to initialize it.
Azure OpenAI Studio opens up a page with three main panels, shown in Figure 10. In the next few pages, I’ll cover these in more detail with zoomed in screenshots.
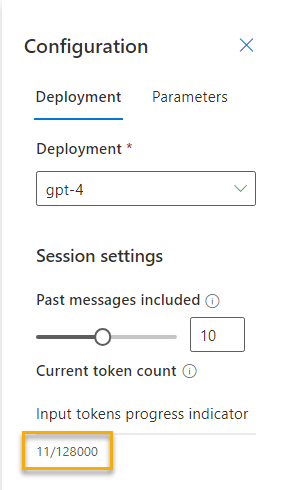
I’ll start with discussing the Chat configuration panel on the right, shown in figure 11:
- The Deployment section allows you to select your deployed model (either gpt-4 or gpt-3.5).
- In the Session settings of the configuration panel, you can set how many of the recent messages you want to include in the AI conversation.
- In addition, the configuration panel helps you keep track of the number of tokens sent to Azure OpenAI. NOTE: To learn more about tokens, look here: https://duckduckgo.com/?q=token+llm&atb=v341-1&ia=web
Now I’ll discuss the Assistant setup panel on the left side of the Chat playground, as shown in figure 12.
If you are following along in the video, we’re at 5 minutes and 40 seconds.
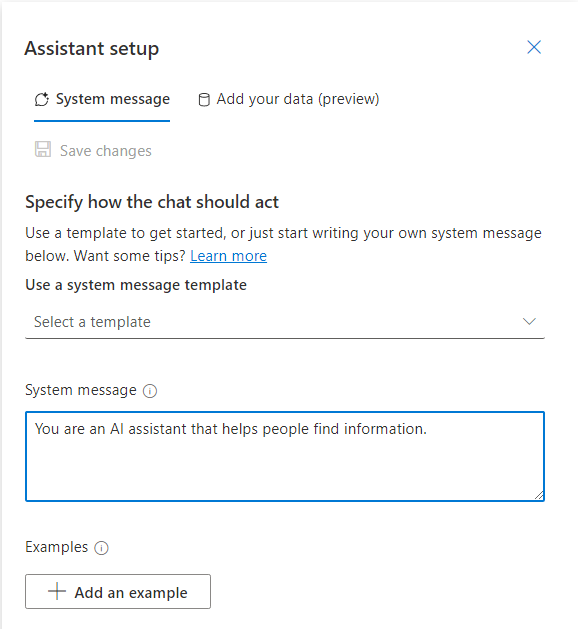
- The system message template allows you to choose from a list of pre-defined system prompts or customize your own. In the video, I change this system message to say, “You are an expert Python engineer.” I’ll click Save here.
- Optional: Click + Add an example to load the types of responses you want the AI to produce. Not covered in this QuickStart.
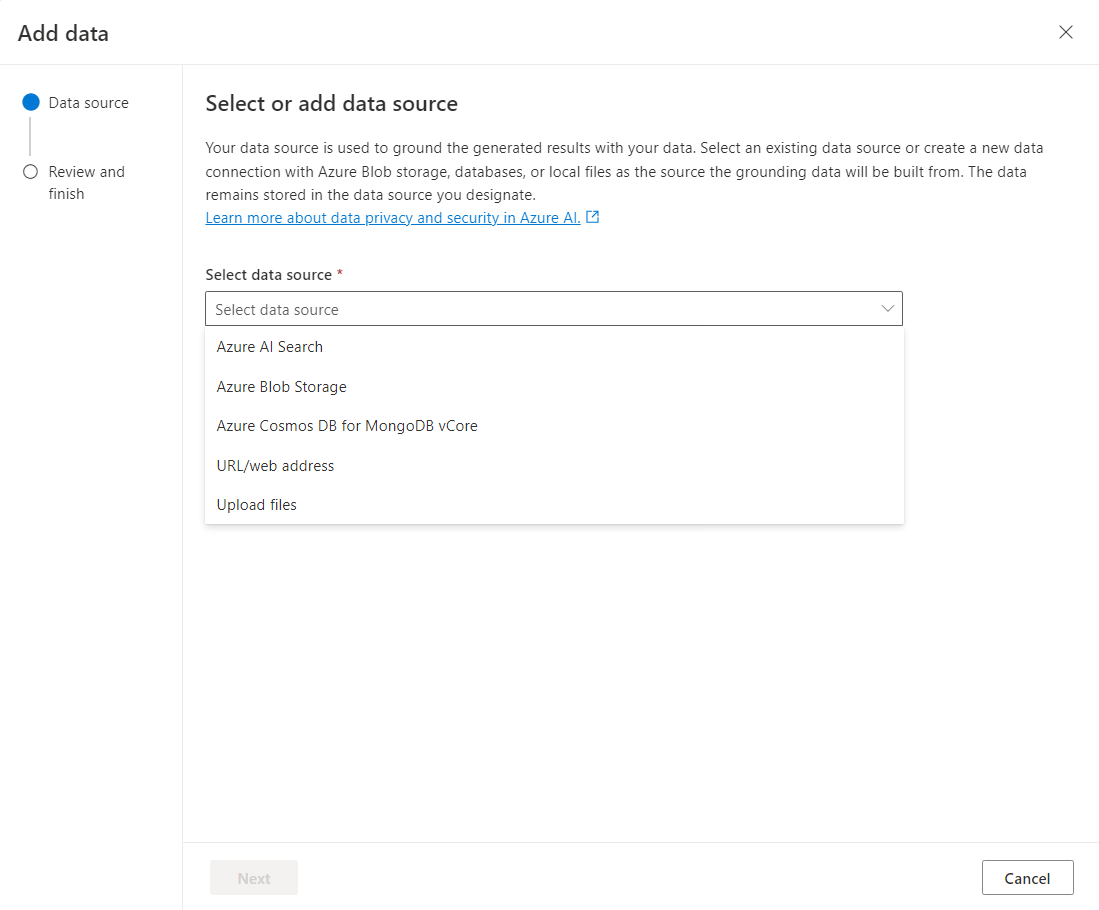
- Optional: Click Add your own data that the AI can reference when producing responses. In figure 13 you can see a list of the data sources you can load data from to ground the generated results.
Retrieval Augmented Generation is out of scope of this QuickStart tutorial, but this provides a very powerful “Retrieval Augmented Generation (RAG)” option for the Chat playground.
If you are following along in the video, we’re at 6 minutes and 03 seconds.
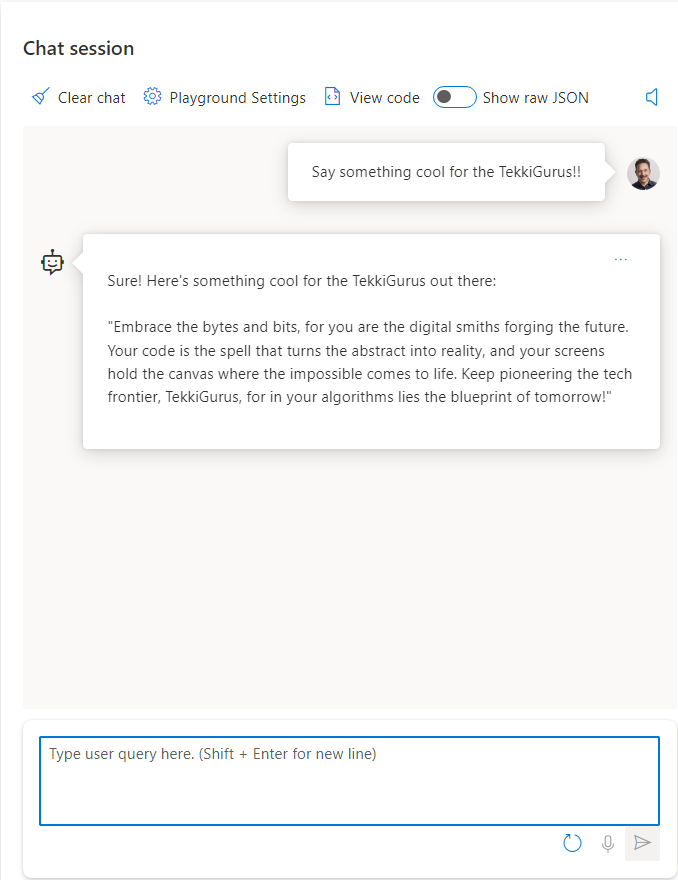
Now things are getting very interesting. I’ll go into the Chat session panel and describe the work that I want my deployed LLM and AI to do. If you are following the video, I’m going to ask it to build a study plan for an aspiring Python developer.
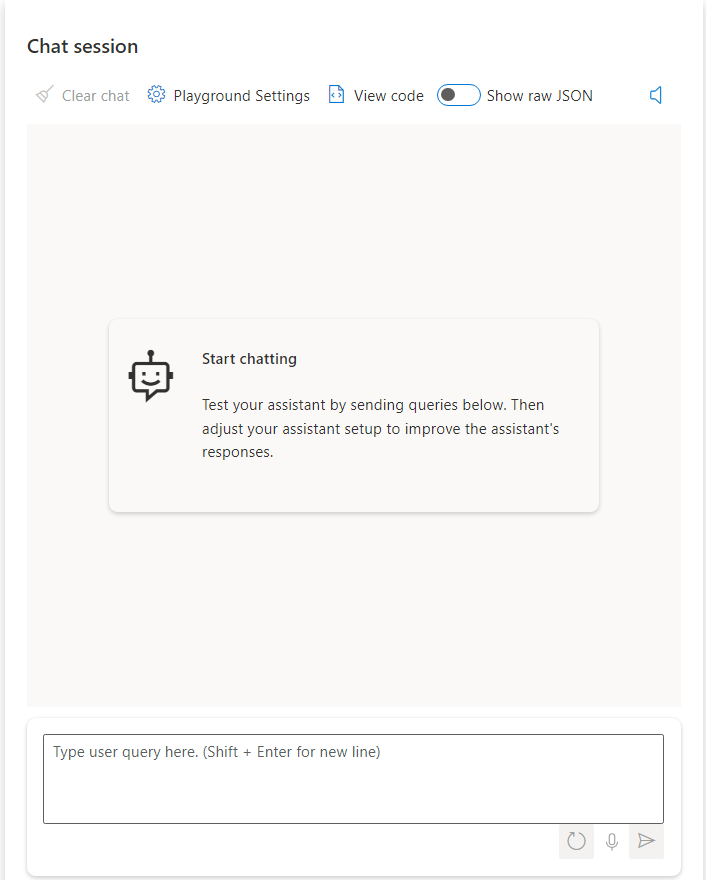
Type in a query here to interact with your chosen LLM.
- Hint: Use SHFT + ENTER to add a new line without sending the query to the AI
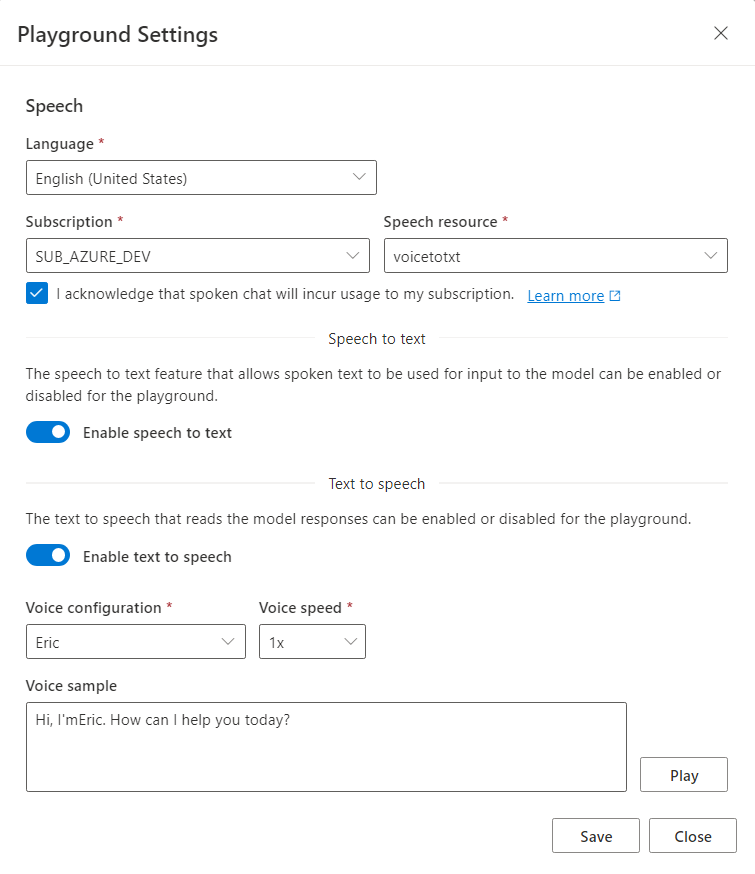
- Playground Settings allow you to configure text-to-speech resources so your AI model can verbally reply to you. This is a paid feature that requires an Azure AI Speech resource to be setup.
- View Code (option at the top of figure 14) provides you with various code snippets (Python, C# and curl) to jumpstart your development efforts, as shown in figure 16.
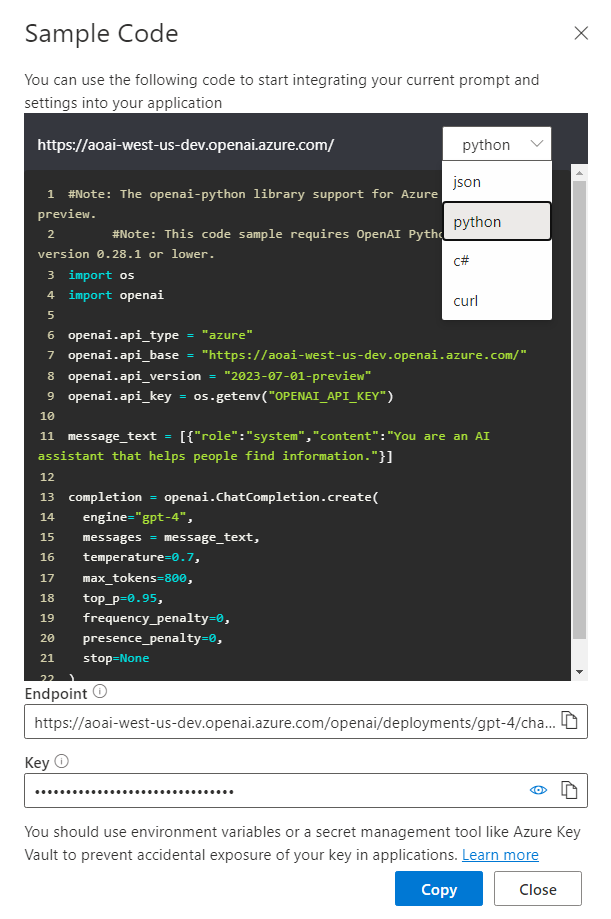
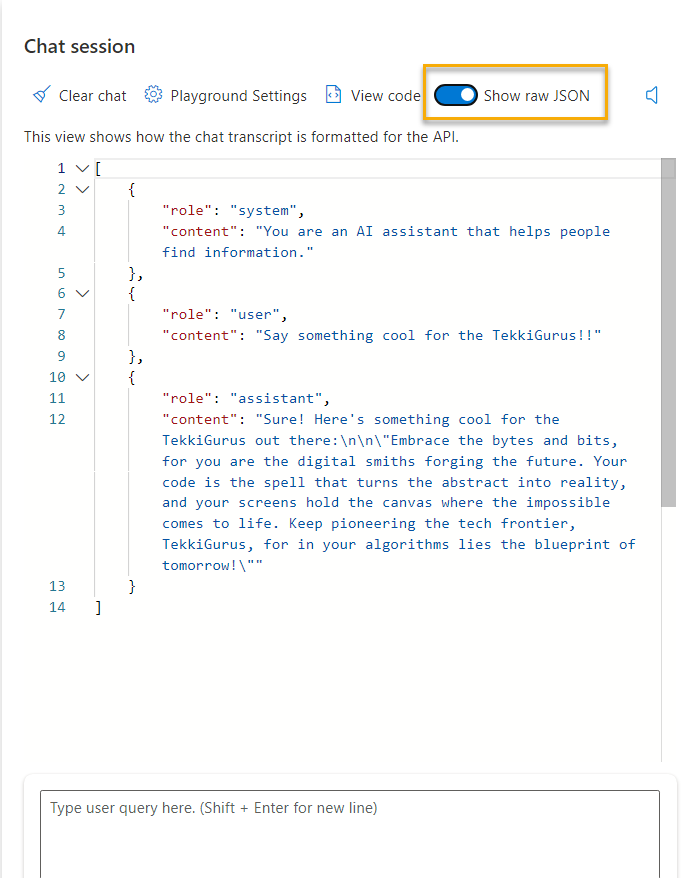
Show raw JSON (top of figure 17) is a handy way to see, and if desired, copy, the correct syntax to be used in REST API requests.
- Example: Toggling “Show raw JSON” gives you working syntax to use when submitting prompts via the REST API.
I hope you were able to follow along with this quick start tutorial and now you too have deployed Azure OpenAI models to your organization. The potential for this technology to provide value is limitless. Whether you need an on-call proof-reader for your next critical report or a brainstorming partner for your team’s next initiative, Azure OpenAI provides your organization with the necessary tools to make it happen.

Eric Thomas
Eric Thomas is a Senior Software Engineer focused on developing cloud-first apps and automations. Eric is focused on Power Apps, Power Automate and deploying Azure Services. His language of choice is Python. Some favorite Azure resources include Logic Apps, Functions, Azure SQL, Azure OpenAI, Blob Storage and Key Vault. Eric is data fluent and astute with REST APIs, basic app security and systems administration. He always engages thoughtfully with each team he is a part of and creates rich documentation and diagrams for each project he is lucky to work on.