Using Microsoft Shifts to Track Hybrid Work Schedules

Shifts in Microsoft Teams is an often-overlooked app in the Microsoft stack because it’s marketed as being for firstline workers, who don’t have their own computing devices. However, with a few simple tweaks, an organization can use it to track who is working from home or from the office on any given day.
What Is Microsoft Shifts?
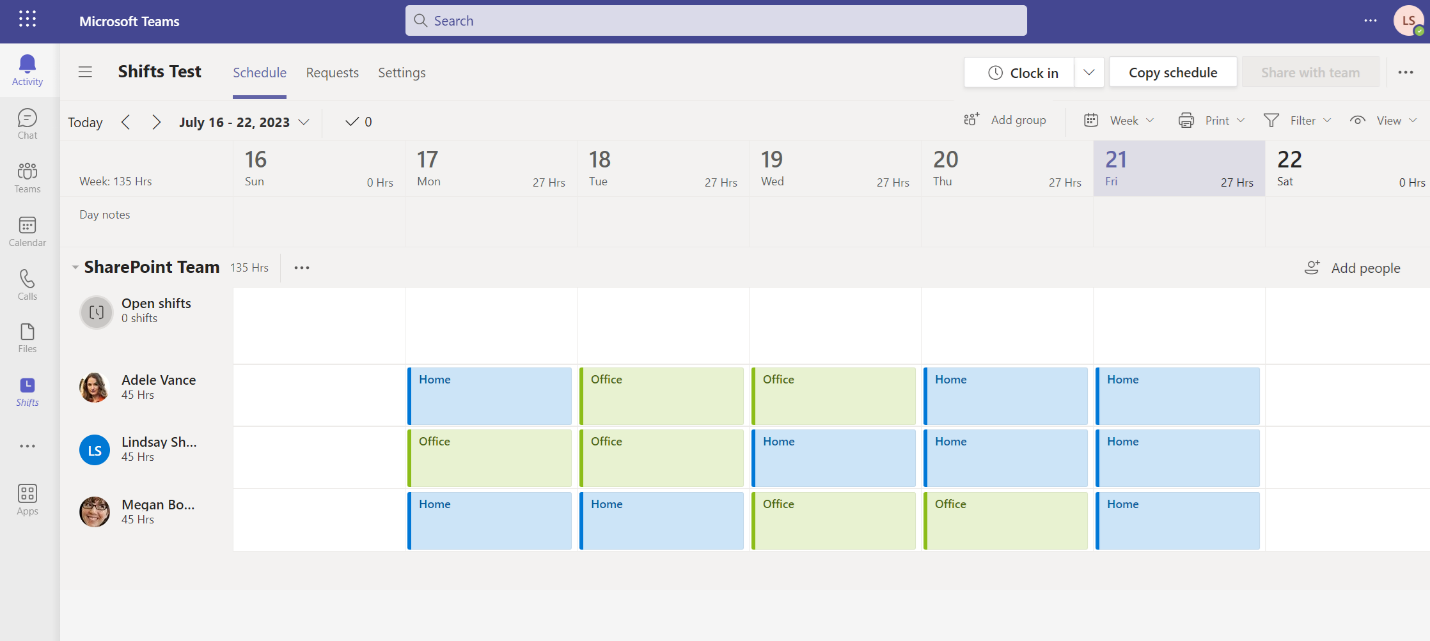
Shifts is a Teams app that, indeed, firstline workers can use to track time and requests for time off, like for vacation or a doctor’s appointment.
| Used with permission from Microsoft. View Full Size
For example, workers can use Shifts to:
- Clock in and out.
- See their scheduled shifts on any device in the Teams app.
- See other shifts on their team, depending on your configurations.
Beyond firstline workers, however, any team that has something other than a 9:00 AM to 5:00 PM, Monday through Friday schedule can use it, and that will be our focus here.
A Different Kind of Use Case
Post-pandemic, many teams have adopted hybrid work schedules, with some employees at home working and some employees in the office on any given day. Tracking these schedules could be useful for planning meetings, looking at employee trends, and even just seeing who is available to go to lunch with you.
Setting up a Shifts group is easy, but you have to be the owner of the team for which you are trying to set up Shifts. If you aren’t the team owner, there is a role you can assign via PowerShell called Schedule Owner, which gives a non-owner scheduling privileges. For more information about adding this policy, see Schedule Owner for Shift Management.
Getting Started with Shifts for Microsoft Teams
To get started, open Teams, and then click the ellipsis (…) icon in the left nav. If you don’t see it, search for Shifts and click to open it. While it’s open, right-click the Shifts icon and then click Pin, so you don’t have to search for it again.
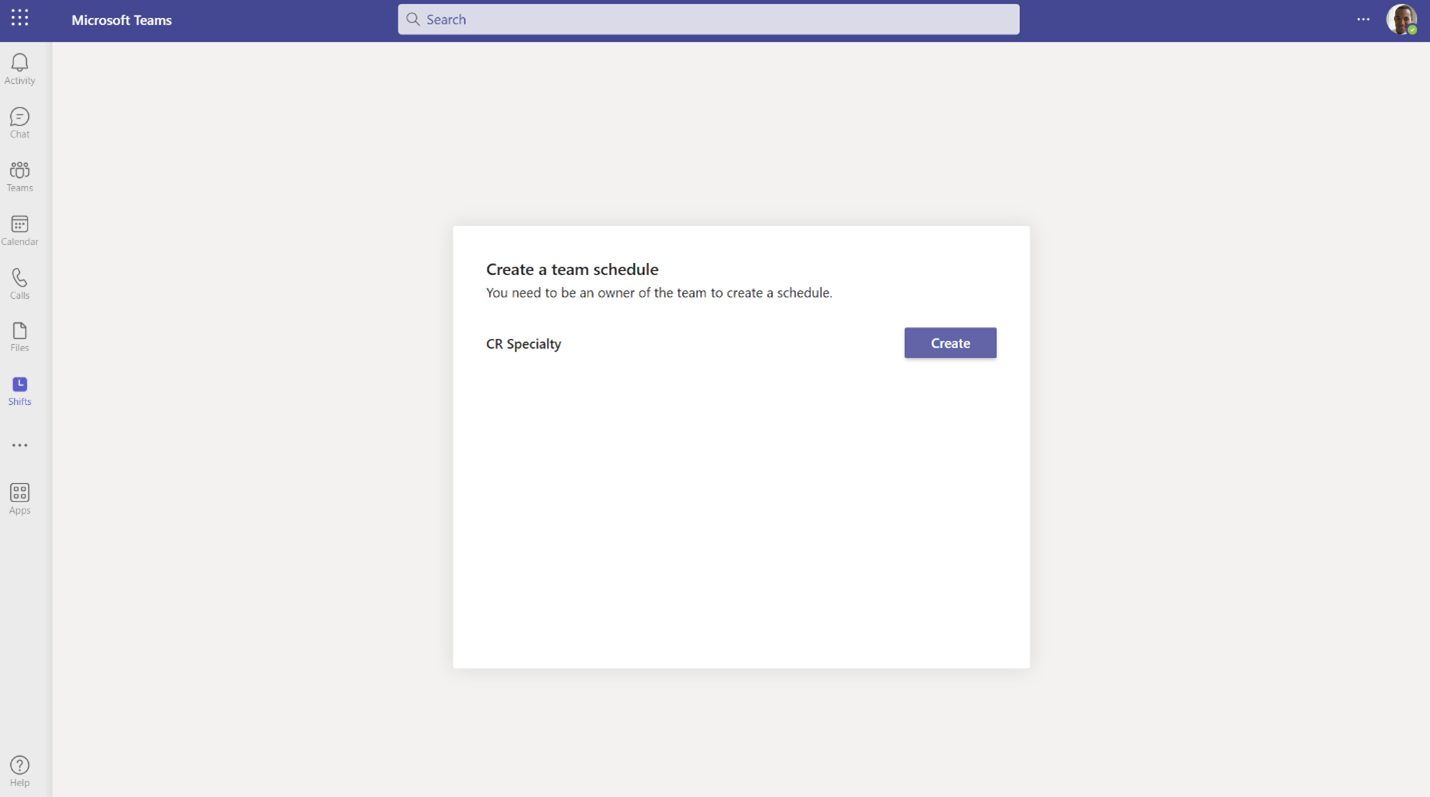
With Shifts open, if you own at least one team, the first time you open it, you will see a screen prompting you to create a new schedule.
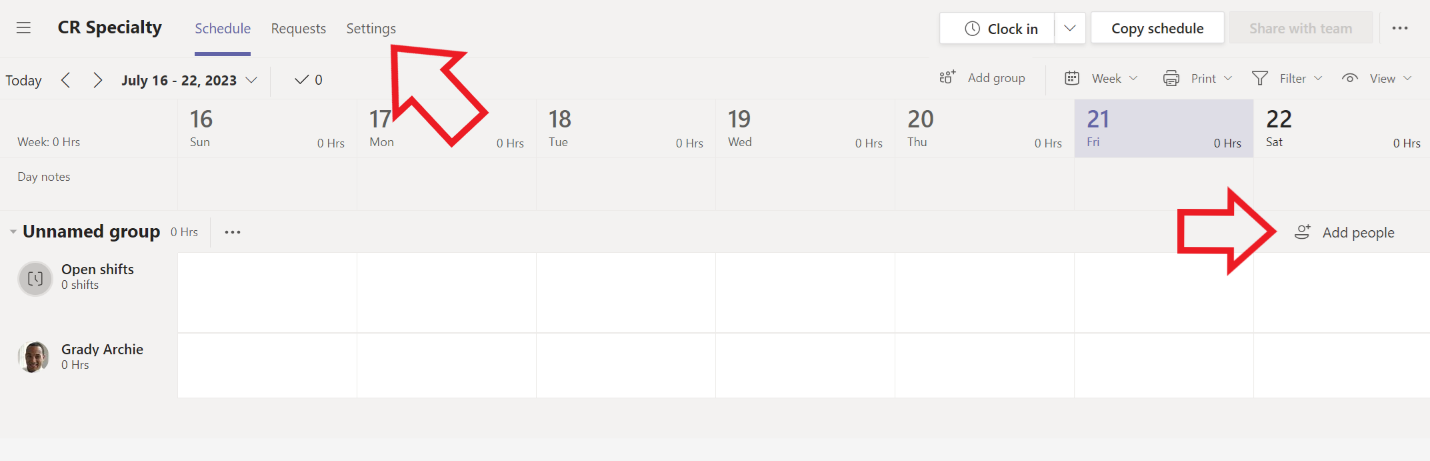
Click Create. Your first Shifts schedule will appear, after you confirm a few other settings like the time zone. With your fresh schedule, there are two important areas to start with: Add people and Settings.
| Used with permission from Microsoft. View Full Size
For this example, the team was empty. When new members are added to the team, click Add people to get them into your schedule.
Note: It takes a little time for them to sync. You will get a message to this effect, if you try to add people to the schedule who were just recently added to the team. You also can’t add people to a schedule, if they aren’t on the team the schedule is based on.
You can have multiple groups as well, if that’s helpful for how your organization is structured. Click Add group on the right side, and then click the three horizontal dots to rename and reorder your groups.
Next, go into Settings. Most importantly, here you can customize your types of leave requests and change the default options by using different names and icons. You can also add custom options. Add two custom options (or rename some existing options): one for Home and one for Office (or whatever you want to call them).
The Employee Experience
Unless you are mandating certain days to come into the office, the rest is up to the employee, after some training, of course.
Employees can only request time off . They can’t edit shifts like the owner or schedule owner can. That’s why you just added the Home and Office options.
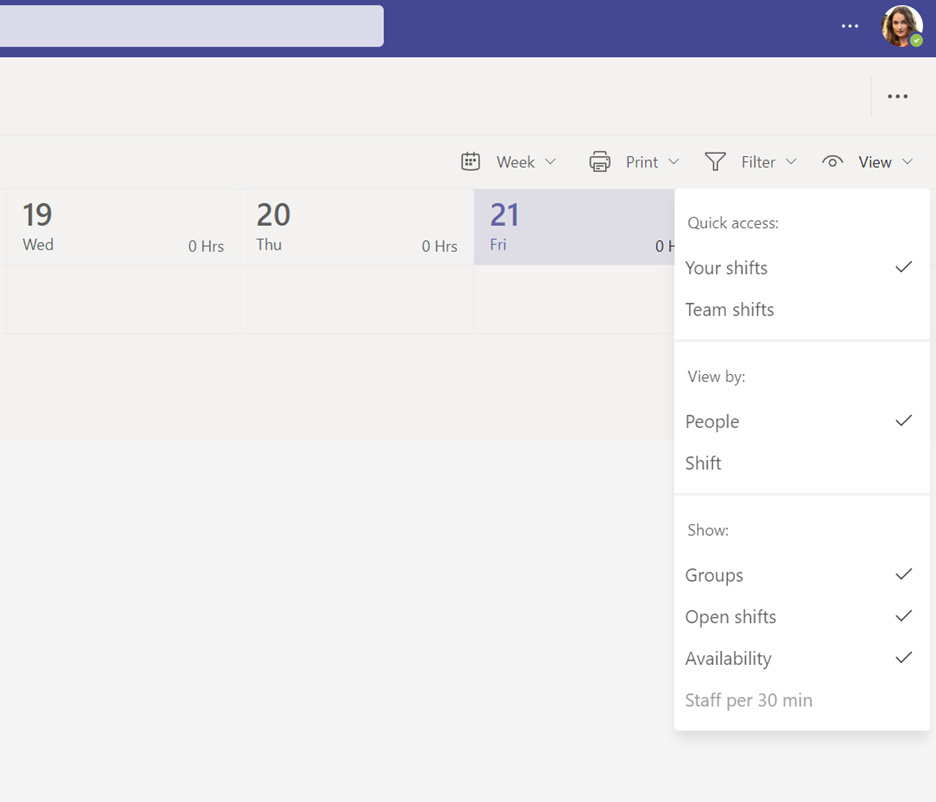
The first thing that employees should do is change their view option. In the top right-hand corner, click View, and then click Team shifts instead of Your shifts to see everyone’s shifts.
Next, employees should go to the Requests tab, and then click New request.
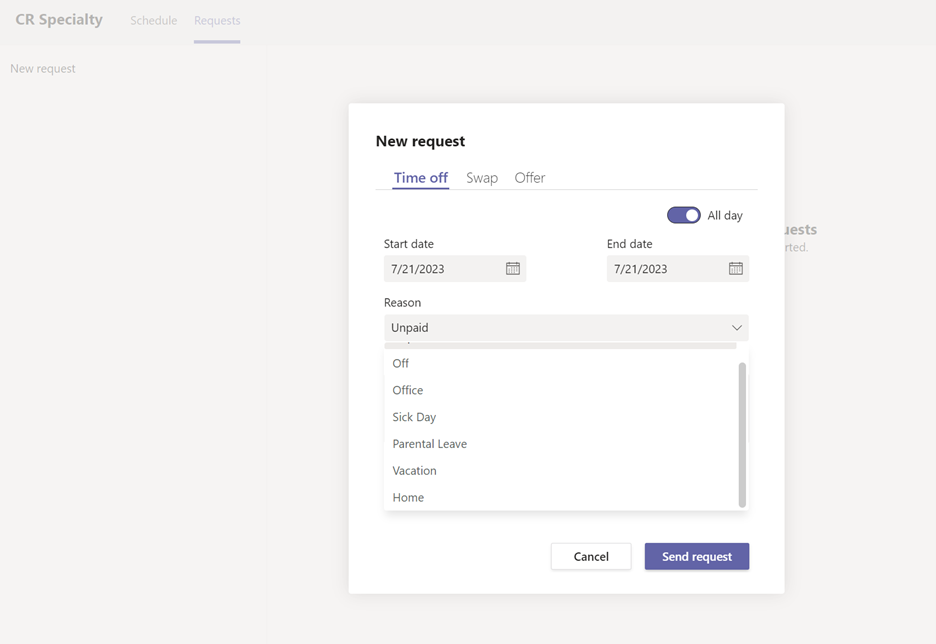
Here, they put in the date and the reason. Normally, they will pick either Home or Office. However, you can also use this to track vacations, so they could track their vacations here, too. If you use the automation option discussed in the next section (“Automating Request Approvals”) of this article, vacation requests will also be auto-approved. Therefore, you should have a separate process for approving vacations and use this to show that an approved vacation is occurring.
The owner or schedule owner will then get these requests in their own Requests tab.

They simply approve them, and then you have a fully populated schedule! To make sure that everyone can see all the shifts, click Share With Team in the top right-hand corner if you’ve manually entered any shifts. Shifts that were approved via a request will automatically show.
Automating Request Approvals
Depending on the size of your team, this amounts to five requests to approve per person, every single week. This could get annoying. However, there’s a template in the Power Automate gallery to auto-approve all requests that are received.
Go to make.powerautomate.com, and then click Templates in the left-hand nav. Search for “shifts” and you will see a template called Auto Approve Time Off Requests. Click the template to select it, and then click Create to make your copy of it.
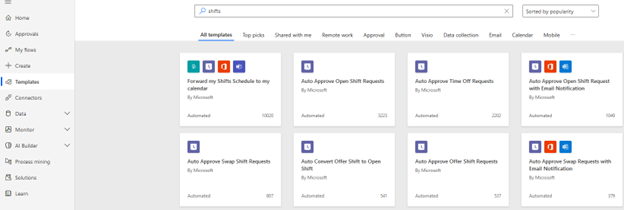
Here, all you have to do is in the trigger (the first action in the flow). Click the down arrow where it says Team, and then select your team from the list. In the If yes section, you can customize the message sent to the employee when the shift is approved. Next, click Save, and you're ready to test it out.
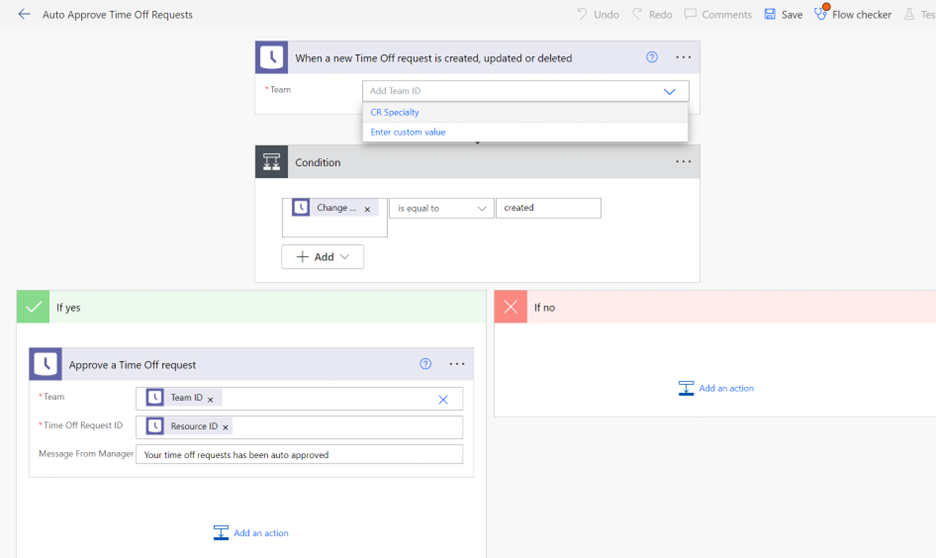
Conclusion
Now you're all set to train your employees and build up your Shifts schedule! Your employees will thank you for this easy solution to a pesky problem.

Lindsay Shelton
In Lindsay's second career, she currently works as an Application Programmer at a medical research institute non-profit, supporting scientists in advancing their mission.
She spent the last decade teaching English Language Arts. During that time, she was selected to receive training to become a technology and pre-engineering teacher based on her aptitude for learning and adapting new technologies with her own students and colleagues.
Lindsay holds a BS in Secondary English Education from the University of Kansas and an MS in Curriculum and Instruction from Emporia State University. In addition, she is certified in Microsoft 365 Teams Administration, Microsoft Power Platform Fundamentals, Microsoft 365 Fundamentals, and she is a Microsoft Certified Trainer. As of 2023, Lindsay is also a Microsoft MVP in Business Applications.
In her spare time, Lindsay enjoys spending time with her two kittens Charlie and Trixie, and marathoning a wide variety of television shows.