How to Use AI in Power Apps (Copilot)

In this article, I'll show you how AI empowers Power Apps allowing you to easily create your solution just by describing what you want to do with your Power App, and AI will generate a first template for you.
Prerequisite
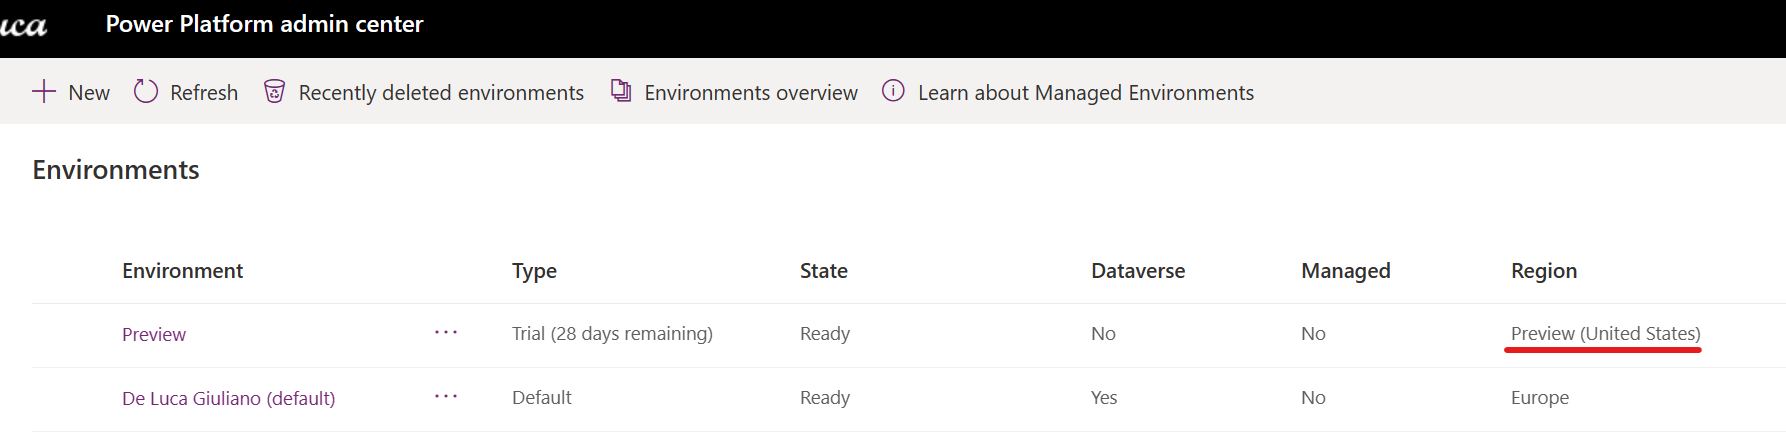
Microsoft is rolling out this new AI feature aka Copilot right now, if you want to play with this capability, which is in preview, you have to create a new environment targeting Preview (United States) in the Power Platform Admin Center.
https://admin.powerplatform.microsoft.com/environments
How to Use Copilot in Power Apps
Alright, now that we have an environment in the preview, we can open the browser to this URL:
make.preview.powerapps.com
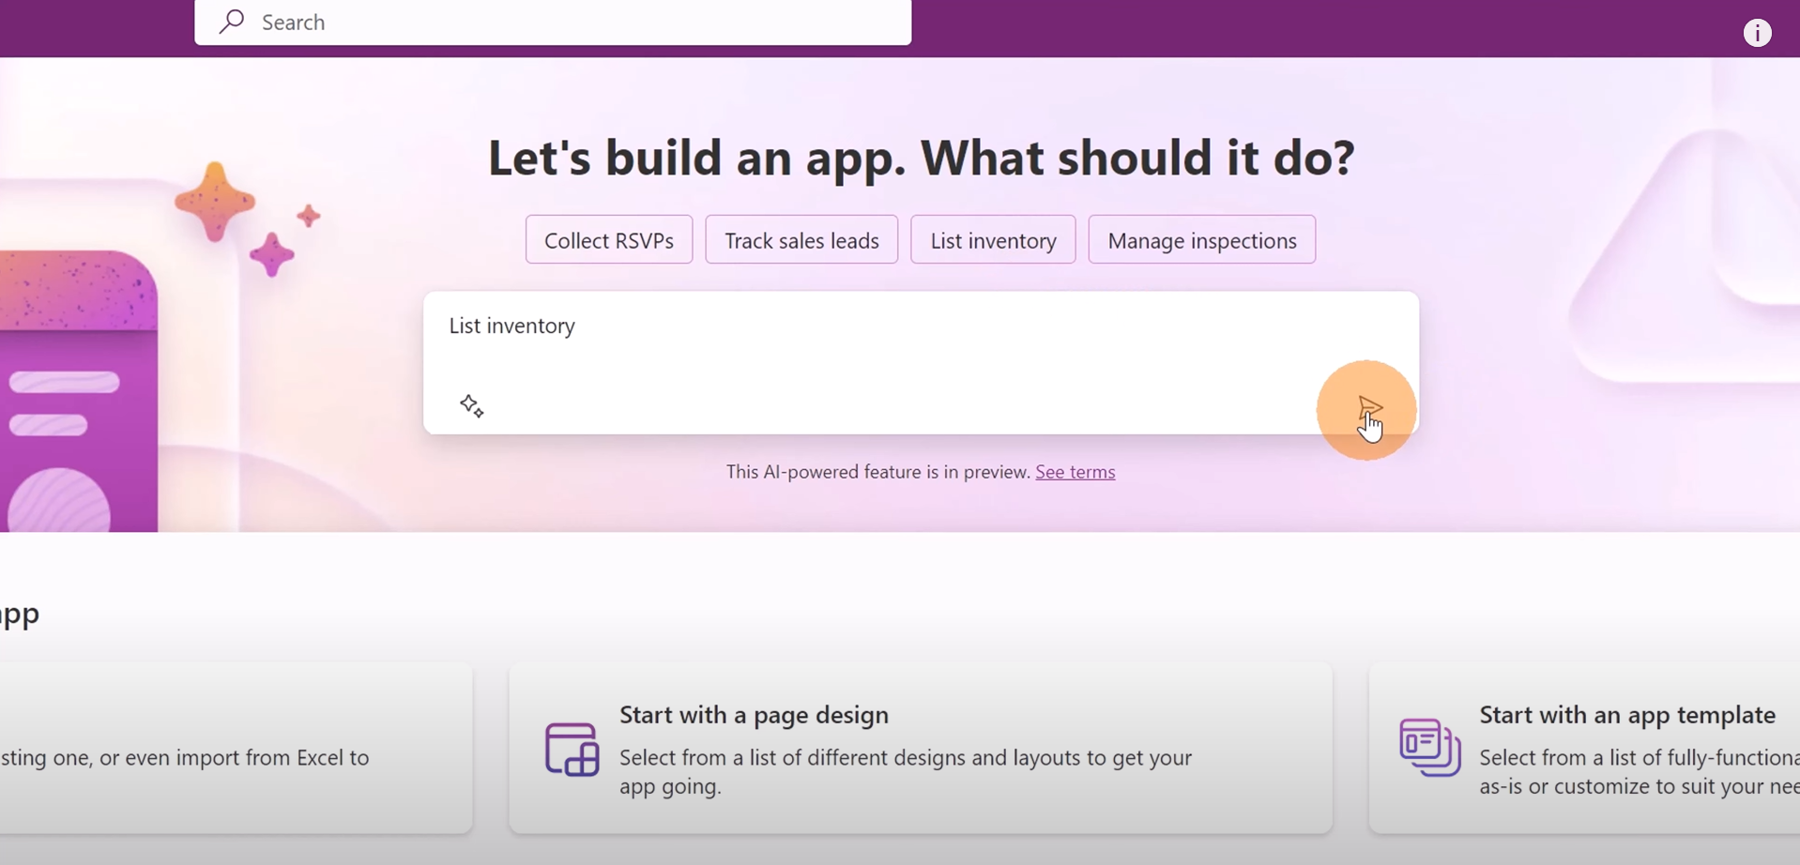
Finally, we'll land on the new Home page of Power Apps with Copilot (Figure 2):

On top of the Home page, we have this new functionality powered by AI Copilot that will allow me to ask for a new app (see the top of Figure 2). AI will produce and create a template of my Power App so I will not start from scratch, but I will start from a solid structure.
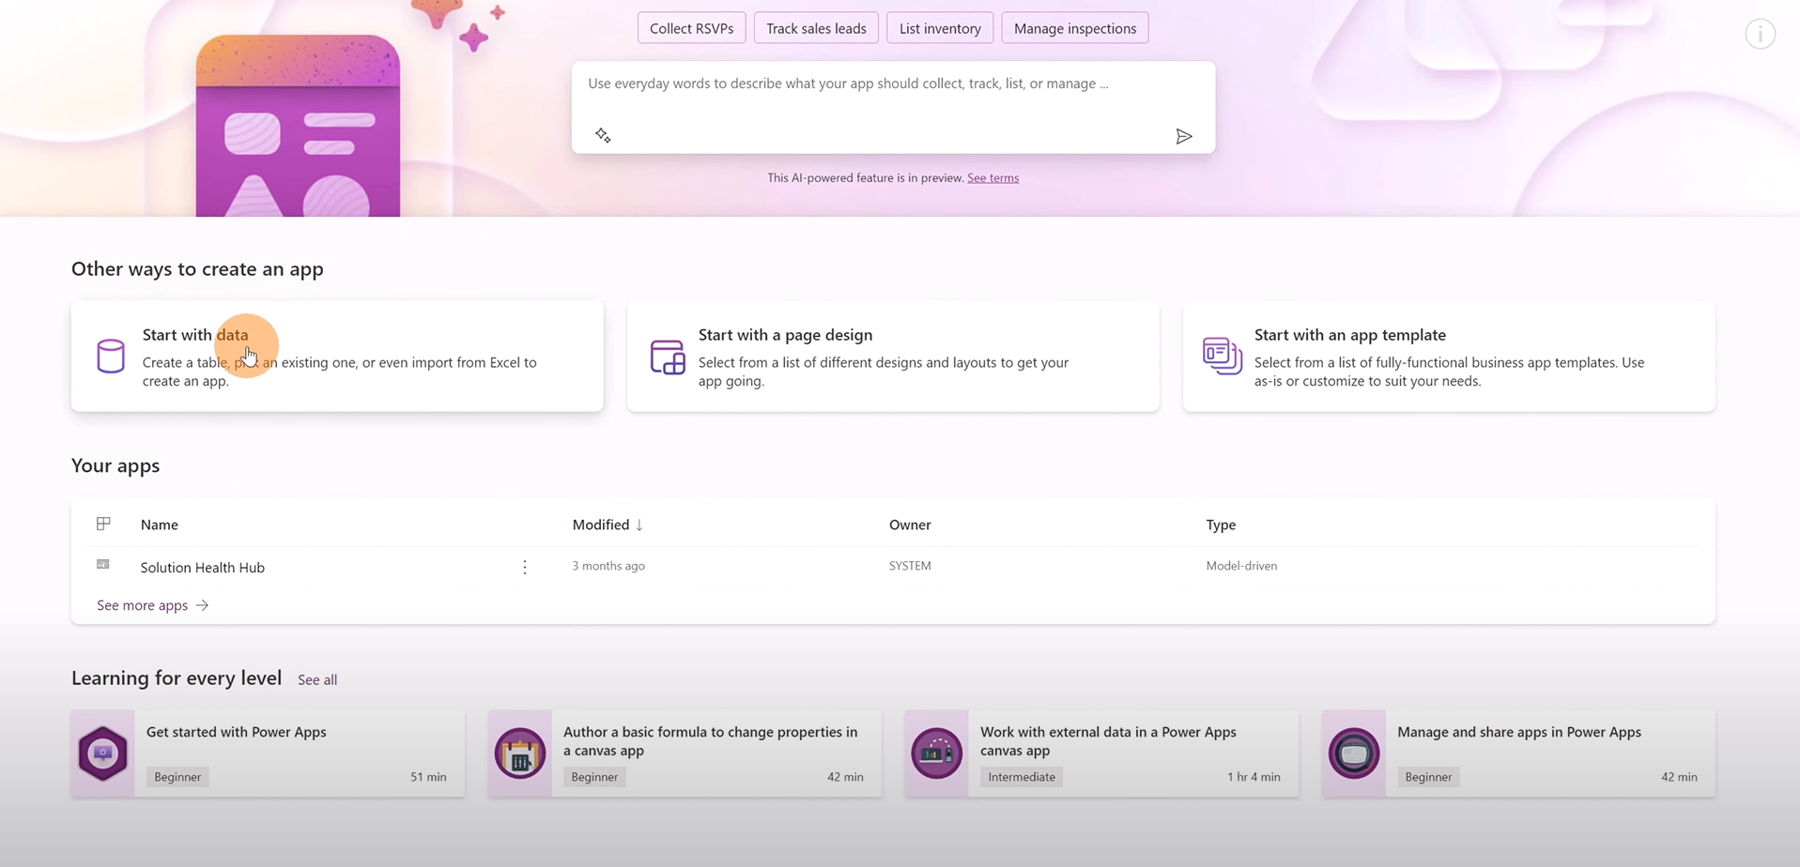
In the section called Other ways to create an app I have additional functionality like for example “Start with data,” “Start with a page design,” and “Start with an app template.”
In the first application, let me ask Copilot to create an app that will take care of an inventory. I'm going to click on the link suggested on top "List inventory" and then I'm going to confirm my request by clicking on the Go button (see the orange circle in Figure 3):

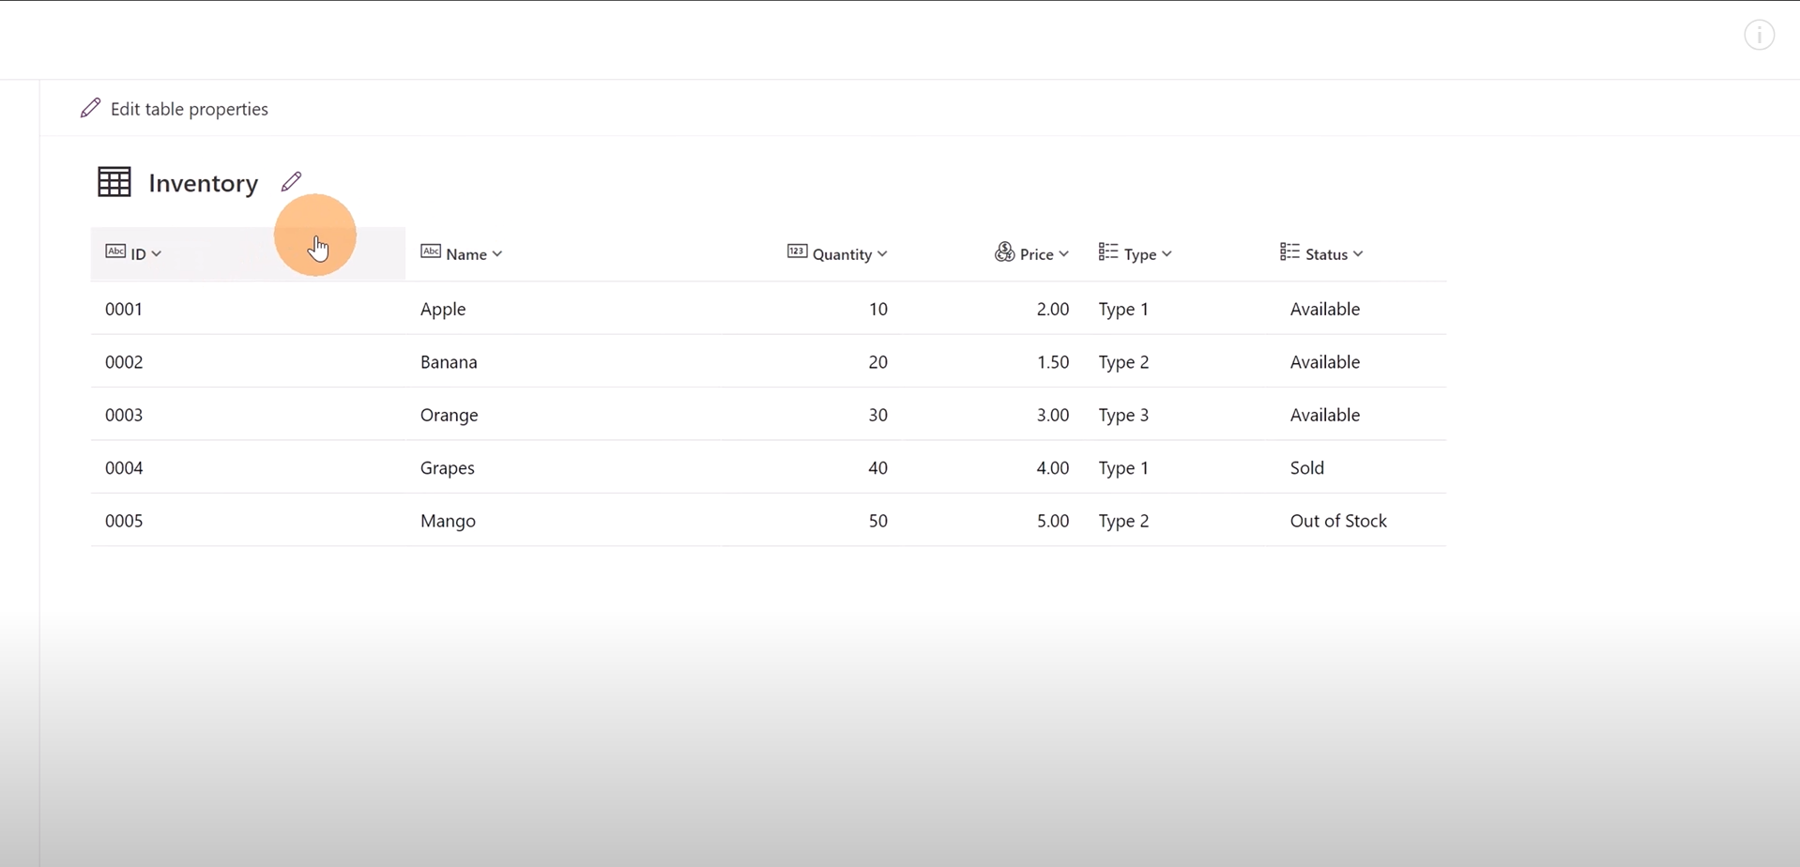
After a few minutes, Copilot creates a Dataverse table called Inventory. It also adds a bunch of columns here like ID, Name, Quantity, Price, Type, and Status (Figure 4).

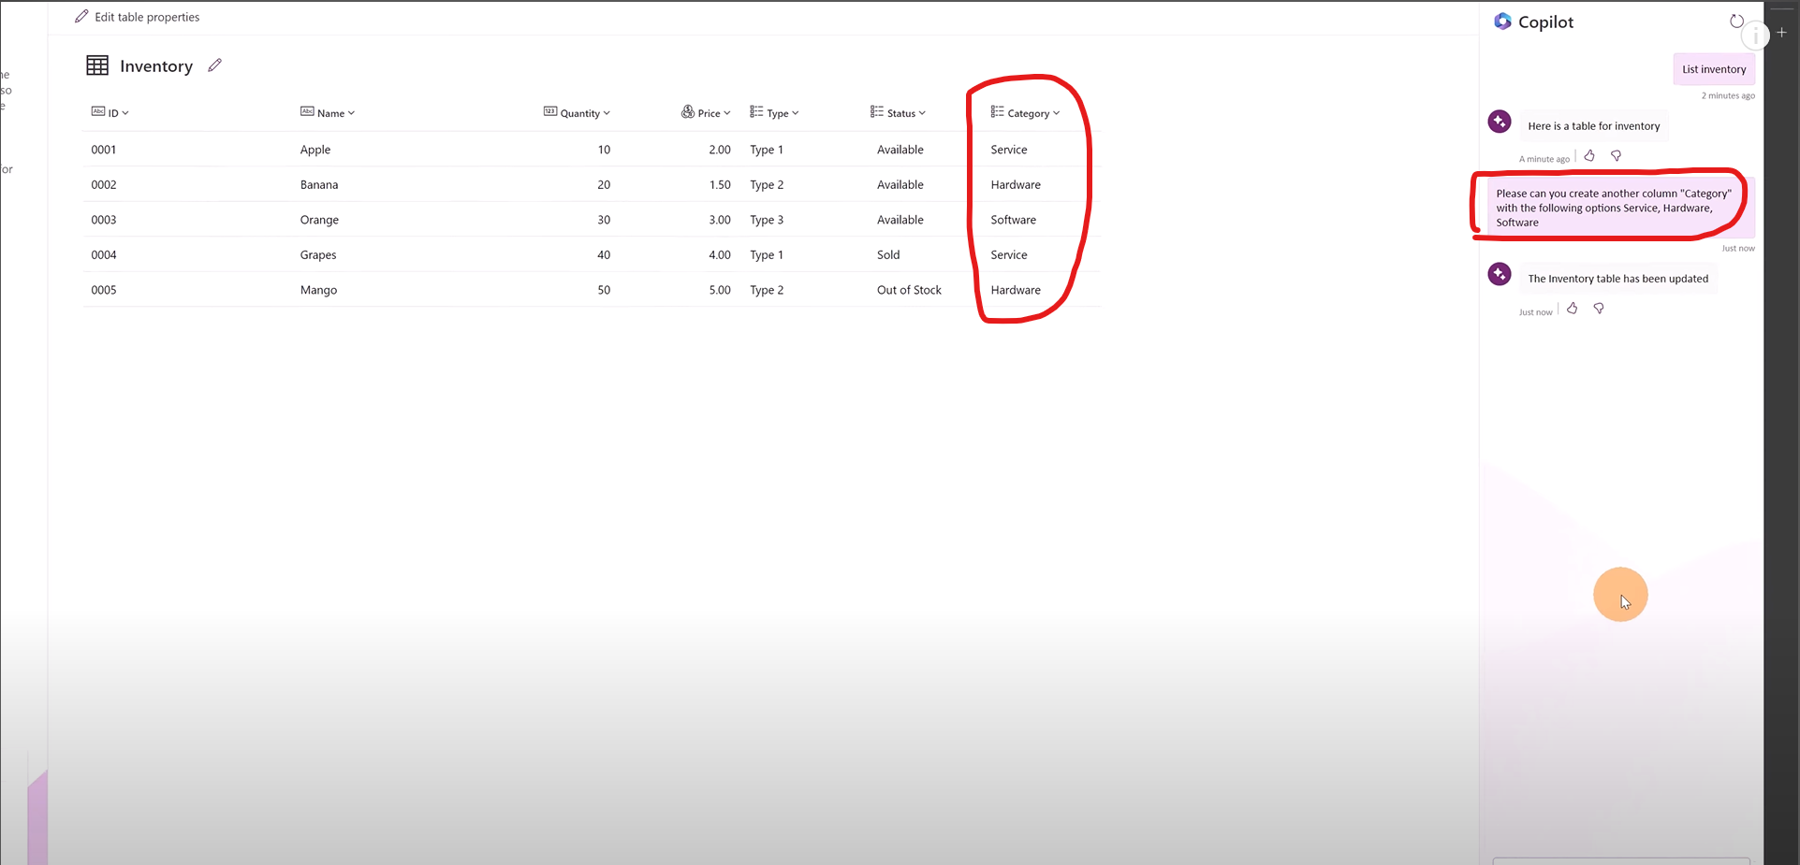
If you watch the video with this article or look at Figure 5, you can see on the right side of the screen Copilot with my previous request "List inventory", now without moving my mouse and performing a manual operation, I can ask Copilot to create an additional column. For instance, I can type “Please can you create another column ”Category" with the following options: Service, Hardware, and Software." I will send the request to Copilot (bottom right area, not included in Figure 5, see the video at 02:40). I wait a moment and then see that Copilot will create an additional column on my table. I don't have to tell it the name of the Inventory table. It knows from the conversation.
Look at this, I have a new column added named Category with options that I asked for before:

How cool is this!
You can ask Copilot to delete or modify columns and Copilot will do that work for you.
Copilot Creates a Responsive App
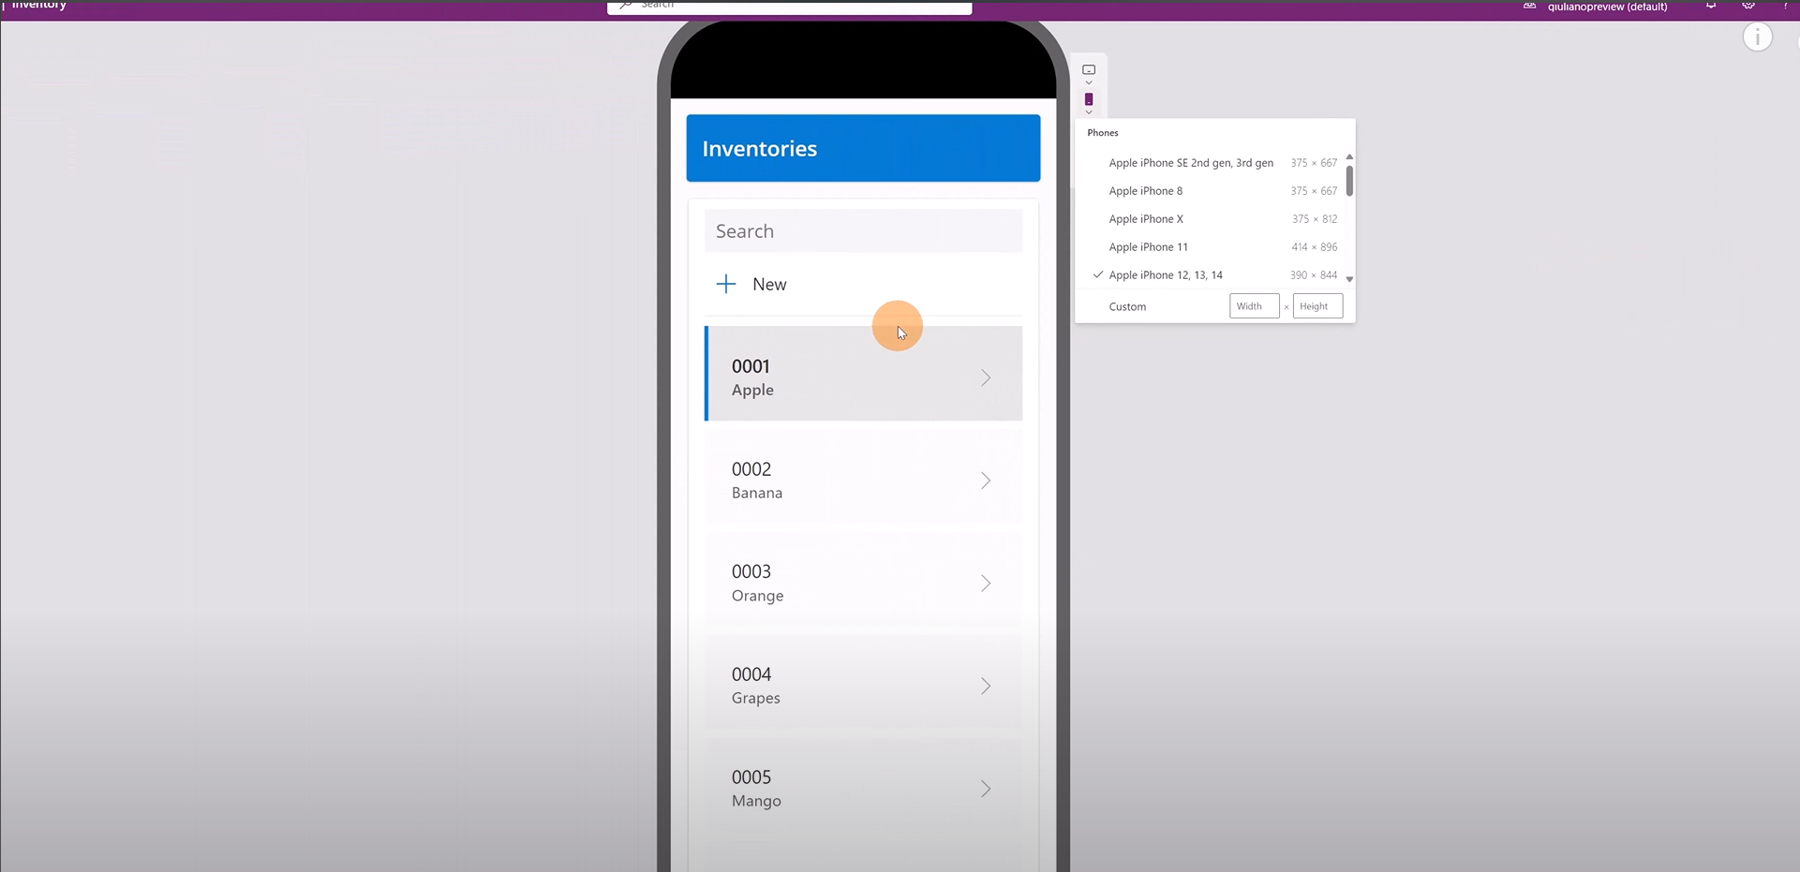
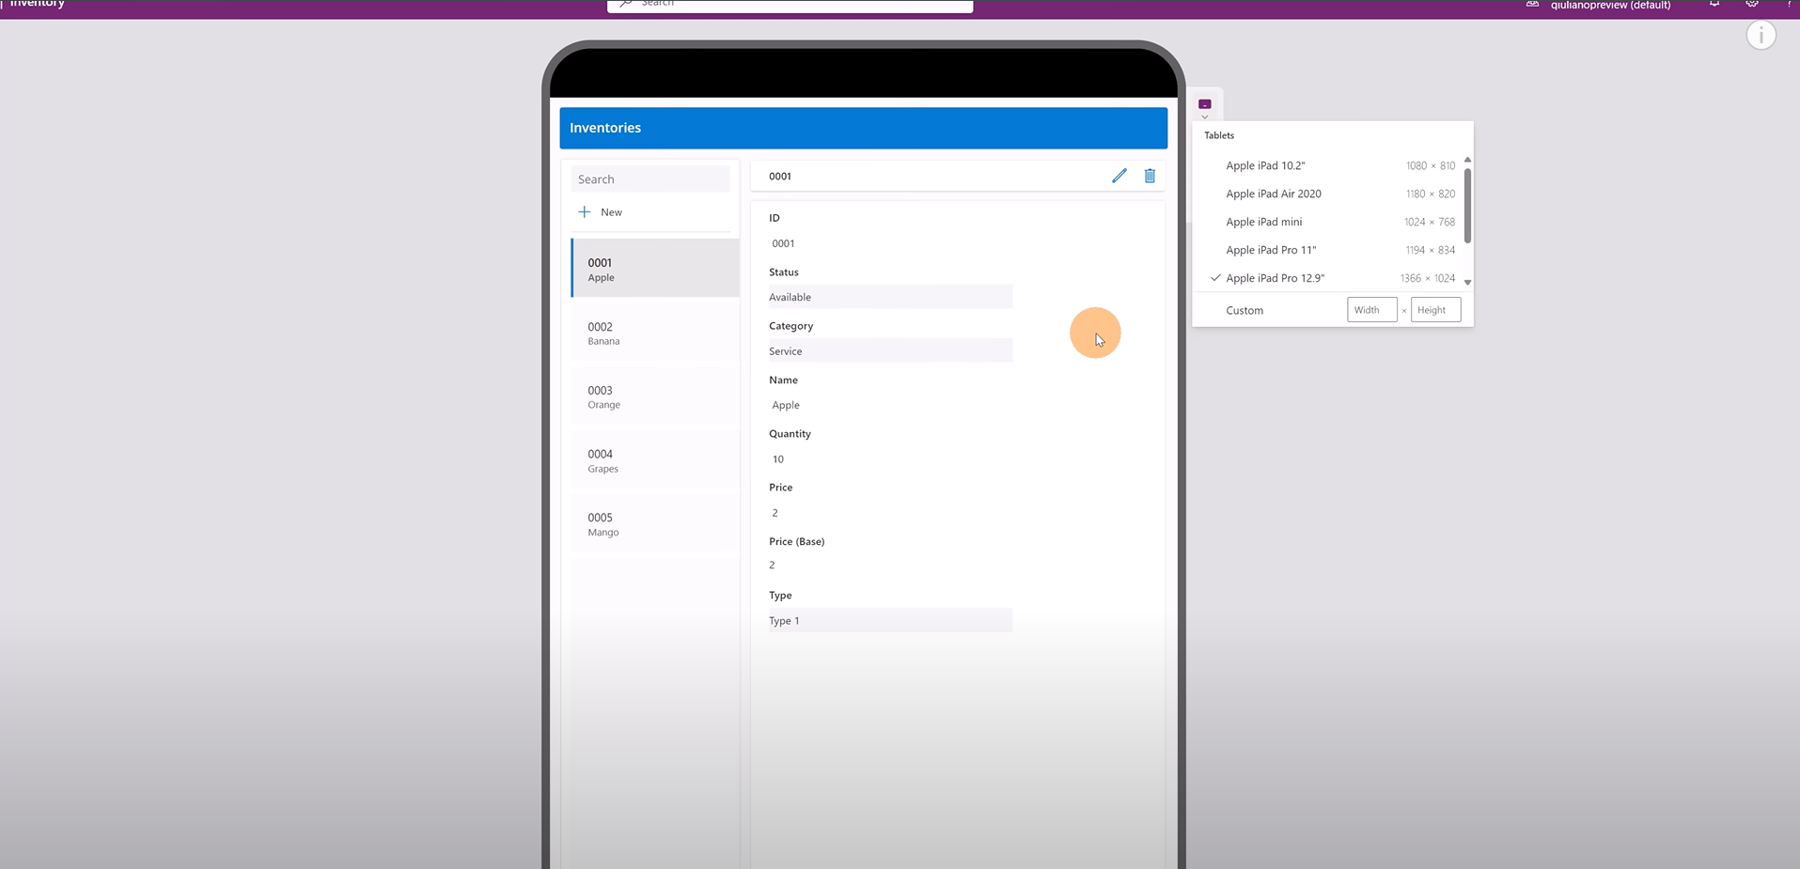
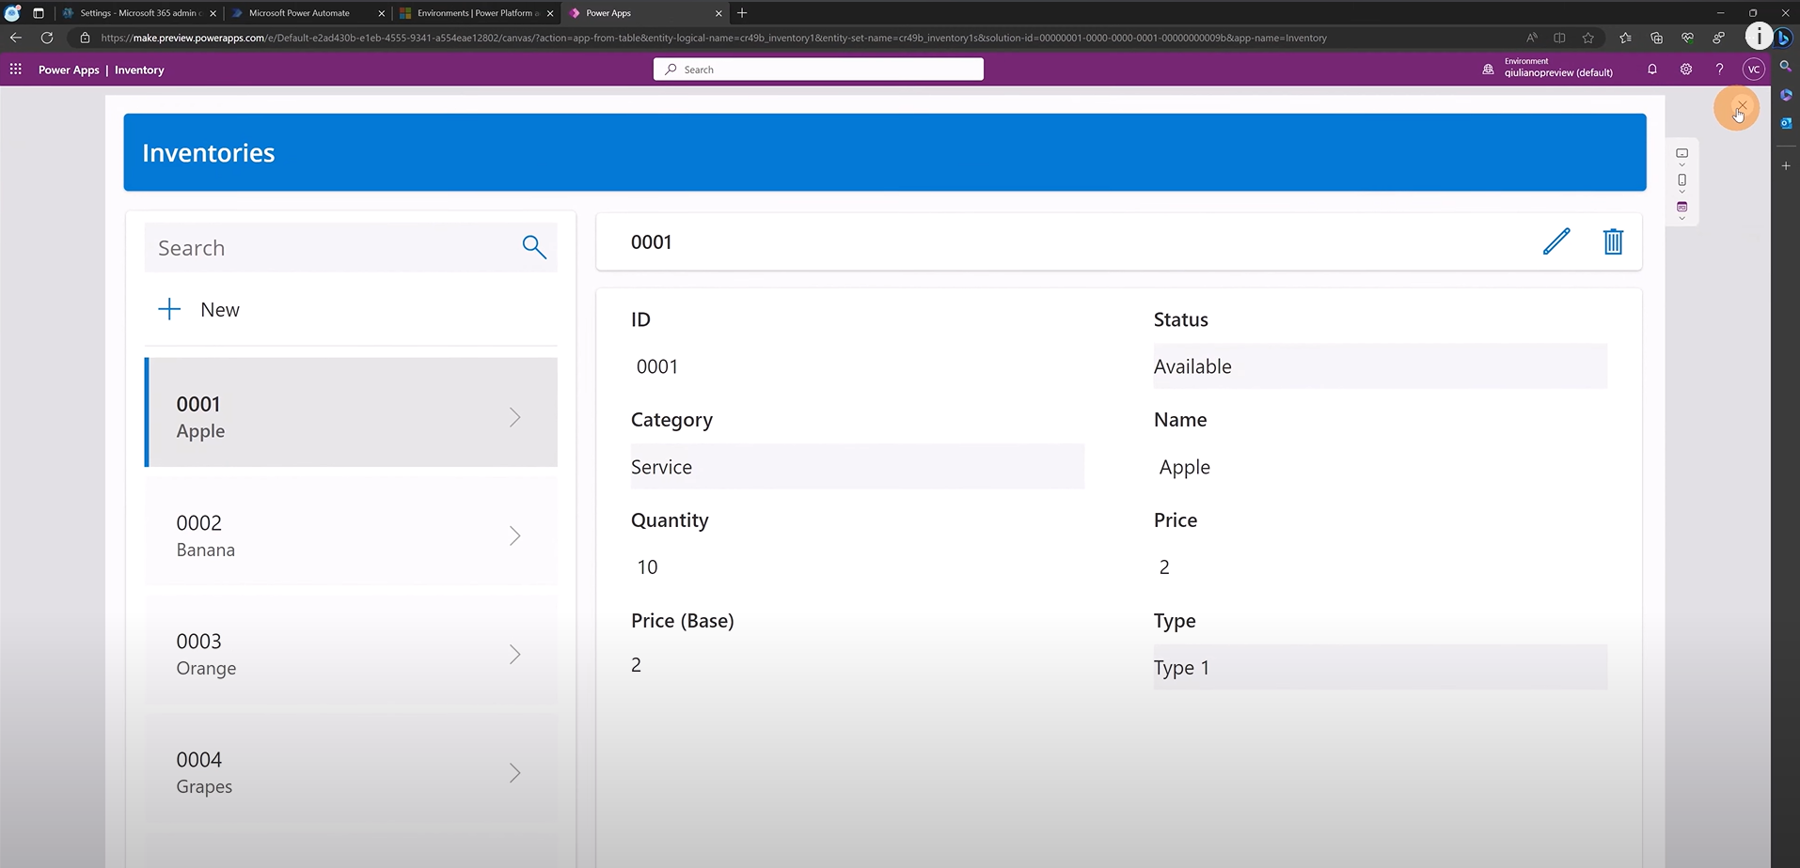
Clicking on the button named Create app (see the video at 03:00) will bring to the starting page where I have a first draft and template of my app. Another cool thing here to know is that this app is responsive; below you can see what it would look like on an iPhone in Figure 6 or a tablet in Figure 7. And of course, in Figure 8 you see the same inventory app running on a desktop.


It doesn't matter where you are because the solution is already responsive.
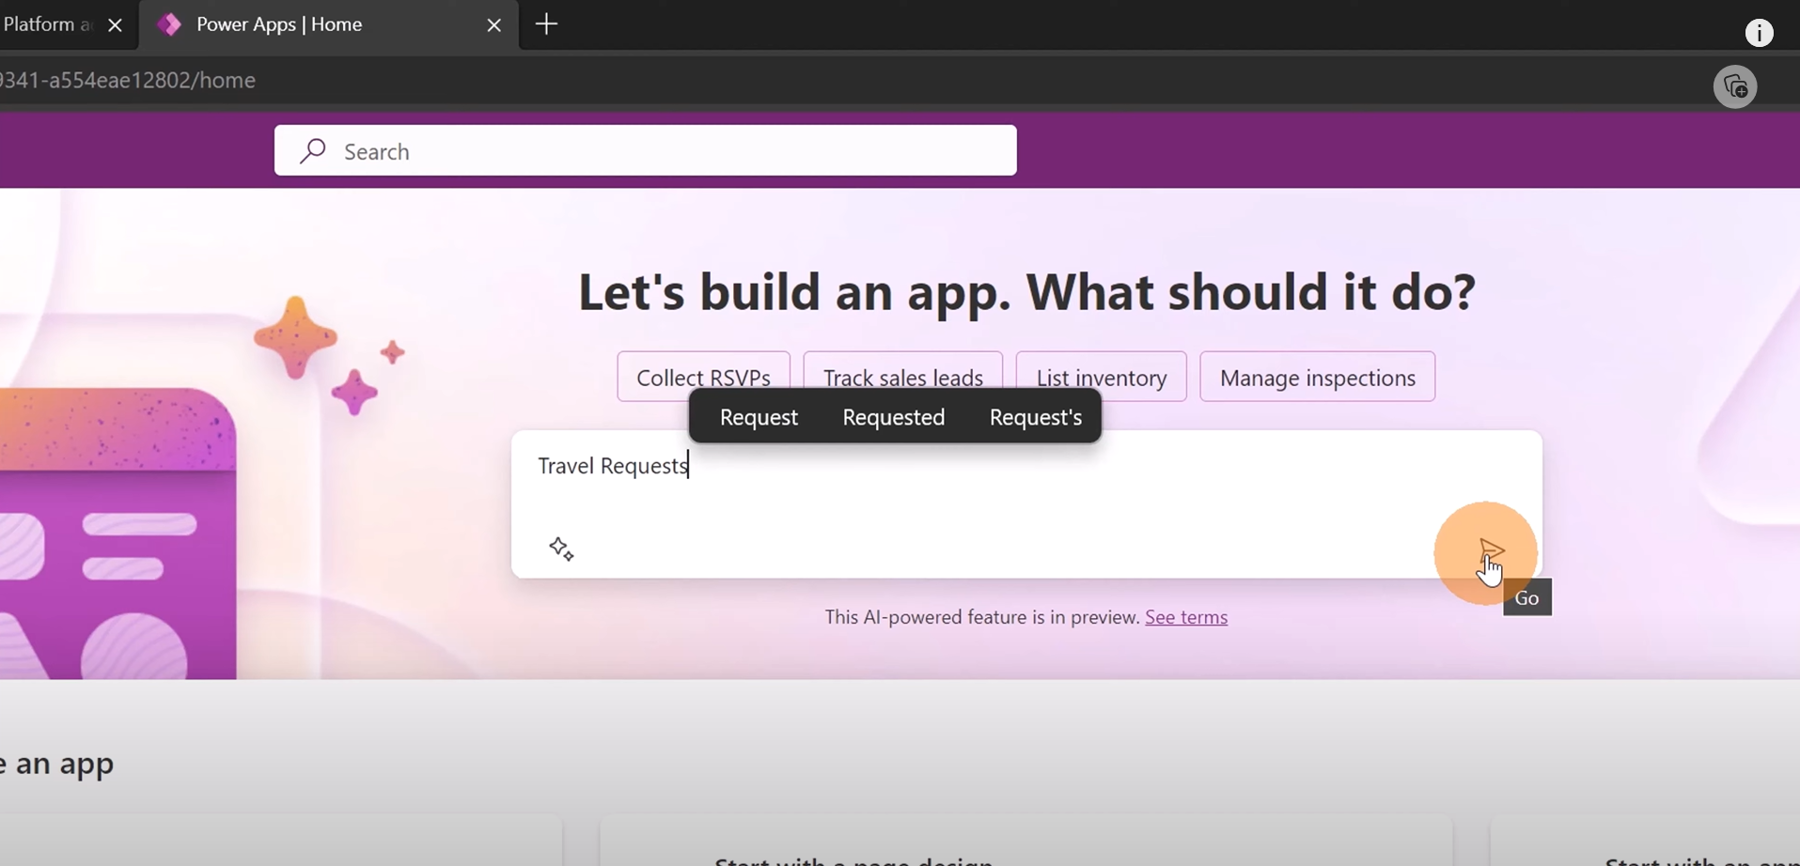
Copilot Creates a Requests App
Let's go back to the homepage of make.preview.powerapps.com in order to create another app. I am going to ask to Copilot to generate and create a "Travel Requests" app, which could manage all travel requests for my organization. In Figure 9, I indicate what kind of app to create and click Go.

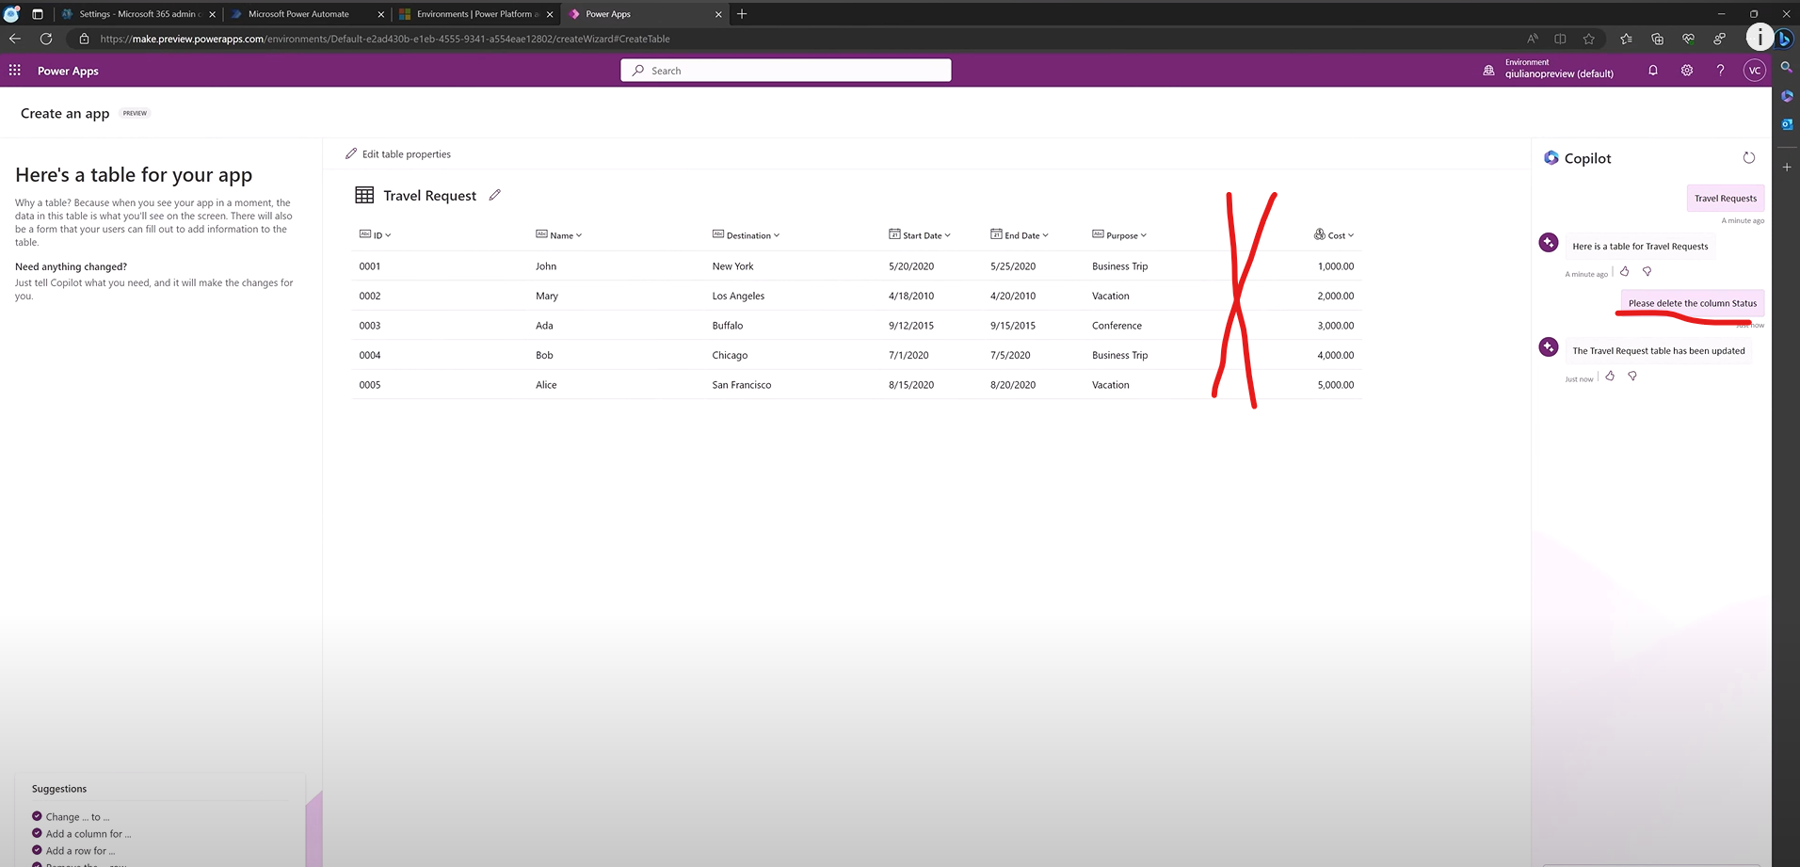
If Copilot is not able to handle your requests, you will see a message that it is not possible to process your request; but this is not the case because Copilot creates a new table named "Travel request" on Dataverse (see Figure 10) with the following columns: ID, Name, Destination, Start Date, End Date, Purpose, Status, and Cost.
Next I want to ask directly to Copilot to modify this table by deleting the column named Status. Let me type "please delete the column Status" and when I click send, voilà the status column is gone.
Other Ways to Create a Power App Using Copilot
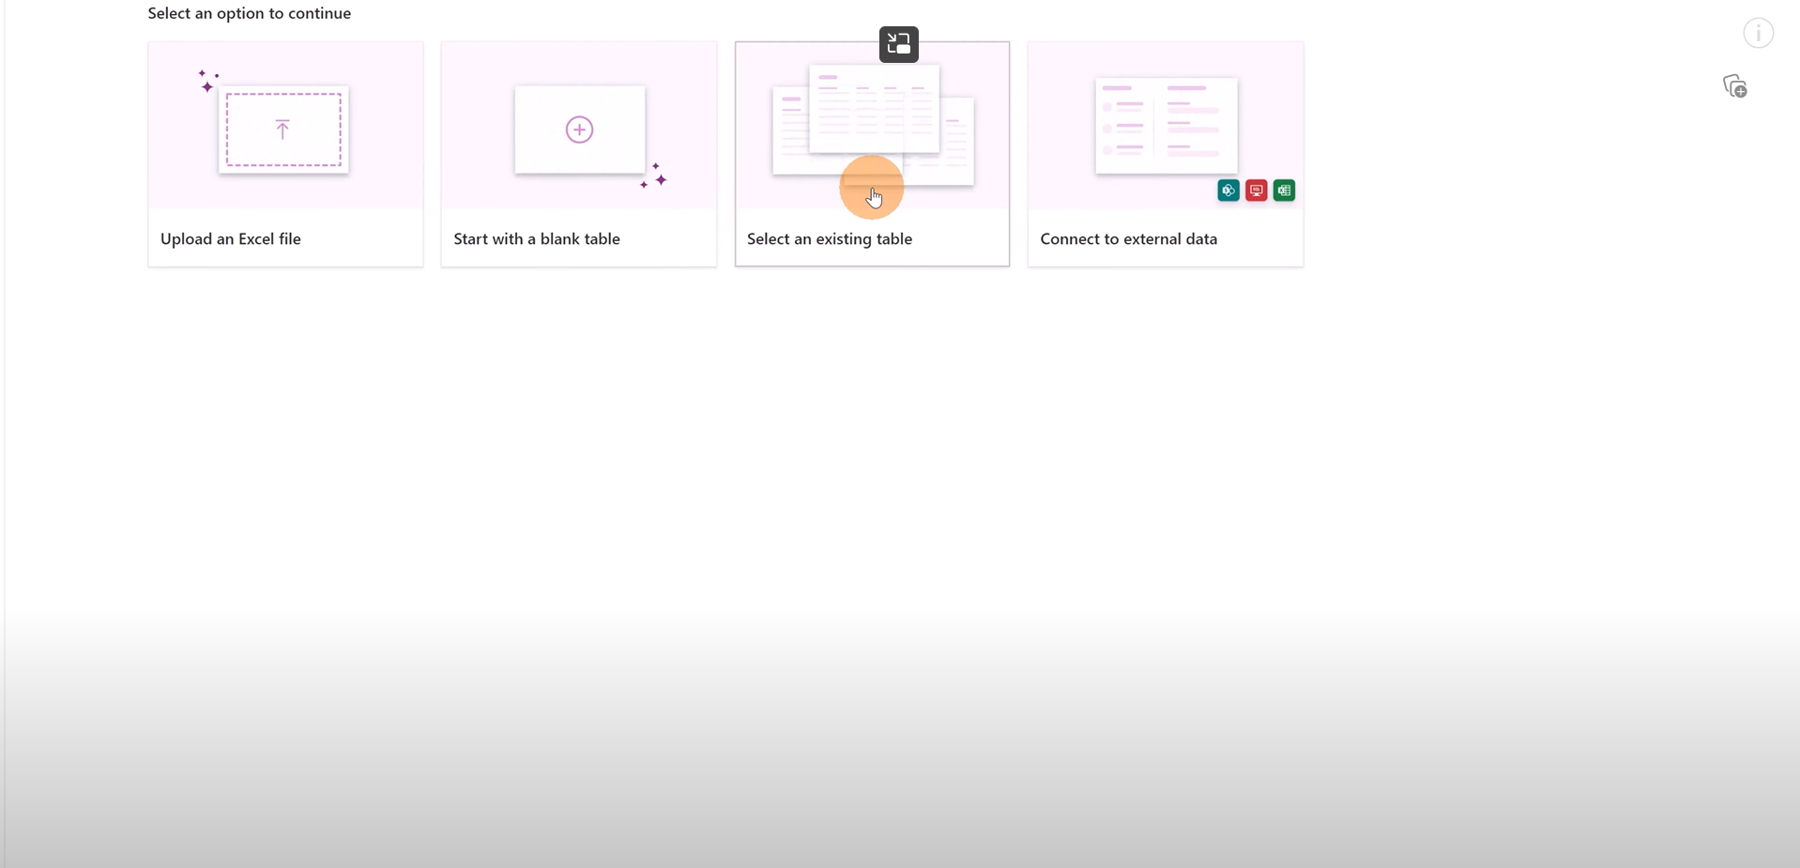
We have other ways to create a new app in the new brand Home Page in the "Start with data" button (Figure 11) I can upload an Excel file if I have or start with a blank table or select an existing table or connect to an external data (Figure 12).
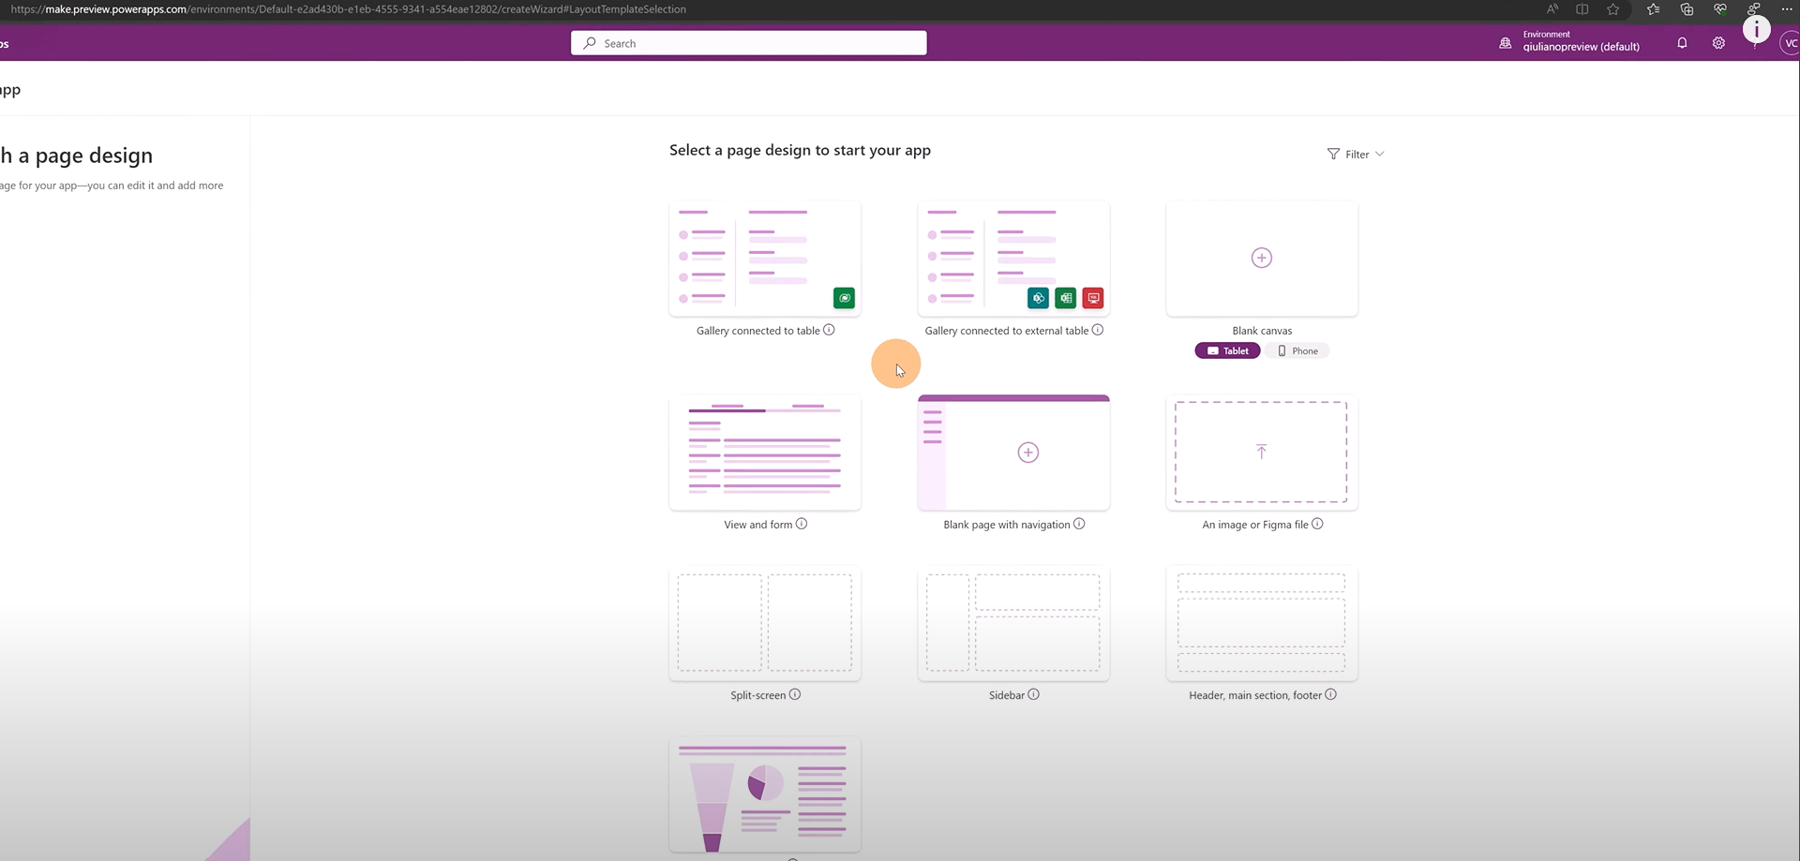
The second option available is "Start with a page design," which offers the starting points shown in Figure 13, including: Gallery connected to a table, Gallery connected to an external table like SQL, Excel, or Azure, Blank canvas app (which targets a tablet or a smartphone), View and form, Blank page with navigation, an image or Figma file, Split screen, Sidebar, Header main section footer, and finally the last one Dashboard.

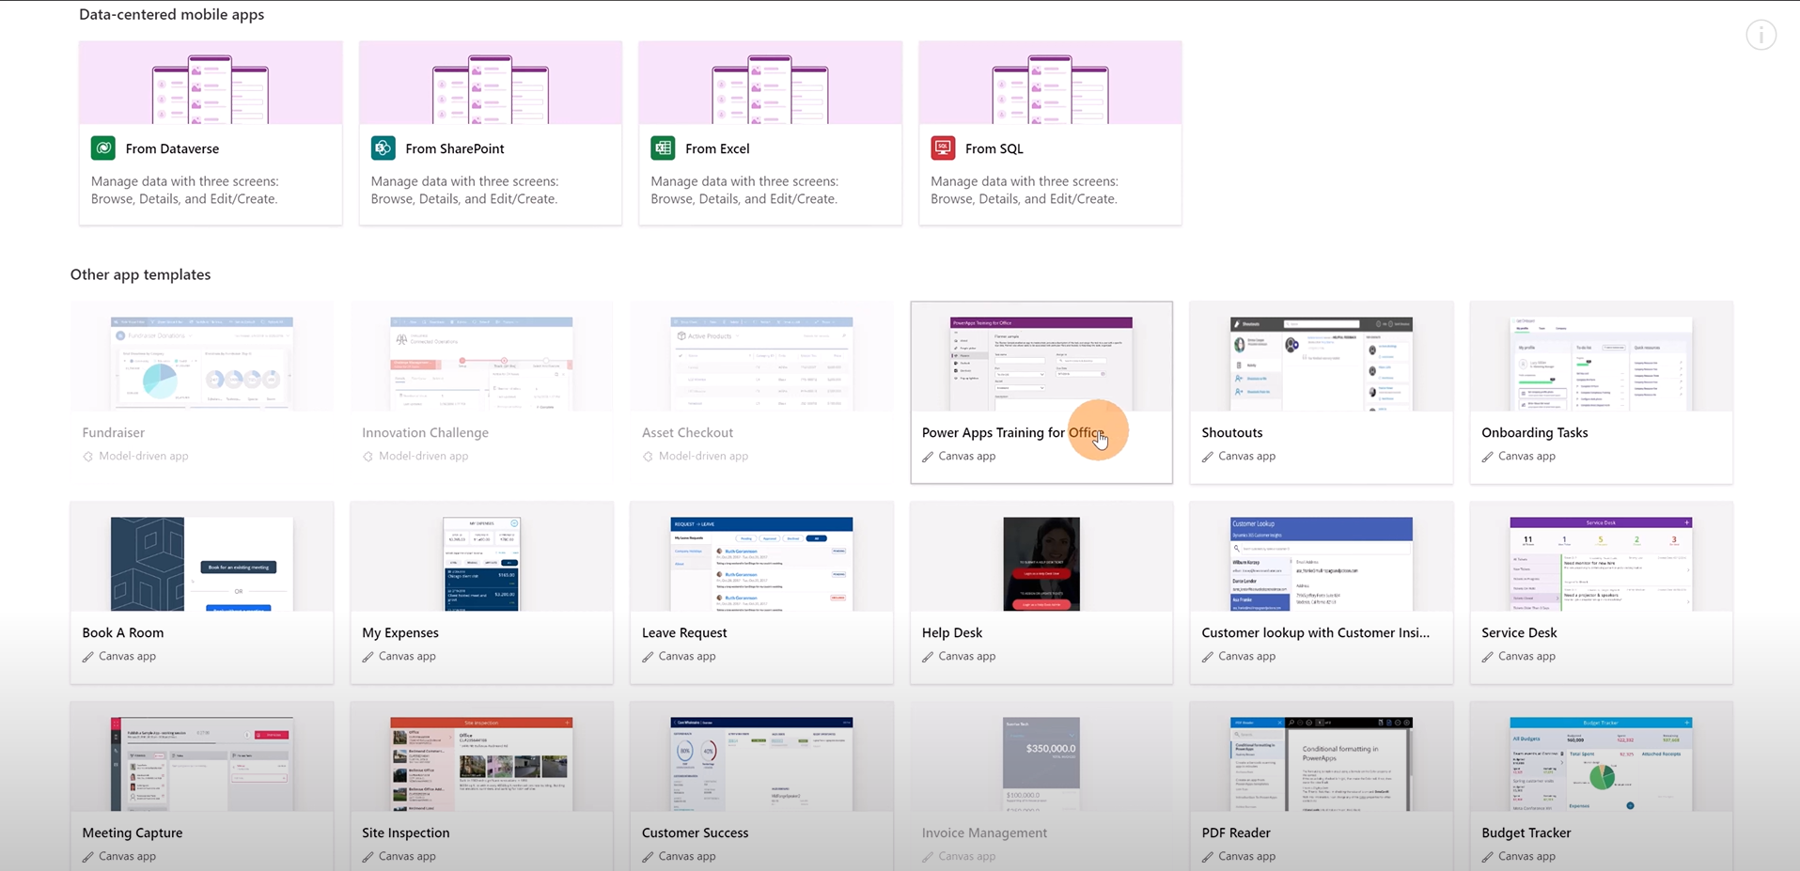
You can also use Power Apps with Copilot and create an app by choosing "Start with an app template," which provides options for Data-centered mobile apps from sources you may be familiar with, or many other types of app templates (Figure 14).

We have explored this new Home page of Power Apps Studio which makes it really easy to start creating new apps.

Giuliano De Luca
Giuliano is an Office Development MVP and specialist in Microsoft technologies for software design and development. He loves to collaborate with the community, Giuliano has passed several Microsoft certification exams and achieved the following certifications: MCSD SharePoint Applications, MCSD Web Applications, MCP, Microsoft Specialist Programming in HTML5 with JavaScript and CSS3 Specialist.
In his free time, Giuliano loves to play and explore new technologies.