Optimizing Azure Virtual Desktop Session Host Images

Optimizing Azure Virtual Desktop Session Host Images
To be an effective Azure Virtual Desktop (AVD) administrator, you need to optimize your AVD deployment for:
- Reliability: Keeping your AVD environment up and running even when Microsoft has an Azure-side failure.
- Security: Ensuring strong authentication, least-privilege authorization, and rigorous accounting.
- Cost optimization: "Right-sizing" your AVD workload so you get a healthy balance between spend and business value.
- Operational excellence: Automating AVD to avoid the pitfalls of human error and inconsistent communication.
- Performance efficiency: Load balancing and scaling AVD to gracefully respond to load surges.
Those five pillars come from the Microsoft Azure Well-Architected Framework (WAF), by the way.
Today we'll drill into supporting those WAF pillars through a specific example: optimizing our Windows 11 Enterprise multi-session session host images.
Why Optimize Our Host Images?
Optimizing your Windows 11 Enterprise multi-session session host images in Azure Virtual Desktop is crucial for at least the following 10 reasons:
- Improved performance: Optimizing session host images leads to better overall performance by reducing system overhead, improving application responsiveness, and ensuring smoother user experience.
- Reduced costs: Optimized session host images often consume fewer CPU, memory, and storage resources, leading to Azure infrastructure cost savings.
- Enhanced scalability: Optimizing session host images gives you great user density per session host, allowing for better AVD host pool resource utilization and scalability.
- Faster provisioning: Optimized images accelerate the deployment process, enabling quicker scaling and reducing downtime during updates or maintenance.
- Increased security: Removing unnecessary components, services, and features reduces the image's attack surface.
- Streamlined management: With optimized images, you can simplify management by reducing the number of components that need to be updated, patched, or monitored.
- Better user satisfaction: By optimizing session host images, you can provide a more responsive and seamless experience to your users, increasing their satisfaction and productivity.
- Compliance adherence: Optimizing session host images often aligns with the internal, regulatory, and/or industry compliance controls to which your team needs to certify.
- Lowered network bandwidth: Optimizing images can reduce the amount of data transferred during the provisioning process as well as during regular use, saving network bandwidth and improving overall performance.
- Greater resource efficiency: Optimizing session host images promotes efficient resource usage, allowing you to achieve better performance with the same or fewer resources, contributing to a more sustainable IT infrastructure.
Now that we've covered the business use case, you wonder, "Okay, Tim, now give me the goods! How do I optimize my Windows 11 Enterprise multi-session host images?" Sure thing. First, allow me to describe my environment.
I'm starting with a brand-new Windows 11 Enterprise multi-session virtual machine (VM) I deployed to my test/dev Azure virtual network (VNet). I'm using a standard Azure Marketplace image because I want to ensure the Azure Virtual Machine Agent is preinstalled and ready to go.
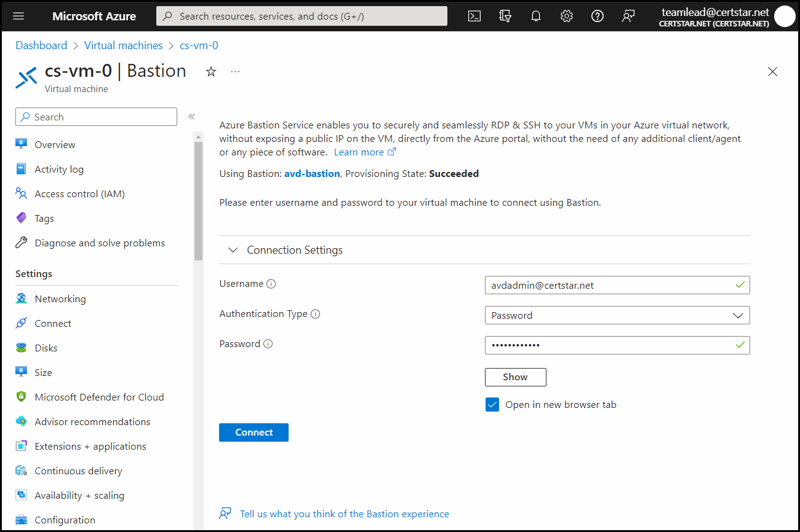
I also joined the machine to my local Active Directory Domain Services (AD DS) domain and used Azure Bastion to establish a Remote Desktop Protocol (RDP)-based management connection to the system.
My goal is to create a "golden image" virtual hard disk (VHD) I can use to easily deploy AVD host pools and session hosts to support my users. Ready? Let's get to work.
Run the Virtual Desktop Optimization Tool
The Virtual Desktop Optimization Tool (VDOT) is a PowerShell script lovingly authored by current and former Microsoft software engineers with the goal of decreasing startup time and first logon time and increasing overall usability during user sessions with your session host VMs.
In a nutshell, the script performs a collection of optimizations to your session hosts based on preferences you specify in a series of JavaScript Object Notation (JSON) configuration files. Some of the optimization categories include:
- Windows services
- Optional features
- Scheduled tasks
- Universal Windows Platform (UWP) apps and AppX packages
- Disk cleanup
- Local Group Policy settings
- TCP/IP networking settings
- Windows Update
- Windows Defender
- Edge browser
- Internet Explorer payload removal
- OneDrive client
The standard warning applies that you need to test this script against Azure VMs you don't care about before applying it to those you do. Here's the high-level overview of how to use the script:
- Clone the GitHub repo to a local folder on the target VM.
- Adjust the PowerShell script execution policy as necessary.
- Edit the .json files in the 2009\ConfigurationFiles folder to suit your optimization preferences.
- When you're ready, run the script:
.\Windows_VDOT.ps1 -Optimizations All -AdvancedOptimizations All -AcceptEULA -Verbose
- Remove the cloned repo folder from your target VM.
As you can see in the following screenshot, the .json files have a property called VDIState with three valid values: Enabled, Unchanged, and Disabled. Enabled forces the optimization, Disabled suppresses it, and Unchanged does nothing.
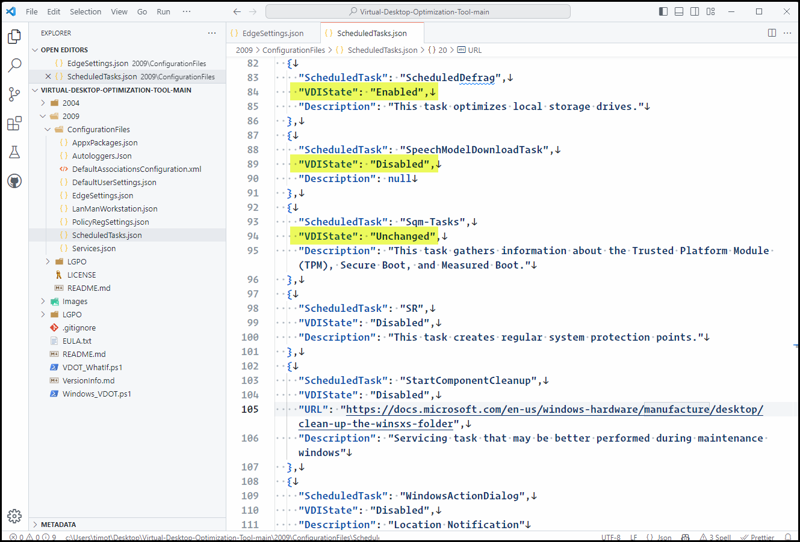
Figure 2: Configuring the VDOT in Visual Studio Code. ALT: A screenshot of Visual Studio Code with the VDOT project loaded into the Explorer pane. The ScheduledTasks.json configuration file is shown, highlighting the three VDIState properties: Enabled, Disabled, and Unchanged.
Implement Roaming User Profiles
The underlying session host is only one leg of a three-legged stool of AVD host optimization. The other two legs are user profiles and applications. Be sure to set up FSLogix profile containers so neither you nor the users you support need to worry about the availability of their documents, app settings, and desktop preferences.
By consolidating user profiles into single virtual hard disk (VHD) image files and keeping them in Azure Files, FSLogix ensures that profiles are dynamically attached and detached to user sessions, resulting in faster logins and reduced profile corruption issues. Furthermore, FSLogix profile containers and Azure Files allow for centralized management and streamlined profile replication, while also offering built-in redundancy and high availability for your user profiles.
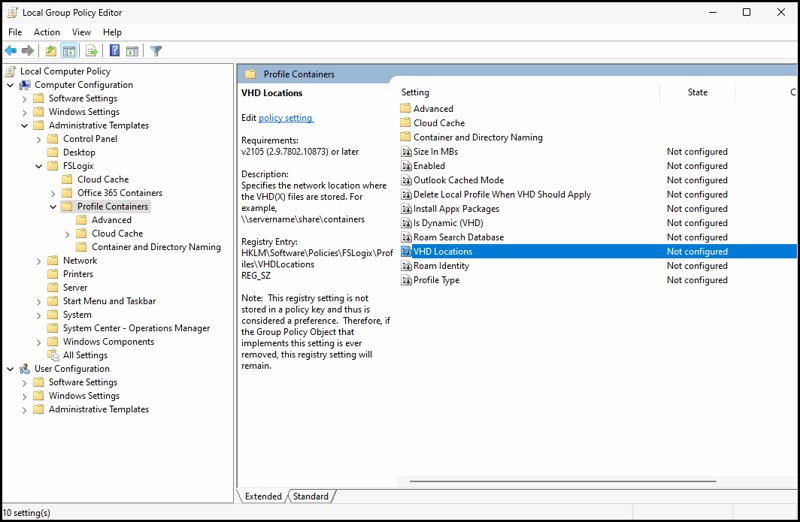
To set up FSLogix on your Windows 11 multi-session session host images, begin by downloading and installing the FSLogix Apps software package on each session host. Once installed, configure the FSLogix profile containers by creating a new Group Policy Object (GPO) or modifying an existing one. Within the GPO, navigate to Computer Configuration > Policies > Administrative Templates > FSLogix and enable the Profile Containers policy. Customize the policy settings according to your environment's requirements, such as specifying the VHD location using the VHD Locations setting. Apply the GPO to the organizational units (OUs) containing your session hosts and verify that the FSLogix profile containers are functioning correctly by logging in to an Azure Virtual Desktop session and observing the creation of the VHD or VHDX file in the specified storage location. This process ensures a smooth, efficient, and unified user experience across your Windows 11 multi-session session host images.
Implement Application Layering
I suggest you avoid installing your users’ line-of-business (LOB) applications locally because they will be more difficult to update and maintain. Instead, look at your Windows 11 base image as (mostly) operating system only.
If you can’t avoid installing some apps locally, be sure to set up FSLogix Application Masking on your session hosts and in Azure Storage. FSLogix Application Masking is a powerful feature that enables granular control over the visibility and access to applications within your AVD environment. This technology simplifies application management by creating a customized experience for each user or group, ensuring they only see and access the applications relevant to their roles and responsibilities.
In other words, you save on license costs and application sprawl because while certain applications are resident on the session host, only allowed users see them. Application Masking achieves this by utilizing a ruleset that dictates which applications, fonts, and other system components are available to specific users or groups. The technology is called “application layering” because you are essentially layering a “mask” on installed applications to hide their traces from unauthorized AVD users.
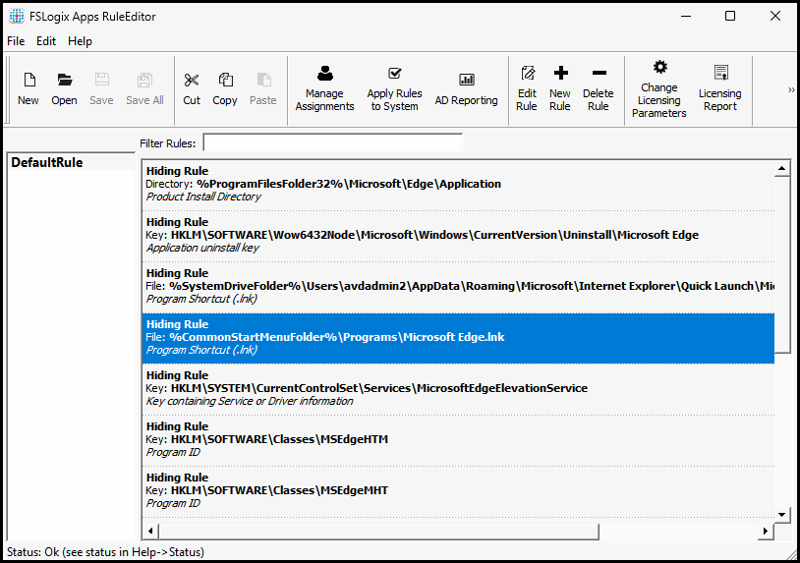
To set up FSLogix Application Masking on your Windows 11 multi-session session host images, begin by installing the FSLogix Apps software package on each session host. Once installed, create and configure the necessary application masking rules by utilizing FSLogix Rule Editor, a graphical user interface (GUI) tool included in the FSLogix Apps package. With the Rule Editor, you can create rule sets containing assignments and file system or registry rules, defining which users or groups should have access to specific applications.
After configuring your rule sets, save them to a central location accessible by your session hosts (again, Azure Files can help here). Lastly, configure the session hosts to use the rule sets by creating or modifying a local or domain GPO.
Deploy the Golden Image to an Azure Compute Gallery
The Azure Compute Gallery (formerly called the Shared Image Gallery) plays a vital role in realizing AVD session host “golden image” optimization by offering a centralized and version-controlled repository for storing and managing customized virtual machine (VM) images. These golden images serve as standardized templates, containing pre-configured applications, settings, and optimizations tailored to your organization's requirements.
By utilizing the Azure Compute Gallery, IT administrators can consistently deploy and manage AVD session hosts with ease, ensuring a uniform and optimized user experience across multiple virtual desktop sessions. Furthermore, the Azure Compute Gallery simplifies the process of updating and maintaining these golden images, allowing administrators to make modifications and roll out updates in a controlled manner, reducing the risk of configuration drift and enhancing the overall stability of the AVD environment.
To deploy a Windows 11 multi-session golden image to the Azure Compute Gallery, follow these high-level steps:
- Deploy an Azure Compute Gallery.
- Define an image definition and version for your golden image.
- Configure the Azure VM that will serve as your “golden image.”
- Use Sysprep to generalize the VM.
- Create a managed image by capturing the stopped, deallocated, and generalized VM.
- Store the managed image in the Azure Compute Gallery.
- Deploy new AVD session hosts by using the “golden image.”
Summary
Optimizing AVD deployments is essential for organizations to strike a balance between cost and performance. By adhering to Microsoft's Azure WAF principles, organizations can develop a reliable, secure, and cost-effective AVD environment. Leveraging tools like the VDOT and FSLogix solutions, administrators can enhance user experiences while simplifying management tasks.
To maintain a sustainable AVD infrastructure, organizations should focus on the following key areas:
- performance optimization
- centralized profile management
- streamlined application deployment
In conclusion, you and your team need to conduct regular evaluations and updates to the AVD environment to maintain optimal performance and keep up with the ever-evolving cloud computing landscape.

Tim Warner
Tim Warner is a senior content developer with Microsoft, specializing in Azure Governance. A former Microsoft MVP, in his spare time Tim teaches thousands of people worldwide how to get certified and build meaningful careers using Microsoft products. Reach Tim at his website, TechTrainerTim.com.