How to Create a People Picker in Power Apps

In this article, I'll walk you through every step to create a people picker in Power Apps. Let's get started.
Create a Blank Power App and Connect to a Data Source
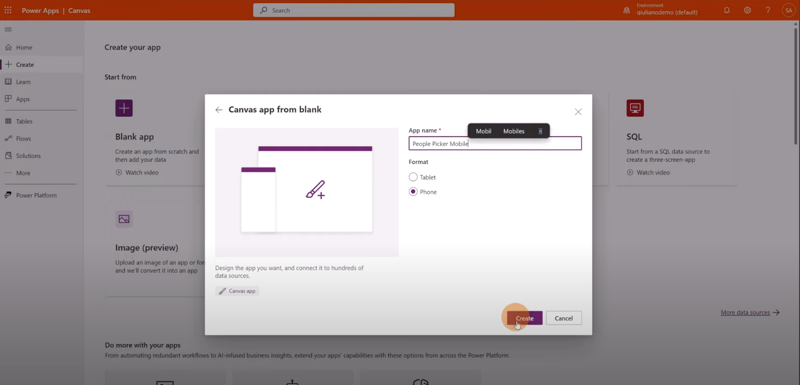
First, open make.powerapps.com. Now click Create. I'm going to start with a blank app. Let me select blank canvas app, I'll choose to target phone as a format, and then I'll name the app.

I'll be original by defining as title People Picker Mobile and finally click on the Create button to confirm the creation (Figure 1). Now I have my form ready.
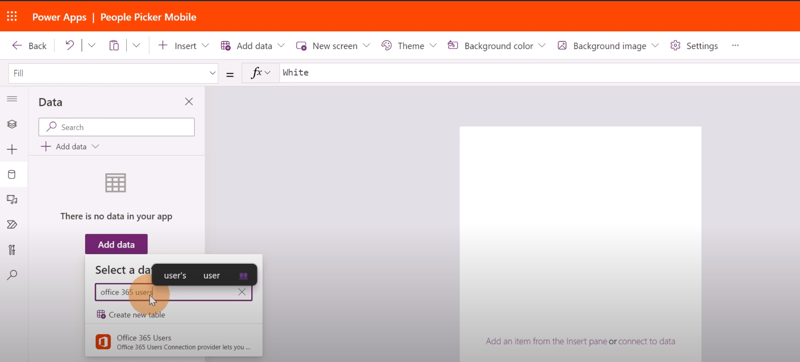
Next, I have to create a connection between the app and Microsoft 365 or better with the Azure Active Directory behind the Microsoft 365 tenant.
In order to do that I have to click on the Data icon located on the left navigation and then I'll click Add data (Figure 2) shown on the form. This allows me to add a connector that I'll use to query the Microsoft 365 tenant.
In the search text type office 365 users to filter the right connector and then click to connect it (Figure 2) so it is selected and added as my data source.
Now that the data source is added, I can go back to my screen (in the video, I click the Tree view icon on the left) and I'll click the Insert icon (the one that looks like +). Here I can start to add a combo box by typing “combo box” in the Search field. I think the combo box is the right control for such scenarios where the end user has to search and filter.
For the sake of the demo, I'm going to place the combo box on top of my screen. When I do that, Power App asks for the data source for the combo box, which in this case is my Office365User connector that I picked earlier. The data source represents the connection between UI (the combo box) and data. On the right side of the screen, you see a panel has opened with properties of the combo box. There are two other menus to the right of Properties, and I want to hit the Advanced menu.

In this panel (zoomed in Figure 4), what I'm going to do is to choose the right search method that I want the combo box to use when it uses the Office365Users connector (see the cursor area of Figure 4). The little red x in the circle indicates that this Office365Users connector isn't configured yet. (If you are following along in Power Apps, you'll see the related red x in a circle next to the combo box on the form).
After Office365Users I'll type a period and a list of valid parameters that can go here appears. There are two options, my suggestion is to use SearchUserV2 so you can get the latest and the greatest capability available.

Alright in the SearchUserV2 method I have to add some parameters (this is a good place to watch the video at 3:15). The first parameter is the search term that will be taken from the combo box (or better, the value typed in the combo box from the end user) in my case is ComboBox1.SearchText, which means here I'll use the search capability of the combo box I put on the form. In the second parameter, I have to define the number of rows that I want in the result, and I'll indicate 10 and then I'll close the curling brackets and close the parentheses.
However, this is not enough because using the SearchUserV2 method implies that I specify a property in order to indicate which information from the search I want to see (email, city, display name, job title....). I'll put value which brings these values back.
Office365Users.SearchUserV2({searchTerm:ComboBox1.SearchText, top:10}).value
This value property at the end can be omitted if you used SearchUser instead of SearchUserV2.

Set the Layout and Other Properties of the ComboBox
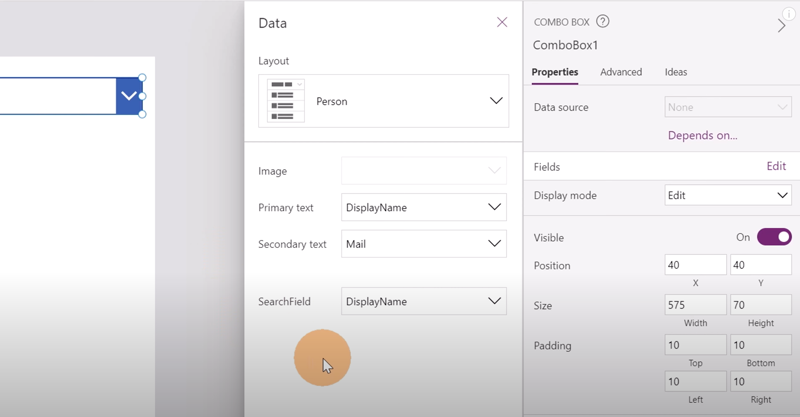
Now my people picker is almost ready to go. I want to make the display fancier, so I'm going to change the layout. To do that, at the top of the ComboBox form, I'll click the Properties tab, and then click on Edit next to Fields (see Figure 6). A pane opens to the left of the ComboBox form where you can change the layout and set other properties.
Under Layout (at the top) I'm going to click the drop down and from the three choices, I will choose Person. Below the layout style, in the Primary text field I want to show the value in the DisplayName property; in the Secondary text field I want to show the Mail (email) property and in the SearchField I have to specify which field will be used to search and filter users; in my case this is also DisplayName. With those properties set up, I'll close the form and go back to the Properties of the ComboBox.

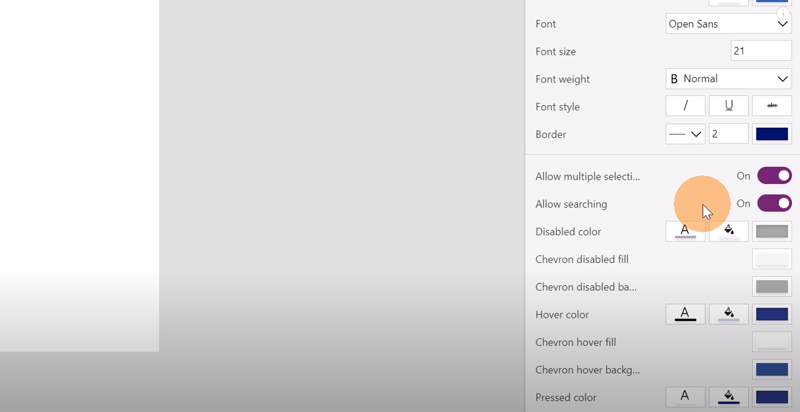
I'll scroll further down the form (Figure 7) to double-check that additional properties like Allow multiple selections and Allow searching are on.
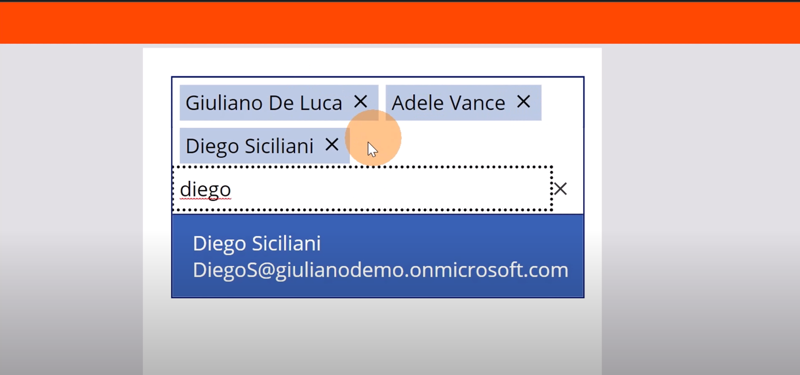
It's time to play the app (use the icon or press F5) and enjoy the people picker. Figure 8 shows the app running for me. I can start to type a name into the Find items box and see the display name and their email, the properties I picked in Figure 6. As I select names, they appear below the combo box using the fancier layout I picked out, also in Figure 6. If I want to remove one, I click the x next to their name.

Giuliano De Luca
Giuliano is an Office Development MVP and specialist in Microsoft technologies for software design and development. He loves to collaborate with the community, Giuliano has passed several Microsoft certification exams and achieved the following certifications: MCSD SharePoint Applications, MCSD Web Applications, MCP, Microsoft Specialist Programming in HTML5 with JavaScript and CSS3 Specialist.
In his free time, Giuliano loves to play and explore new technologies.