A Hands-on Guide to Set Up Webinars in Teams

Microsoft came out with the capability to use Microsoft Teams for webinars some time ago, but along with the release of Teams Premium in January, webinars for all versions of Teams have gotten a huge facelift and fixed some of the previously reported issues. This article will walk you through how to use Teams’ new webinar function.
Creating Your Webinar
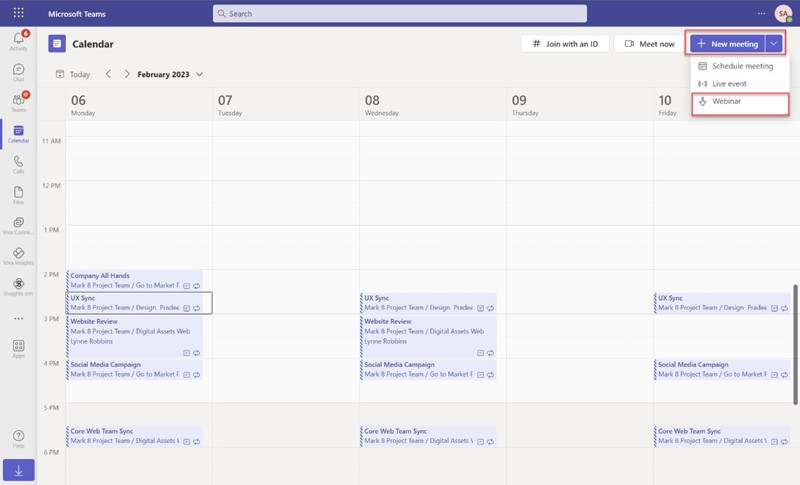
To create a new webinar, go to your calendar in Teams, then select the New meeting button and choose Webinar from the menu.
The next screen is where you will configure:
- Webinar title
- Start and end date
- Webinar description
- Presenters, who will be added to the presenter screen
- Co-Organizers, who will not be added to the presenter screen, and don’t have permission to edit the webinar
- Event Access, where you can choose between Private, limiting it only to your organization, or Public, where anyone can register and attend.

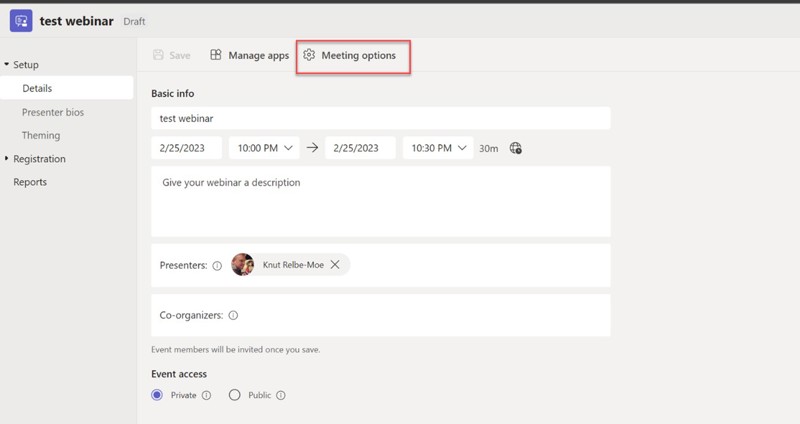
Once you select Save, you will then have access to the options for presenter bios, meeting options, and managing apps that you want to add to your webinar. Event members will get a meeting invitation when you save the webinar.
Presenter Bios
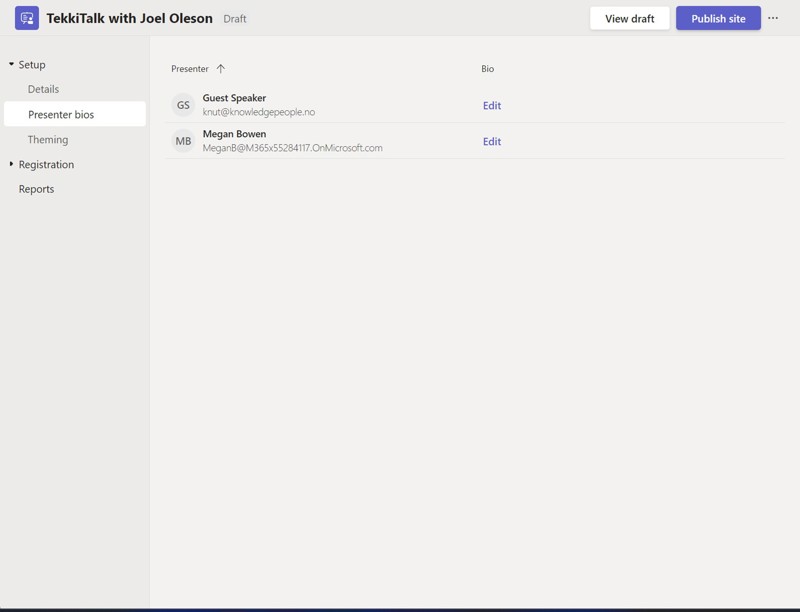
Under Presenter bios, you can add and modify information about your presenters by selecting Edit beside the appropriate presenter. You can also, at any time, preview how the webinar page will look by selecting View draft.

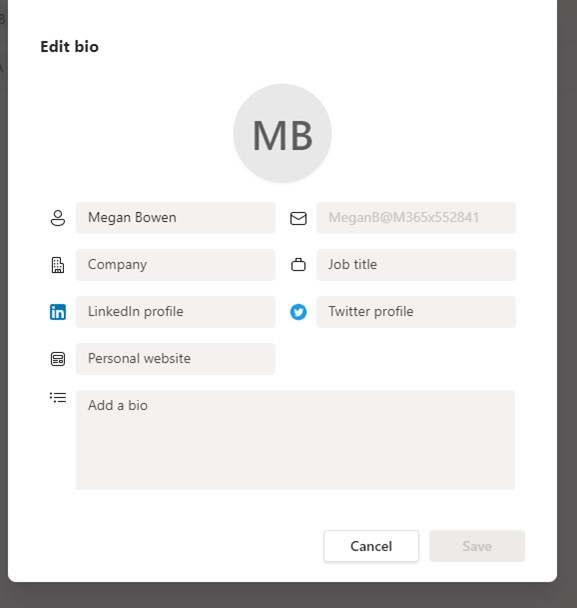
On the Edit bio screen, you can modify all the information about the presenter besides the email: name, company, job title, LinkedIn profile, etc. The information you are adding here is stored in a SharePoint List. It would be ideal if Azure AD would auto-populate as much of this information as possible when it’s an internal user, but this will probably be added in the future.
Add your information and select Save.
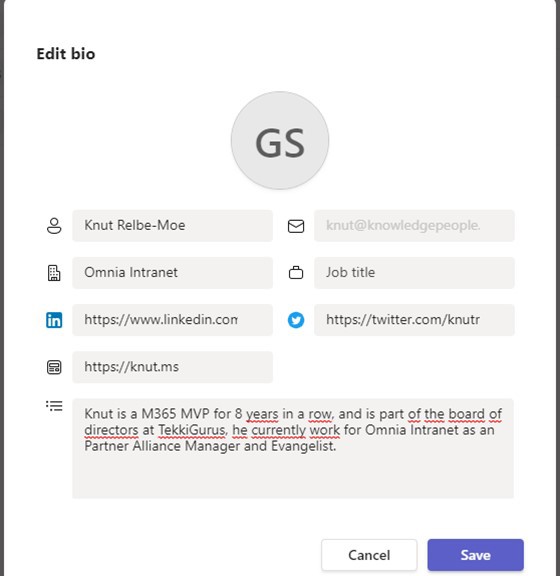
External users have to be invited in order to have a presenter role, and are added as Guest Speaker. With external guest speakers, regardless of whether or not Microsoft updates the app to auto-populate speaker information with Azure AD, you will always need to go in and modify the guest speaker information.
Add all the information as needed for your speakers.
Once you are finished editing the information about the speakers, it’s time to view the draft. So, select View draft in the upper right corner.


Theming
The next thing to configure is theming.

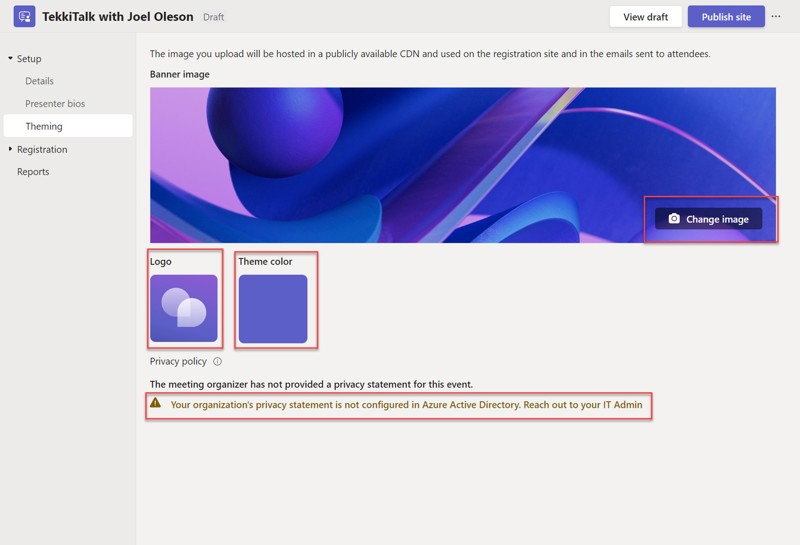
Here, you can change the banner image, the logo and the theme color. If you get the error message that you don’t have a privacy statement configured, you can find more information about how to do that here:
Add your organization's privacy info - Microsoft Entra | Microsoft Learn
Note: Because webinars retrieve their privacy statement from Azure Active Directory, this means that the privacy currently must be the same for all webinars.
The Logo needs to be at least 280 x 280 pixels; to change it, select Choose another image in the right corner of the popup window. Select your image and select save.
To change the theme color, select the Theme color button.
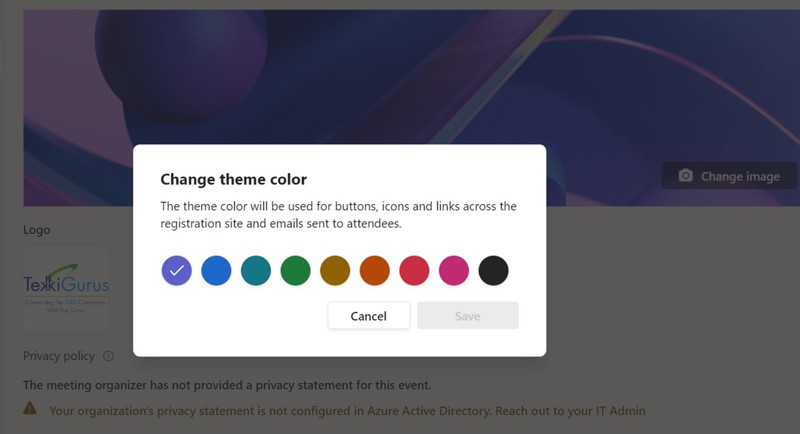
Select the theme color of your choice, then select Save. Currently, standard webinars don’t support custom theme colors. If you want to replace the header banner, select Choose another image.
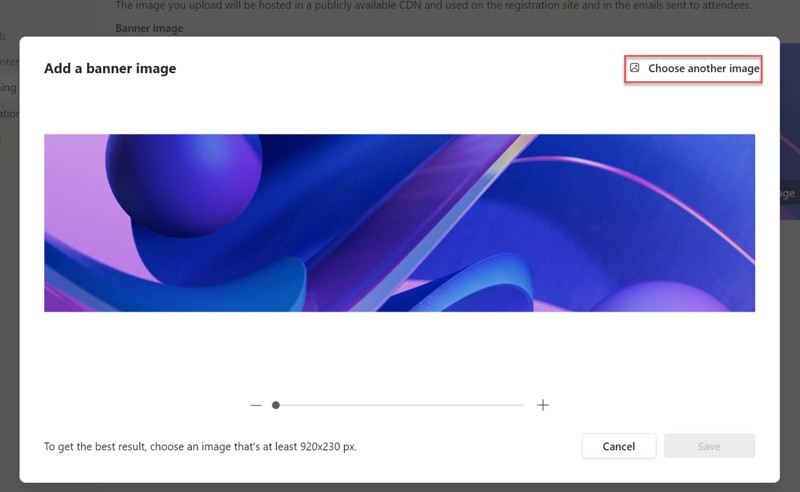
Select the image of your choice and then select save to replace the banner image. The best proportions for the banner image are at least 920 x 230 pixels. If you upload an image that is different from the banner proportions, you will get the option to choose the focal point of the image, as is the case with SharePoint.

Meeting options

It’s a good idea to configure what the attendees see when they get into the webinar, and what they are able to do when it comes to interactions. To configure these options, select the Meeting options button on the upper bar.

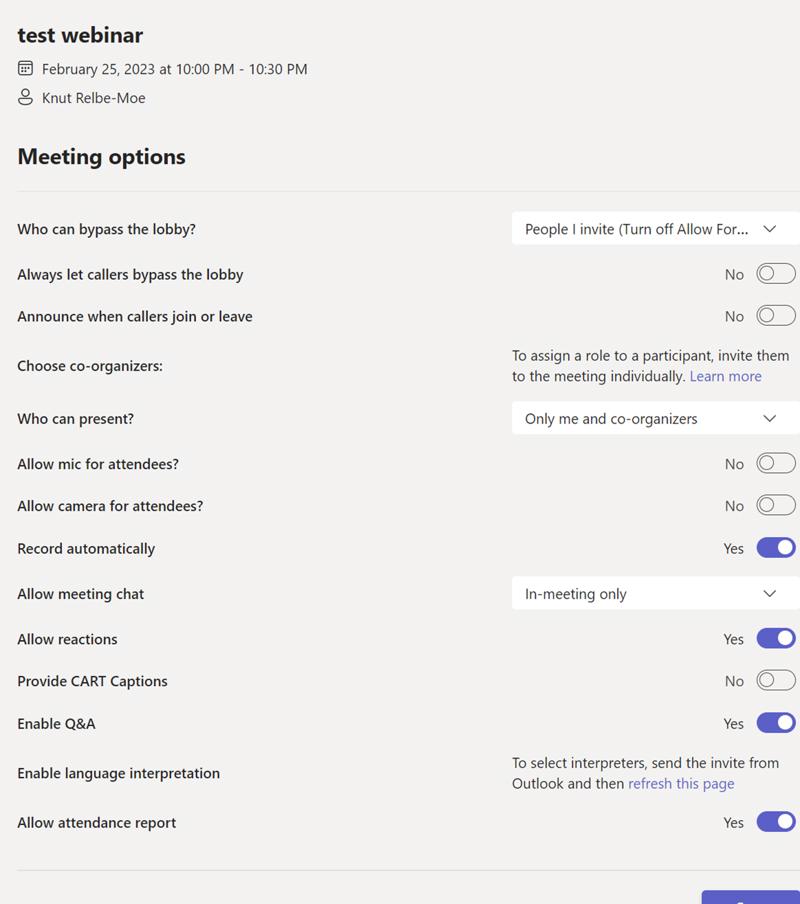
From this screen you will configure if you should have the Q&A added as a default to the webinar, whether the attendees should be allowed to turn the microphone or camera on or off, and other options about attendee interaction during the webinar. Configure all the options accordingly to your preferences.
Registration
Let’s continue with your webinar setup and configure the registration experience for your attendees.
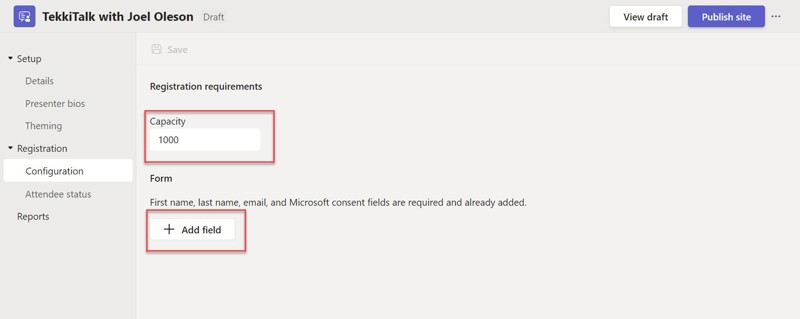
If you want to require registrants to include more information than first name, last name, email, and the Microsoft consent fields, then you can select Add field. You can also modify the capacity of your webinar, to a current maximum capacity of 1000.

Let’s add organization and job title to the form by selecting Add field.
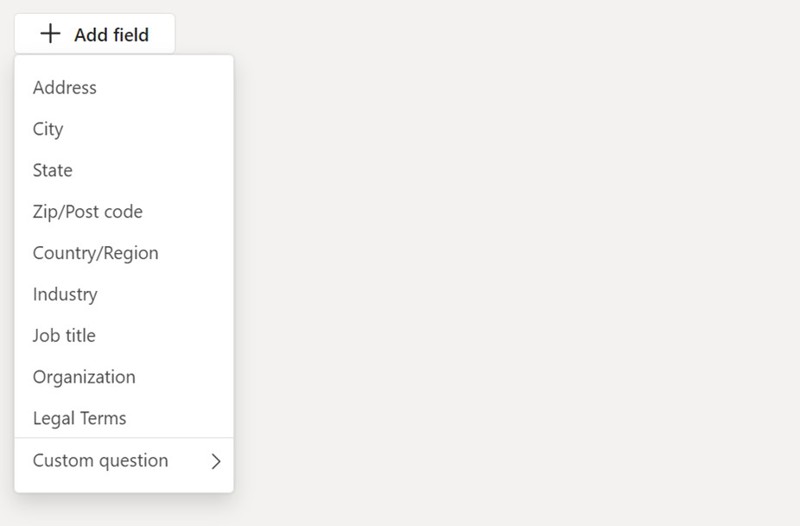
Select Job Title, then add another field and select Organization.
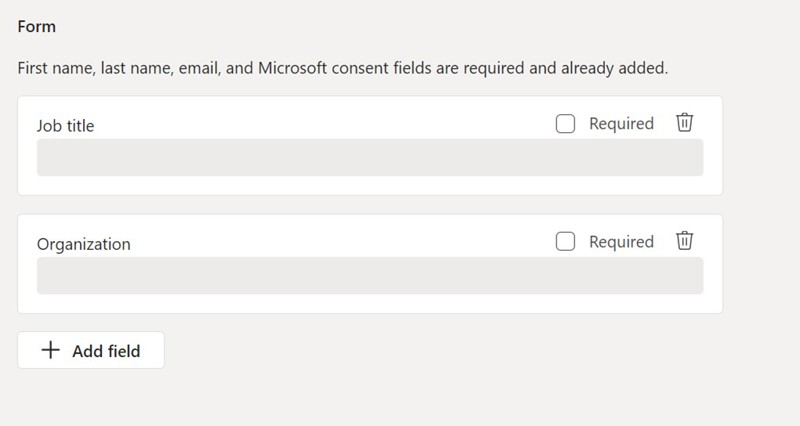
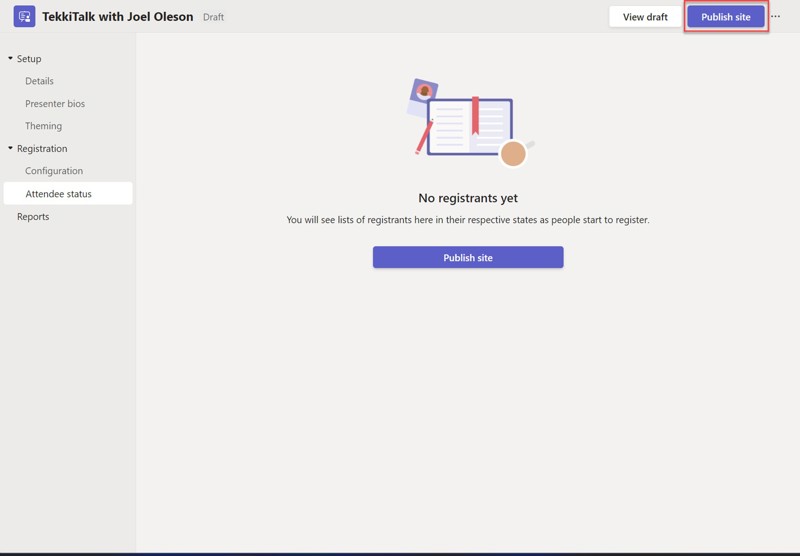
The only options here are to make the field required or to delete the field. Currently, there are no options to modify the sort order of the different forms. When you are happy with your form, it’s time to select Publish site.

After that, the user will see the following screen:
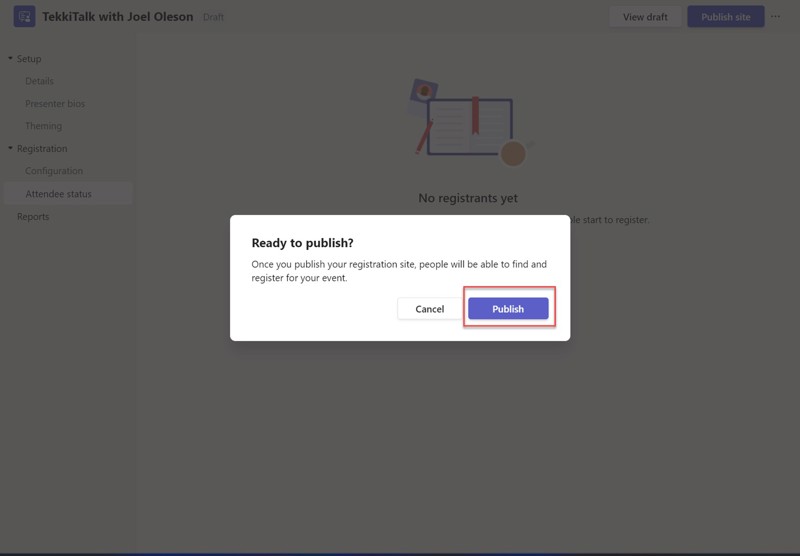
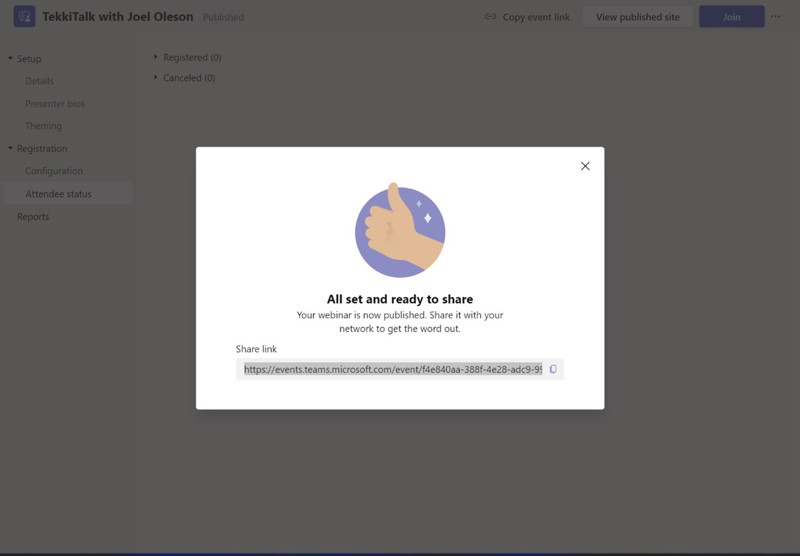
Confirm the publishing of your webinar by selecting Publish on the pop-up screen. That will bring up a screen with a URL that you can share in all your different channels for people to join your webinar.

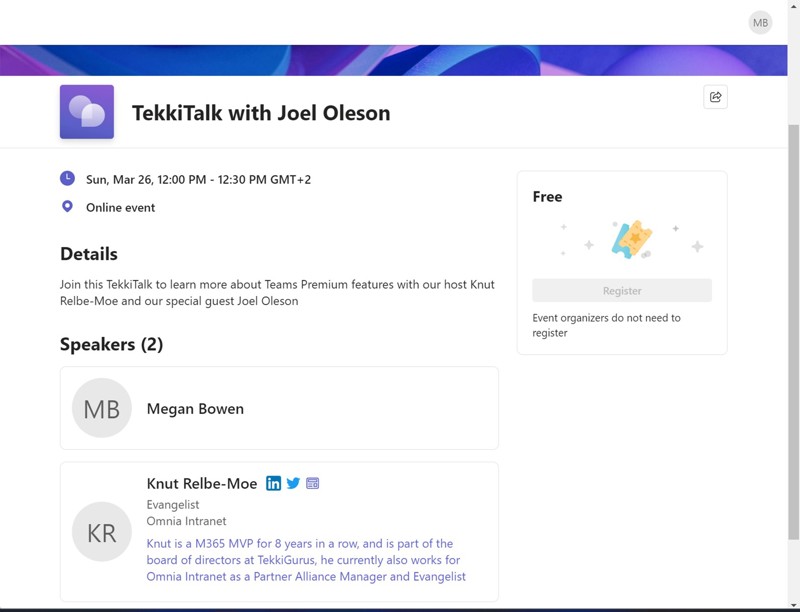
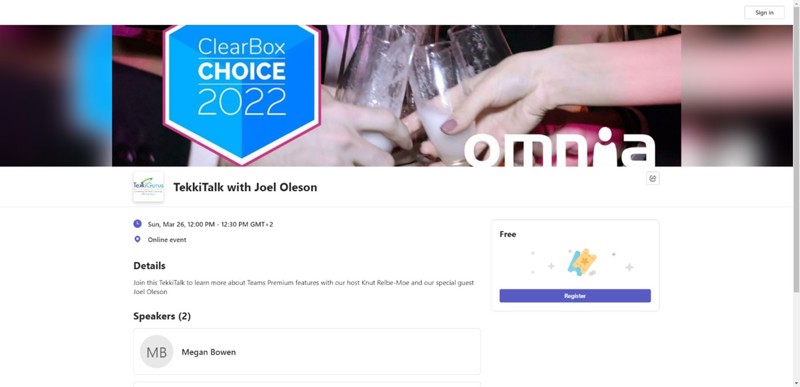
This is how the finished webinar signup page looks:
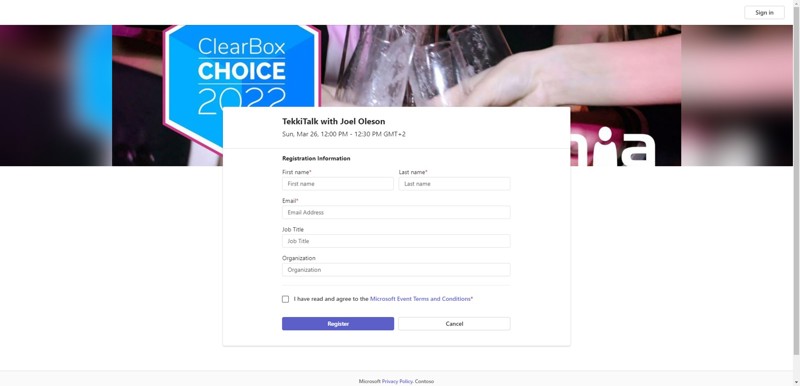
And the Registration form:
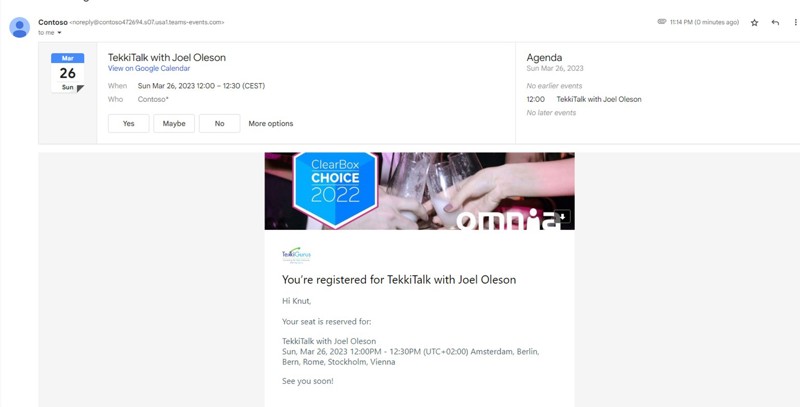
And finally, this is what the confirmation email looks like:
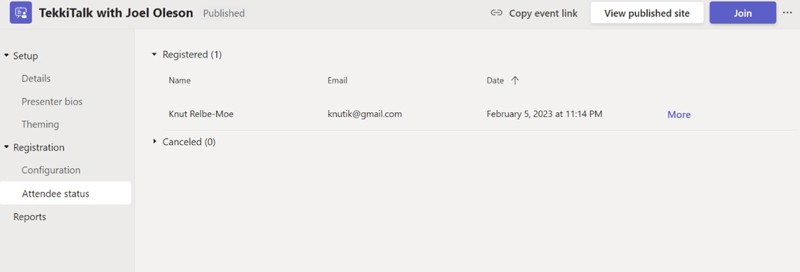
Let’s go back to the of the webinar administration page, where there is one more submenu under Registration in the left navigation: Attendee status. Here, you can see all the registrants to your webinar. You will also see who has cancelled their registration.
The last thing to look at on the left navigation bar is the Reports section.
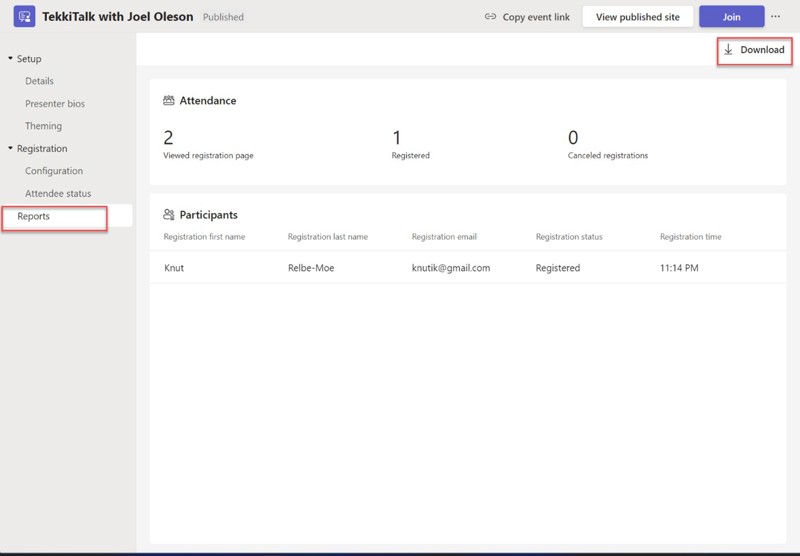
This section is pretty self-explanatory: As you can see, you can download a report of participants here if you need it.
Configure Discussion Options

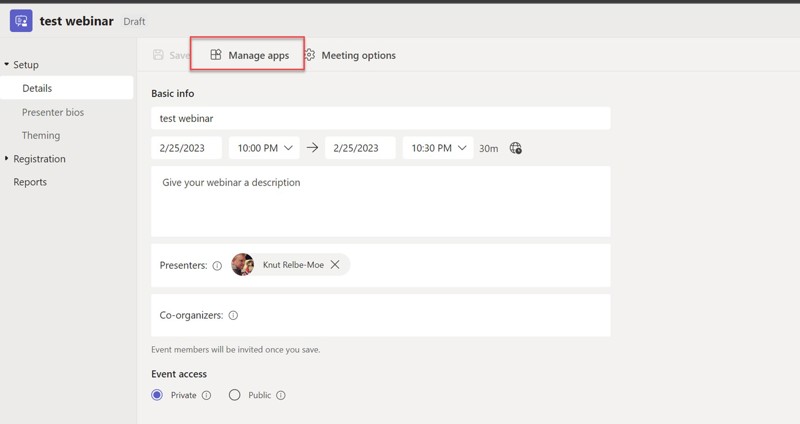
Selecting Manage apps on the top bar allows you to configure the built-in participation apps as well as the option to add third-party apps. Let’s look at those in more detail.

One of the great things with webinars in Teams is that you can also preconfigure Q&A and add other apps to the webinar. To preconfigure Q&A, select Q&A in the top navigation menu.

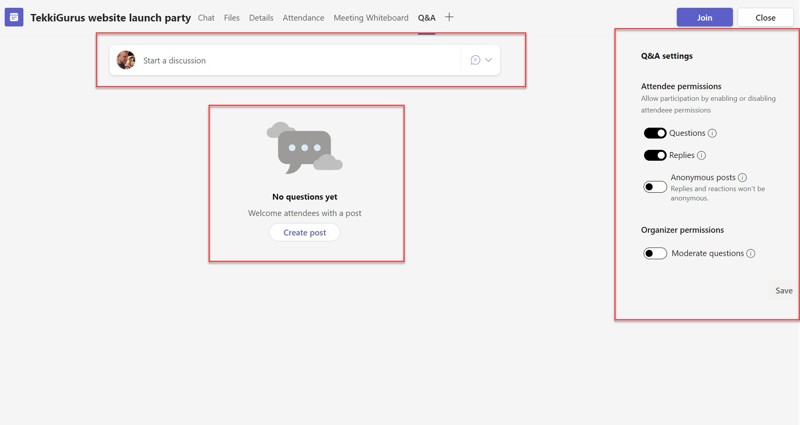
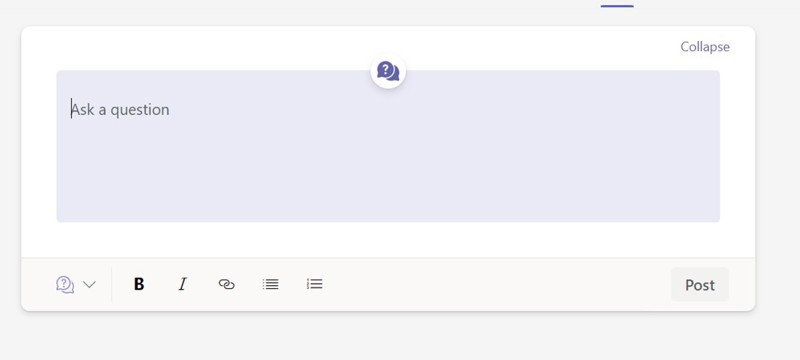
If you select inside the Start a discussion field you will get a bigger textbox.
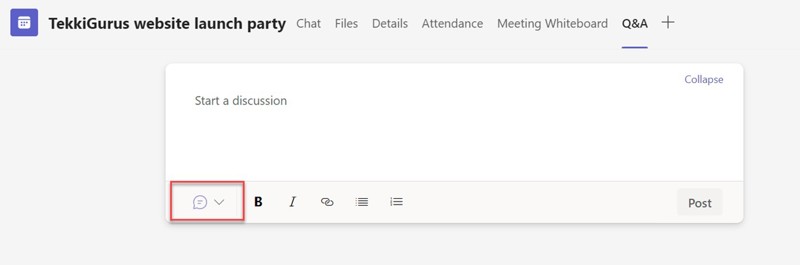
If you select the question button that is marked with a red square in the left corner, you can switch between starting a discussion and writing a question. If you select a question, it looks like this:
Having a pre-written question is a great way to get webinar attendees to be active participants right from the time they join the webinar.
I highly recommend that you also adjust the permissions for the Q&A section.
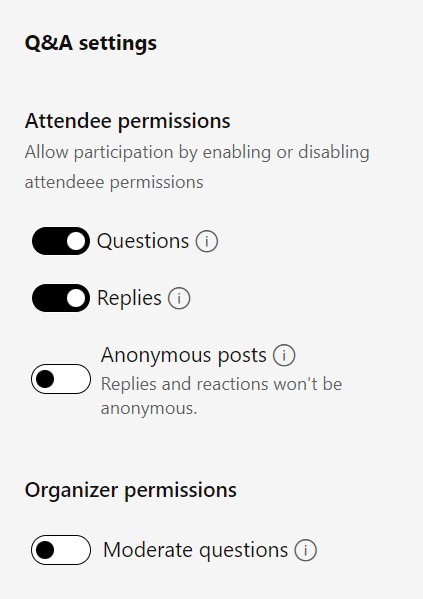
Here the organizers can configure the permissions to allow questions or replies from the attendees, and also allow anonymous posts or not. And last but not least, there is the option to allow organizers to moderate questions from the attendees. Be aware that if you switch on moderation of questions, you can’t switch it off again.
Add Other Apps to Your Webinar

If you want to add other apps to your webinar, you need to select the big + button in the upper right corner that will brings this screen forward.
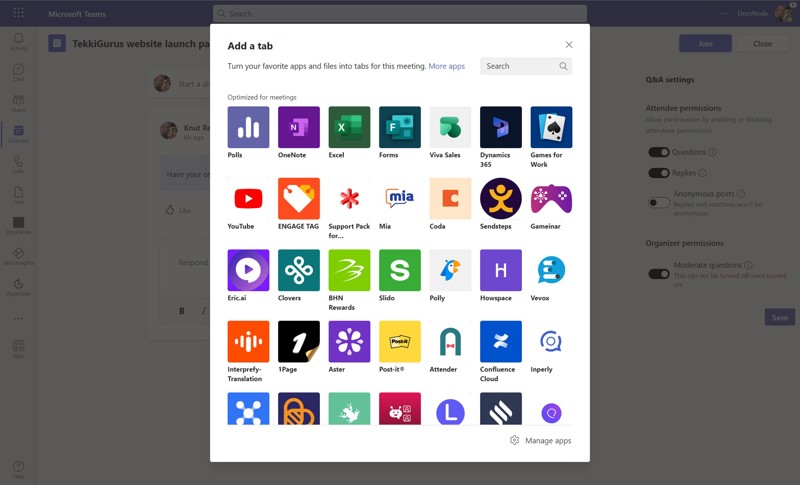
Here you can select the apps that you want to add to your webinar.
Modify or Cancel a Webinar
To modify or cancel a webinar, you need to find your event inside of Teams calendar view and open it.
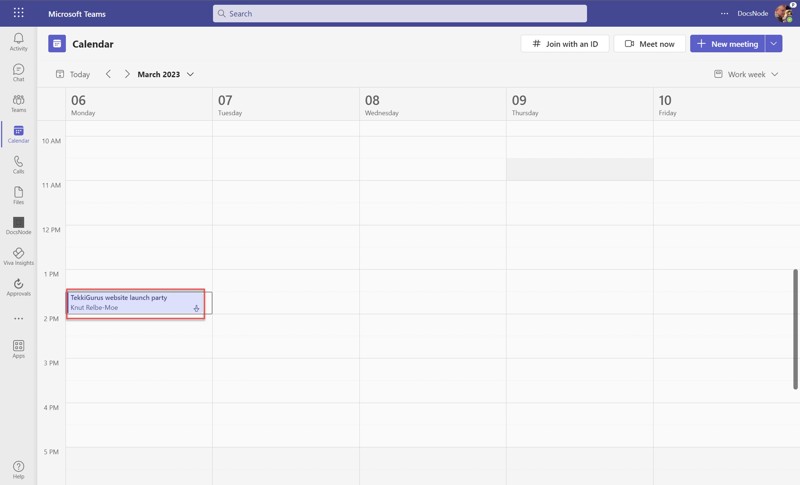
When you open up the webinar, you will be presented with a standard meeting screen.
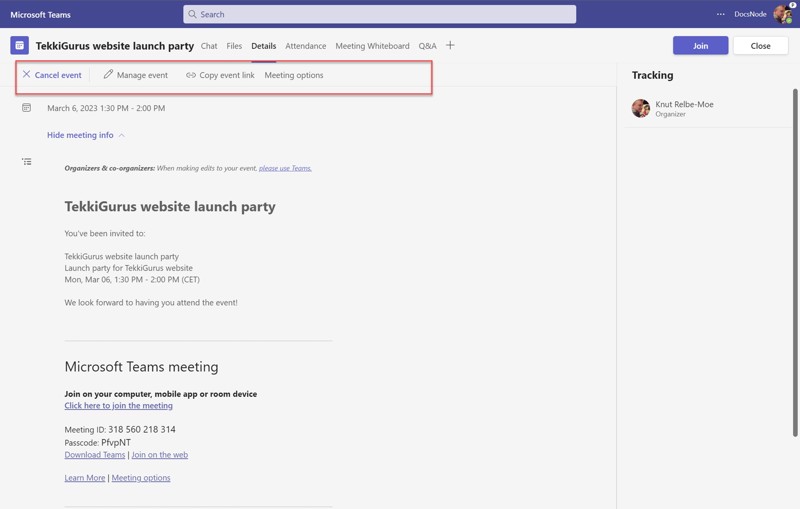
To cancel the event, just select the Cancel event button on the top of the page; to modify the event, select the Manage event button. From here you can also get the event link via the Copy event link button. These options are also available by right-selecting the webinar directly in the Teams calendar.
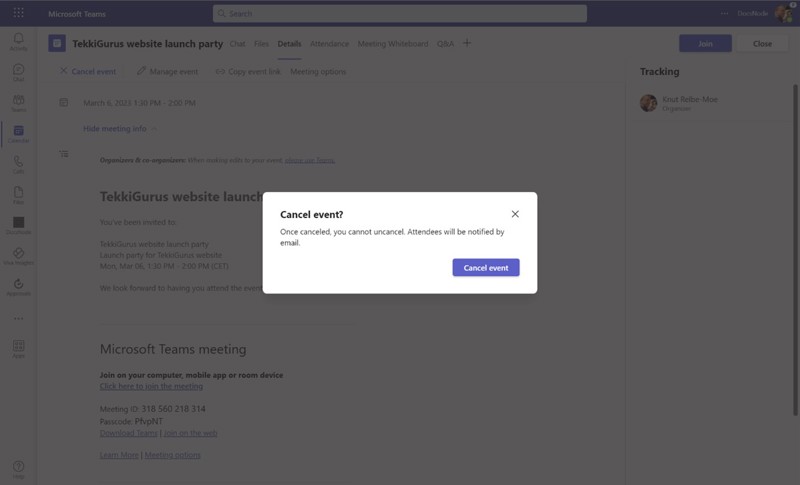
When you cancel the event, attendees and organizers will be notified by email.
Questions
1. Is it possible to turn off the Teams webinar experience?
Answer: Yes, it’s possible to turn this off with PowerShell:
Set-CsTeamsMeetingPolicy -Identity <policy name> -AllowMeetingRegistration $False
Set-CSTeamsEventsPolicy -Identity <policy name> -AllowWebinars Disabled
2. I still have the old webinar experience, what can I do?
Answer: You have to enable the new experience with PowerShell.
Turn on meeting registration:
Set-CsTeamsMeetingPolicy -Identity <policy name> -AllowMeetingRegistration $TrueActivate the new webinar experience:
Set-CsTeamsEventsPolicy -Identity <policy name> -AllowWebinars Enabled
3. Can I use PowerShell to configure who can register for webinars?
Answer: Yes, you can, but keep in mind that this will also be the policy for meetings.
Allow only users in your organization to register:
Set-CsTeamsEventsPolicy -Identity <policy name> -EventAccessType EveryoneInCompanyExcludingGuestsAllow everyone, including anonymous users, to register:
Set-CsTeamsEventsPolicy -Identity <policy name> -EventAccessType EveryoneConclusion
With the new changes Microsoft have made to the webinar experience, a lot of the issues we were complaining about before have been addressed. Hopefully this hands-on guide has given you a sense of what you can do, and how you can do it, with the new webinars for Teams.

Knut Relbe-Moe
Knut Relbe-Moe works as a technical evangelist and has been awarded the Microsoft Most Valuable Professional (MVP). He has worked with SharePoint and Teams for many years and has worked on both big and small projects. He loves to share his knowledge and experience with the community and has been a mentor to many other people.
Knut has also helped to establish and grow commercial business models, sales strategies, successful partner ecosystems, partner experience and partner success functions in various roles.