Create a Power Virtual Agent to do Sentiment Analysis with the Power Platform

Introduction
Sentiment analysis is the process of using natural language processing, text analysis and computational linguistics to identify and extract subjective information from source materials. It is used to determine the attitude, opinions and emotions of a speaker or writer with respect to some topic or the overall contextual polarity of a document.
One example of how sentiment analysis can be used in human resources is to analyze employee feedback. An HR department could use sentiment analysis to automatically process and categorize employee surveys, to quickly identify patterns of positive or negative sentiment among employees about specific topics such as work environment, management, or benefits. This could help the HR department identify areas where the company is excelling and areas where improvements can be made.
This is just one of the reasons why sentiment analysis has become an essential tool for businesses looking to understand customer or employee feedback and make data-driven decisions. Power Platform, a low-code platform that enables users to build workflows and automate processes, offers a simple and effective way to perform sentiment analysis on large volumes of text data.
With Power Platform, businesses can easily create and customize sentiment analysis workflows to suit their specific needs. Whether it's analyzing customer reviews, social media posts or survey responses, sentiment analysis can help identify patterns and trends in customer feedback, understand customer needs and concerns, and ultimately improve products and services.
We will take a closer look at the benefits of using Power Platform for sentiment analysis and provide a real-world example of how it can be used to drive business growth. This article is designed for business owners, marketers and data analysts who want to gain a deeper understanding of how sentiment analysis can help them make better decisions and improve their bottom line.
We will explore the use of sentiment analysis using AI Builder to gather employee feedback and respond appropriately. AI Builder is a service provided by Microsoft that allows users to build and deploy custom machine learning models without having to write any code. It includes pre-built models for common business tasks such as sentiment analysis, object detection and form processing. One of the pre-built models provided by AI Builder is a sentiment analysis model. This model can be used to automatically classify text as positive, negative, or neutral sentiment. It can be used to analyze customer feedback, social media posts and other forms of written text to gain insight into how people feel about a particular product, brand or topic. AI Builder provides an easy-to-use interface for building and deploying custom models, including sentiment analysis models. It also allows users to fine-tune the pre-built models to better match the specific data and use case. Once the model is trained, it can be integrated with various Microsoft products such as Power Automate, Power Apps and Dynamics 365, to automate business processes and improve decision making based on the insights generated from the sentiment analysis.
We will cover three possible scenarios — positive, negative, and neutral — and how to handle them using Power Automate, Power Virtual Agents and Microsoft Teams. By the end of this article, you will have a clear understanding of how to use these tools to analyze employee feedback and improve your HR processes. We will also provide the links for the specific tools required for this process: Power Automate, Power Virtual Agents and Microsoft Teams.
First step: set up a Power Virtual Agent
The first step in implementing this solution is to set up a Power Virtual Agent. Power Virtual Agents is a service provided by Microsoft that allows users to create and deploy chatbots without having to write any code. It is a part of Power Platform and can be used to automate customer service, helpdesk and other common business tasks. In the following case, the bot will serve as the primary means of communication between the employee and the sentiment analysis system. As we progress through the process, you'll see that we will integrate this Power Virtual Agent into an existing scenario that employees are already familiar with. The third step (below) will cover this in more detail.
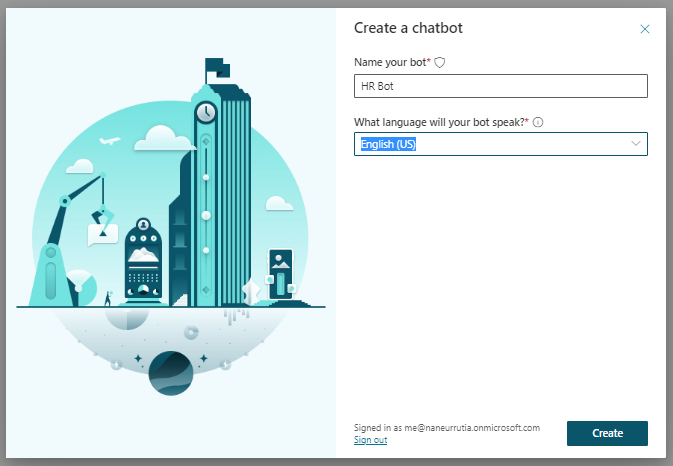
1. To start, log into Power Virtual Agents, fill out the required information and select Create.
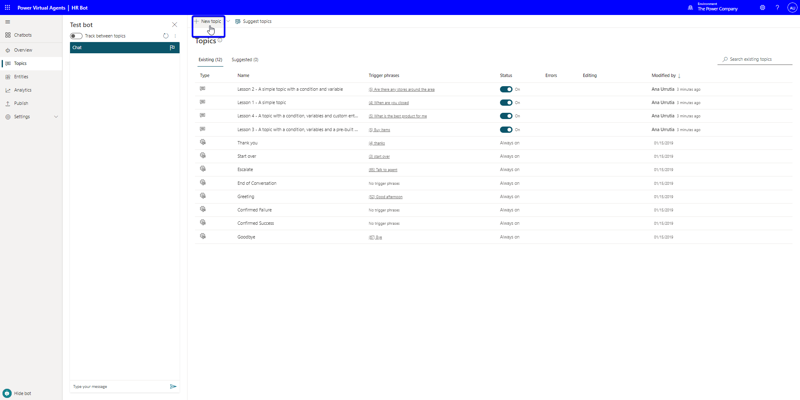
2. Next, navigate to the Topics section and select +New topic. Give the topic a name of your choice. In this example, we have already created a topic called "Employee feedback," which will become clear later in the article.
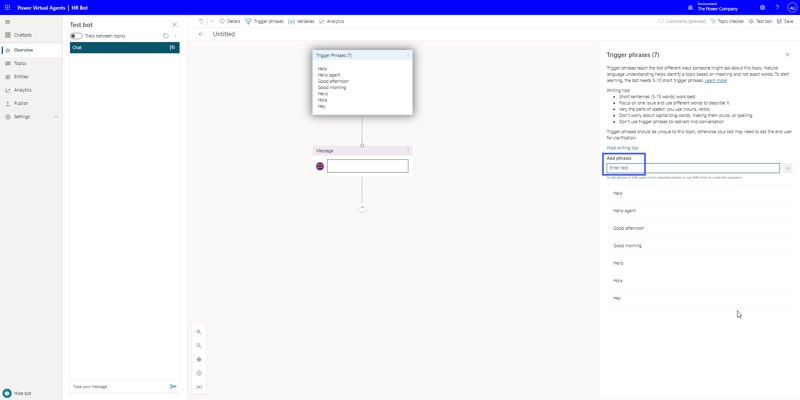
3. Identify the trigger phrases that you would like your bot to respond to. Once you have a list, add them to the Trigger Phrases box.
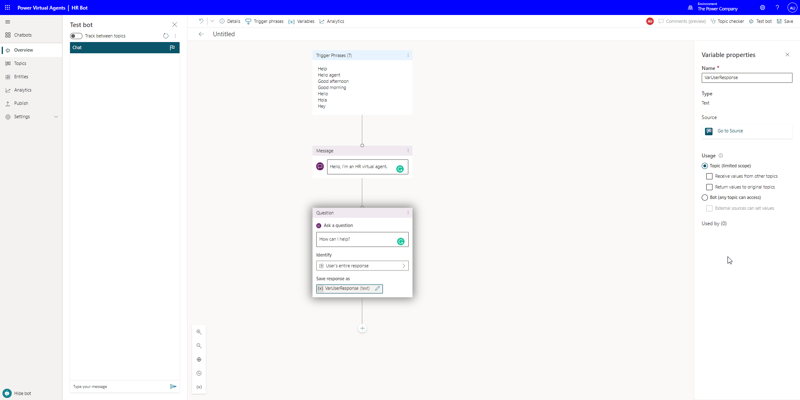
4. When creating your bot's message, include a question as well. Keep in mind that you may need to adjust some default values and options, as demonstrated in the accompanying video.
The following changes were made after the initial configuration, as you can appreciate in figure 4.
- The Identify option was set to User's entire response.
- The Save response as option was set to VarUserResponse.
5. Next, add an action and select Create a flow.
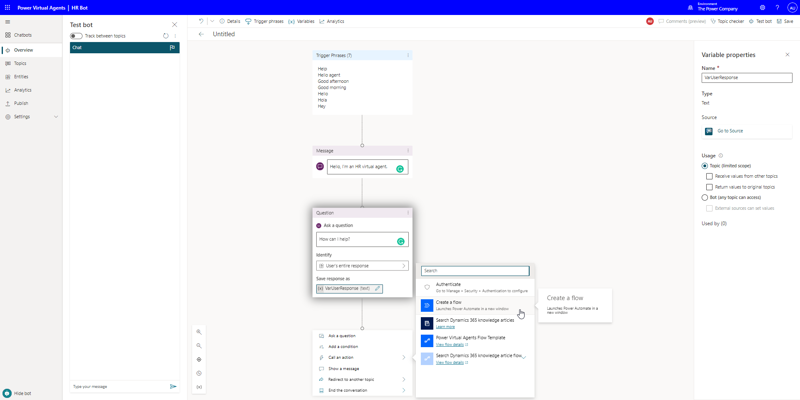
At this stage, a new tab for Power Automate will open from the Create a flow in figure 5. Now Power Automate has launched as shown in figure 6.
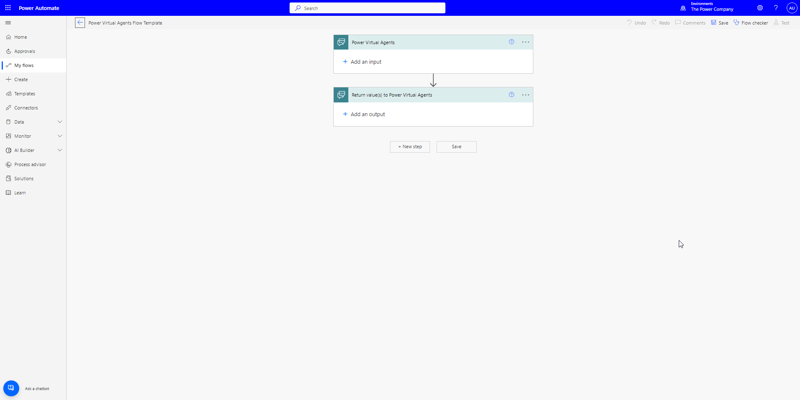
Second step: Power Automate
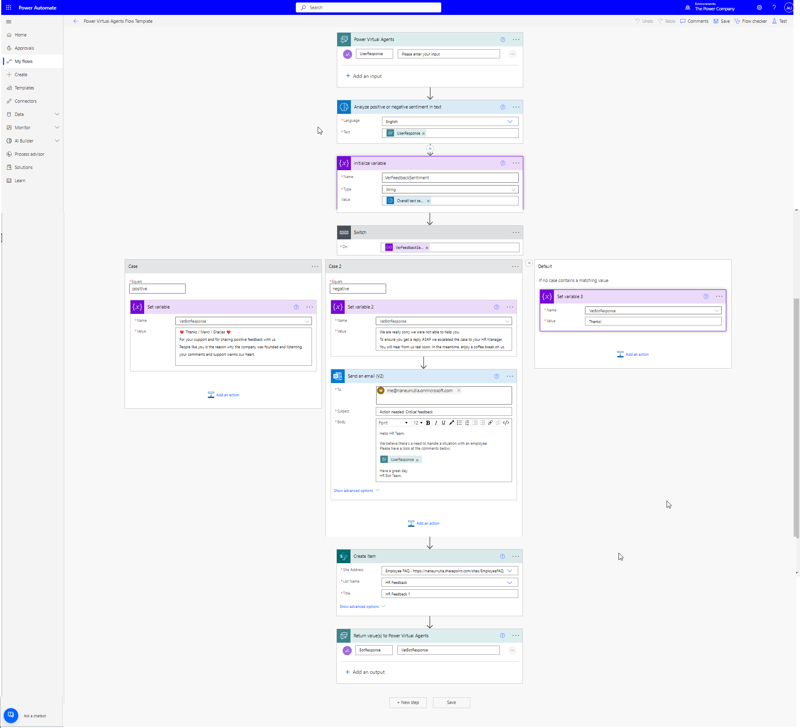
The second step in this process is to set up Power Automate. This tool will analyze the sentiment of the phrase the employee inputs into the system and provide them with different answers based on the outcome. Additionally, it will trigger certain actions with the HR team.
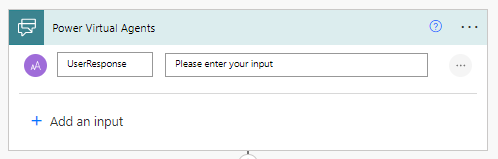
1. To begin, fill in the first box as demonstrated:
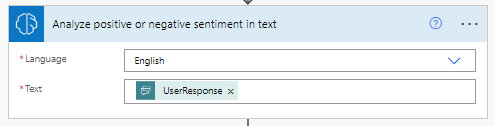
2. Add an action and select Analyze positive or negative sentiment in text. Fill in the required fields as follows:
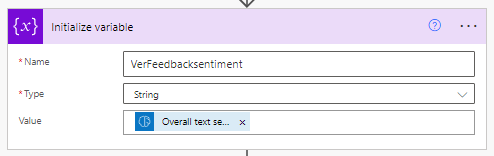
3. Add another action and select Initialize variable. Fill in the fields as shown:
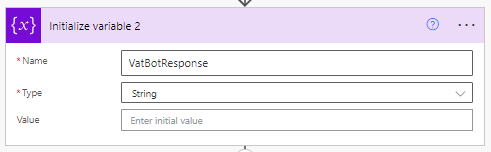
4. Add an action and choose Initialize variable. Complete the fields as follows:
5. Add an action and select Switch. Complete the On variable field as follows:

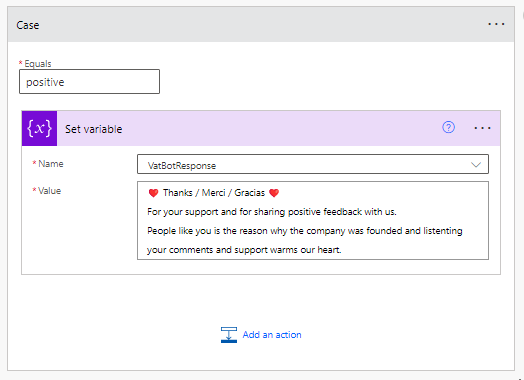
Now you will need to decide how your bot will respond to positive, negative and neutral inputs. You can refer to this example for inspiration.
- In the Case: positive section, select Set variable and fill in the name and text you would like customers to receive in positive cases.
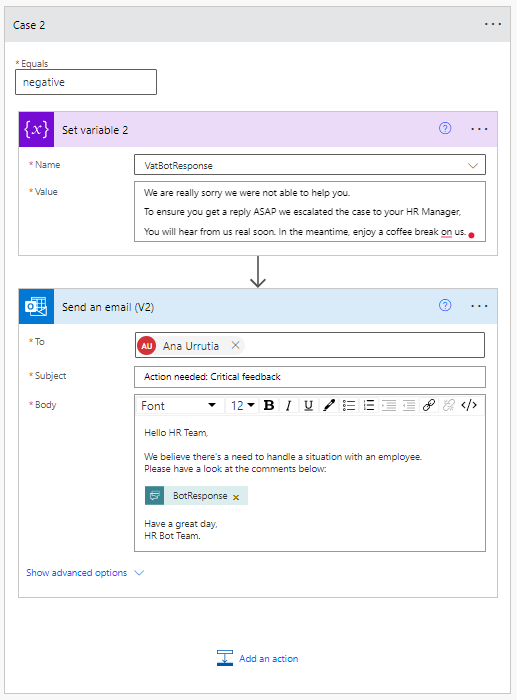
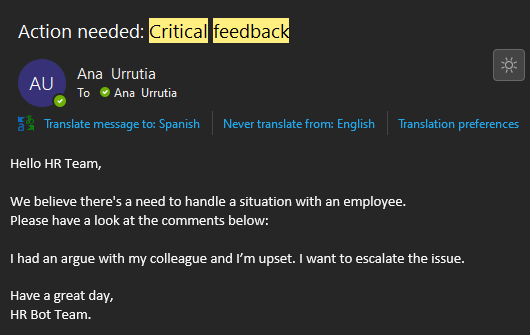
- The Case: negative section differs from the positive case. We want to escalate the received feedback to the HR team via email. The first step is the same as the positive case, but an additional step is added: "Send an email (V2)." Fill in the To, Subject and Body fields. In the body, include a dynamic field so that the recipients are aware of the submitted response and can take appropriate action.
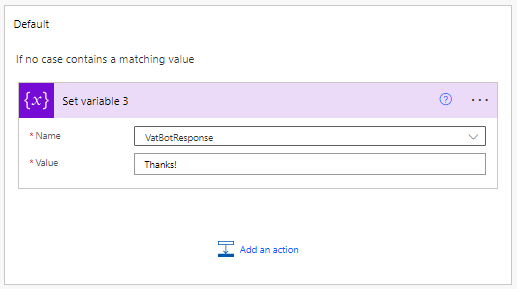
- The neutral case is easy to understand, similar to the positive case. Complete as follows.
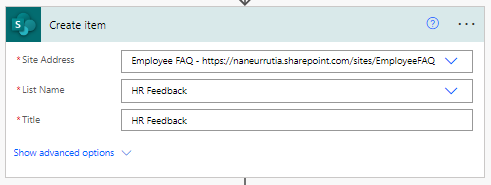
6. To save feedback and sentiment, select the Create option under SharePoint actions. The following information is required: Site Address, List Name and Title.
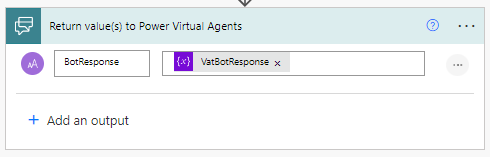
7. We will send these values back to HR Bot — Power Virtual Agents (created in figure 1).
The flow you have created should resemble the following:
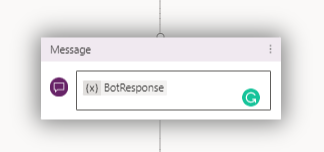
Returning to the first step: Power Virtual Agents.
After creating the flow, you will see that a new box is filled in with new information:
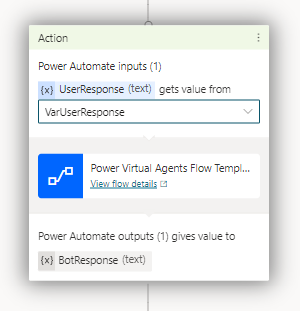
You will need to create a new message and include the variable Response.
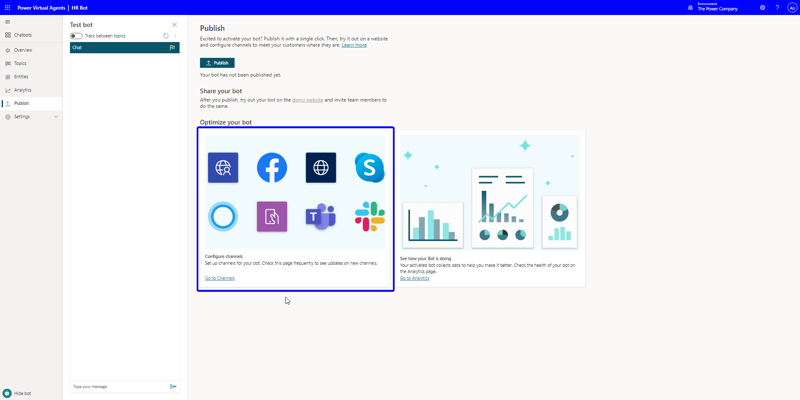
Third step: Publish the Power Virtual Agent on Microsoft Teams.
Utilizing Microsoft Teams is a wise choice as it will be easily adopted by employees, as they are already familiar with Teams for various tasks.
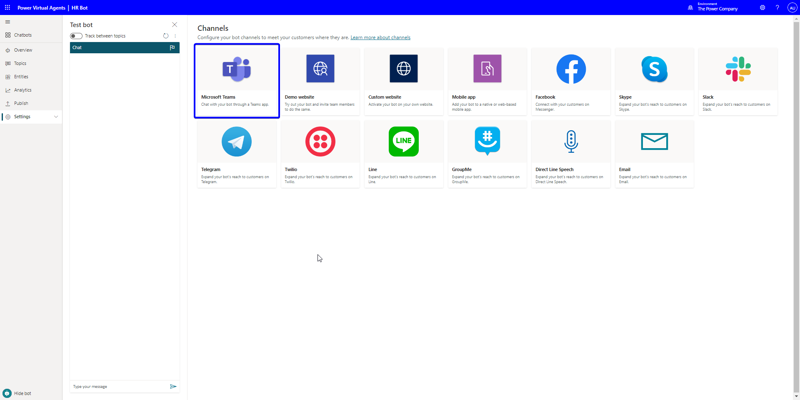
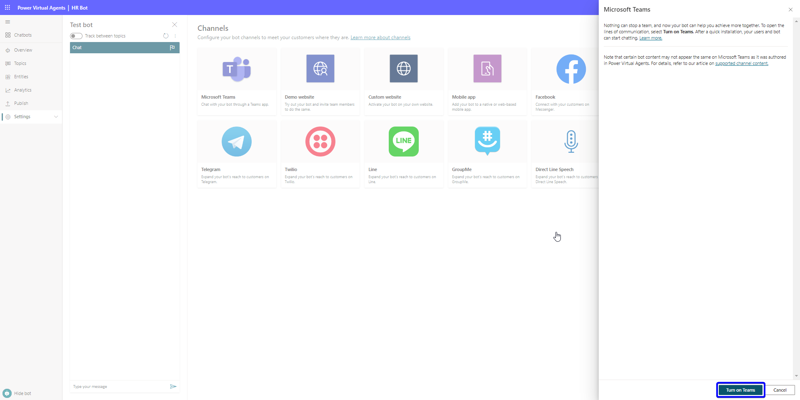
1. In Power Virtual Agents, navigate to Publish and choose Go to Channels.
2. Select Microsoft Teams.
3. A new tab will open. Select Turn on Teams.
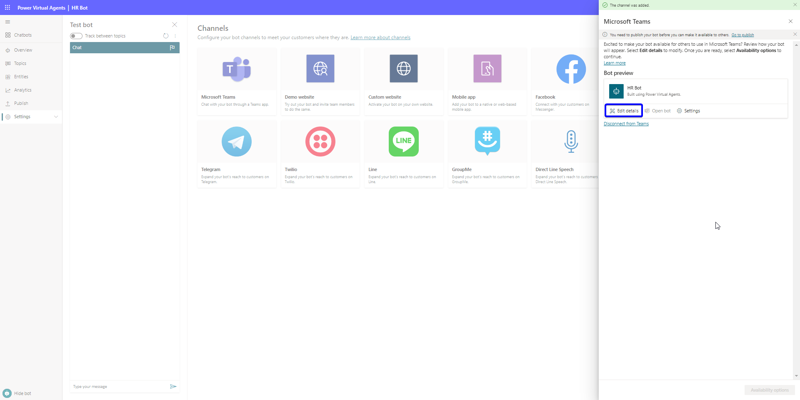
4. This tab will open, select Edit details.
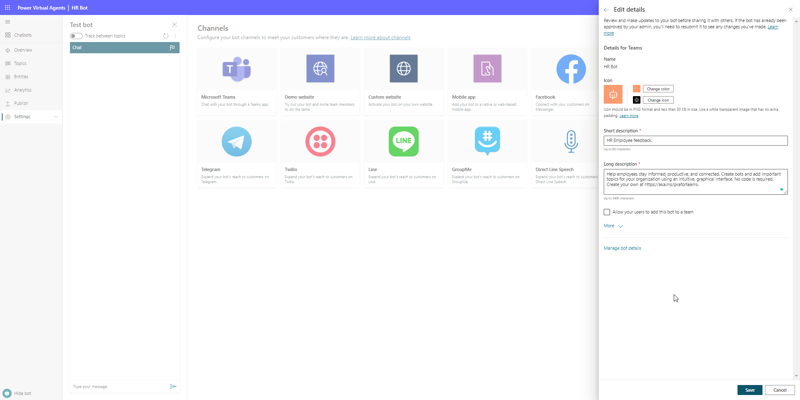
5. You can modify the details if desired, once you have finished, select Save.
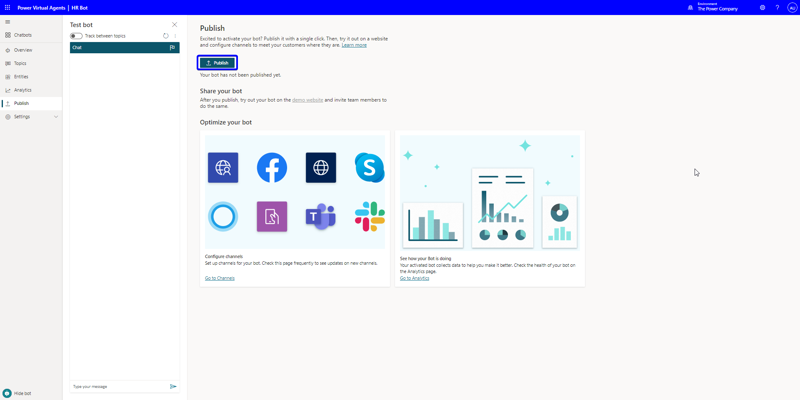
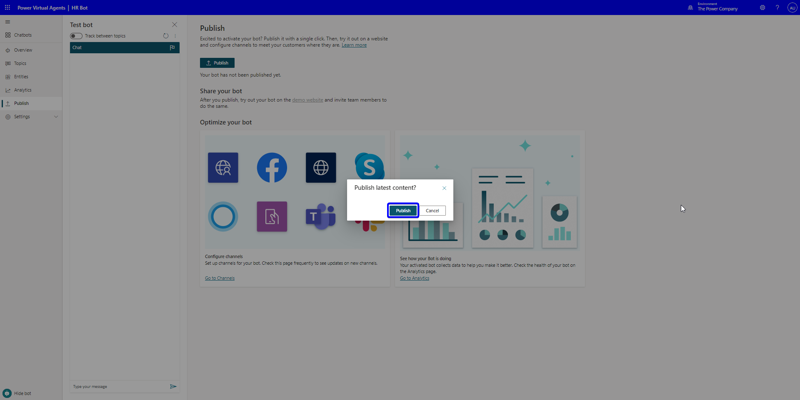
6. Select Publish.
7. Confirm.
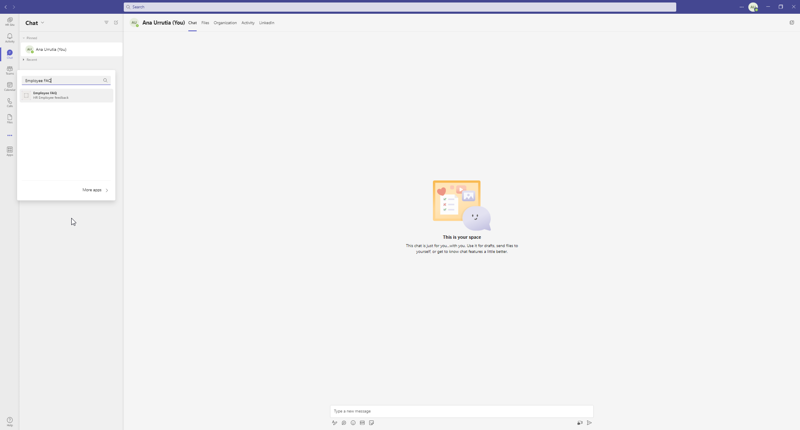
Add bot to Microsoft Teams
1. Search for the bot.
2. Test the solution.
a. Positive
Video 1: Demonstrates positive sentiment interaction with the Employee FAQ chatbot that was published to Teams.
b. Negative
Video 2: Demonstrates negative sentiment interaction with the Employee FAQ chatbot that was published to Teams.
3. Neutral
Video 3: Demonstrates neutral sentiment interaction with the Employee FAQ chatbot that was published to Teams.
Conclusion
In conclusion, sentiment analysis using the Power Platform can be a powerful tool for businesses looking to gain valuable insights into customer opinions and feedback. By using natural language processing and machine learning techniques, the Power Platform can analyze large amounts of customer data and provide valuable insights into overall sentiment, as well as specific topics and keywords. This can help businesses identify areas of improvement and make more informed decisions. Overall, the use of sentiment analysis on the Power Platform can lead to more effective customer engagement and better business outcomes.

Ana Inés Urrutia de Souza
Ana Inés Urrutia de Souza (https://www.anainesurrutia.com/) is a Microsoft Most Valuable Professional (MVP) with a reputation as a worldwide reference in Dynamics 365 Human Resources, Employee Experience, and Power Platform. She is a recognized leader in the field of human resources and has a wealth of experience and knowledge to share.
With her deep understanding of Microsoft technologies, Ana has become an expert in the implementation and use of Dynamics 365 and Power Platform for Human Resources. She is a sought-after speaker at conferences and events and frequently provides training and guidance to other professionals in the field.
In addition to her technical expertise, Ana is also a mentor and community leader. She is passionate about sharing her knowledge and experience to help others succeed and is committed to fostering a supportive and inclusive community in the HR and technology sectors.
With her combination of technical acumen and leadership skills, Ana has established herself as a true authority in the field of Human Resources and Dynamics 365 and continues to push the boundaries of what is possible within this field.