Working with Microsoft Azure Active Directory Applications – Part 1

Microsoft Azure Active Directory (Azure AD) applications are cloud-based applications that can be integrated with Azure AD for authentication and authorization purposes. Using such applications provides a way to centrally manage and secure access to your cloud-based applications and services using Azure AD identities and credentials.
This article is presented in two parts, exploring the practical implementation and functionality of apps across tenant boundaries. It provides an overview of how these apps operate and the details of permissions when used in a real-world setting.
In Part 1 we will learn how to set up and use applications within an M365 tenant, while Part 2 will demonstrate how to utilize and manage multi-tenant apps in third-party M365 tenants.
Benefits of Using Azure AD Applications
Some common scenarios where Azure AD applications are beneficial are single sign-on mechanisms for users, multi-factor authentication (MFA), conditional access policies, centralized app registration and management, and API access management. By integrating with Azure AD, your cloud-based applications and services administrators have full control over the applications and security features.
This gives service administrators full control over applications and security measures. All of this serves to secure access to data and services in the organization. You can find more about applications and management at https://learn.microsoft.com/en-us/azure/active-directory/develop/active-directory-how-applications-are-added.
Demo Setup
Let´s start with our scenarios to see how apps management is done in a M365 tenant. Here, we are using two demo tenants: In part 1 we are using a home tenant named tpe5 where the application is created. In part 2 we are using a partner tenant tpoe5 that wants to access the application.
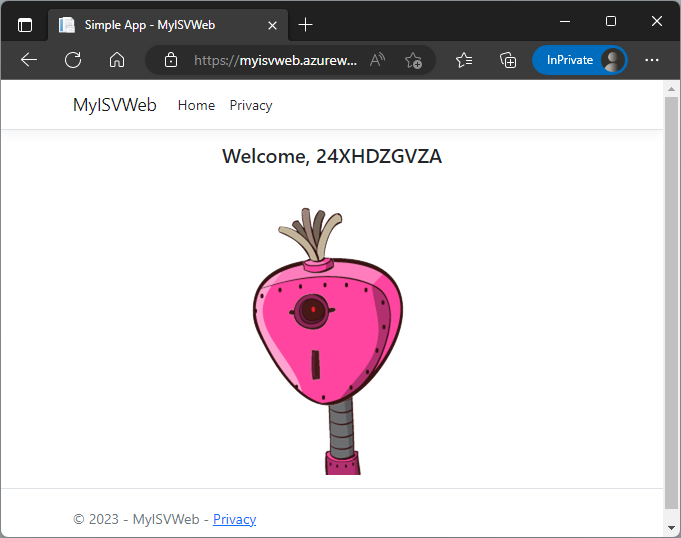
To test an application, we already have a simple web application installed that shows a random name and a random robot image with every call using a free web service from https://robohash.org. The URL to the web application is https://myisvweb.azurewebsites.net. We will use this mini website to demonstrate that the web app displays some (business) data. This web app represents our business solution, which we want to protect against unauthorized access. When we open the URL, the web app shows a random name and robot image, as shown in Figure 1.

To protect this resource – this web app – we will use an Azure AD application. Only registered users shall get access to the web app. Currently, any user anywhere in the world can use this URL anonymously to access this service. In this demo, the web app itself does not check any user sign-in. It's a small dynamic dummy website that should be protected no matter what the app itself does. You can do this with any resource.
Create an App in the Home Tenant
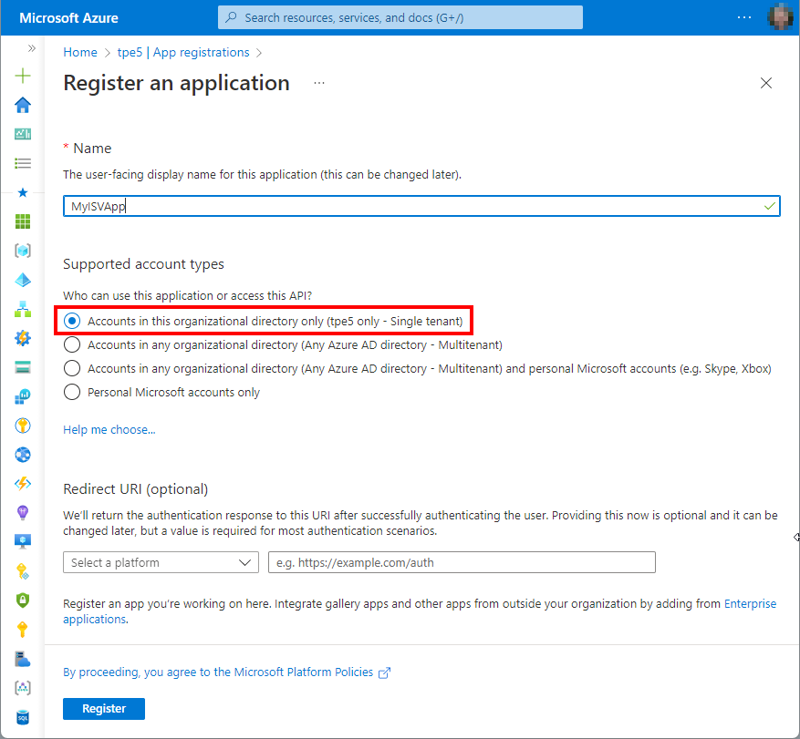
In the Azure portal, we create a new application named MyISVApp. We open https://portal.azure.com/#view/Microsoft_AAD_RegisteredApps/CreateApplicationBlade, and enter the app name. If we only want to use the app in our own Azure AD tenant, we leave the selection at the first option, “Accounts in this organizational directory only (<tenant-name> only - Single tenant)”, as shown in Figure 2.
After a successful login process, we want Microsoft to redirect the user to our own web app. So, we select the type Web from the dropdown and add the application URL, in our case https://myisvweb.azurewebsites.net.
One app can have up to 256 redirect URIs stored, but we currently need only two URIs. Sometimes, having many URIs makes sense, for example when developing the app with https://localhost:port, for development and test slots, and for other purposes. You can find more information about the redirect URL options online at https://learn.microsoft.com/en-us/azure/active-directory/develop/reply-url .
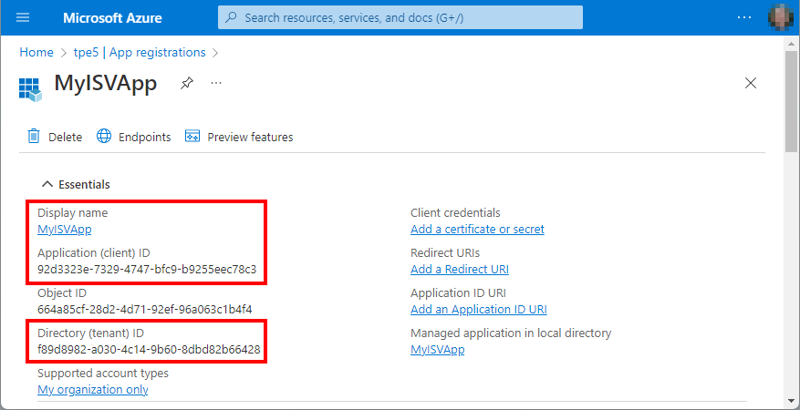
When we select Register, the app is created in our home tenant, and we see (Figure 3) the application name, App Id, and Tenant Id.
We can change the application settings later here as well, for example when we want to add a certificate, a client secret, another redirect URI, and other application properties, as follows.
Grant Flow and Tokens
When we protect an app, after a successful sign-in, the (web) app can work with the data returned from the identity provider. Typically, in the web app, you want to identify the logged-in user, the tenant, and the permissions provided by the app. This allows the app to offer and perform certain functions depending on user login.
In our example, as mentioned, we do not process this information in the application. However, we use this sign-in flow in case the app should handle this in the future. Using this process and flow is a very common scenario.
In our case, using Azure AD and the OAuth 2.0 implicit and hybrid grant flow with our web app, we need to do two things:
- Add the callback redirect URI ".auth/login/aad/callback", and
- Retrieve the ID token on the authorize request along with an authorization code.
When we are building a web application that needs to authenticate users using Azure AD, we need to add the URI ".auth/login/aad/callback" as a redirect URI to the application registration as the callback URL for the authentication flow.
When a user tries to sign into our web application, Azure AD will redirect them to the Microsoft sign-in page to enter their credentials. After the user successfully signs in, Azure AD will redirect them back to our application's redirect URI with an authorization code or access token in the query string. The application can then use this authorization code or access token to access the user's resources in Microsoft Graph or other APIs.
By adding this URI as a redirect URI to our Azure AD application, we are telling Azure AD that our application expects to receive authorization codes or access tokens at this URI, and that Azure AD should redirect users to this URI after they have successfully authenticated. This helps ensure that only our application can receive the authorization code or access token, and that the user's credentials are not intercepted or compromised during the authentication process.
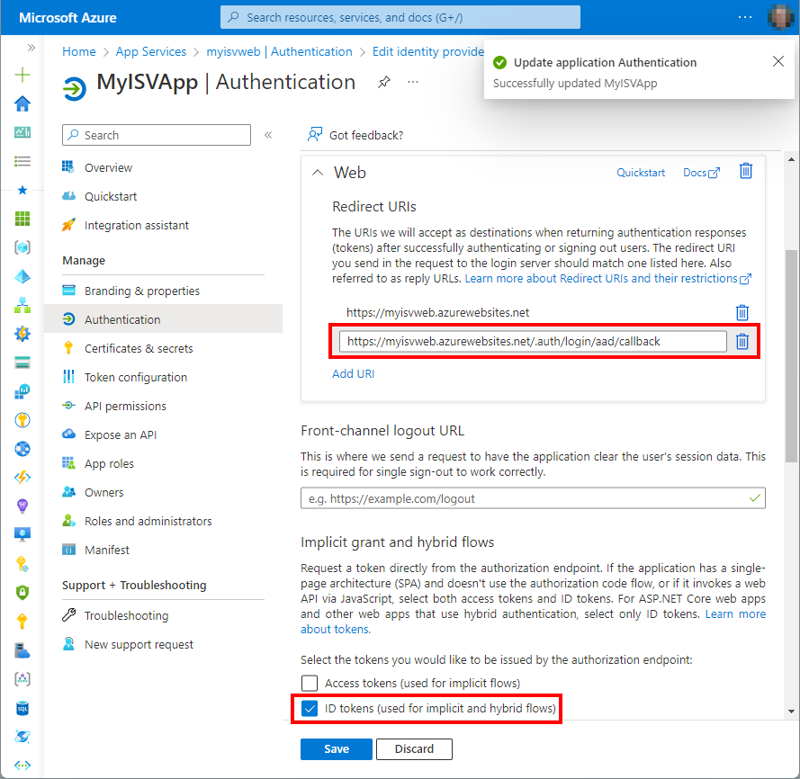
For that, we open the link right to the Redirect URIs label. We use the website URL, which is https://myisvweb.azurewebsites.net/, and add “.auth/login/aad/callback” to it. Then, we add the required Redirect URIs, and the token information, as in Figure 4. So, the Redirect URI for MyISVWeb web application is as follows:
https://myisvweb.azurewebsites.net/.auth/login/aad/callback.
Note: You should only add redirect URIs that are valid and owned by your application. Otherwise, an attacker could use an unauthorized redirect URI to intercept the authorization code or access token and potentially gain access to the user's resources. You can find out more at https://learn.microsoft.com/en-us/azure/app-service/configure-authentication-provider-aad#-option-2-use-an-existing-registration-created-separately.
Also, we want to retrieve the ID token on the authorize request along with an authorization code. Access tokens are only required for single page applications using JavaScript. Here, we only enable the ID tokens switch in the “Implicit grant and hybrid flows” section (shown in Figure 4).

This ensures that for the implicit and hybrid grant flow, the tokens will be delivered from the identity provider and our app will be able to work with the token data. Then, we select Save.
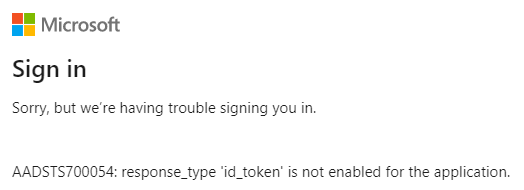
Note: The flows control the passing of the token depending on the type of application. If we want to use the app in this scenario, we must provide the ID tokens information. Otherwise, the Azure AD would inform us that the token is missing in our authorization flow, as shown in Figure 5.
You can find more about the application flow details at https://learn.microsoft.com/en-us/azure/active-directory/develop/v2-oauth2-implicit-grant-flow , and a description at https://learn.microsoft.com/en-us/azure/app-service/configure-authentication-provider-aad#-step-1-create-an-app-registration-in-azure-ad-for-your-app-service-app .
With that, the basic app settings are done. The users should be able to login with this application and their user credentials. We'll try that later.
Add Application Permissions
Each app automatically has permissions to sign in as a user, which is the delegated User.Read permission in the Microsoft Graph API. There are two types of application permissions:
- Delegated permissions are granted to an application to act on behalf of a user. These permissions are typically used for scenarios where the application needs to access resources owned by the user, e.g., his email, calendar, contacts, teams, etc.
- Application permissions are granted to an application to act on its own behalf without a user context. These permissions are typically used for scenarios where the application needs access to resources that are not tied to a specific user, e.g., to access data in a database or a scheduled task that runs every night and processes data without any user interaction.
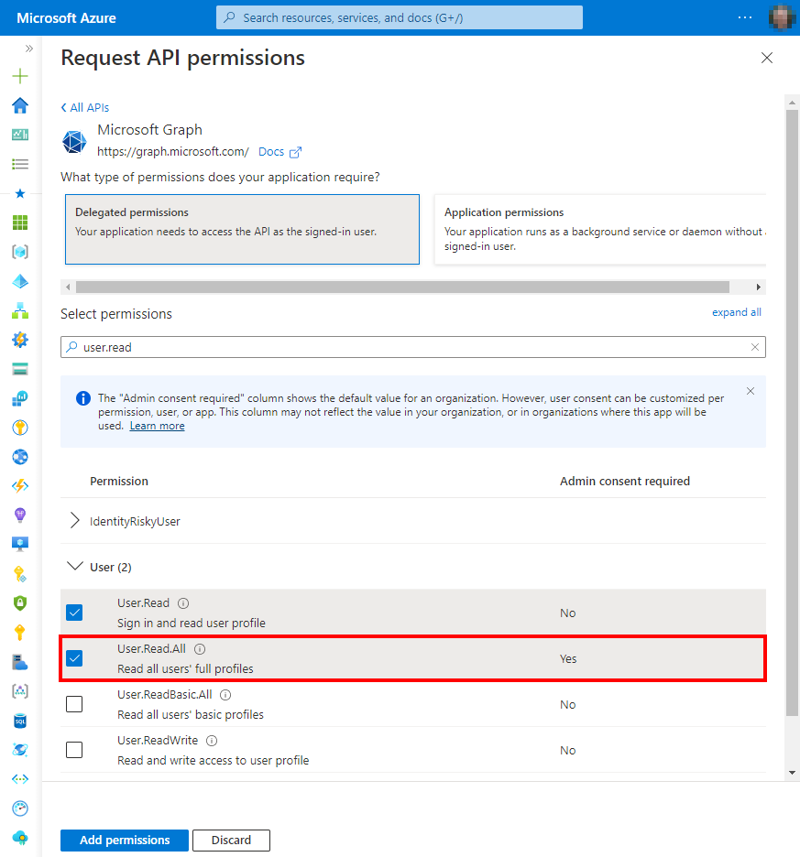
Just for our demo, we add another delegated permission for Microsoft Graph for the app to access the profile information of all users in the tenant. We add User.Read.All, as shown in Figure 6.
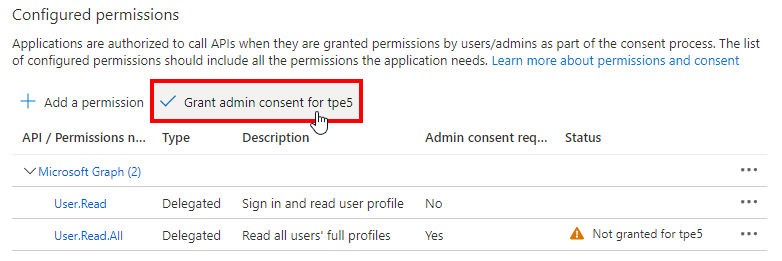
We see that this permission requires an admin consent. This is the case for many permissions, depending on the security impact of the feature. After selecting Add permissions, the admin needs to select Grant admin consent for <tenant> (Figure 7) and to confirm.

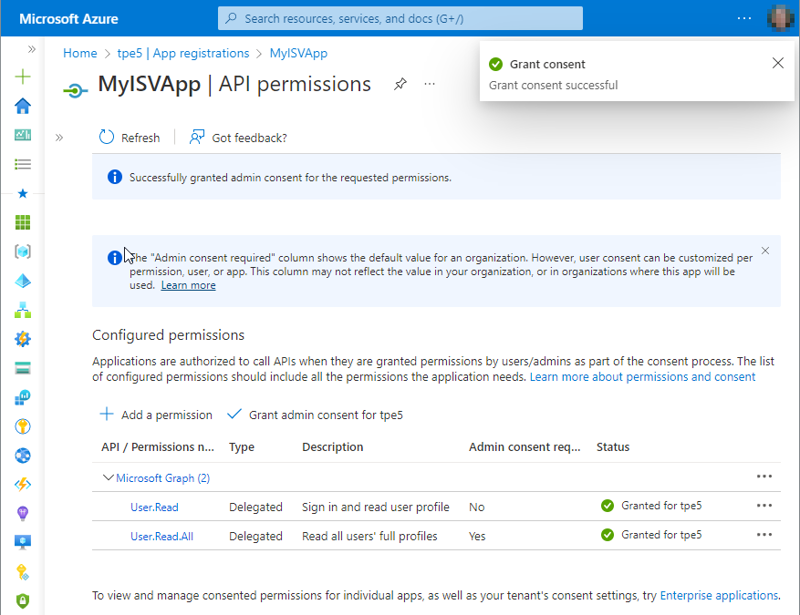
When done, we see in Figure 8 the green status Granted.
Protect the (Web) Application With Azure AD
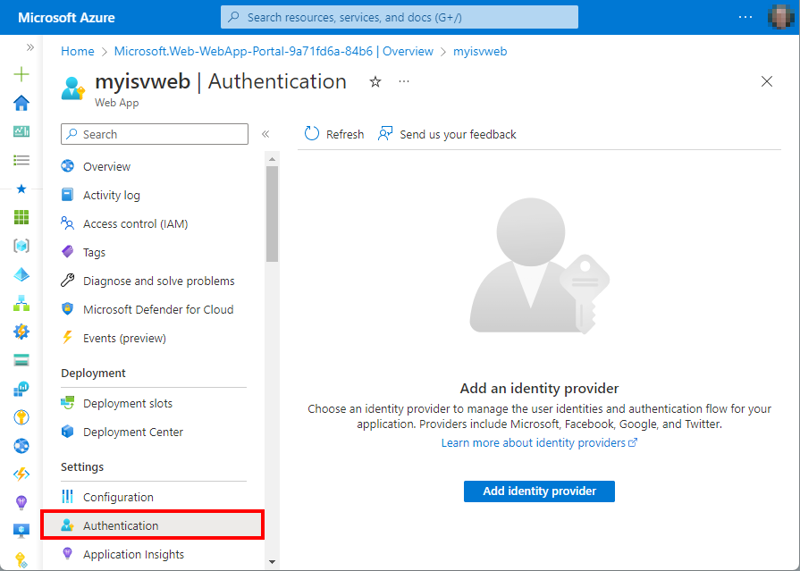
In our demo, we want to protect an application that is running in an Azure App service as a website. Azure makes that easy. We open the web app in the Azure portal, go to Authentication, and select Add identity provider (Figure 9).

As we see in the identity providers list (Figure 10), there are other identity providers we can use. In our sample, we want to use Azure AD, so we select Microsoft.

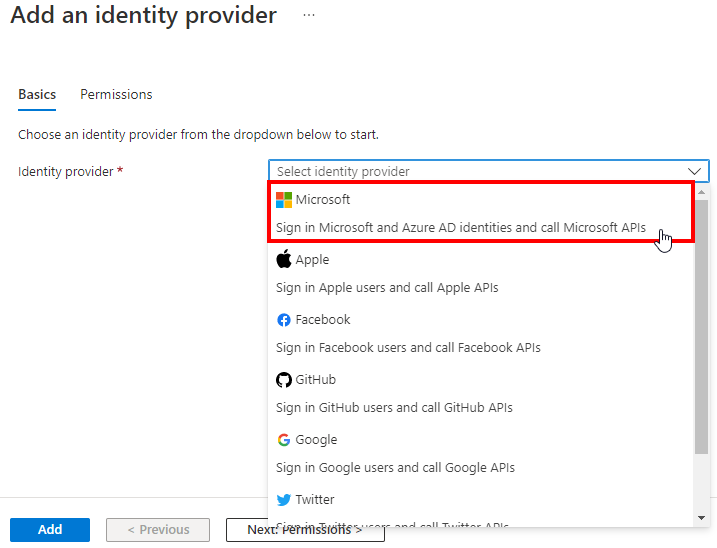
After that selection, we see a bunch of options to choose from. We select our existing app MyISVApp, for Restrict access, we select Require authentication and indicate from the list how to react to Unauthenticated requests, as shown in Figure 11.

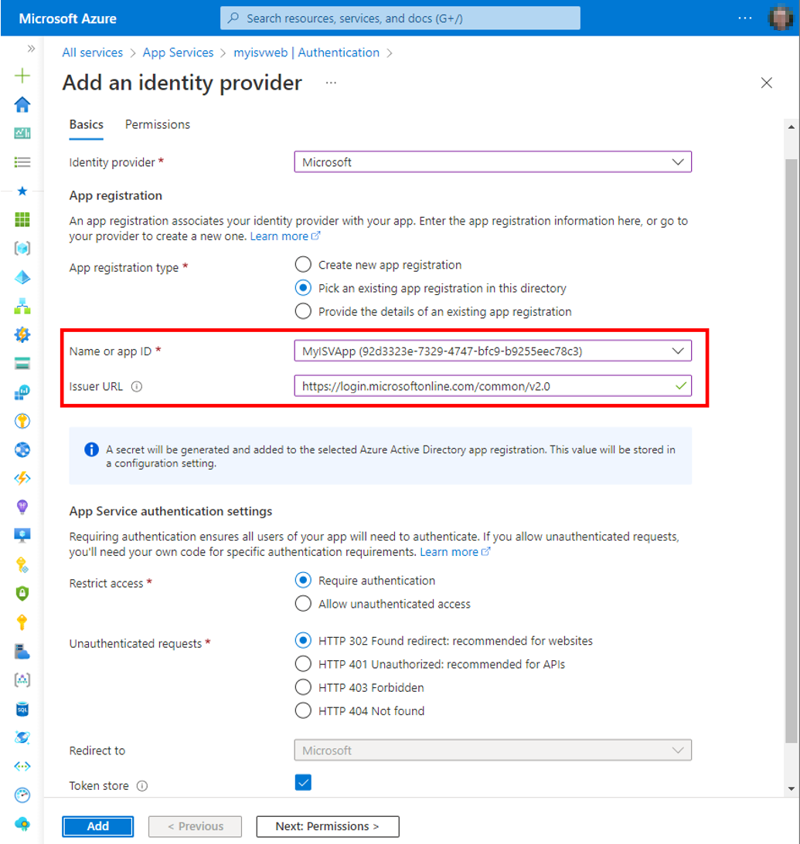
Note: In the form, there is an Issuer URL field. In a single tenant scenario, this field is automatically filled out with the ID of the Azure AD from which users should be allowed to authenticate in our application. The consequence is that users from other tenants are denied access. Therefore, for switching to a multi-tenant app later, we must remove the prefilled Issuer URL, or replace the content by the Issuer URL “https://login.microsoftonline.com/common/v2.0” (the common endpoint that allows a sign-in for all M365 tenants) for the app to authenticate and to work.
We then select Add. This operation automatically creates an app secret and adds the generated value in the application settings of the web in a key named MICROSOFT_PROVIDER_AUTHENTICATION_SECRET. With the client secret, the hybrid flow is used, and the App Service will return access and refresh tokens. You can find a detailed description at https://learn.microsoft.com/en-us/azure/app-service/configure-authentication-provider-aad.
The web app is now protected by Azure AD. Users must authenticate to open the web app.
Test Sign-in of Your Home Tenant as Administrator
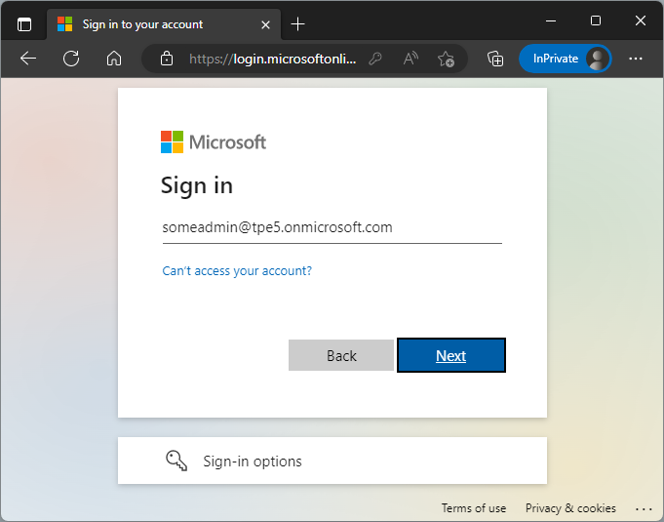
It´s now time to test the application protection in our home tenant. First, we try it as a Global Admin, and open the web app URL at https://myisvweb.azurewebsites.net. As we see in Figure 12, the application protection redirects to the Microsoft sign-in page. We need to sign in with the user and the password (and MFA, if configured).

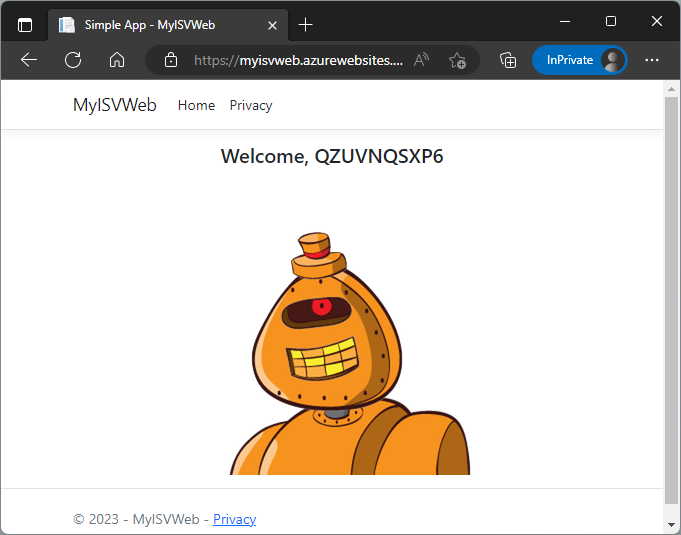
After the successful login, the redirection works, and the web application follows. We enter the web application at https://myisvweb.azurewebsites.net , and we can see some (random) data, as shown here in Figure 13.
The website opens, and we see a different generated name and image.
Sign in as User in the Home Tenant
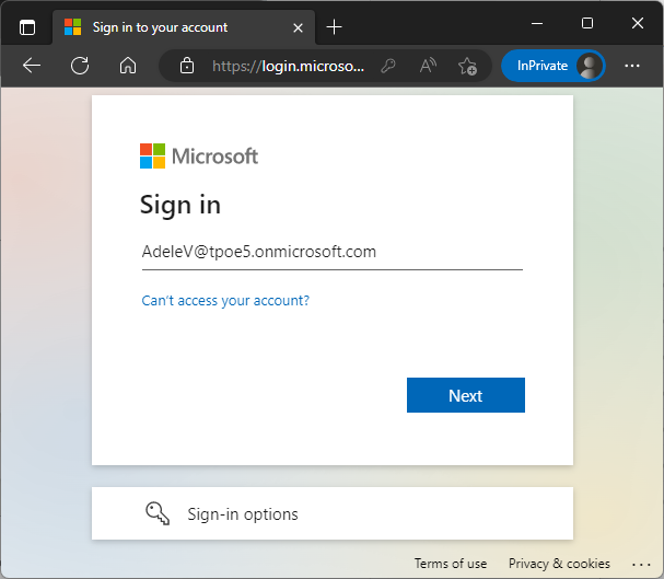
Now we close the browser, reopen it in InPrivate mode, and sign in as another user of the home tenant (Figure 14). Here, we sign in as AdeleV@tpe5.

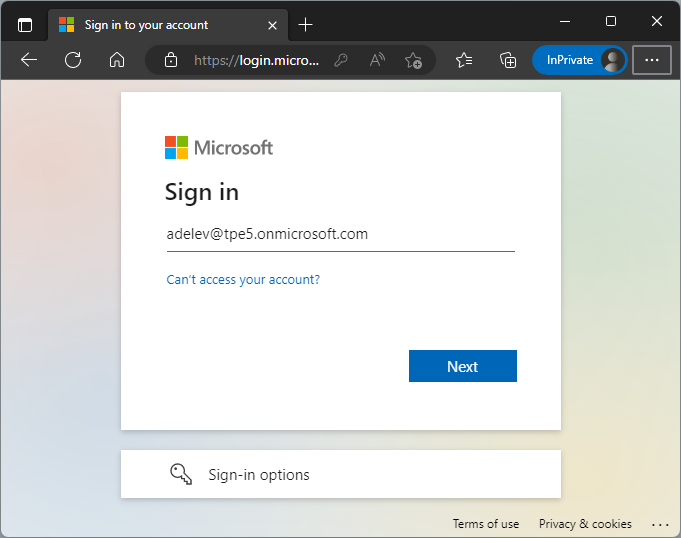
And it works, as shown in Figure 15.

Why is that? Well, the Global Admin has granted all required permissions to this application. This works for all users in the home tenant.
Application Access for Anonymous Users
Anonymous users cannot access the web application. Now there is a login process in front of it.
Application Access for Users With a Microsoft Account or From Another M365 Tenant
Ok, so how does it work for users from another tenant, or for users with a personal Microsoft Account (MSA)?
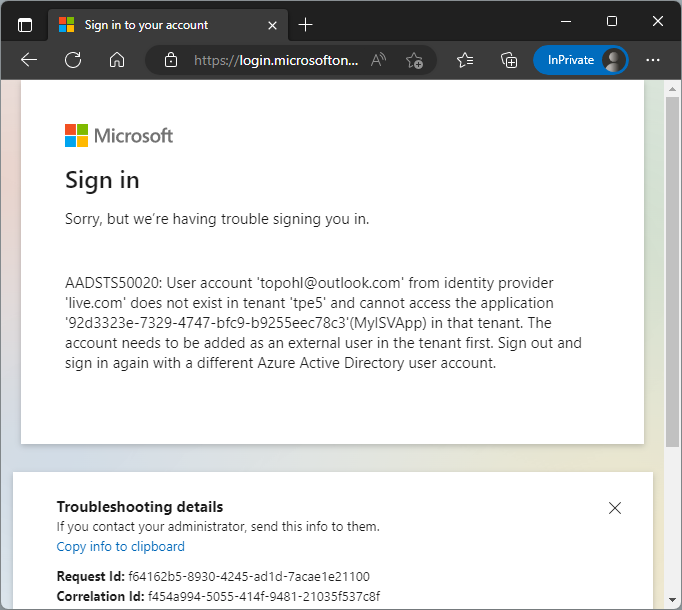
When we try to sign in with a different account of the home tenant – here with a MSA like someuser@outlook.com, we get a corresponding error message (Figure 16), saying “Sorry, but we’re having trouble signing you in. AADSTS50020: User account '<accountname>' from identity provider '<providername>' does not exist in tenant '<home-tenant-name>' and cannot access the application '<app-id>' (<app-name>) in that tenant.” as shown in Figure 16.

So, the app is currently only available for users in our home tenant.
Application Access with a Guest Account
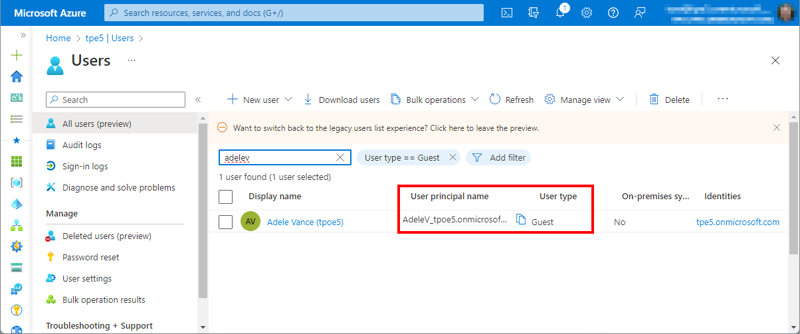
How does this work for users that have a guest account in the home tenant? We add a user from another M365 tenant as a guest to our home tenant (Figure 17). The guest user is AdeleV@tpoe5 – a user with a work account from a different M365 tenant.
Now, we try to open the web app at https://myisvweb.azurewebsites.net/ as AdeleV@tpoe5 (Figure 18):

After successful login, the user gets a permission request from the app (Figure 19). The notification informs about the required permissions of the MyISVWeb in the home tenant for the user account.
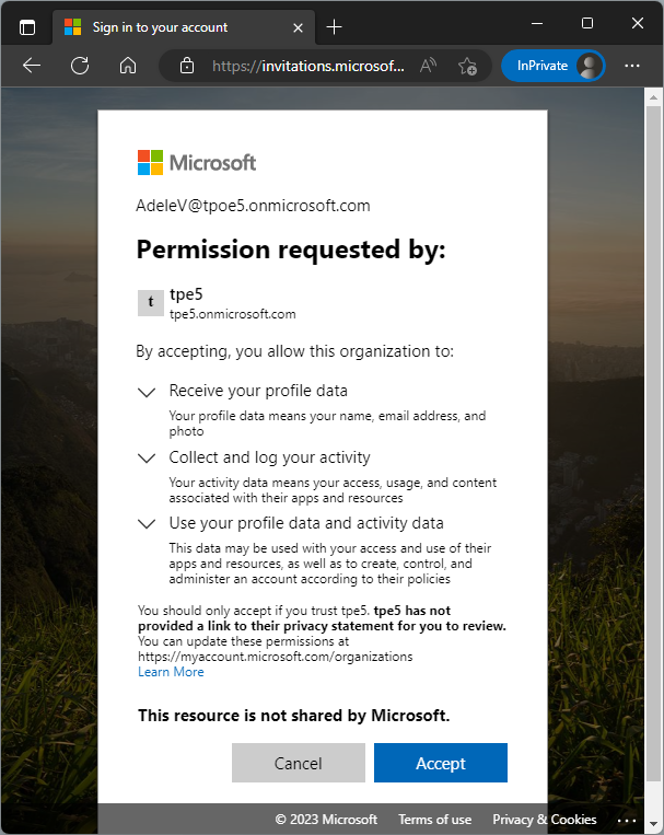
This request follows an all or nothing principle: If the user trusts the app, he/she must accept all requested permissions. Otherwise, the app cannot be used.
Note: By adding more application properties, like a privacy statement URL, and eventually a Microsoft Partner Id, the app is shown as a trusted app without the warnings shown above.
When accepted, the web app follows, as shown in Figure 20.

So, guest users in the home tenant can access the application as well. The permission requests follow only at the first start. Once the app has been accepted, no further permission requests will follow.
Summary
This article describes how to set up and manage applications in a Microsoft 365 tenant, with a particular focus on how Azure AD applications can be used to provide secure access control to data and services. The demo includes a secured web application and shows how to create an Azure AD application in the home tenant (in your organization) and add redirect URIs for the authentication flow. The article shows the importance of integrating with Azure AD for centralized app registration, management and security measures.
In part 2 we look at how using and managing a multi-tenant app works in foreign M365 tenants.

Toni Pohl
Toni works as consultant and has authored several technical books and articles. He is conference speaker and passionate blogger. Since 2013, Toni was awarded as Microsoft MVP for his contributions for various community activities around Windows and Web technologies, Microsoft 365 and Microsoft Azure. Toni is interested in software development, innovation and cloud computing and loves playing with new technologies and developing cloud solutions.
Toni is Microsoft MVP for Microsoft Azure and Office Development.