5 Steps to Synchronize Microsoft Teams with File Explorer

Syncing your Microsoft Teams to your local computer is one of the easiest ways to improve file organization. If you have access to Microsoft 365 through school or work, you can then utilize OneDrive to sync Microsoft Teams and File Explorer. This allows you to access files when you’re offline and automatically sync files back to Microsoft Teams once you go back online. It’s important to be aware that your organization can choose to disable this functionality. If you have trouble syncing, then be sure to contact your IT admin. (To sync SharePoint with File Explorer, see my article 6 Steps to Synchronize SharePoint With File Explorer.)
Follow these 5 steps to configure syncing
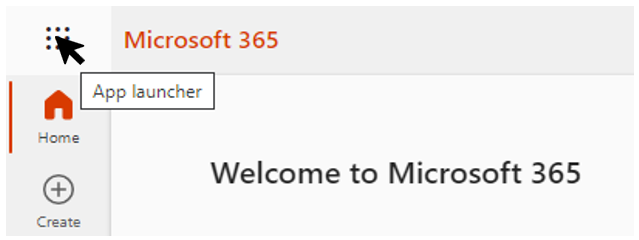
Step 1: Go to office.com. If you are not already signed into your organization Microsoft 365 then do so now. Once you have signed into Microsoft 365, select the Microsoft 365 app launcher as shown below:

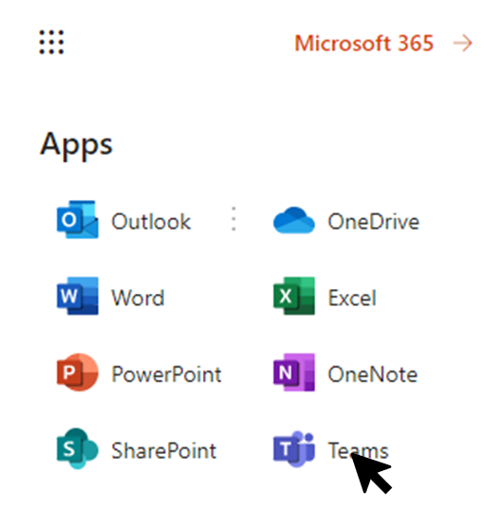
Step 2: Once the app launcher menu opens, navigate to the Teams app:
Step 3: After Microsoft Teams opens then navigate to the Teams channel you would like to sync your File Explorer to. Within the Teams channel you will see a “Files” tab. Click into the “Files” tab and select “Sync.”

Step 3 can be completed from the desktop application and the web application of Microsoft Teams.
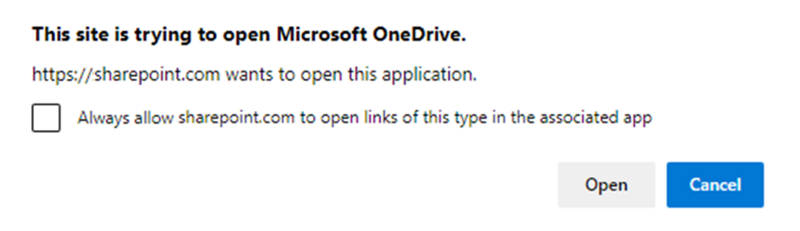
Step 4: If you are in the web application of Microsoft Teams you see the dialogue box in Figure 4. This means the site is connecting Teams to File Explorer through Microsoft OneDrive. If you are not signed into OneDrive, you will be prompted to do so.

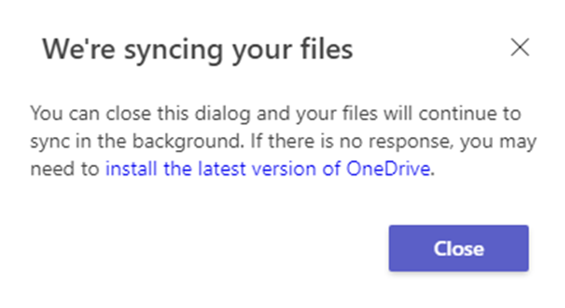
If you are in the desktop application of Microsoft Teams (and already signed into OneDrive) you will be given the dialogue box below.
NOTE: Step 4 cannot be completed if your organization has disabled this functionality. You may need to contact your IT administrator.
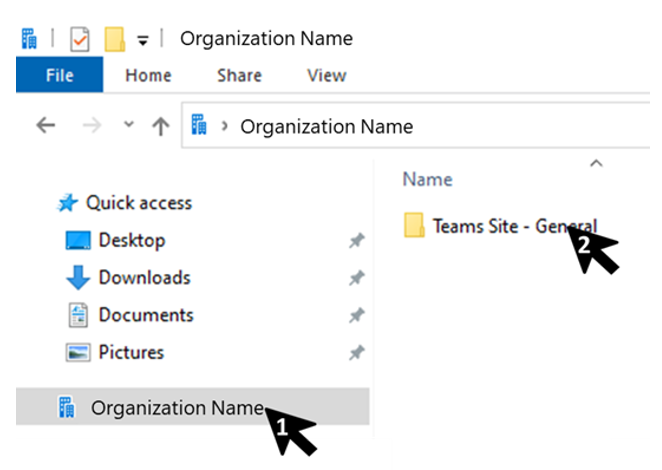
Step 5: You can now save your files within File Explorer, and they will automatically sync to Microsoft Teams. You can check this by going to File Explorer and navigating to the correct file path. You’ll notice that the files sync to a folder that has the name of your organization.
It is possible that you’ll want to disconnect or stop the sync. You can resolve this by right clicking on the folder within File Explorer and navigating to settings. Within the settings window, open the Account tab. Once you’re in the Account tab you will see all the locations that are syncing. Simply click “Stop sync” on the location(s) you want to disconnect.

Summary
You have completed the process to sync your Microsoft Teams files with File Explorer. If you need to sync on another computer, then follow steps 1-5 again.
- Step 1: Open App Launcher
- Step 2: Select Microsoft Teams
- Step 3: Navigate to Teams Channel > Files > Sync
- Step 4: Accept any dialogue boxes (sign into OneDrive)
- Step 5: Open File Explorer and start saving files
TIP: To sync SharePoint with File Explorer, see my article 6 Steps to Synchronize SharePoint With File Explorer.

Curtis Norman
Curtis is an accomplished healthcare analytics professional who enjoys solving complex problems utilizing data-driven methodologies. Curtis has done work for many hospitals and medical groups across the United States. His passion for healthcare was inspired by clinicians who attended to his daughter who was born prematurely, only weighing 1 lb 13 oz at birth. He is a vocal supporter of the Microsoft Ecosystem and effectively utilizes the Microsoft analytics suite in his daily work. Curtis is a well-respected Udemy Instructor who has created courses on various healthcare-related subjects including SQL, Finance, and healthcare data. His courses include – Intro to SQL using Healthcare Data, 101 Practice SQL Questions: Basic to Advanced, and Healthcare Revenue Cycle and Finance. During his leisure time, Curtis enjoys spending quality moments with his family and dog in the outdoors.