Microsoft 365 A to Z Series: Bookings

Microsoft 365 A to Z Series: Bookings
Ever receive that email or chat message asking about your availability for a meeting, and to please send some dates and times you are available? That is probably many of you, multiple times a week, I am sure. I lived this nightmare for a long time until Microsoft Bookings came along, and it has helped my partners, clients and my team determine when I am available and lessen double bookings. It is also possible to integrate it into the company – for clients or non-clients who need support assistance – to book time and pay all at the same time. If you want to spend less time figuring out your calendar for the week and more time helping clients and completing tasks, Bookings is the application, and you need to check it out.
Configuring Microsoft Bookings
In the Microsoft 365 app launcher (aka the ‘waffle’) you will find the app Bookings listed. When selected, it will take you to your Personal booking page. This page will show you current booking pages that you have created or have been shared with you in your organization. From here you can also create shared booking pages by selecting Create.

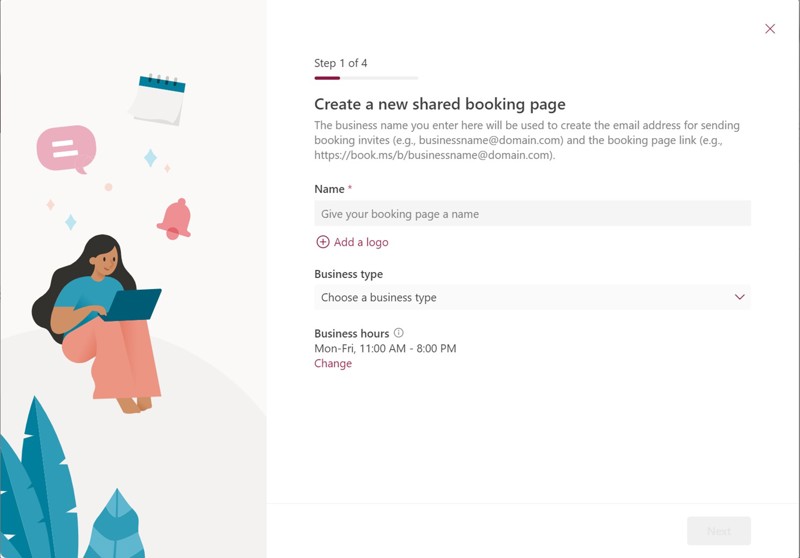
Step 1 in creating the booking page is to name it and provide a logo to add some company branding, which assists in identifying it is a valid booking page and not one being spoofed. Select your business type and then set the business hours for this page.
Step 2 is adding the users within the organization that you want to show in the booking page that meetings can be scheduled with. By default the creator of the page is identified as the Administrator, however other users can be identified as Administrators as well. There are other roles available with in bookings as well; I have listed them in the table below and what functions are available to them.
| Roles | Function |
|---|---|
| Administrator | Can edit all settings, add and remove staff, and create, edit and delete bookings. |
| Team Member | Can manage their availability as well as bookings assigned to them. When adding or editing a booking, they’ll be assigned as a staff. |
| Scheduler | Can manage bookings on the calendar and customer details. They have read-only access to settings, staff, and services. |
| Viewer | Can see all the bookings on the calendar but can’t modify or delete them. They have read-only access to settings. |
| Guest | Can be assigned to bookings but can’t open booking mailbox. |

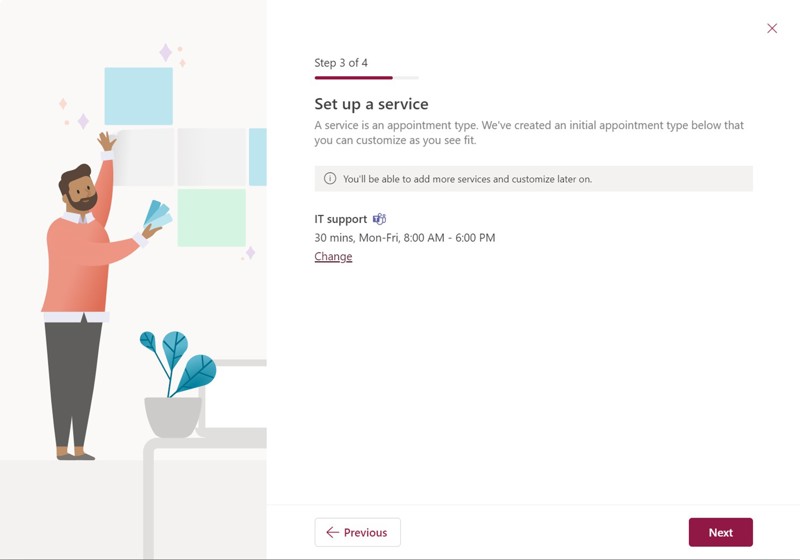
Step 3 allows you to set up different types of services and options for meetings durations when booking. Most common options for scheduling meetings are provided by default, such as a 15-minute, 30-minute or one-hour meeting. However, it is also a great way to identify different support meeting times that a rate can be associated with. When adding the different meeting options, you can set specific business hours for each.
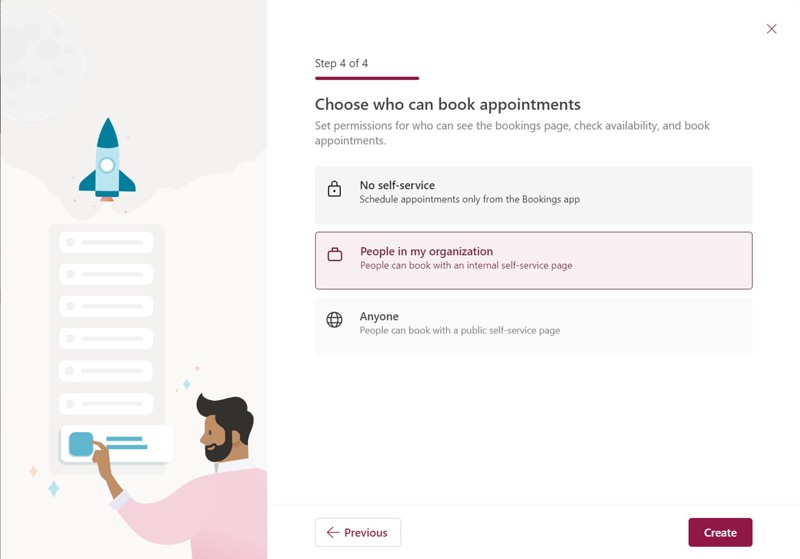
Step 4 is setting permissions for who you want to be able to use the booking page. Three options have been provided to grant access. The “No self-service” option means that even though a bookings page has been created, all meeting scheduling must be done in the Bookings app itself. If you want to restrict the bookings page to only be used within your organization, you will use “People in my organization.” To share your booking page externally to the company and provide you the ability to place a link in your email, select the “Anyone” option.
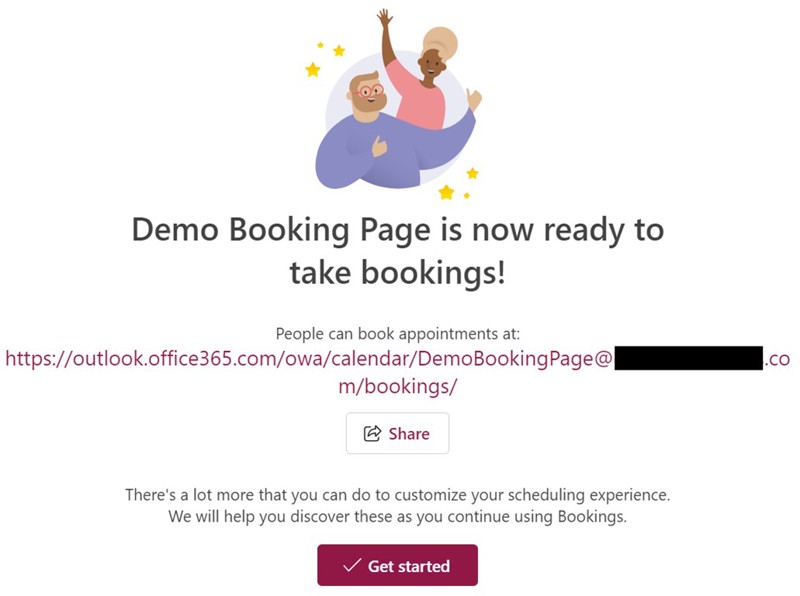
After selecting Create, the page will start building out behind the scenes. Once it has completed, the message in Figure 6 will appear with the link to the booking page. This is the link that can be utilized in creating a “Book A Meeting” link in your email signature line, company internet site, social media outlets and any internal sites.
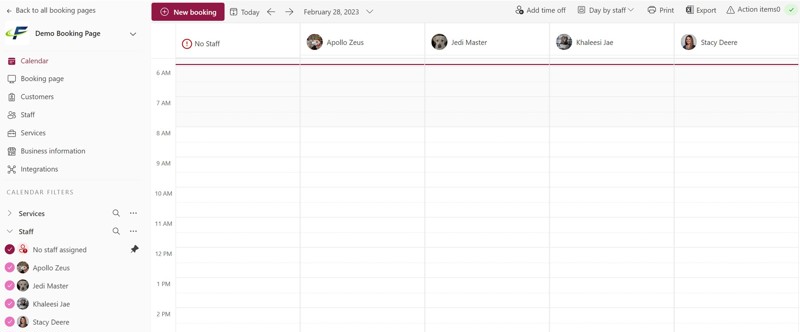
When you select “Get started” from the creation screen above or select the bookings page from your personal booking page from the app, the bookings calendar in Figure 7 appears, in addition to all the pages settings and configurations. This is where you can make changes to staff, business hours, business information, and various other settings. Notice an option called “Integrations” in the left navigation panel. This is where you can add Power Automate into the mix to set up flows that kick off under certain conditions, such as when a calendar invite is created or deleted. As always, Microsoft has provided some templates to help get started in the creation of flows.
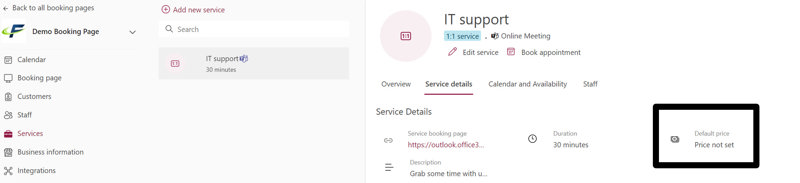
In the calendar configuration settings is where you will also find the ability to add a price to the different services you have added (see Figure 8).

Using Your Booking Calendar
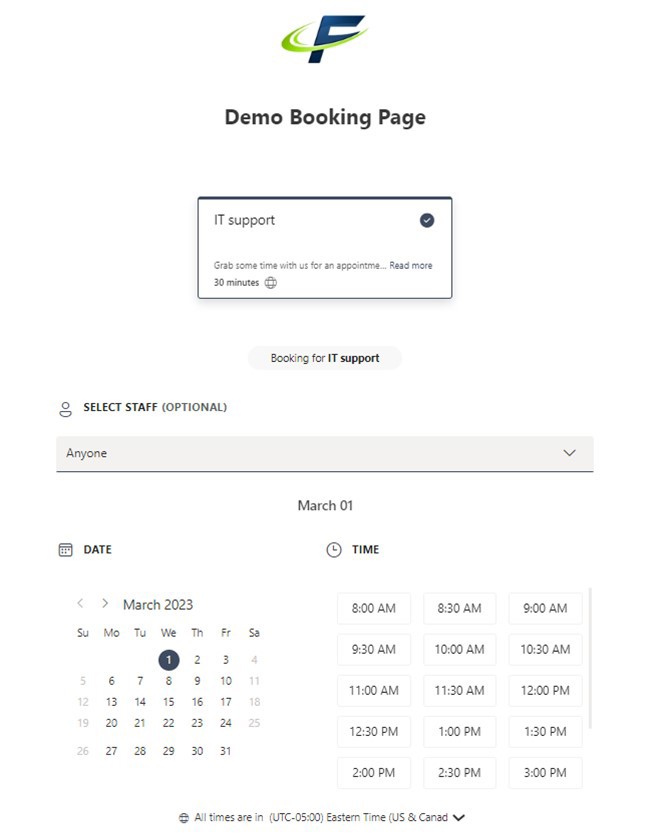
After your page is created and all the settings have been configured, your page is ready to start accepting meetings. Selecting the link that was provided during page creation will direct users to the live booking page. At this point, the person scheduling the meeting will select their meeting options (if multiple) and the individual they would like to meet with. When the staff member is selected, the calendar and times associated will update to the staff member’s availability. Also, when a date is chosen, the time slots will update for that given day. By default, time zone will be the tenant time zone; however, schedulers can adjust it to see their time zone if need be.
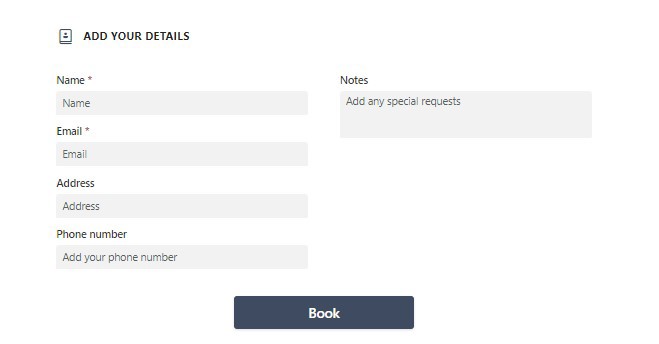
Once the scheduler has chosen a date and time, the last step is to add their contact information and any notes they want to add, such as any insights into an issue they may be having or just the topic of conversation. This information will be saved in the system and will capture email to handle any rescheduling that might be needed.
Conclusion (and a Caveat)
If you manage multiple calendars from different organizations, unfortunately, Microsoft Bookings isn’t going to be a huge help. Bookings can only see the calendar for the organization it is configured in, meaning it can only display your availability in one calendar. However, this is where some great ISPs can come in handy, as there are a few out there that will connect all your calendars to supply your true availability. However, for people who use a single calendar, Bookings is a great way to eliminate the back-and-forth of finding meeting times.

Stacy Deere
Stacy Deere a Microsoft MVP and owner of Focal Point Solutions LLC, a Cincinnati, OH-based company that provides SharePoint and Microsoft 365 consulting. With 20+ years of experience in the IT industry, Stacy has mainly focused on collaboration solutions. She has numerous environment deployments, upgrades, migrations and many other SharePoint and M365 projects under her belt. The main focus of all projects is implementing the best solution for the organization and one that the users want and can easily utilize. Within the SharePoint community, Stacy is a Microsoft Office & Apps MVP, an author and is known for topics such as governance, user engagement, security & compliance, and Administration.